
The Relationship Between GA and GTM
Google Analytics (GA)
GA is a web analytics tool primarily used to collect and analyze user behavior data. With GA, you can gain deep insights into data such as website traffic, user behavior, and conversion rates. The data for GA reports is typically sent via Google Tag Manager (GTM).
Google Tag Manager (GTM)
Google Tag Manager (GTM) was officially launched on October 1, 2012. It's a tool developed by Google to solve the complexity of website tag management. It aims to make it easier for marketers and webmasters to manage tracking codes and tags without frequently relying on engineers to modify the code. GTM is like opening a flexible JavaScript back door for your website.
Before Discussing GA Events, We Must First Install the Tracking Code on Our Website
In GA4, follow these steps:
- Settings → Data collection and modification → Select data stream.
- Click Tag settings → Installation instructions → select Install manually, and embed the provided code into your website.
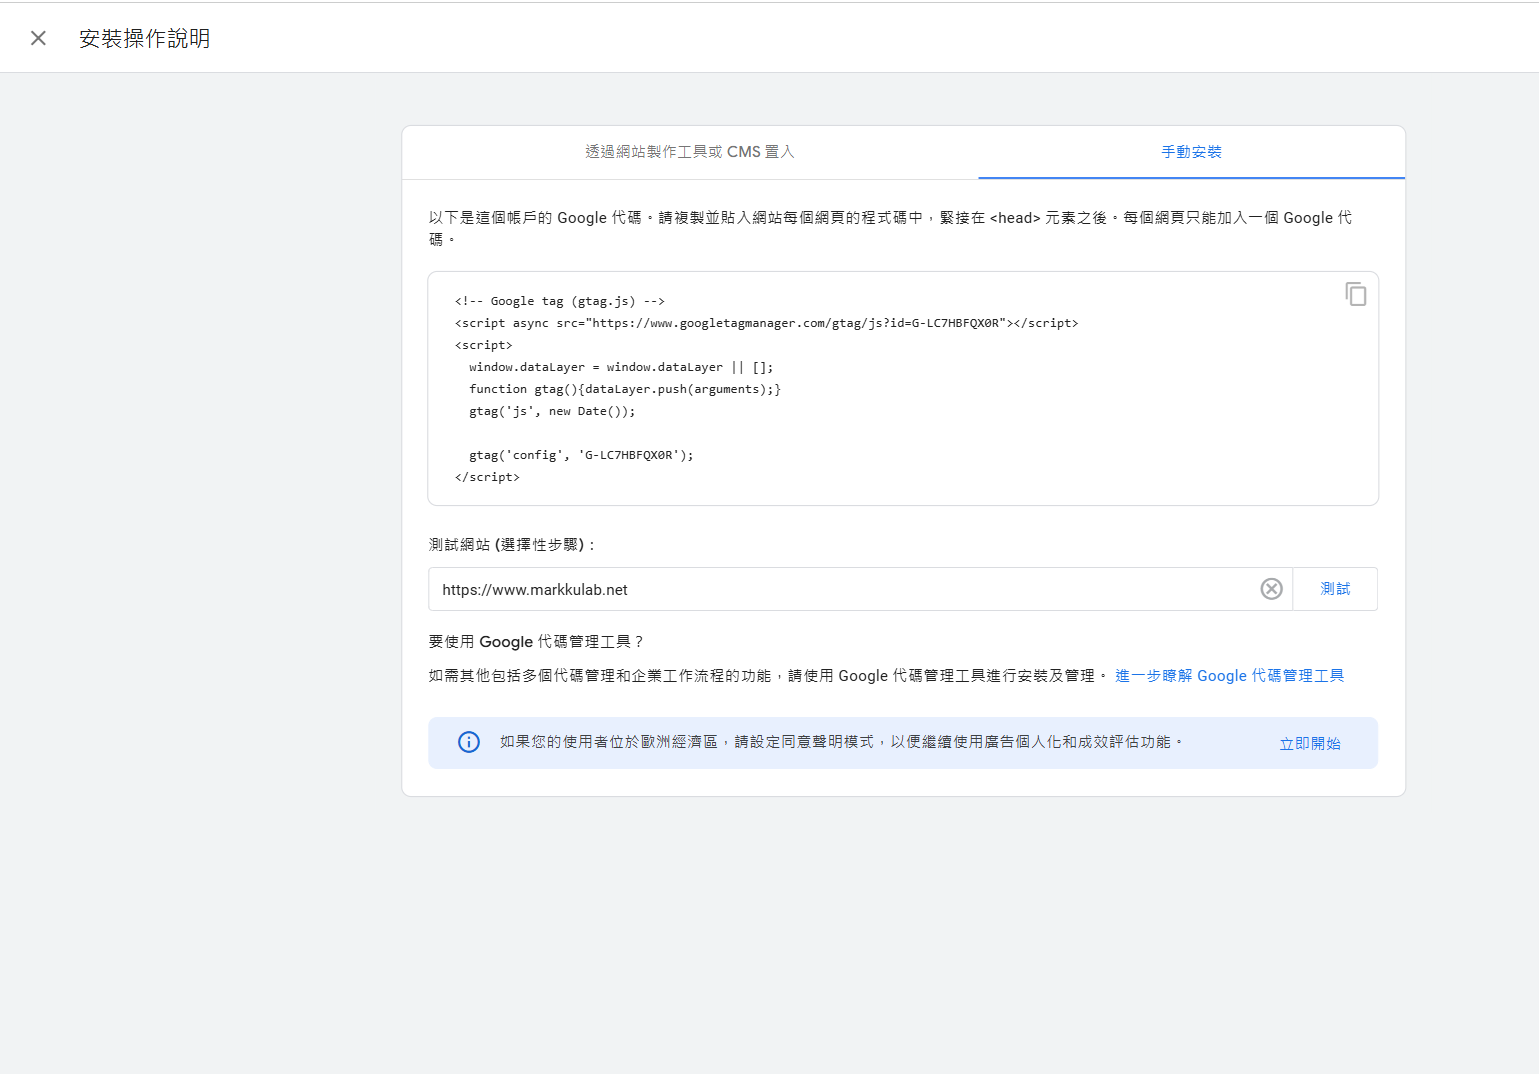
Note: It's easy to confuse the GTM Container ID with the GA Measurement ID.
Here is a comparison of the two:
| Feature | GA Measurement ID | GTM Container ID |
|---|---|---|
| Function | Used for tracking and analyzing data | Used for managing and deploying multiple tags |
| Format | UA-XXXXXX-Y / G-XXXXXXXXXX | GTM-XXXXXXX |
| Direct Deployment Method | Embed GA tracking code | Embed GTM container code |
| Flexibility | Can only track data for a single tool | Supports tag management for multiple tools |
| Target Audience | Geared towards technical staff or websites with simple needs | Suitable for marketing teams that need to frequently adjust tags |
If your only requirement is to track GA data and your website structure is simple, you can use the GA Measurement ID directly. However, if you need to manage multiple tags (like GA, Facebook Pixel, AdWords, etc.) or frequently perform tests and adjustments, using the GTM Container ID is more flexible.
GA4 Event Categories
GA4 events are divided into four main categories. We can choose the appropriate event type based on our needs.
1. Automatically collected events
These events require no extra setup. As soon as you embed the GA4 tag, it starts collecting them automatically. For example: page views (Page View).
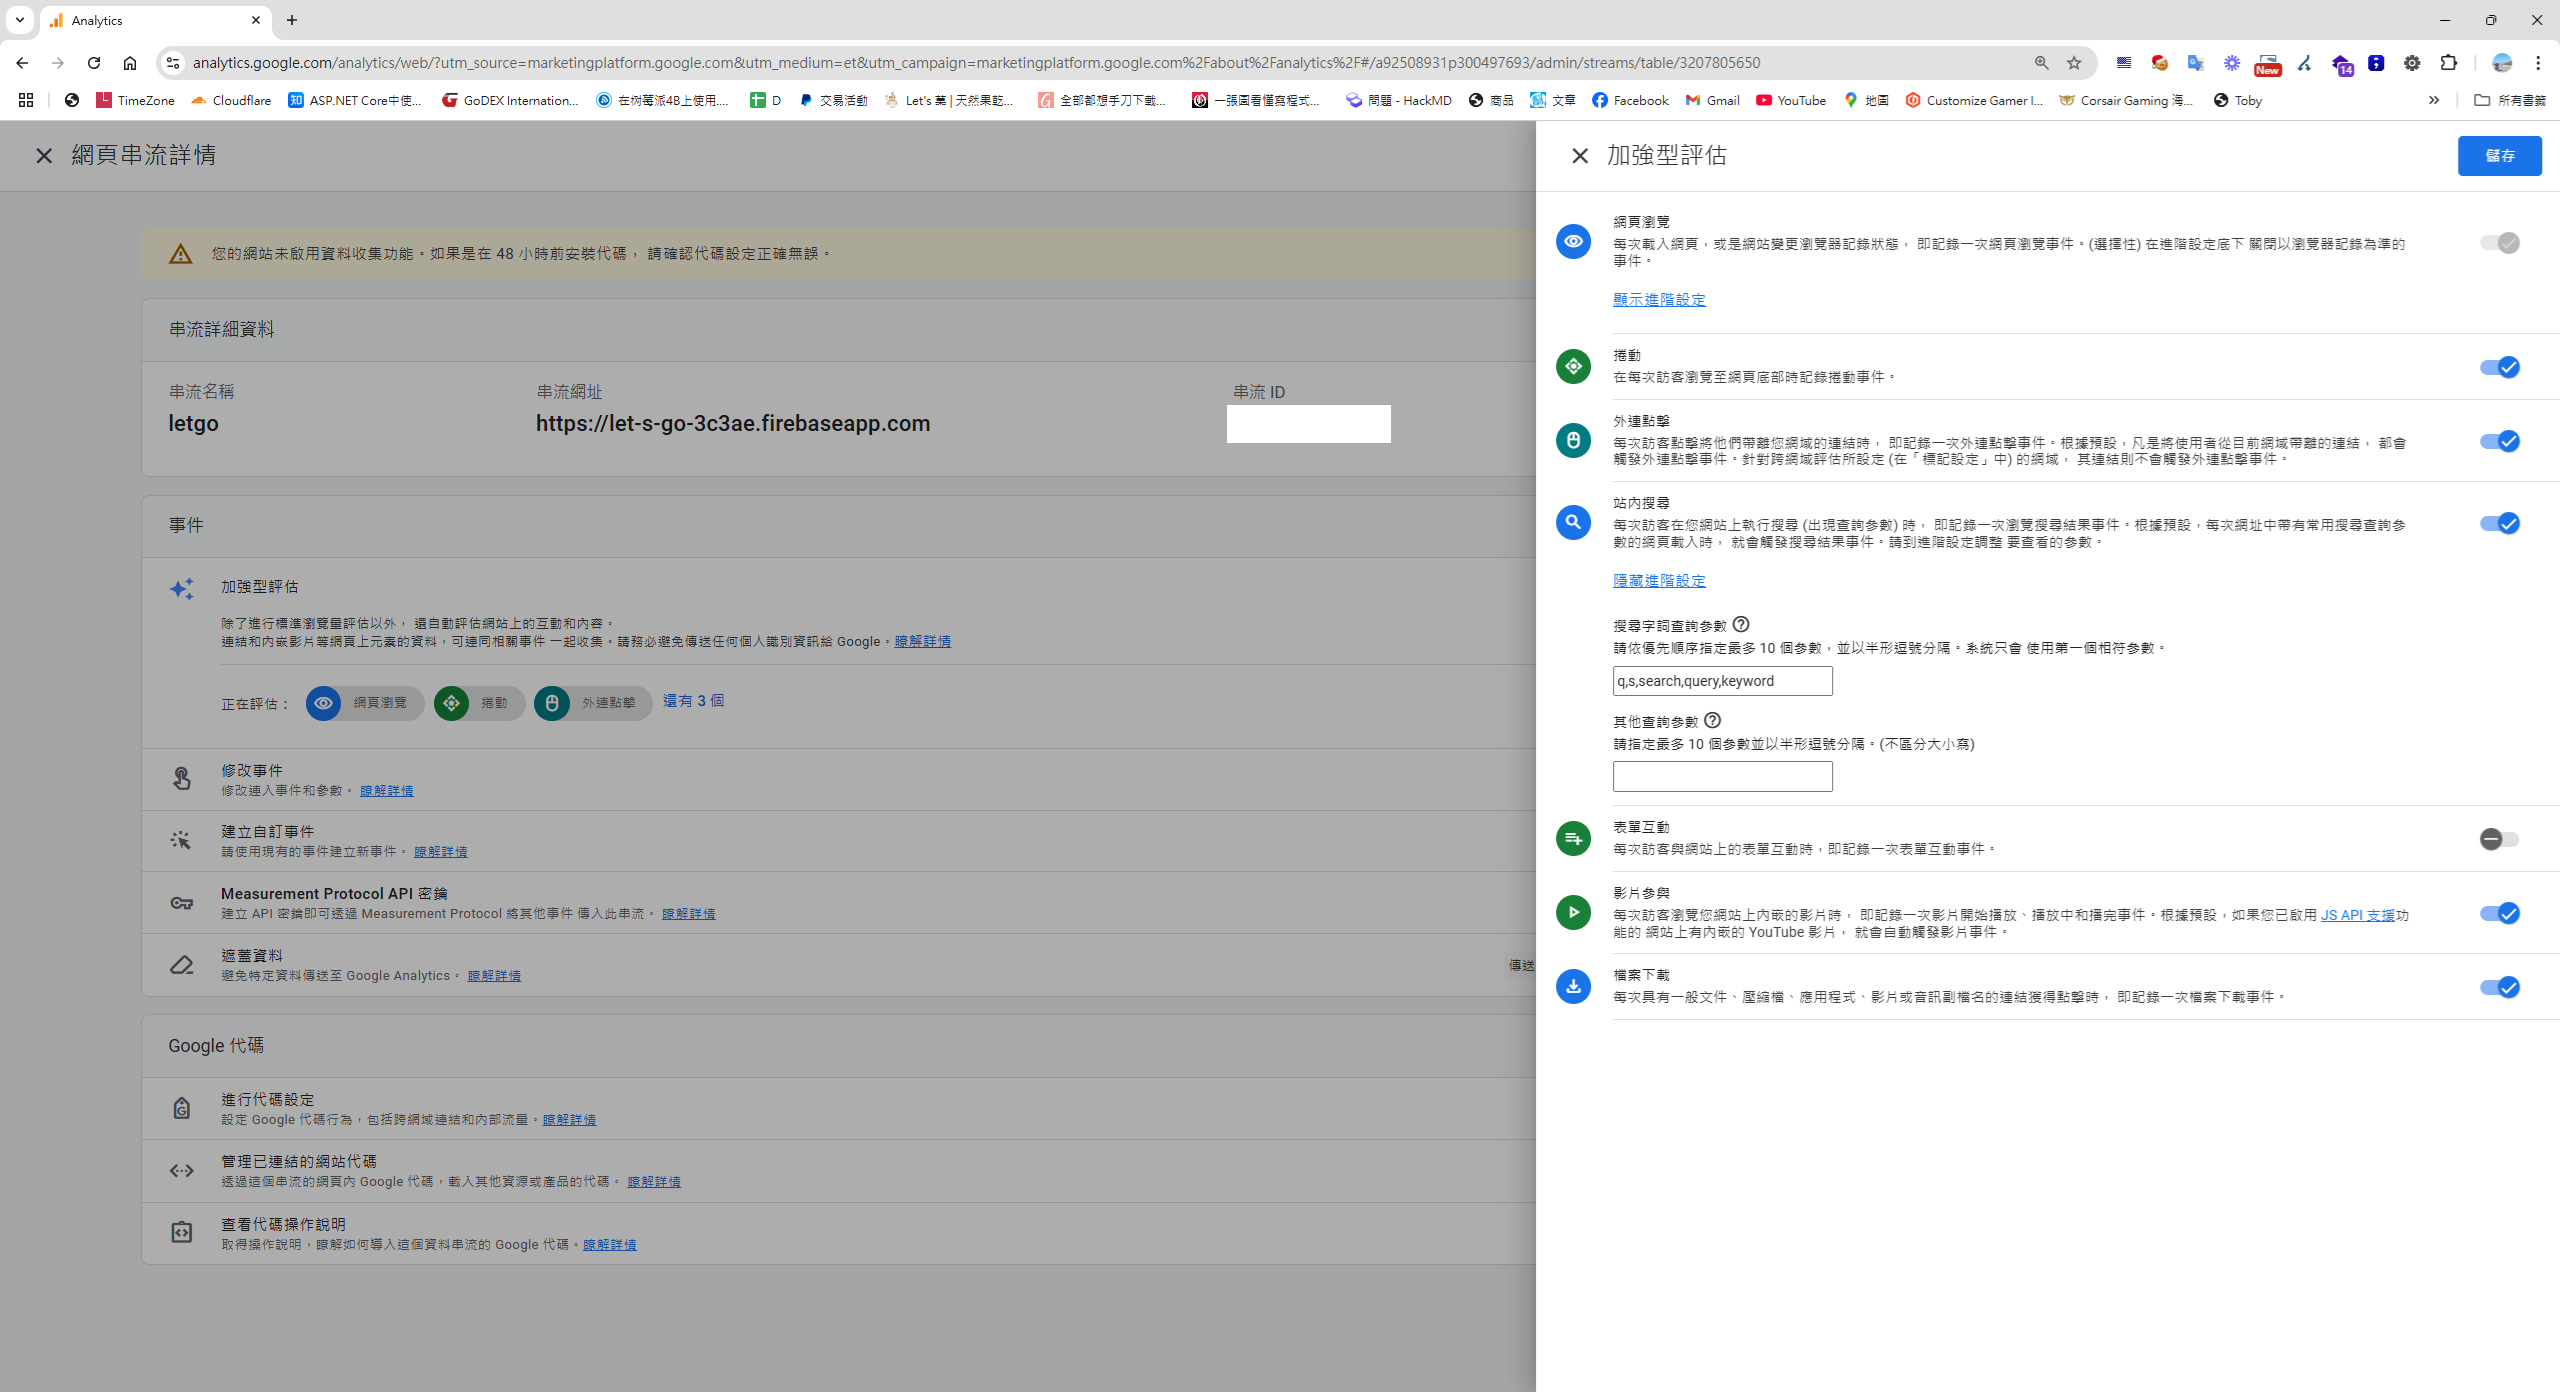
2. Enhanced measurement events
You need to enable "Enhanced measurement" in your data stream. Once enabled, it will automatically collect common interaction data, such as:
- Scrolls
- Outbound clicks
- Site search > based on URL parameters
- Video engagement
- File downloads
3. Recommended events
Recommended events need to be configured according to official guidelines, and the data is sent to GA by implementing code. For example:
- Login
- Logout
- Order
- Ecommerce Events
For e-commerce sites, here are some common recommended events:
view_item_list: View item listview_item: View item detailsadd_to_cart: Add to cartadd_payment_info: Add payment infopurchase: Purchase
For detailed guidance, please refer to the official documentation.
4. Custom events
If automatically collected and recommended events don't meet your needs, you can use custom events to collect specialized data and generate reports tailored to your business requirements.
Examples of custom event applications:
- Analyzing which button types users prefer to click.
- Tracking users' preferred login methods (e.g., Google, Facebook, Email).
Next, We'll Pass Parameters for Recommended/Custom Events to GA via GTM
1. On the website frontend, pass product parameters to GTM using gtag. Let's use add_to_cart as an example.
gtag('event', 'add_to_cart', {
  currency: 'USD', // 幣別
  value: 29.99, // 總價值
  items: [
    {
      item_name: 'Gaming Keyboard', // 商品名稱
      item_id: 'SKU12345', // 商品 ID
      price: 29.99, // 商品價格
      quantity: 1, // 商品數量
      item_brand: 'HYTE', // 品牌
      item_category: 'Peripherals', // 類別
      item_variant: 'Black', // 商品變體
    },
  ],
});
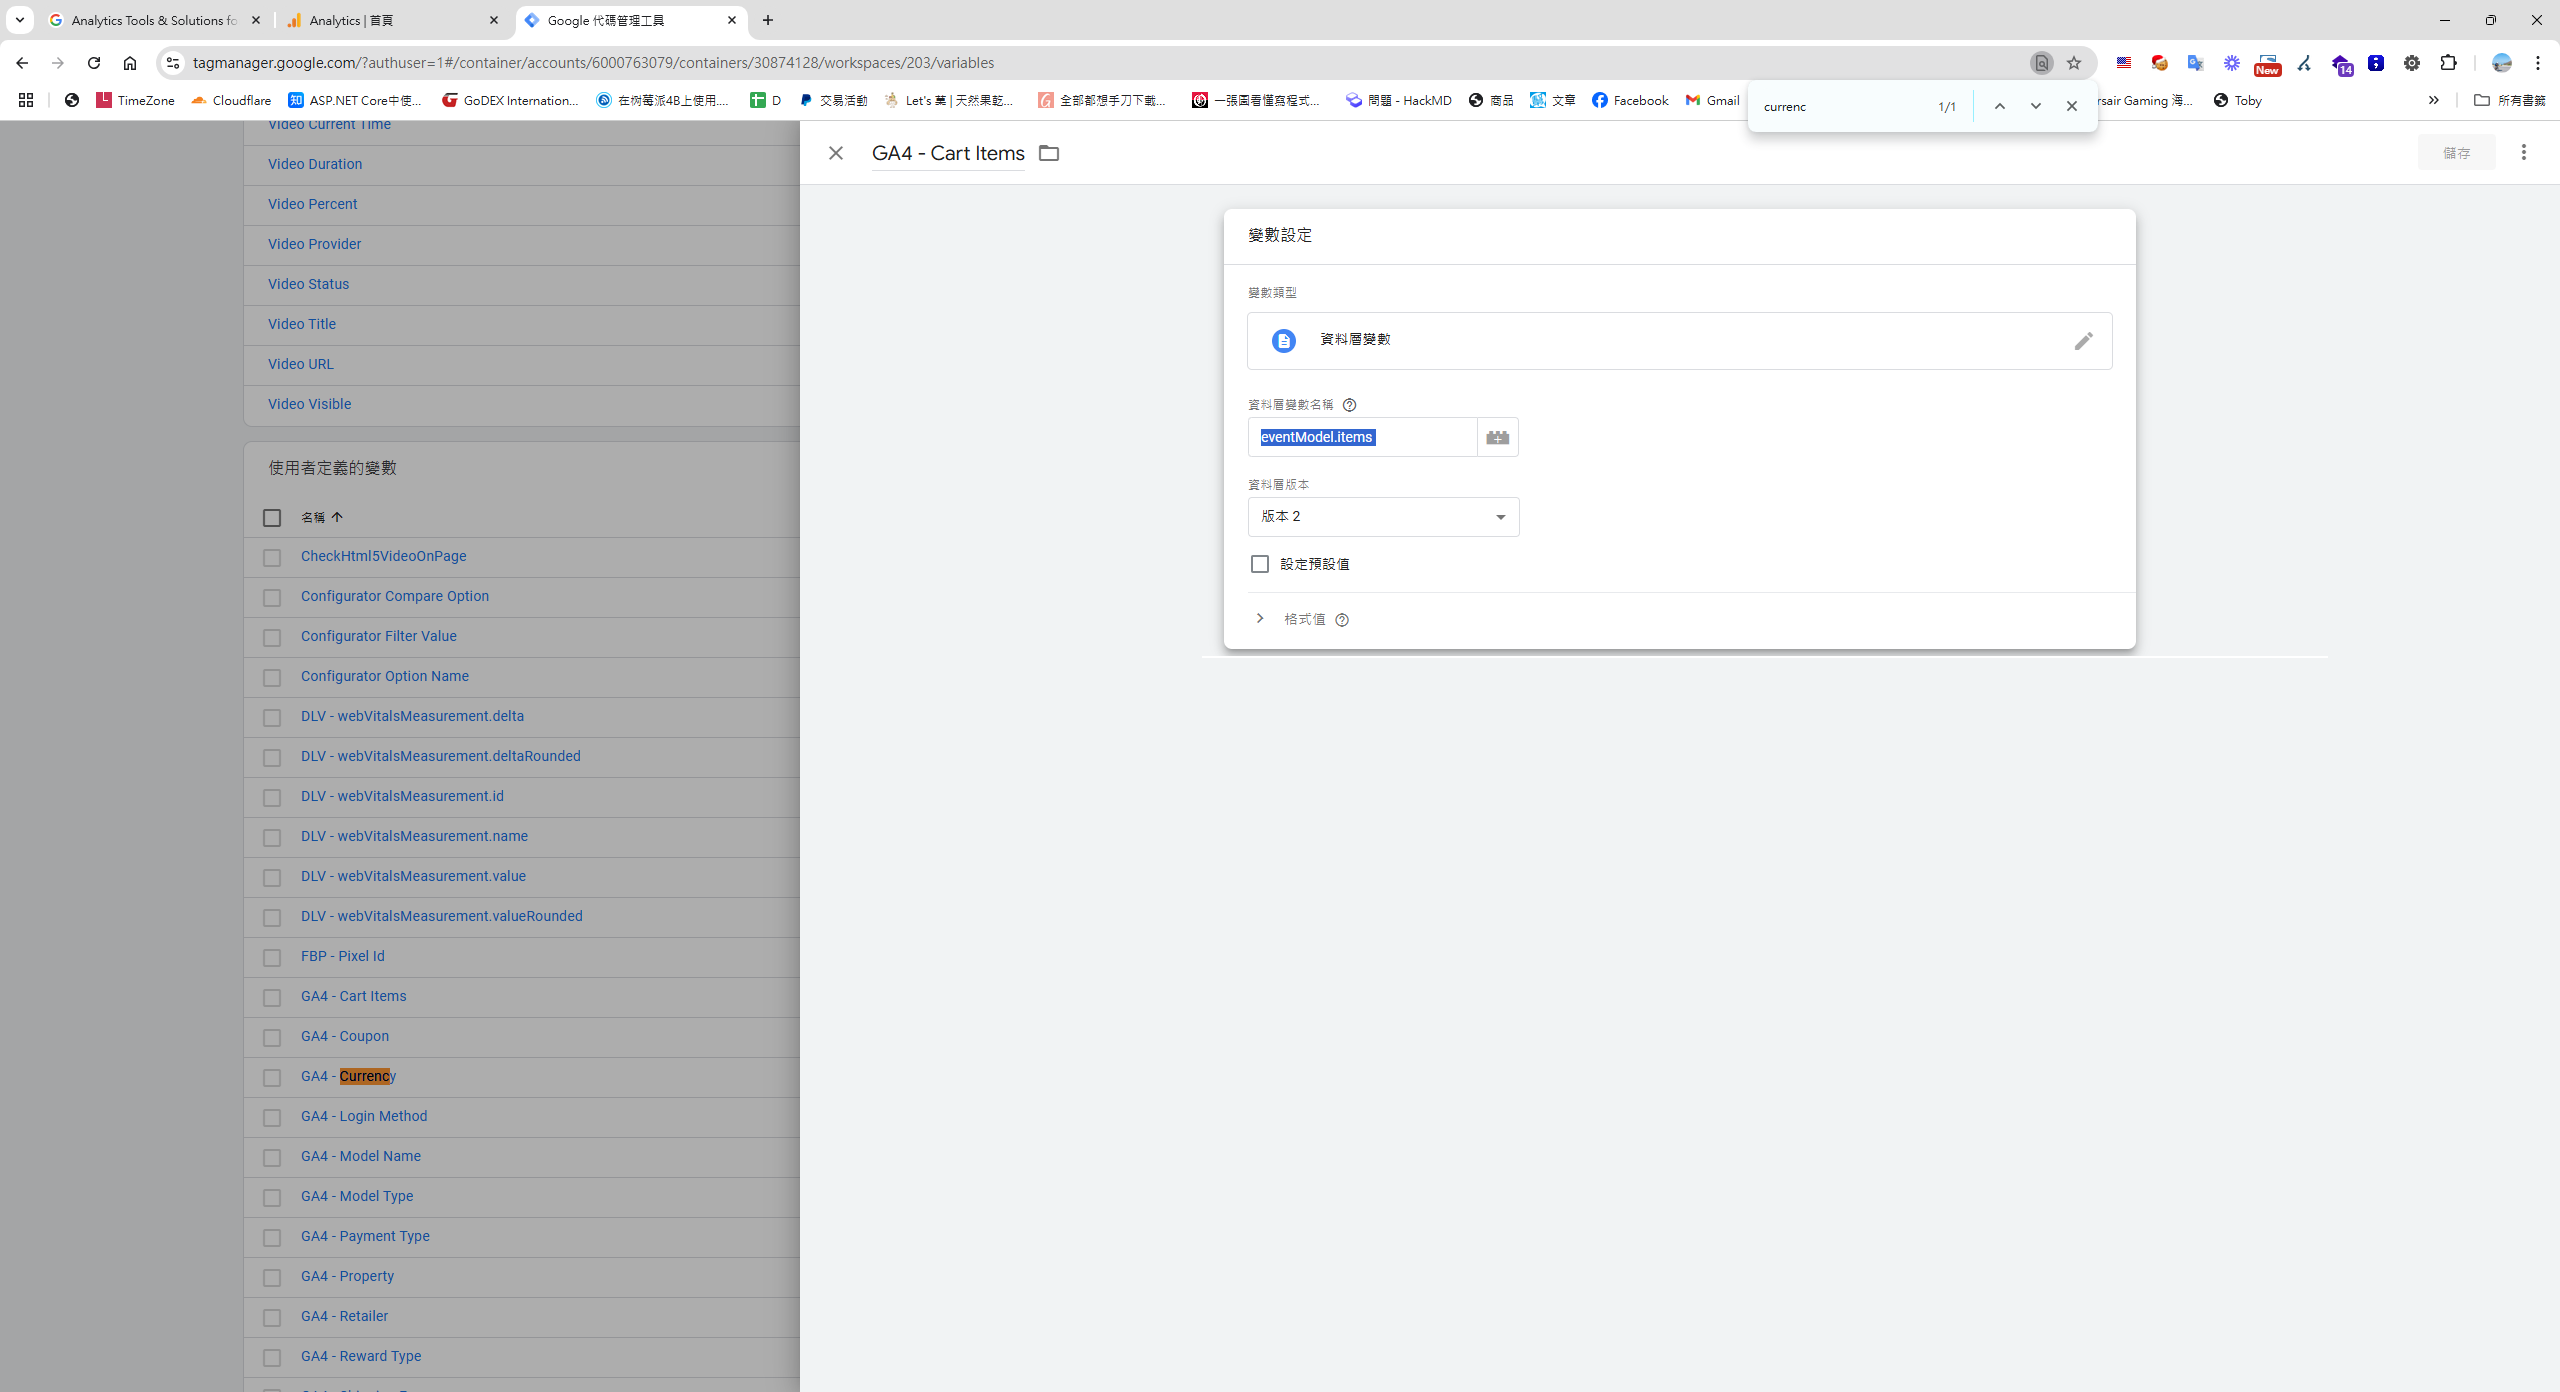
2. Next, go to Google Tag Manager, and navigate to Variables -> New.
Create variables one by one based on the incoming parameter properties to pass them as event parameters to GA.
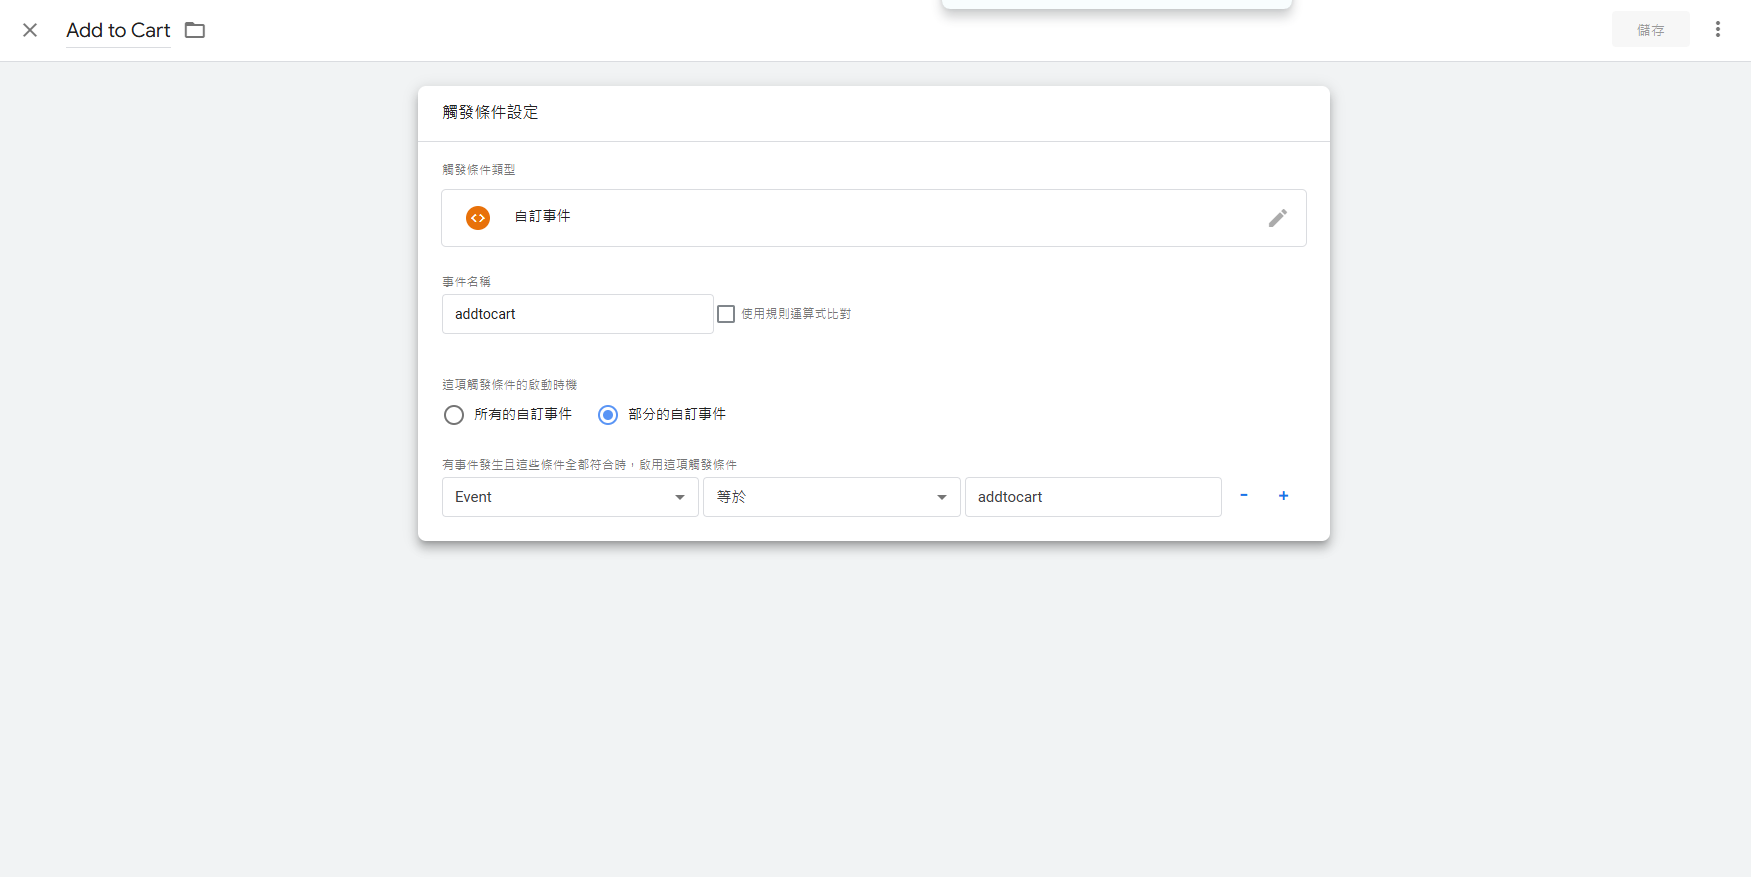
3. Set up a trigger: Triggers -> New.
4. Go to the Tag Manager: Tags -> New.
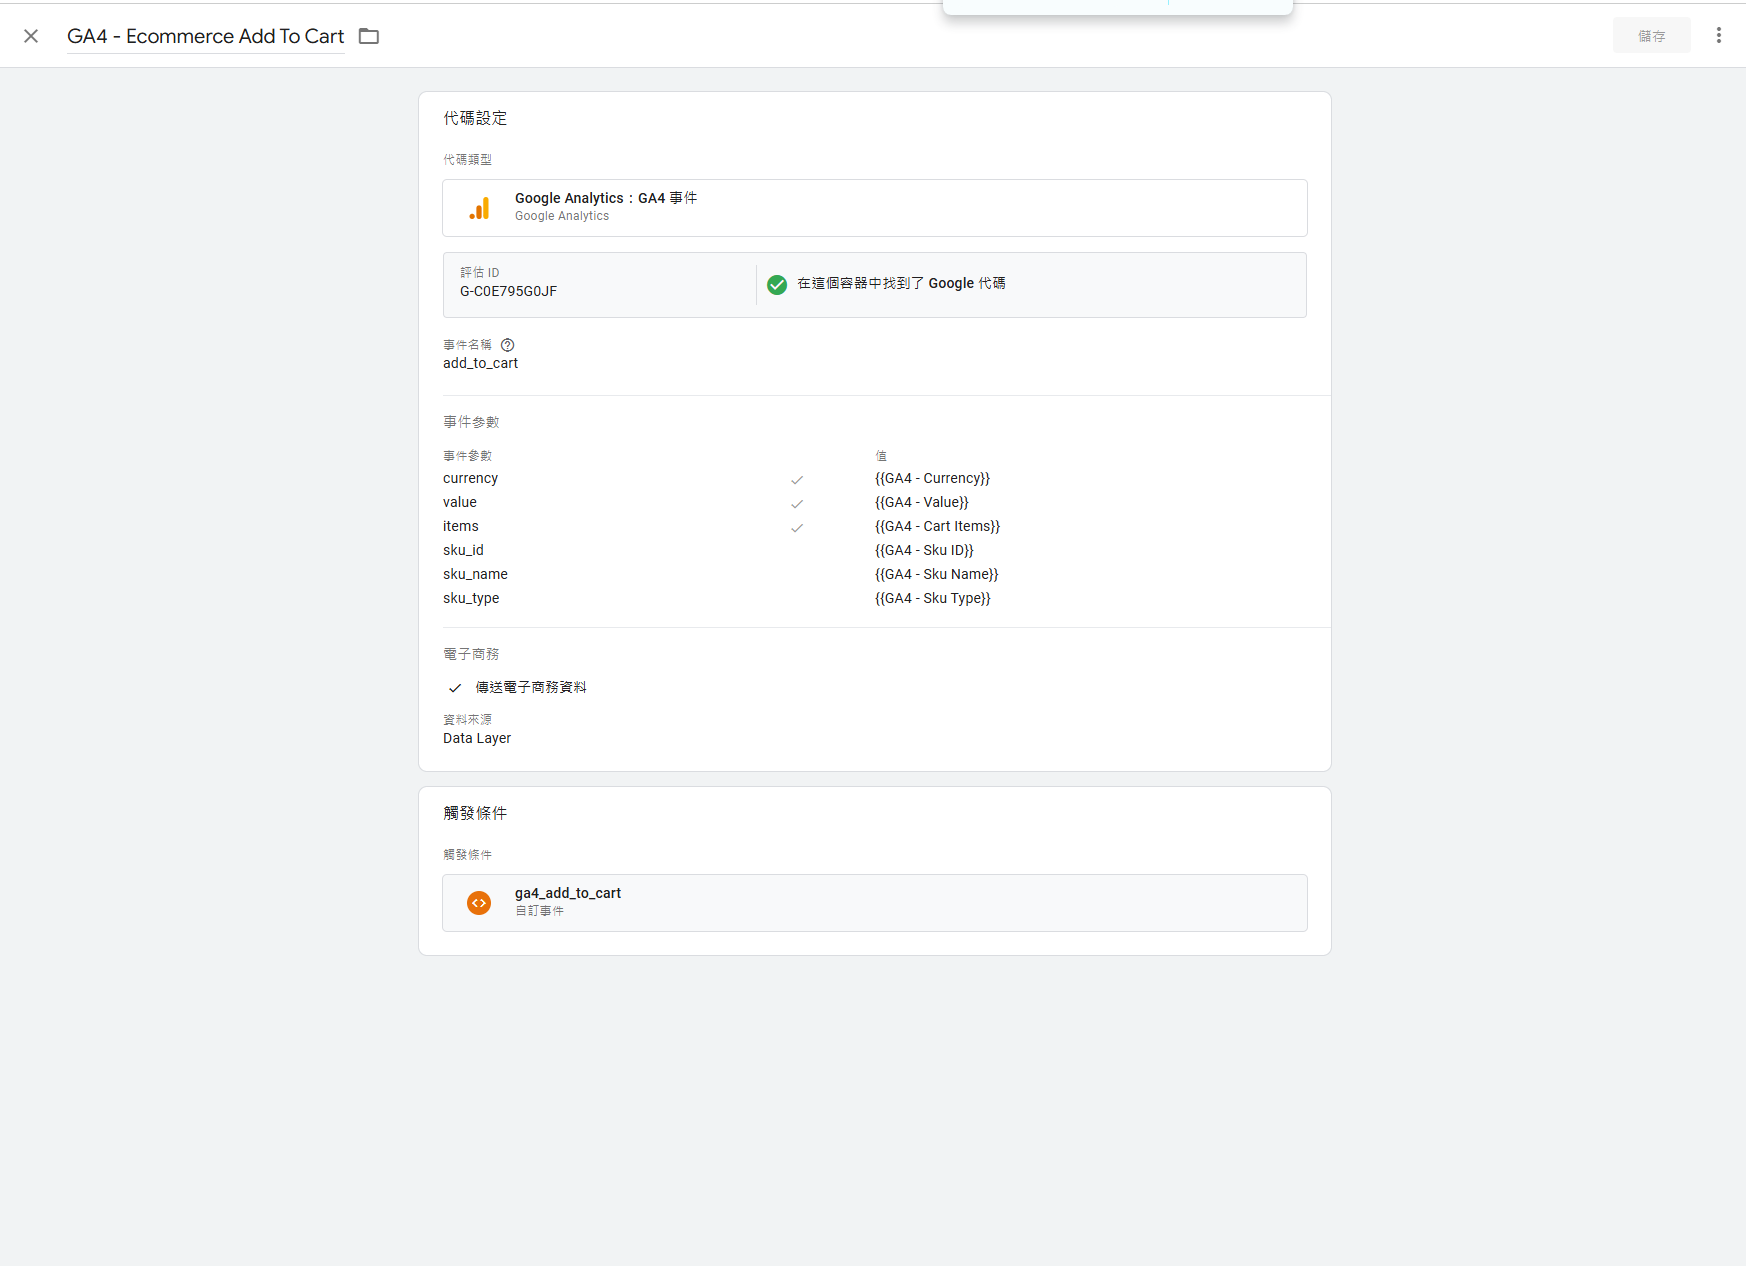
P.S. When looking at GA4 examples, you'll see gtag and dataLayer. dataLayer is actually the foundation of gtag.js. The operation of gtag.js is based on dataLayer. When you call the gtag() function, it actually pushes the parameters into the dataLayer, which then passes them to the relevant Google tools.
Debugging GTM Events
If you want to confirm whether your JavaScript is being sent to GTM correctly, you can use Tag Assistant for debugging.
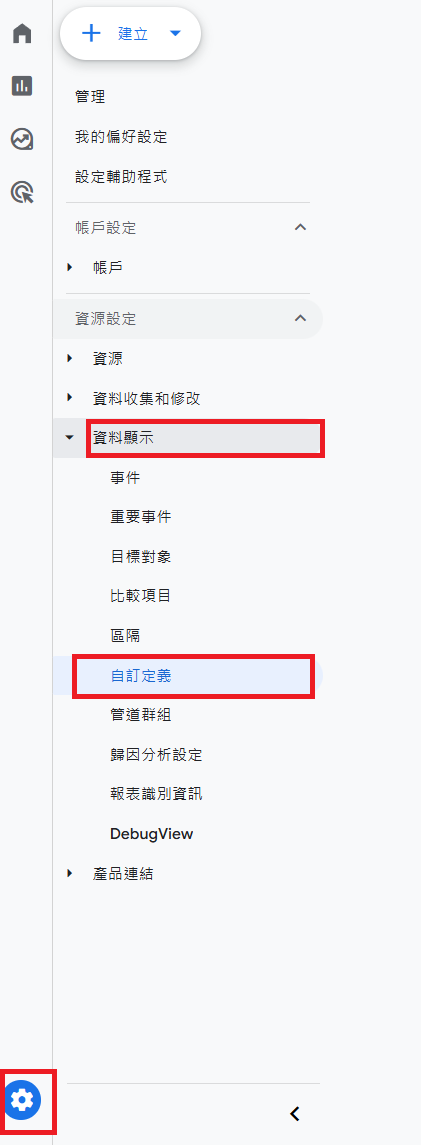
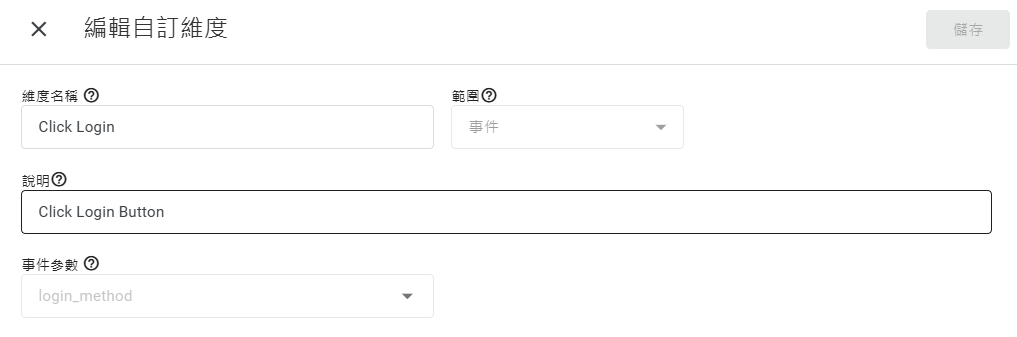
For custom events, return to GA and connect them using custom dimensions. This allows you to use these custom dimensions in your custom reports.
Admin (bottom left) > Data display > Custom definitions > Create custom dimensions
GA Debugging
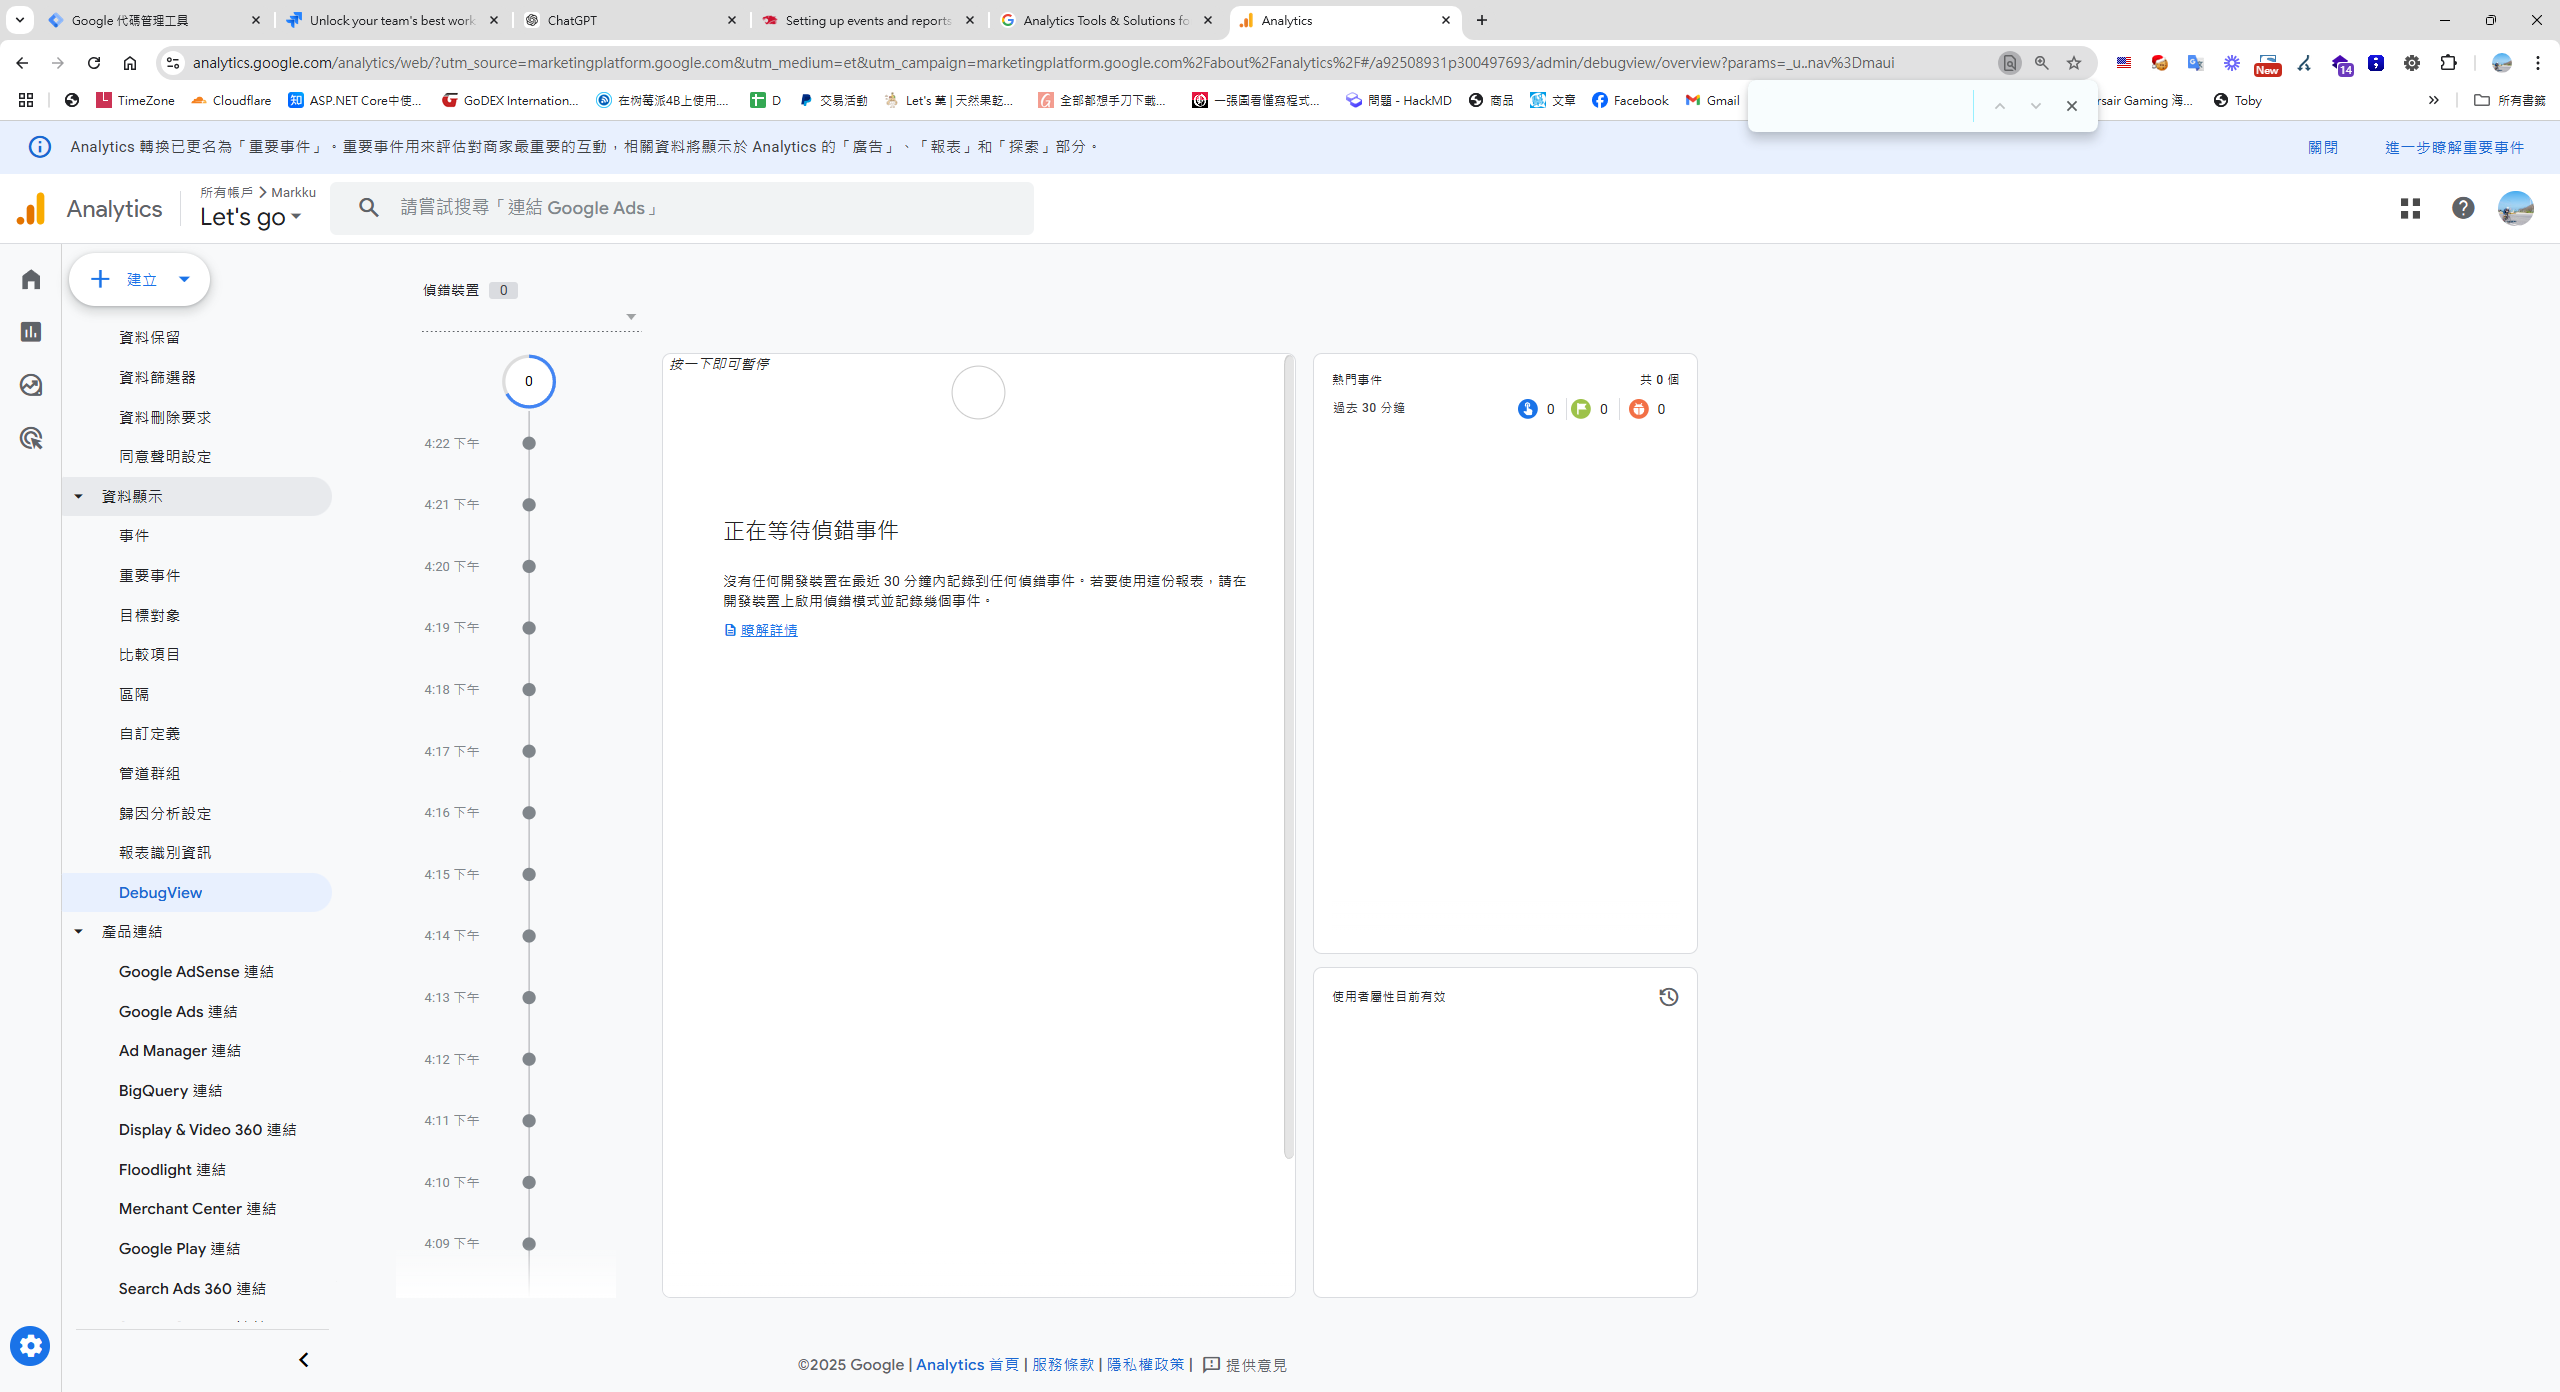
Back in GA > Admin (bottom left) -> DebugView
Bonus - Loading a Third-Party JS, Clarity.js, via GTM
Microsoft Clarity is a free user behavior analytics tool that helps you understand how users interact with your website. Here's how to load the Clarity JS via GTM:
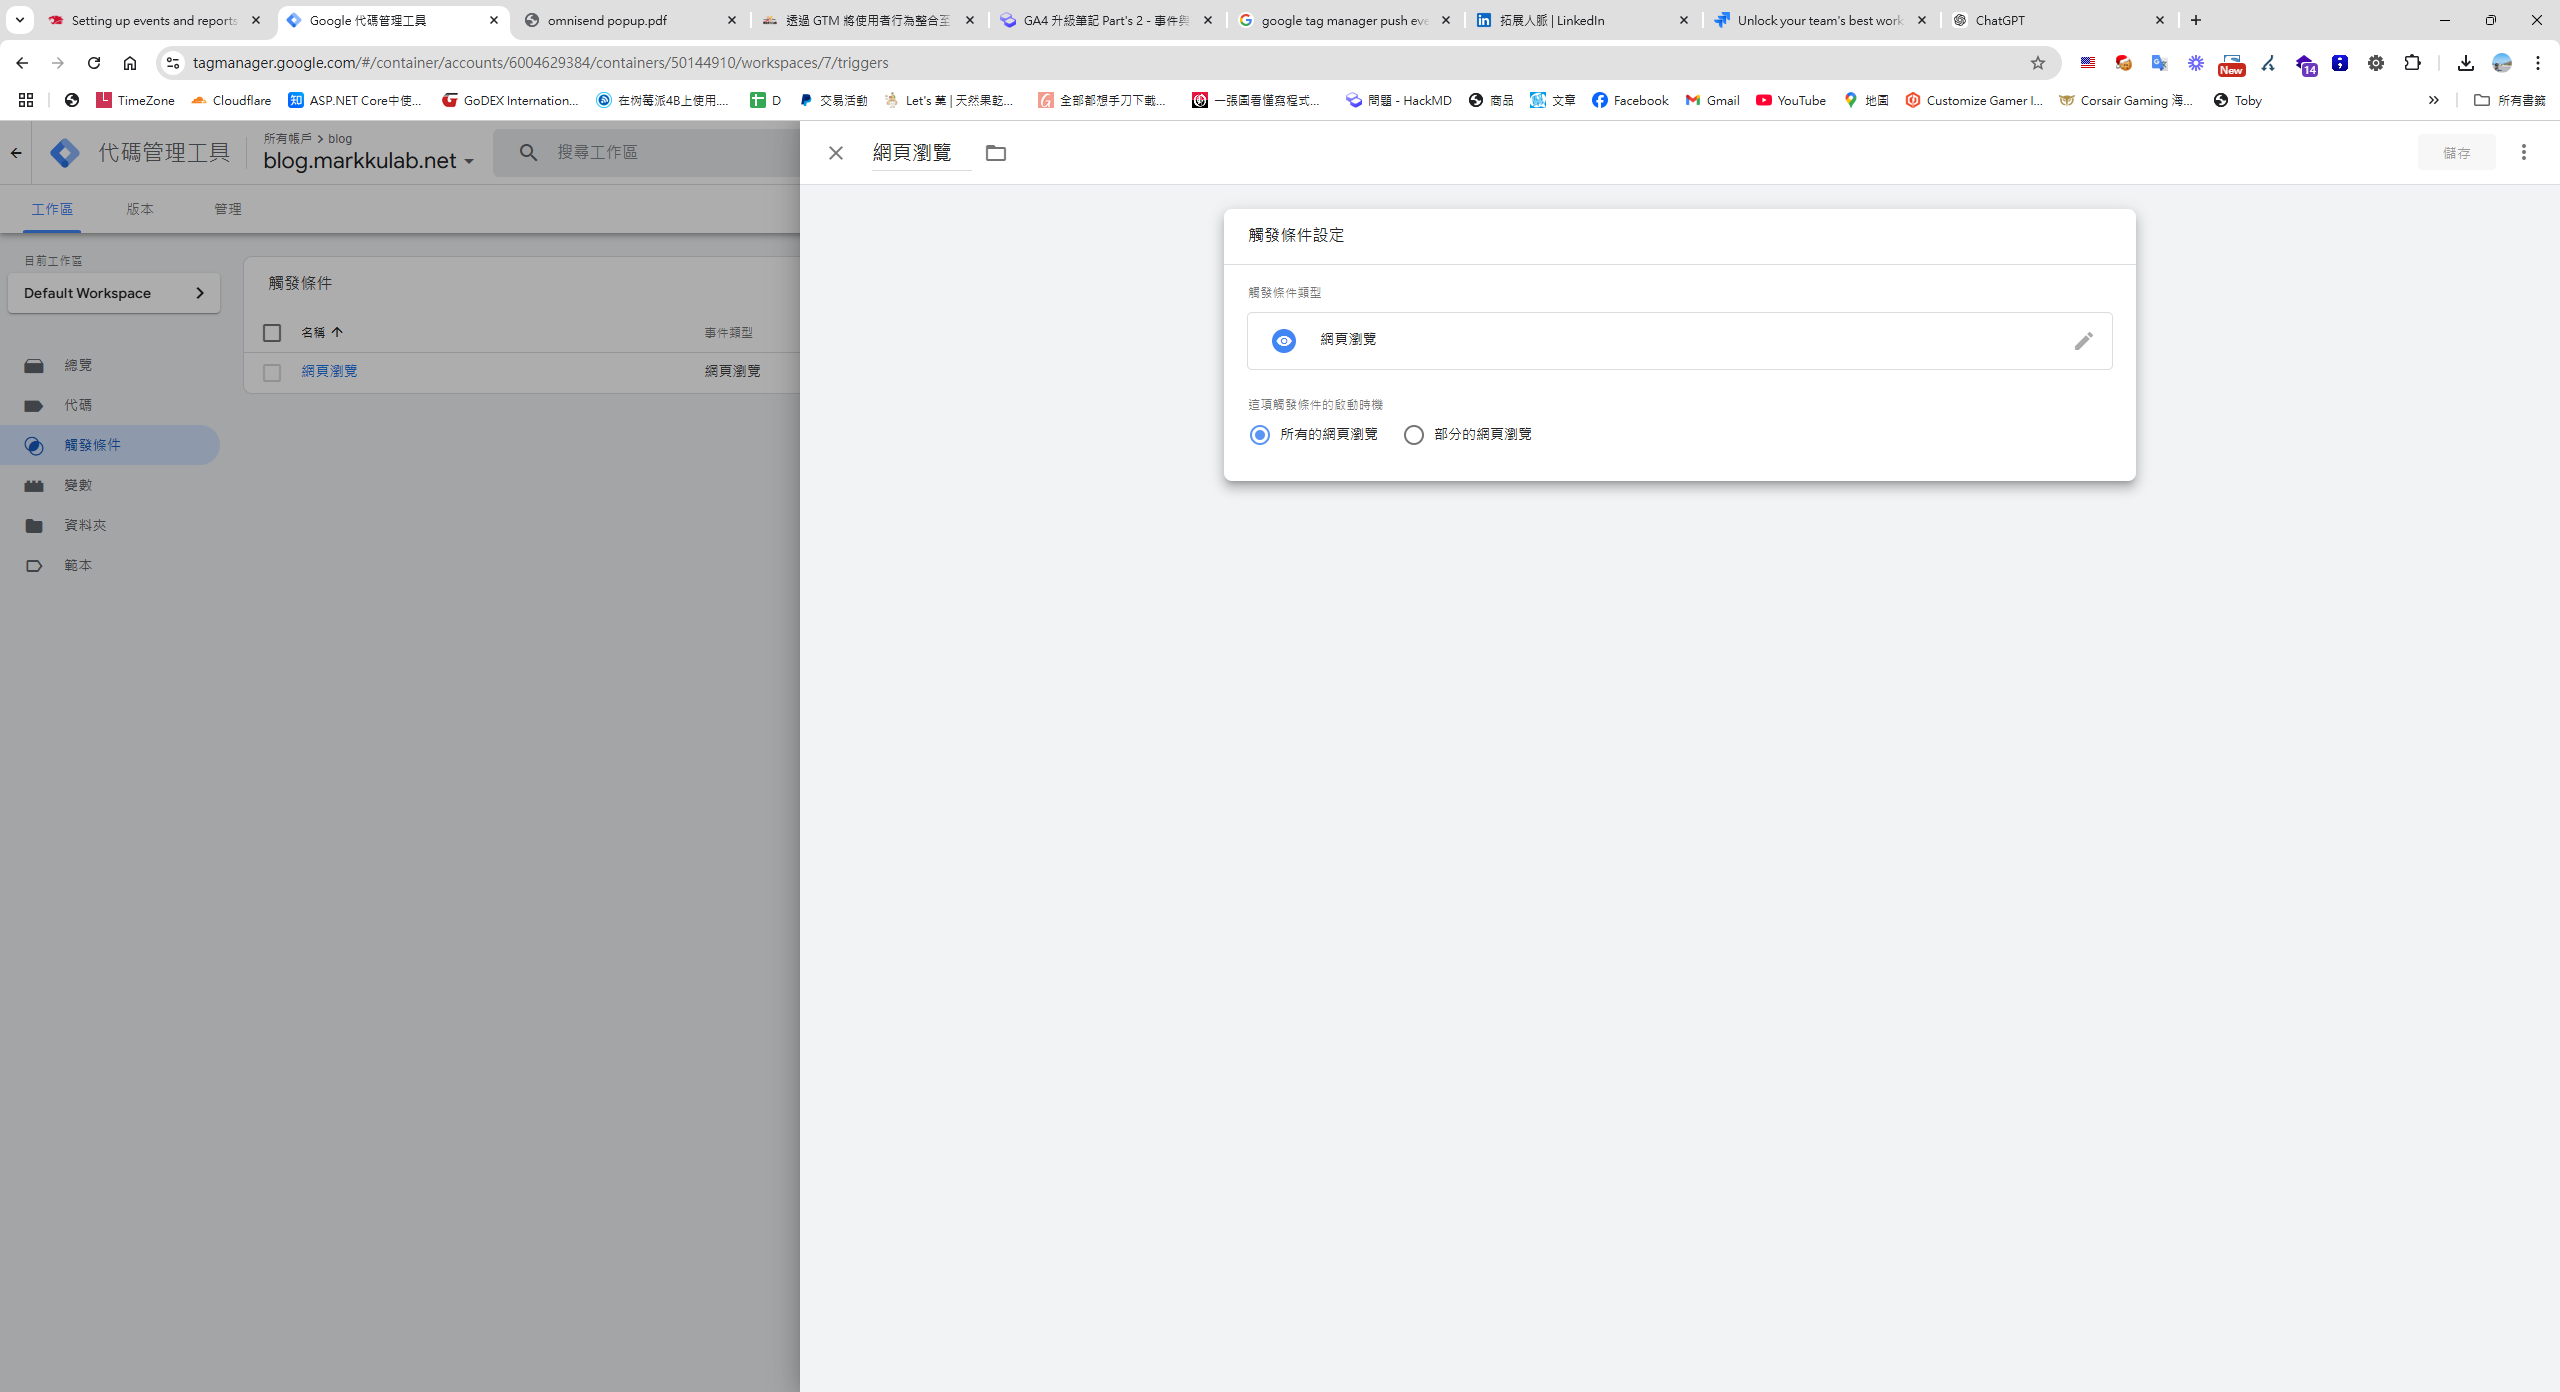
Step 1: Triggers > New
In GTM, create a trigger, for example, "All Pages", or set specific conditions based on your needs, as shown in the image below:
Step 2: Tags > New
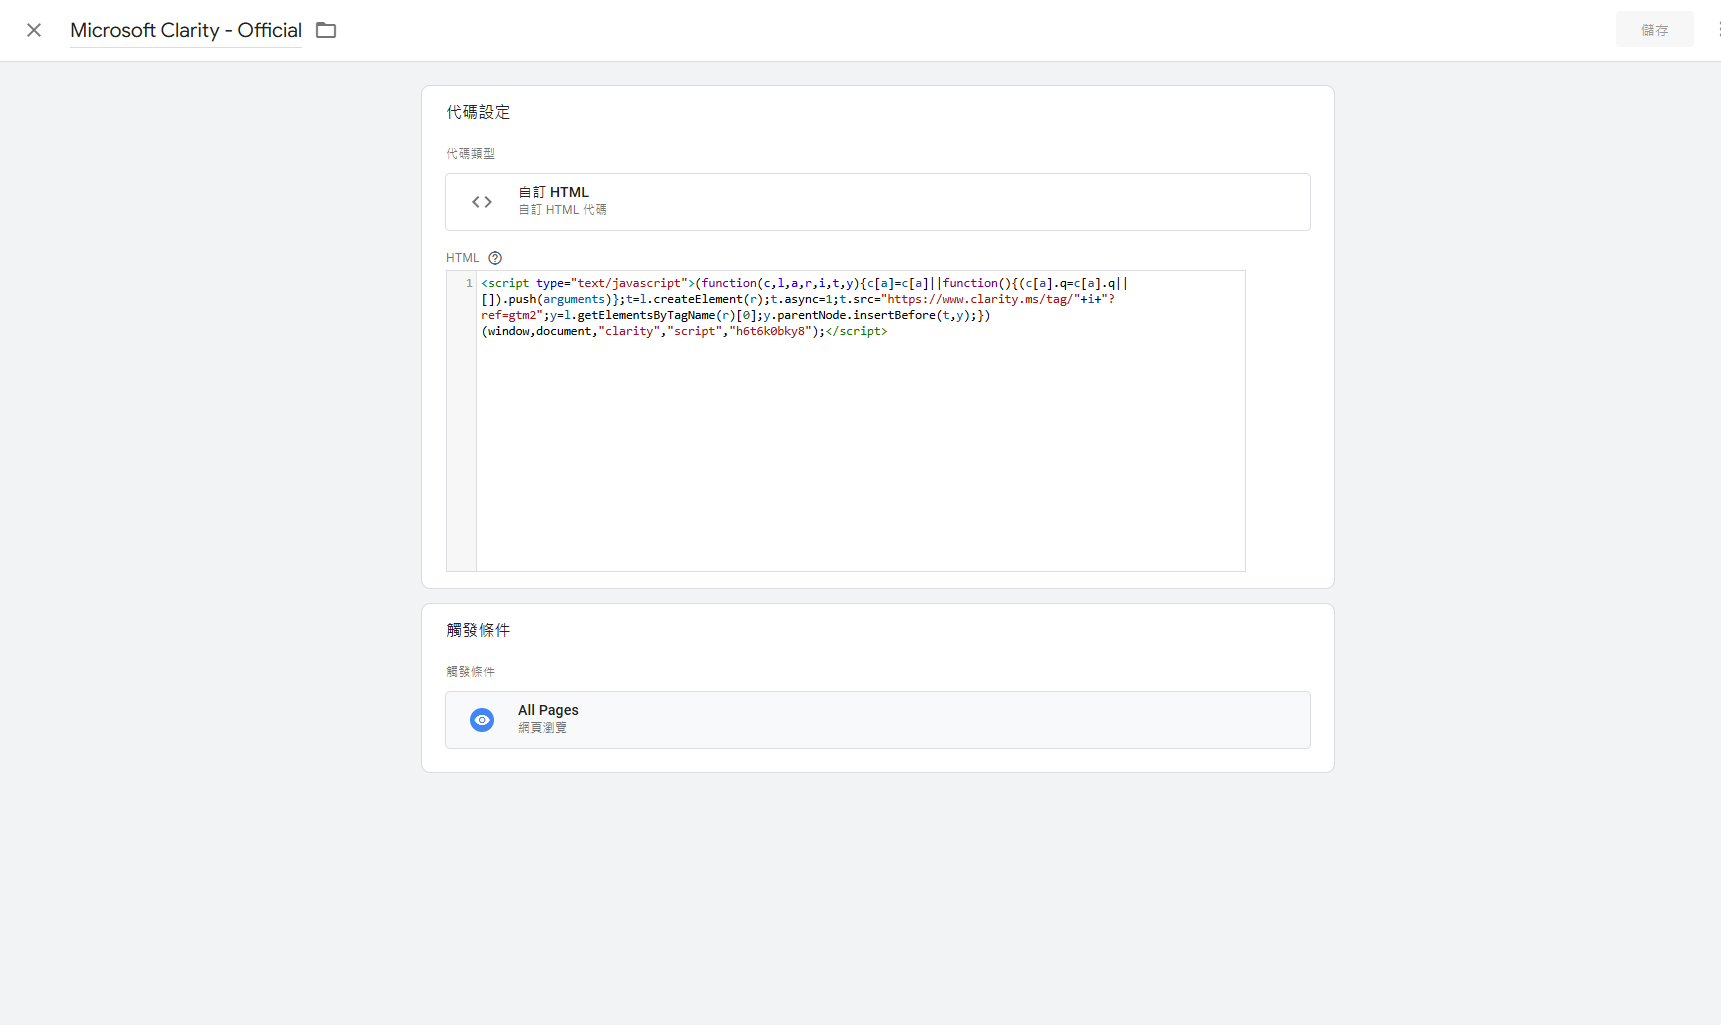
<script type="text/javascript">
(function(c,l,a,r,i,t,y){
    c[a]=c[a]||function(){
        (c[a].q=c[a].q||[]).push(arguments)
    };
    t=l.createElement(r); t.async=1;
    t.src="https://www.clarity.ms/tag/"+i;
    y=l.getElementsByTagName(r)[0];
    y.parentNode.insertBefore(t,y);
})(window, document, "clarity", "script", "h6t6k0bky81");
</script>
Note: Replace h6t6k0bky81 with your own Clarity project ID.
Step 3: Submit and Publish
After completing the trigger and tag setup, follow these steps:
- Click the Submit button in GTM.
- Fill in the change description, for example, "Add Clarity tag".
- Publish the changes.


Comments