
Introduction
If you run a website that primarily serves European and American markets and uses multiple third-party tracking tools, you must pay attention to GDPR (General Data Protection Regulation) compliance requirements. With the EU's Digital Markets Act (DMA) going into effect on March 6, 2024, tracking user data now requires explicit consent.
This article will teach you how to use Google Tag Manager (GTM) to set up Consent Mode. This ensures that GA4 e-commerce event parameters are only sent to the Facebook Pixel after the user clicks "Agree," making your tracking practices GDPR-compliant.
Why Do You Need to Understand the DMA?
The Digital Markets Act (DMA) is a regulation introduced by the EU to regulate tech giants (like Google, Apple, Meta, etc.) that officially went into effect in 2024. For websites operating in Europe and the US, this regulation requires that you clearly inform users how their personal data is used and obtain their consent before tracking any data.
How Does This Affect Websites?
If your website serves users in Europe and the US, such as an e-commerce or SaaS platform, you need to comply with these regulations to avoid potentially hefty fines.
How to Implement GDPR-Compliant User Tracking?
Choosing a Method
-
Use an Off-the-Shelf Cookie Management Tool There are many tools on the market today, like Cookiebot, that can help you achieve compliance quickly. These tools don't require coding and cost around NT$7,000 per year, making them suitable for small to medium-sized businesses.
-
Custom Development Although custom development requires technical support, it offers more flexibility in designing the user interface and functionality to meet specific needs. This tutorial will take this approach, using GTM and custom code for implementation.
Tutorial Steps
Prerequisites
-
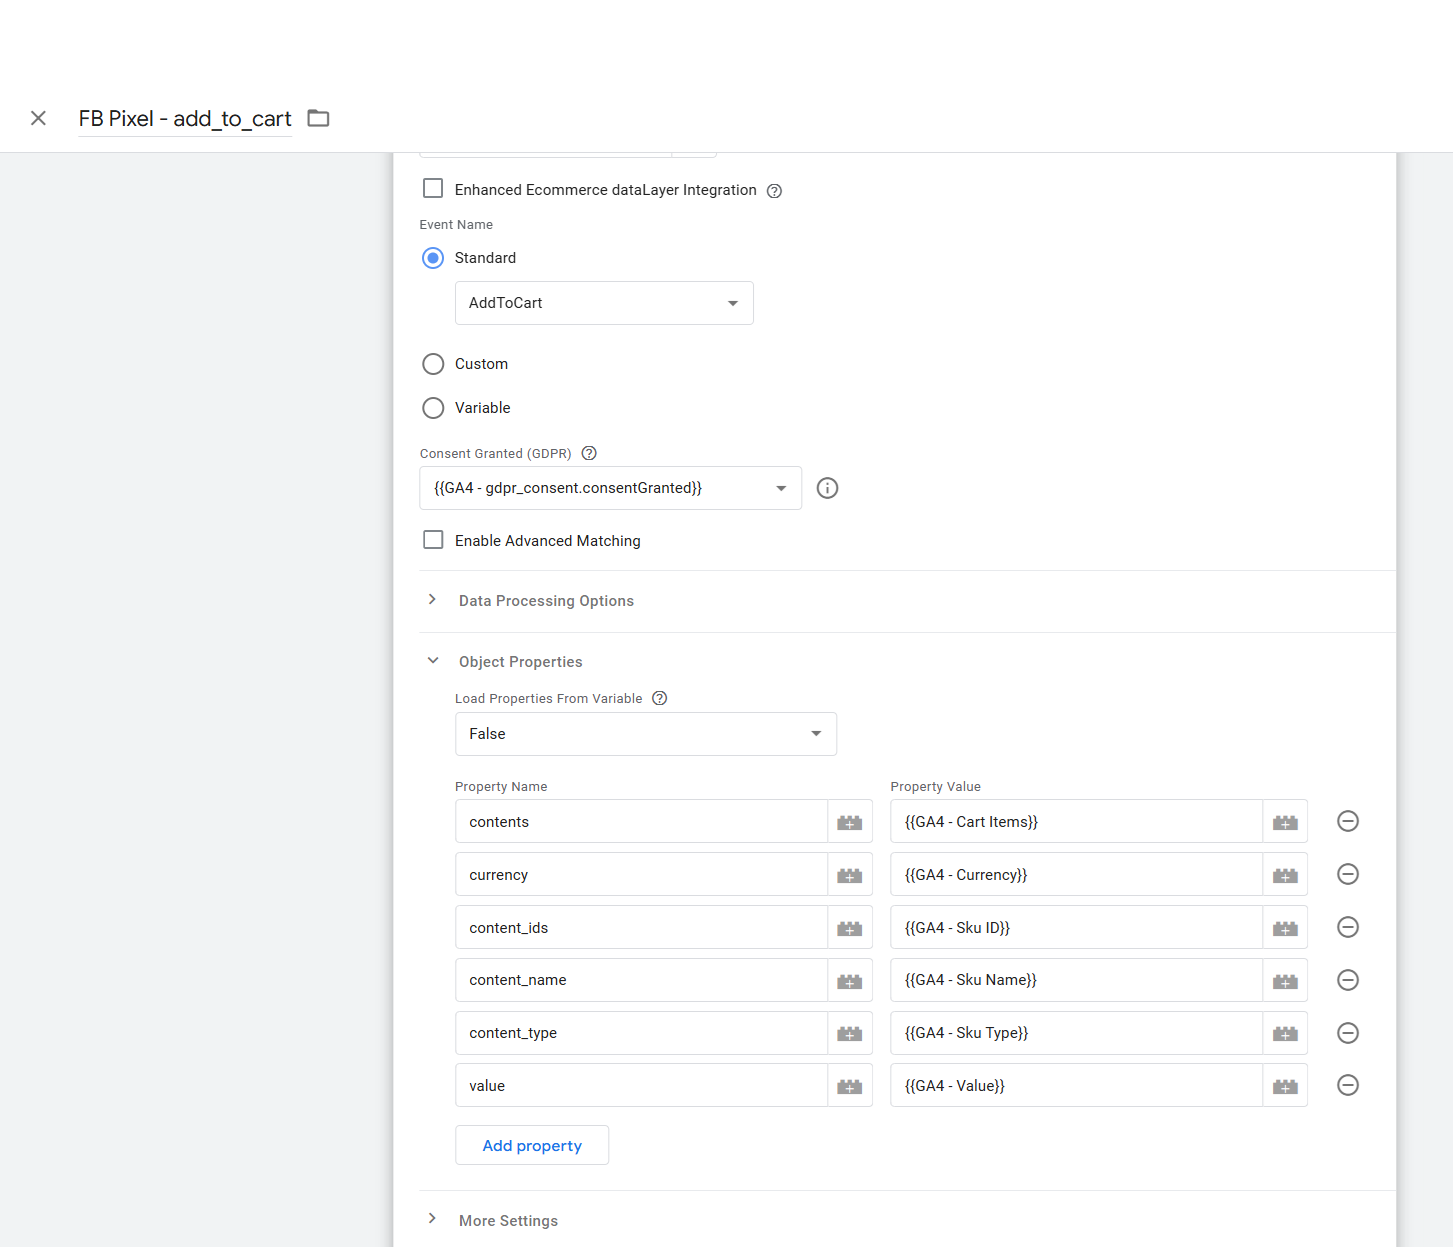
Ensure your GA4 e-commerce events are already set up. These events will be used to pass data to the Facebook Pixel.
-
In GTM, create a new variable to store your Facebook Pixel tracking ID.
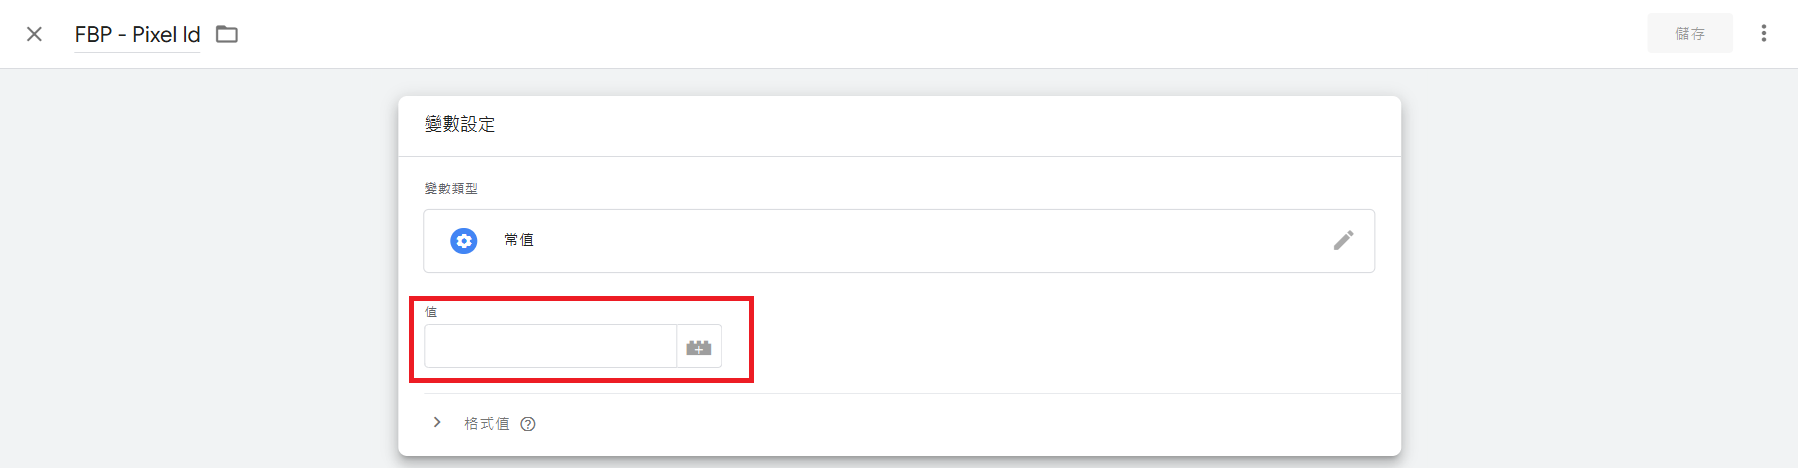
Facebook Tracking ID Setup -
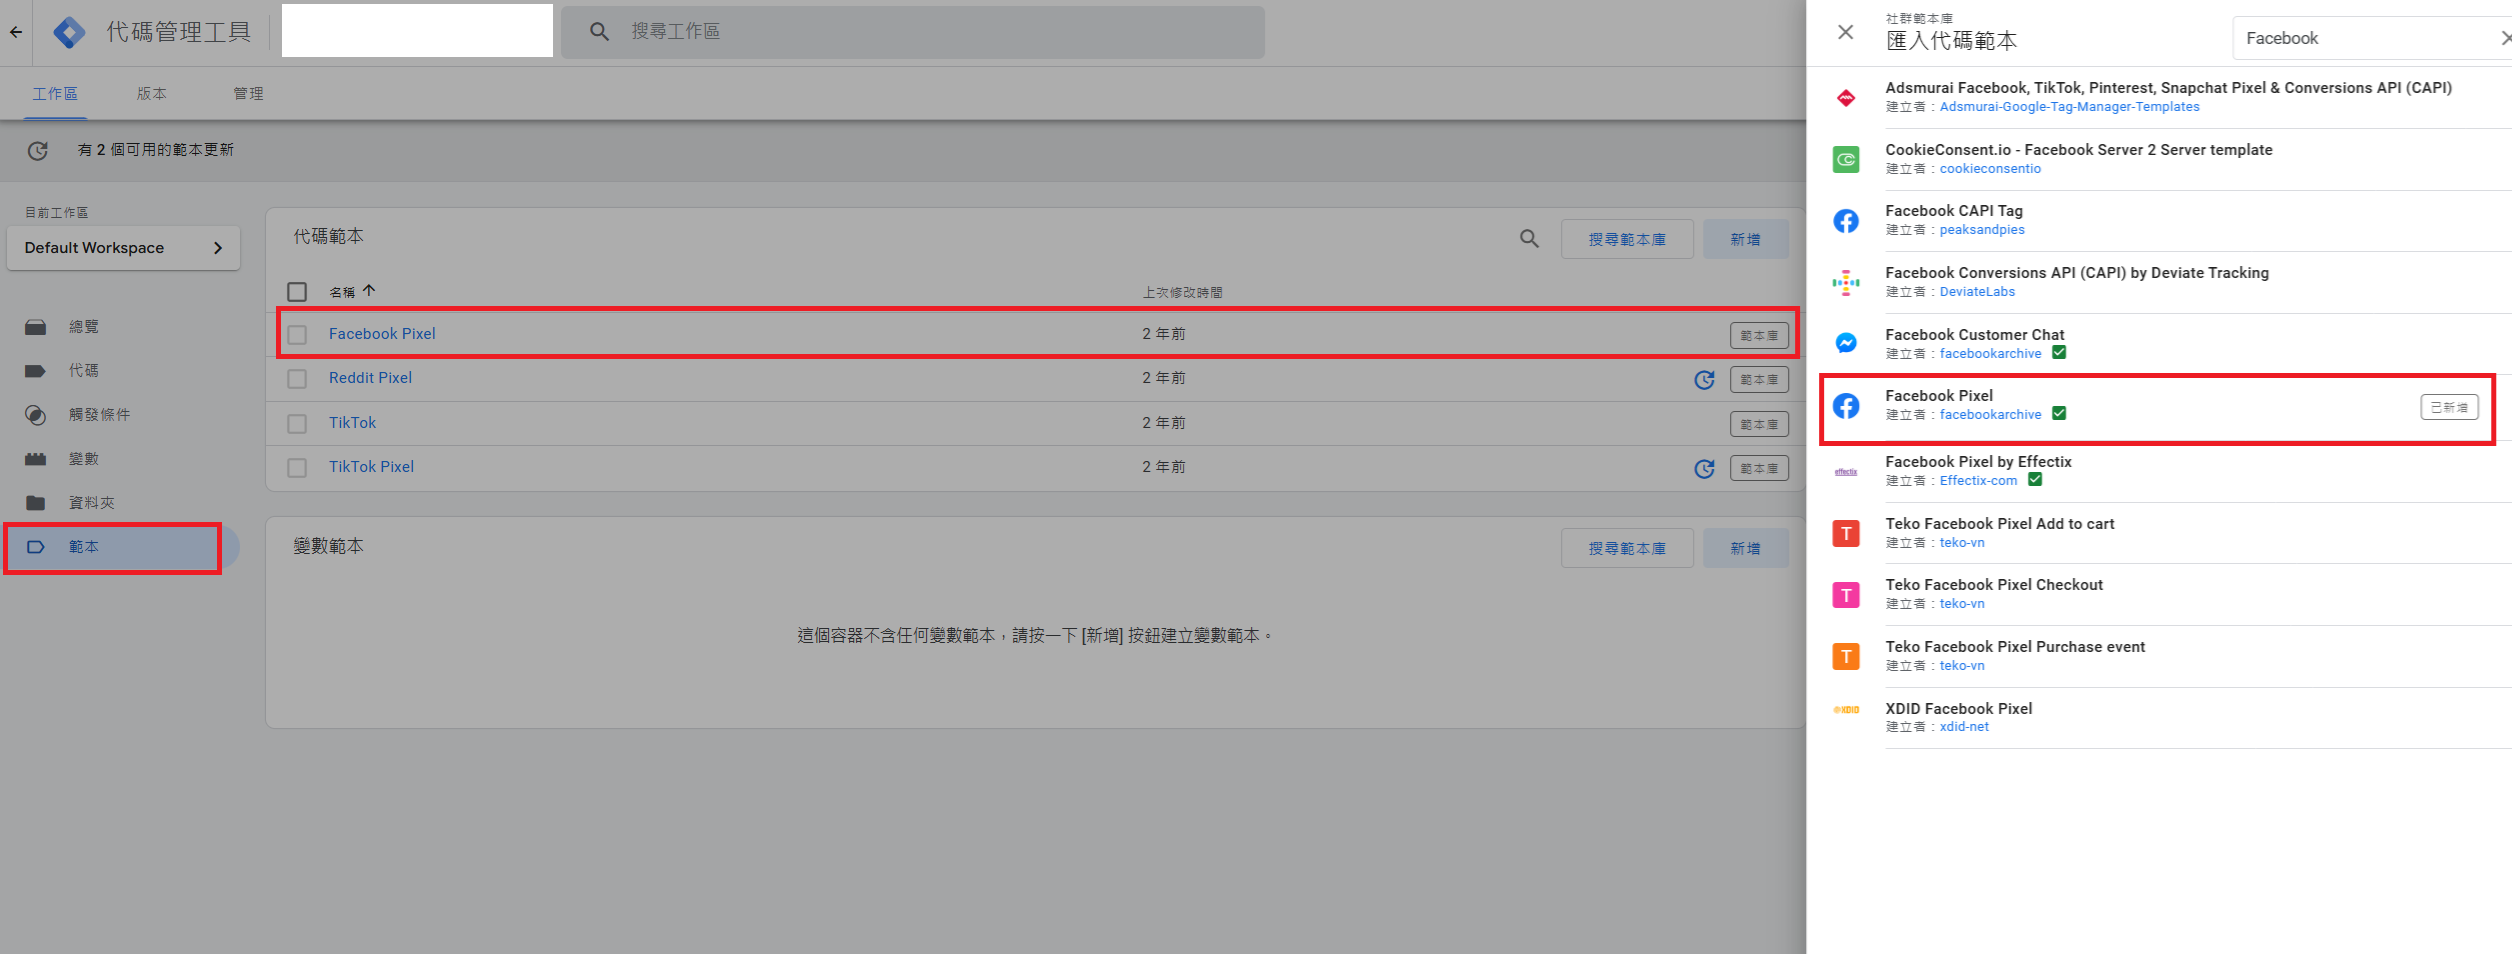
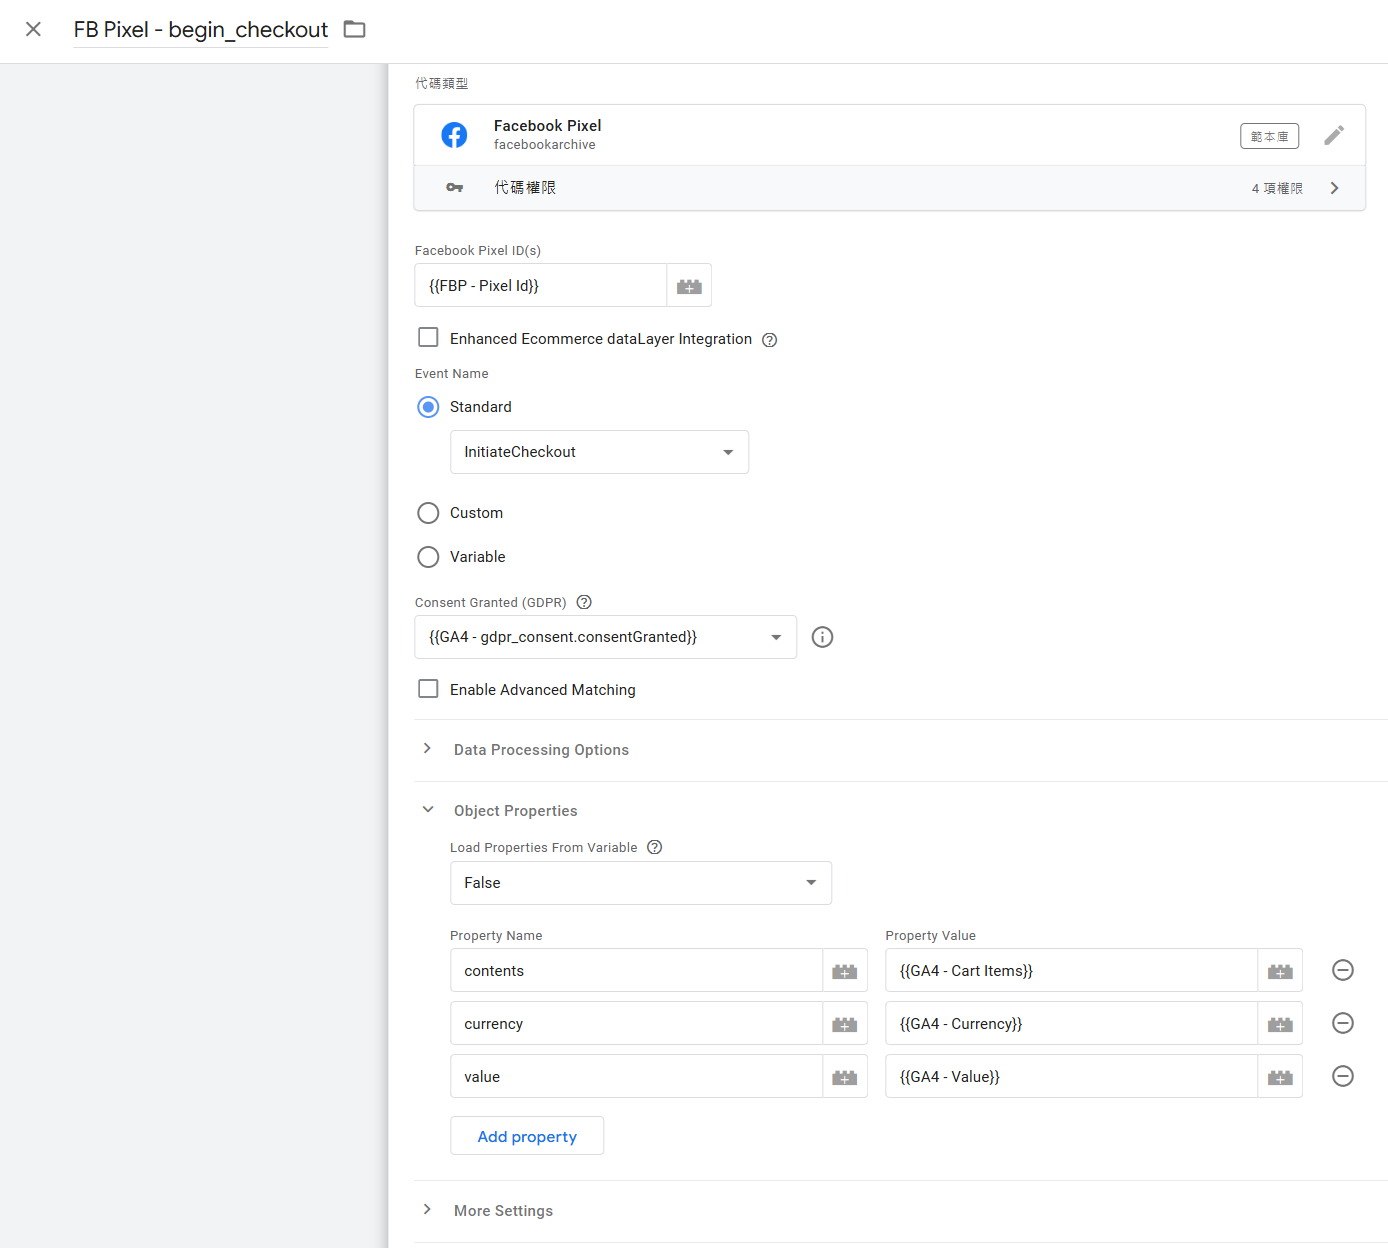
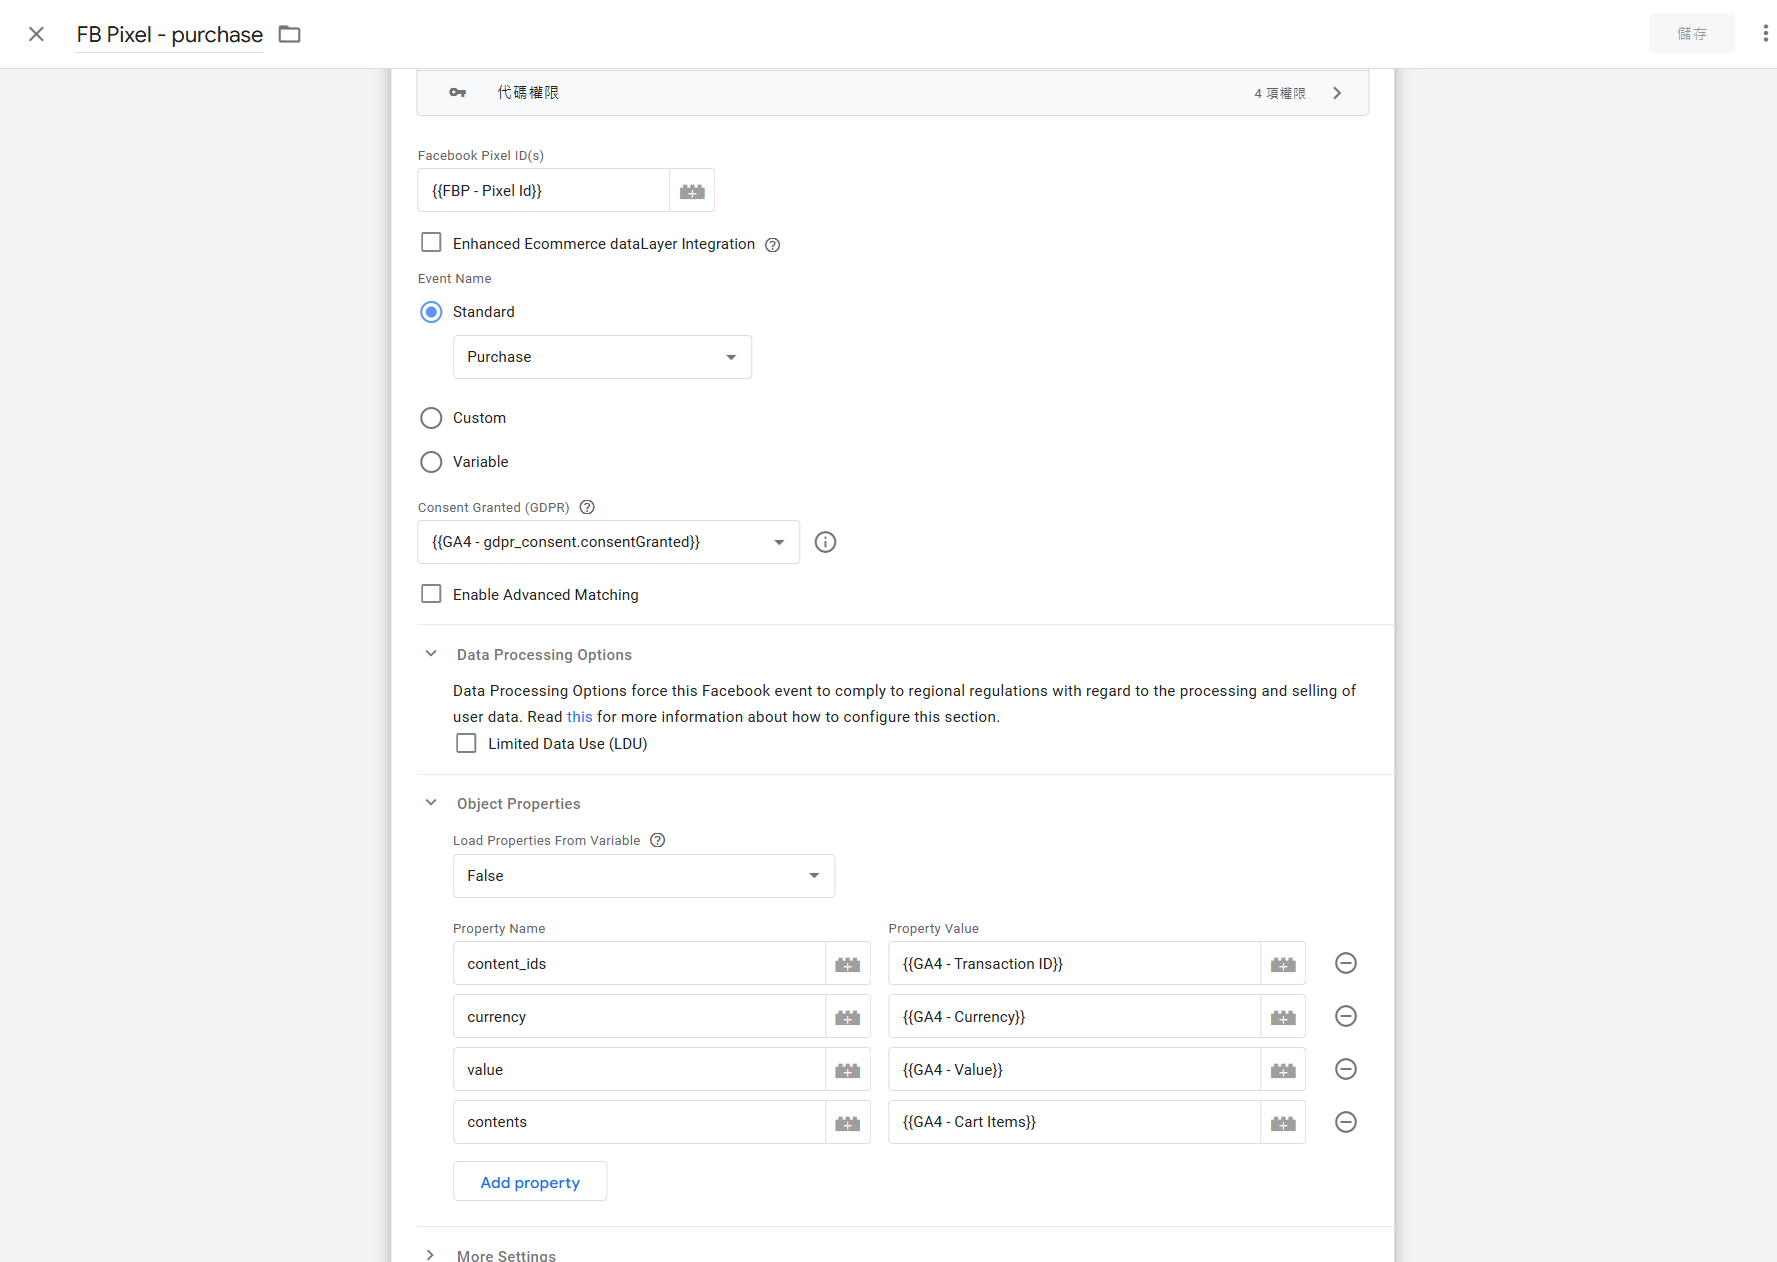
Configure the GTM event template to ensure events are sent correctly.
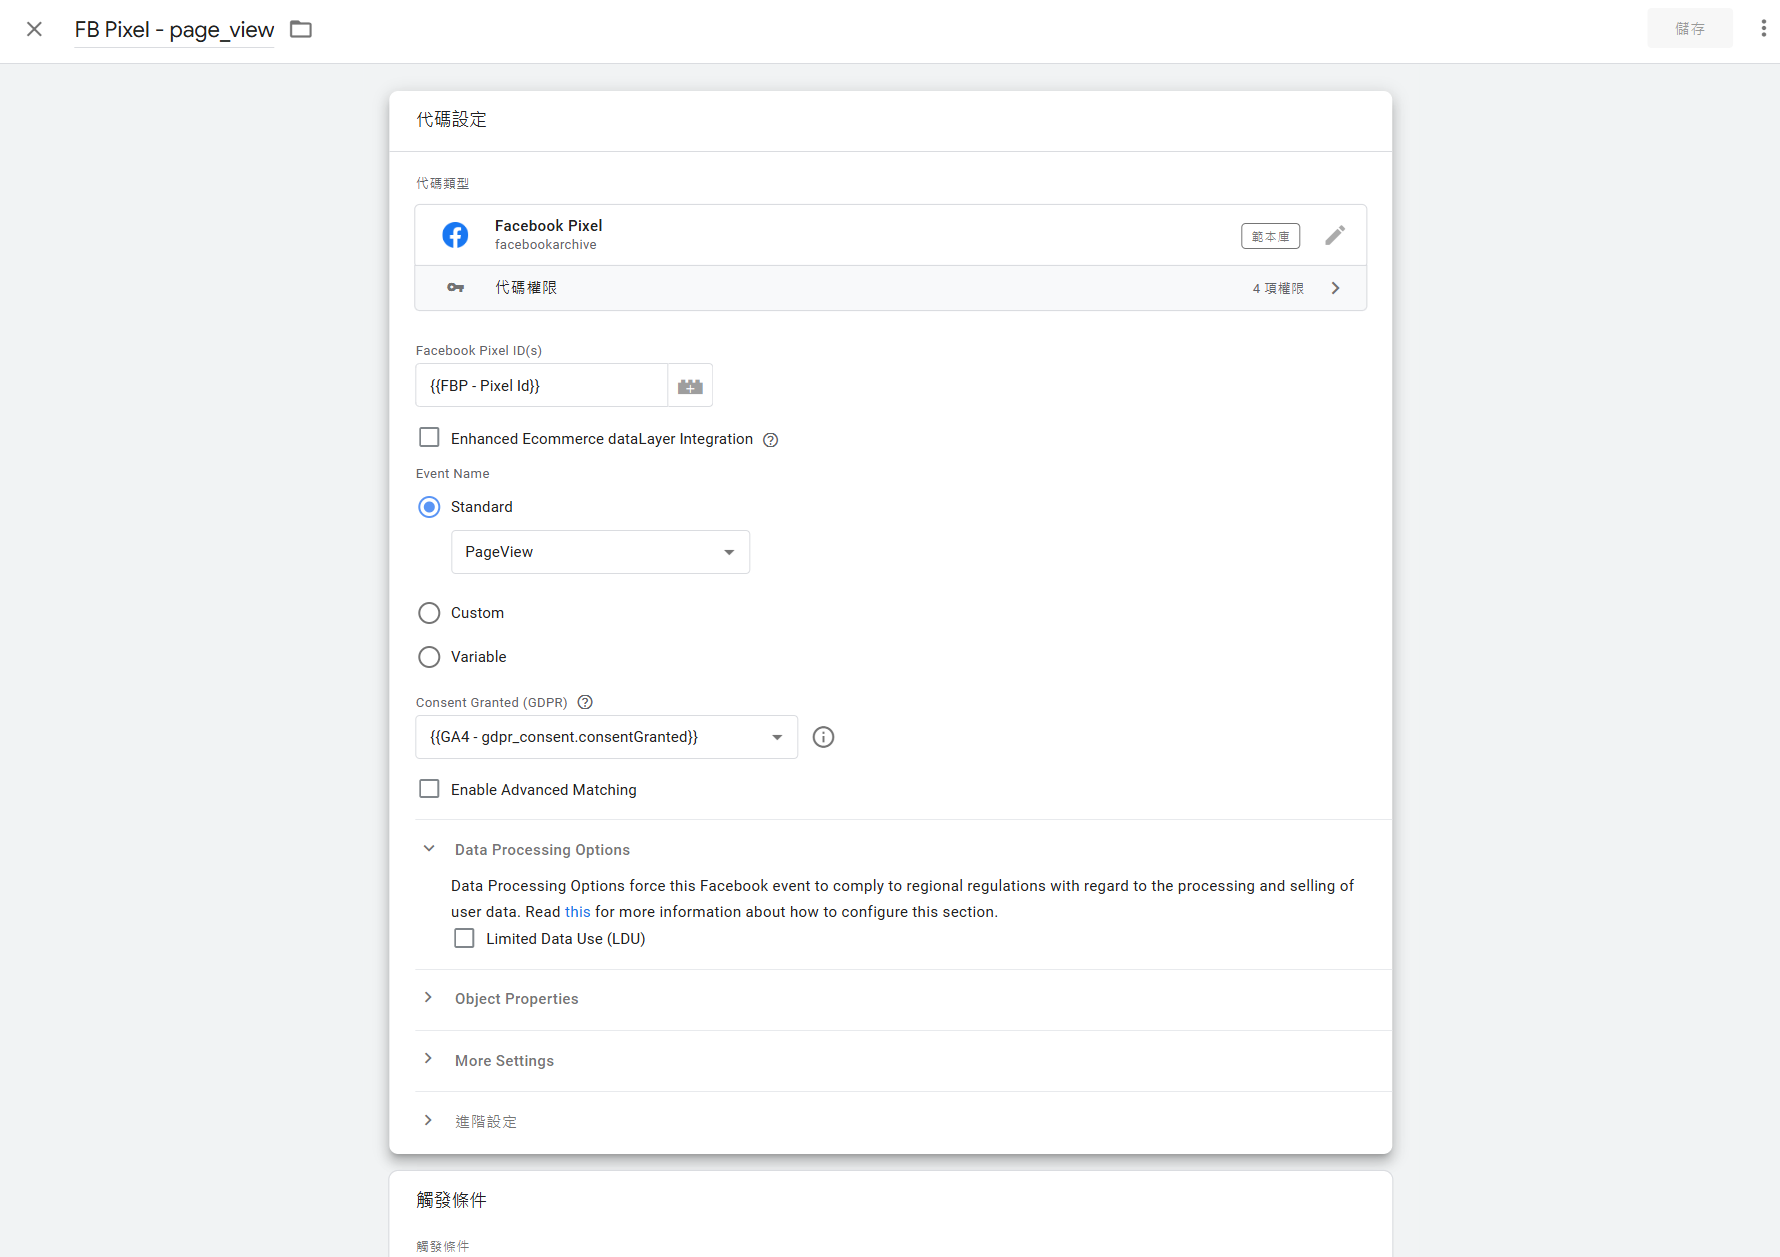
 Since we've already integrated GA e-commerce events, we can forward the properties of these GA events to the Facebook Pixel.
Frontend Implementation: Passing the Consent Event
When a user clicks the "Agree" button, you can use the following code to pass the consent event and its properties to GTM via the data layer.
export function acceptConsentGranted(isAllow: boolean = false) {
    if (!window || !window.dataLayer) {
        return;
    }

    window.dataLayer.push({
        event: 'consent_update',
        gdpr_consent: {
            consentGranted: isAllow, // true 或 false
            timestamp: new Date().toISOString(),
        },
    });
}
P.S. The dataLayer is the foundation of gtag.js; the operation of gtag.js is based on the dataLayer.
Finalizing the Setup in GTM
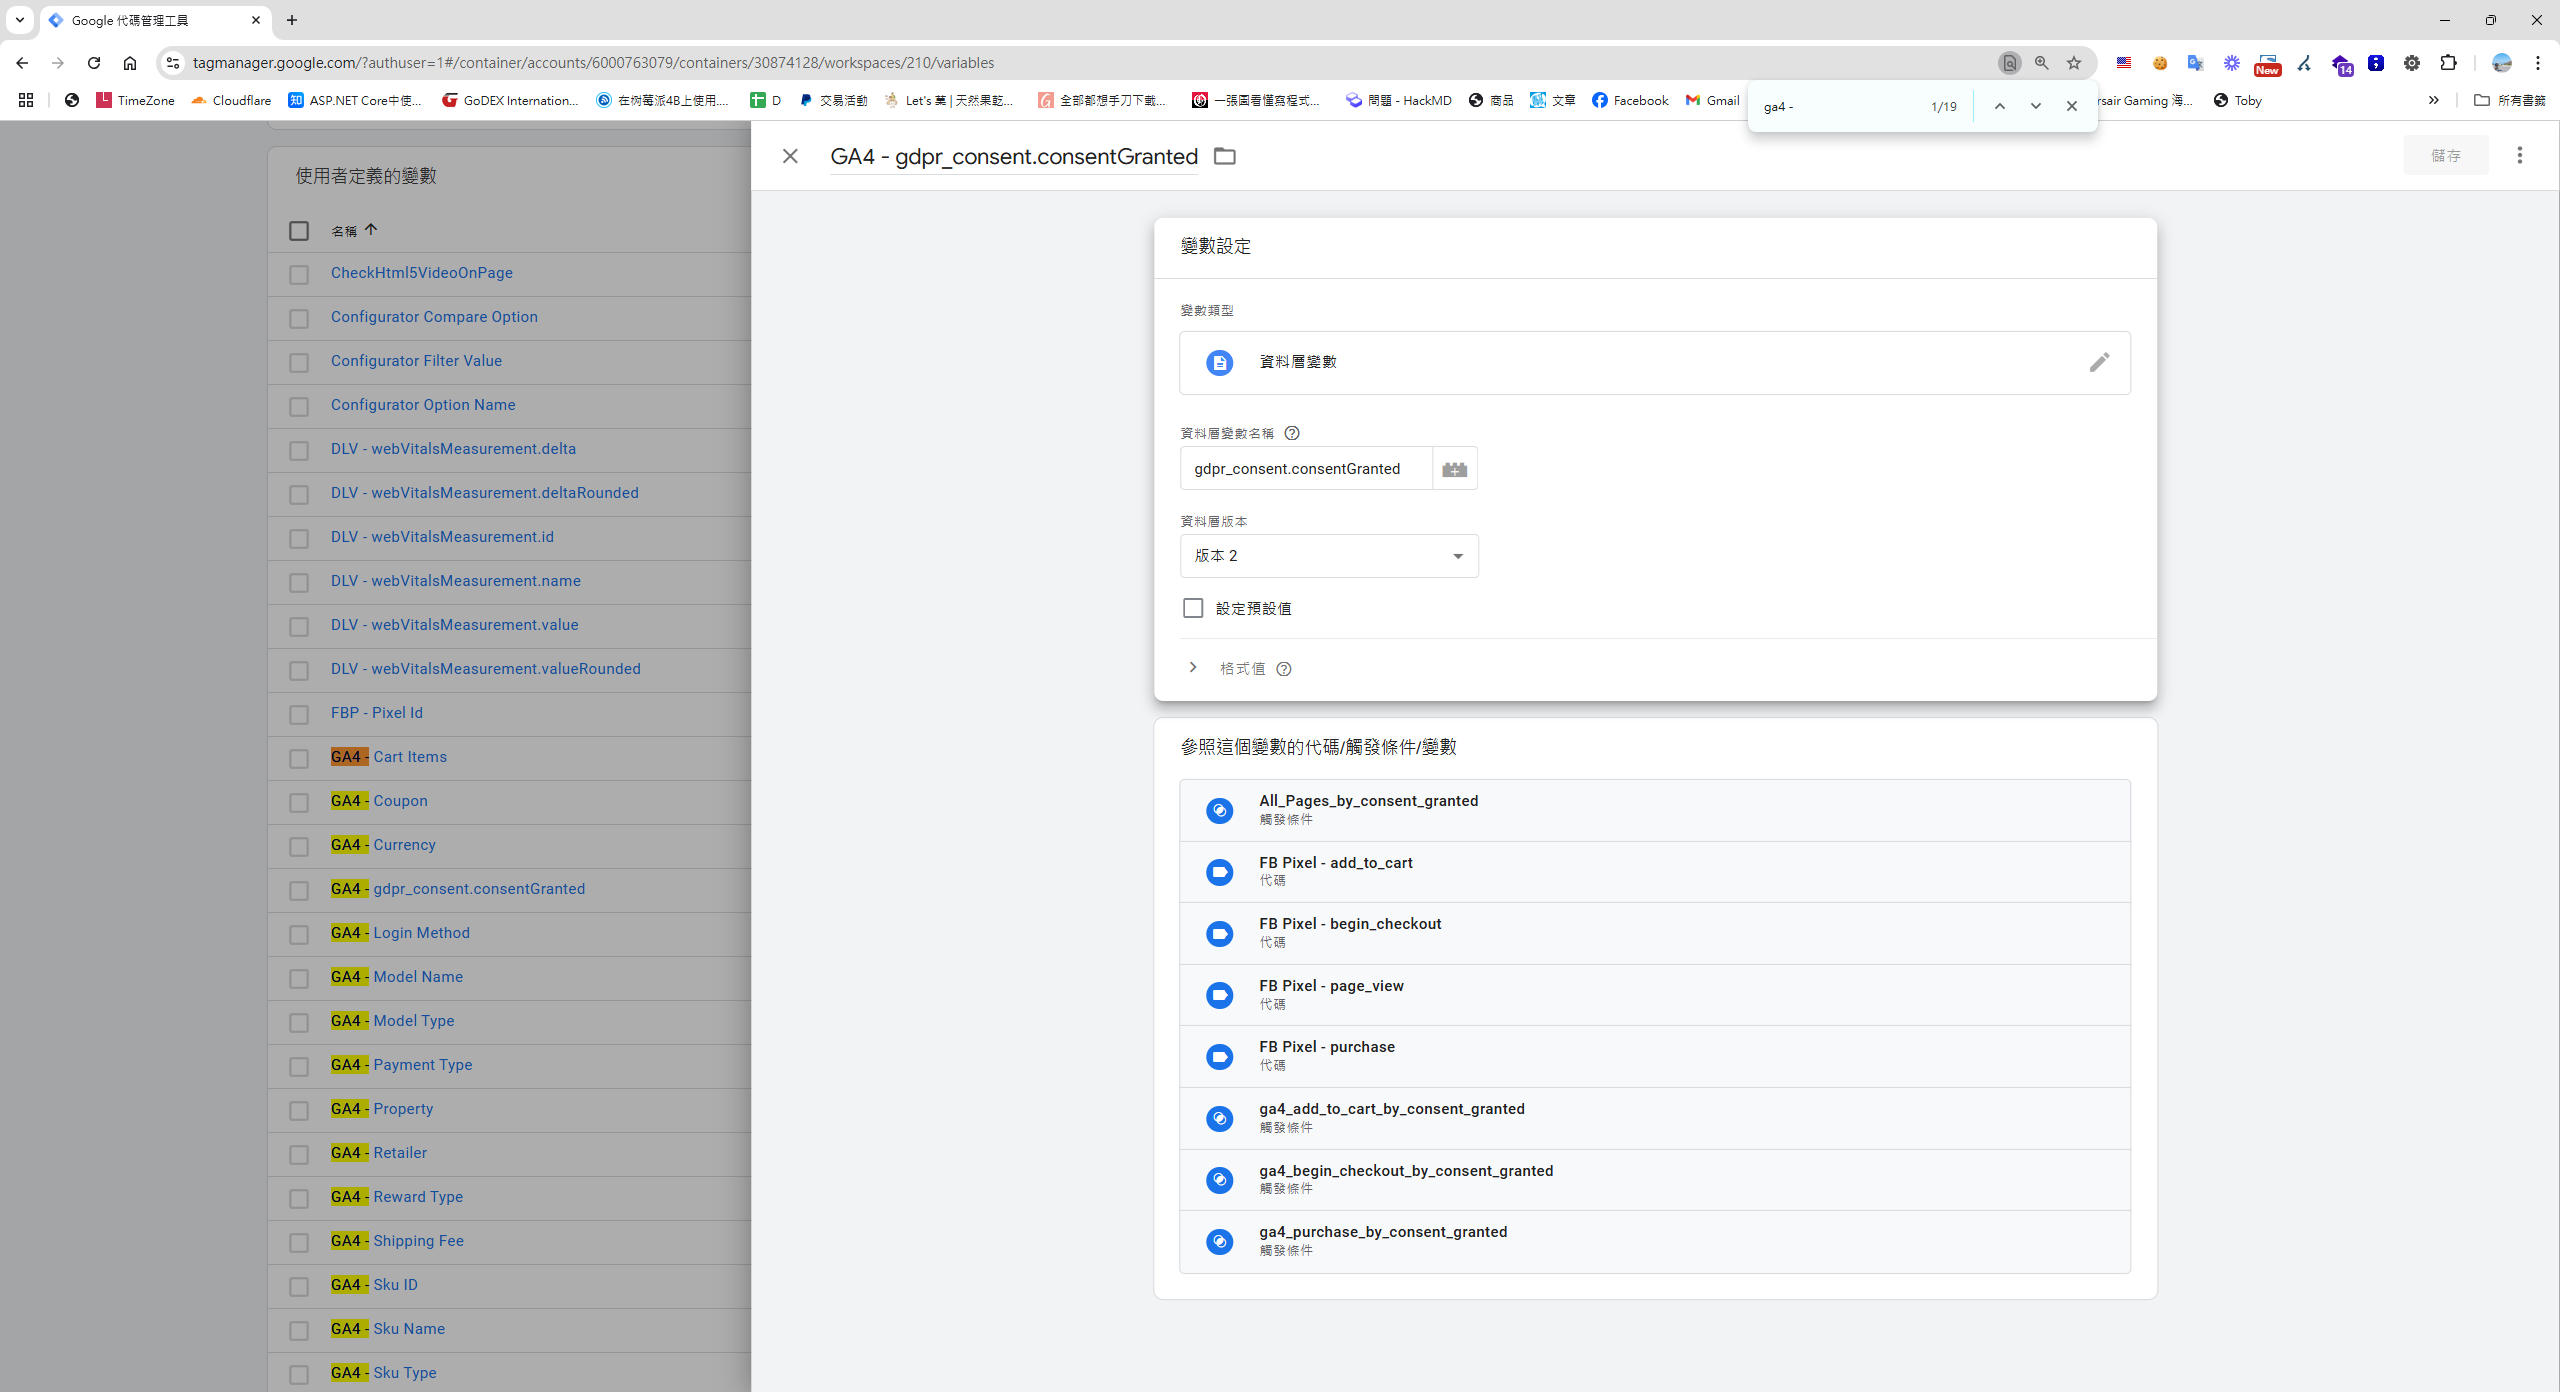
1. Create a Variable
Create a new variable to receive the value of gdpr_consent.
2. Modify Trigger Conditions
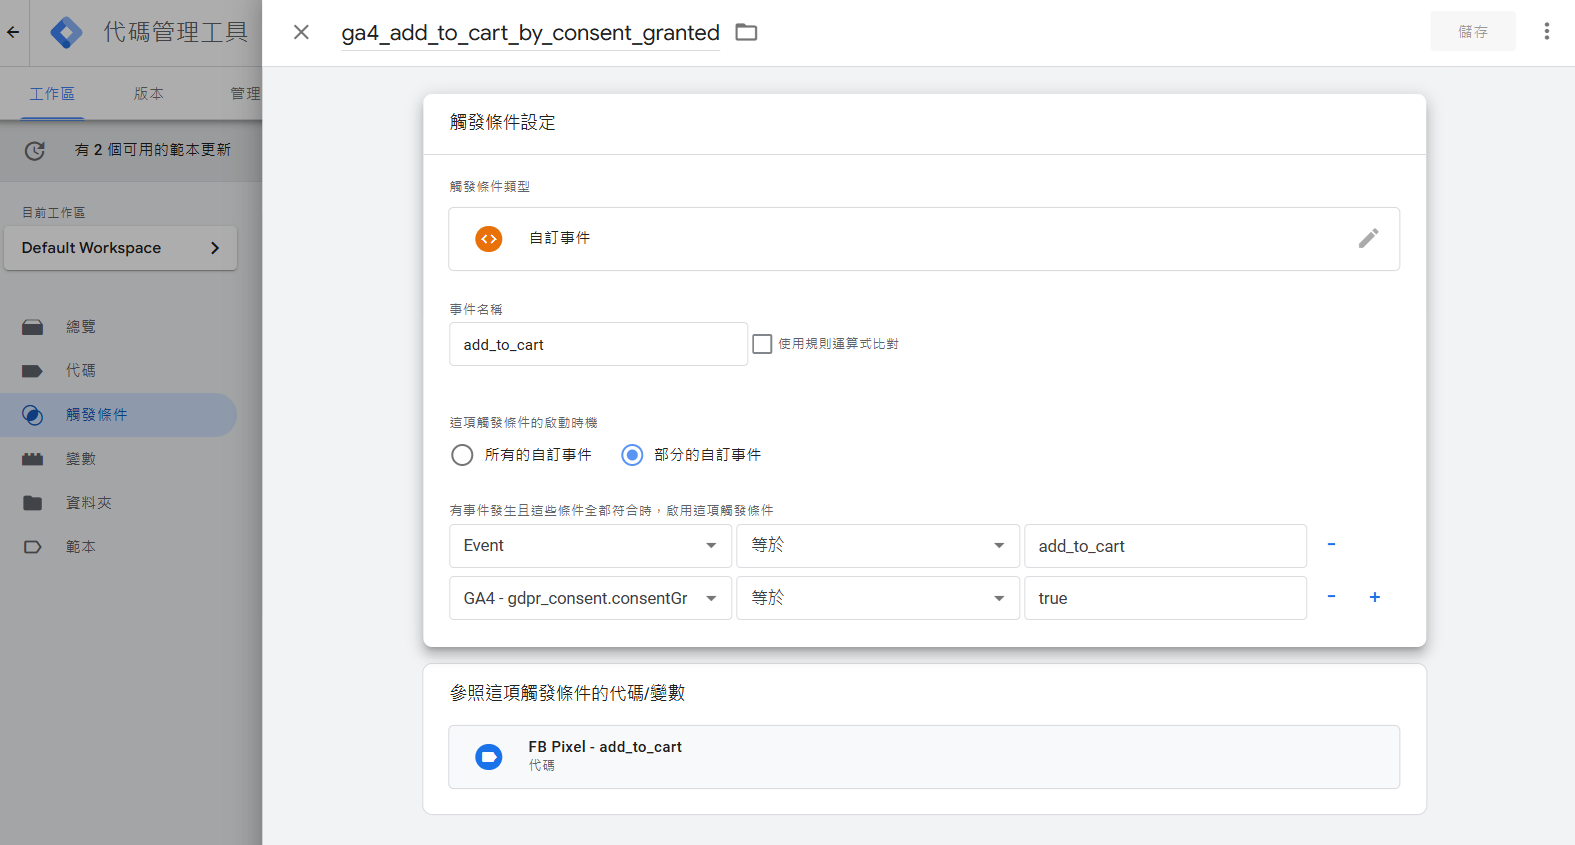
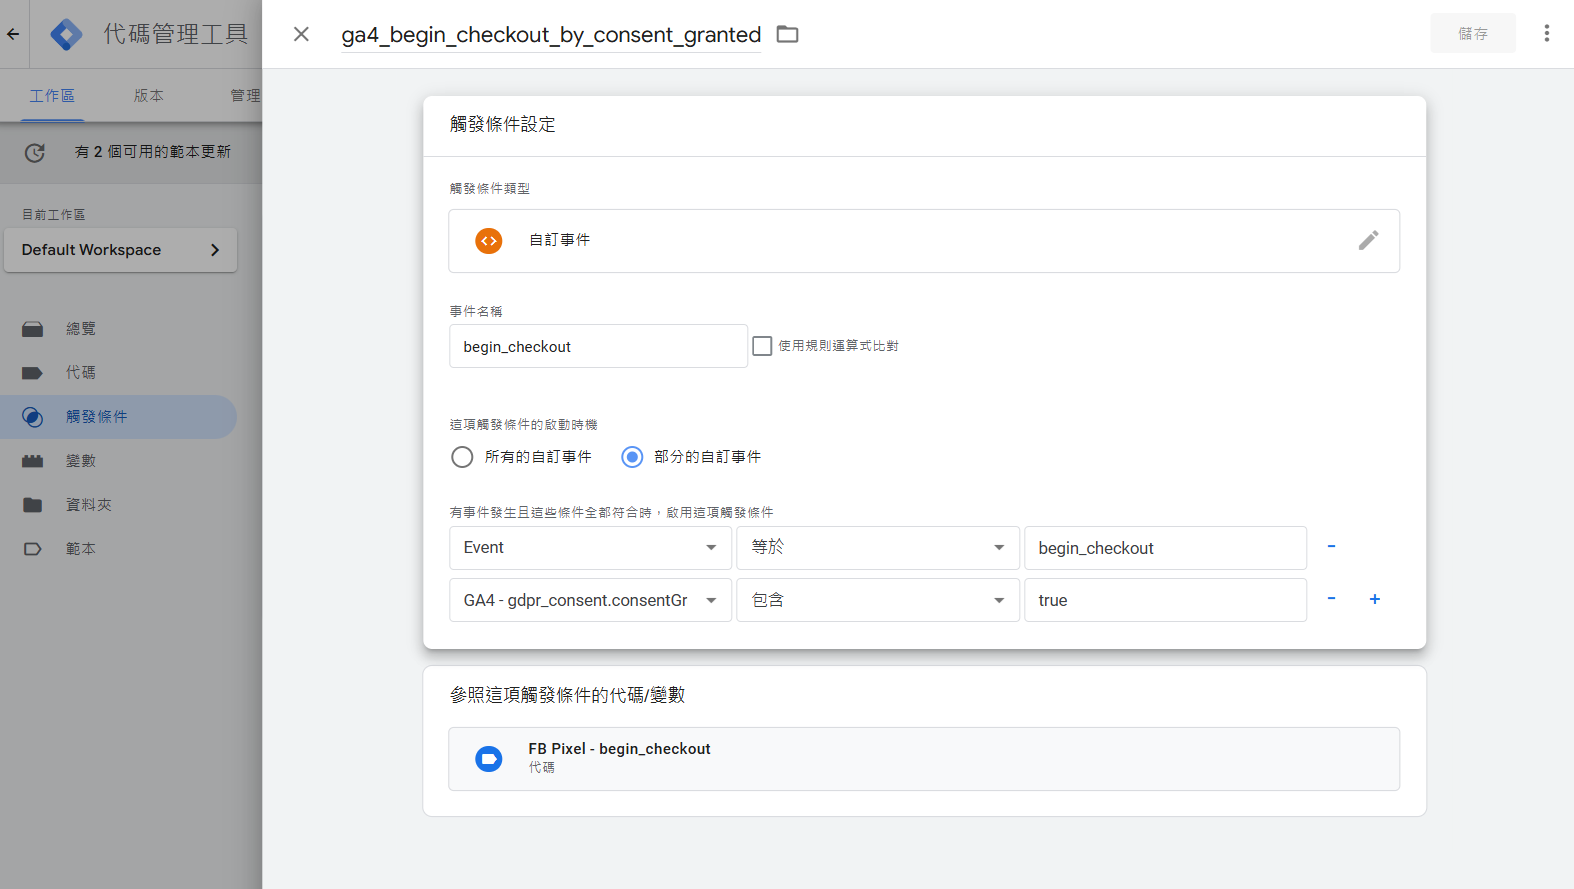
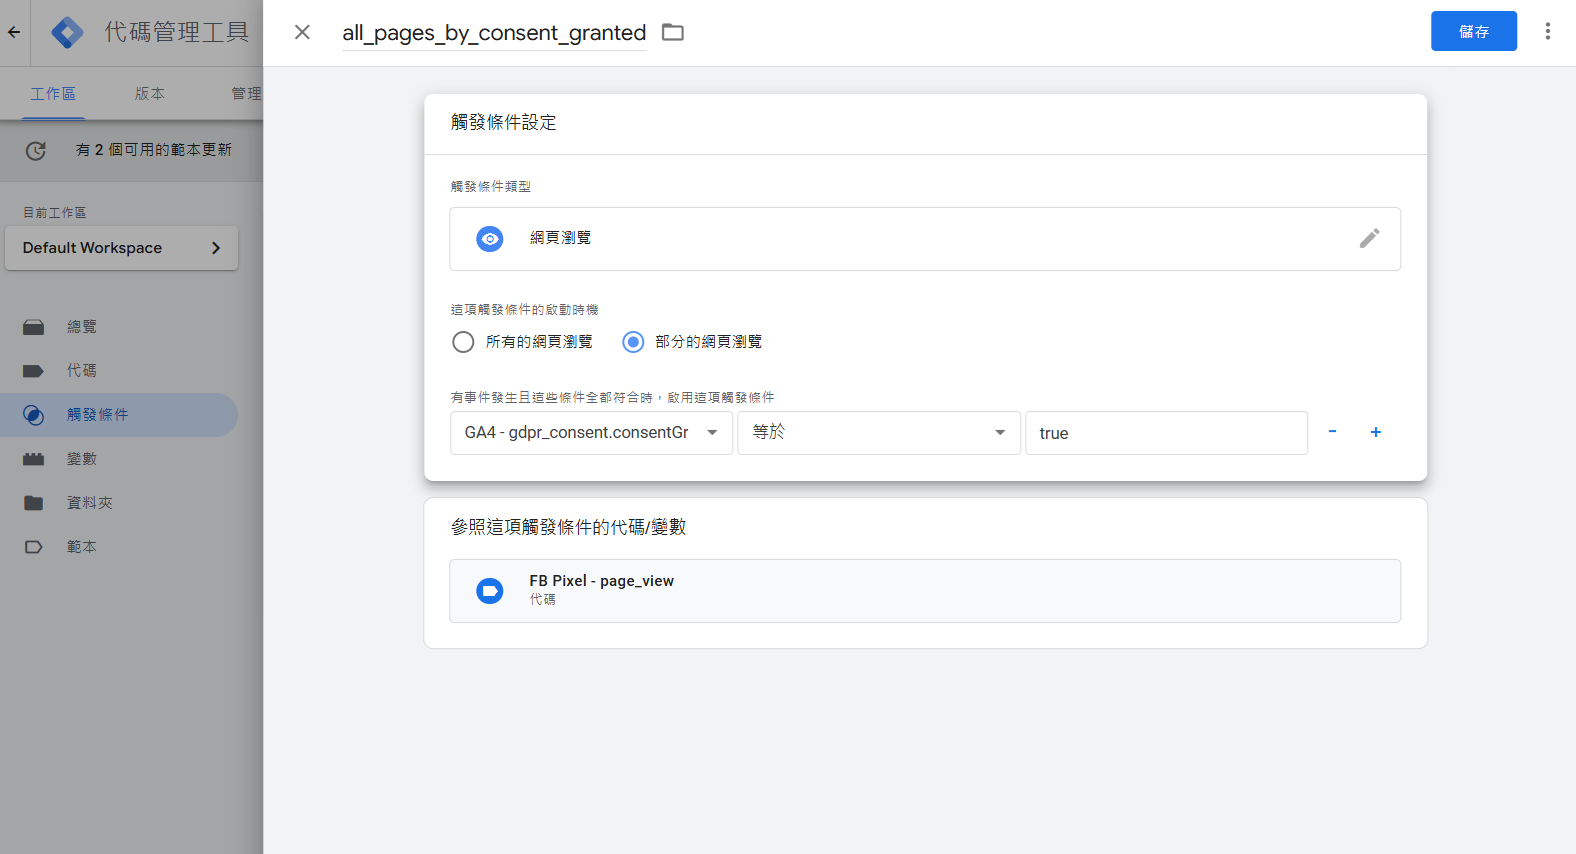
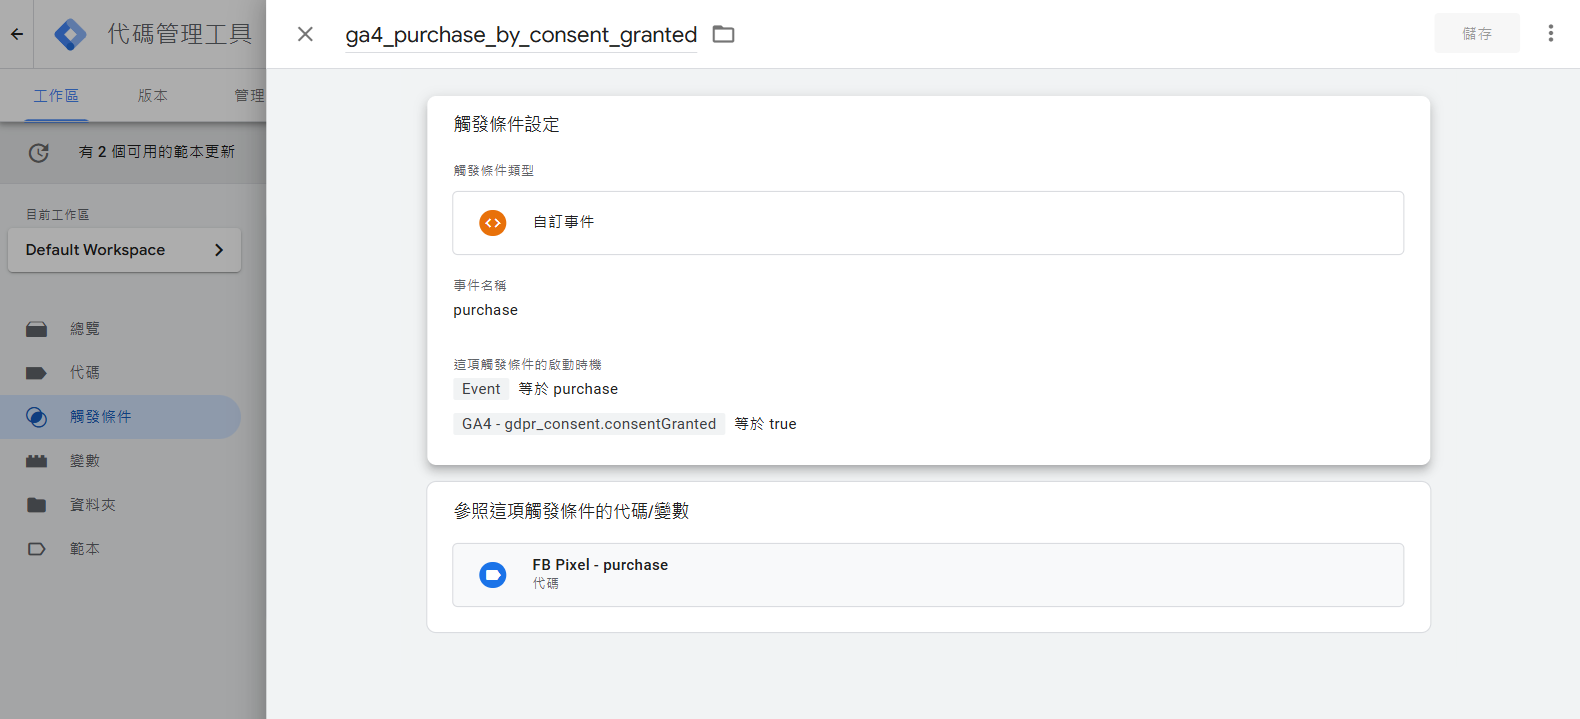
Set the trigger conditions in GTM so that events only fire when gdpr_consent.consentGranted is true. Here are a few examples:
-
FB Pixel - Add to Cart
-
FB Pixel - Begin Checkout
-
FB Pixel - Page View
-
FB Pixel - Purchase
Testing and Verification
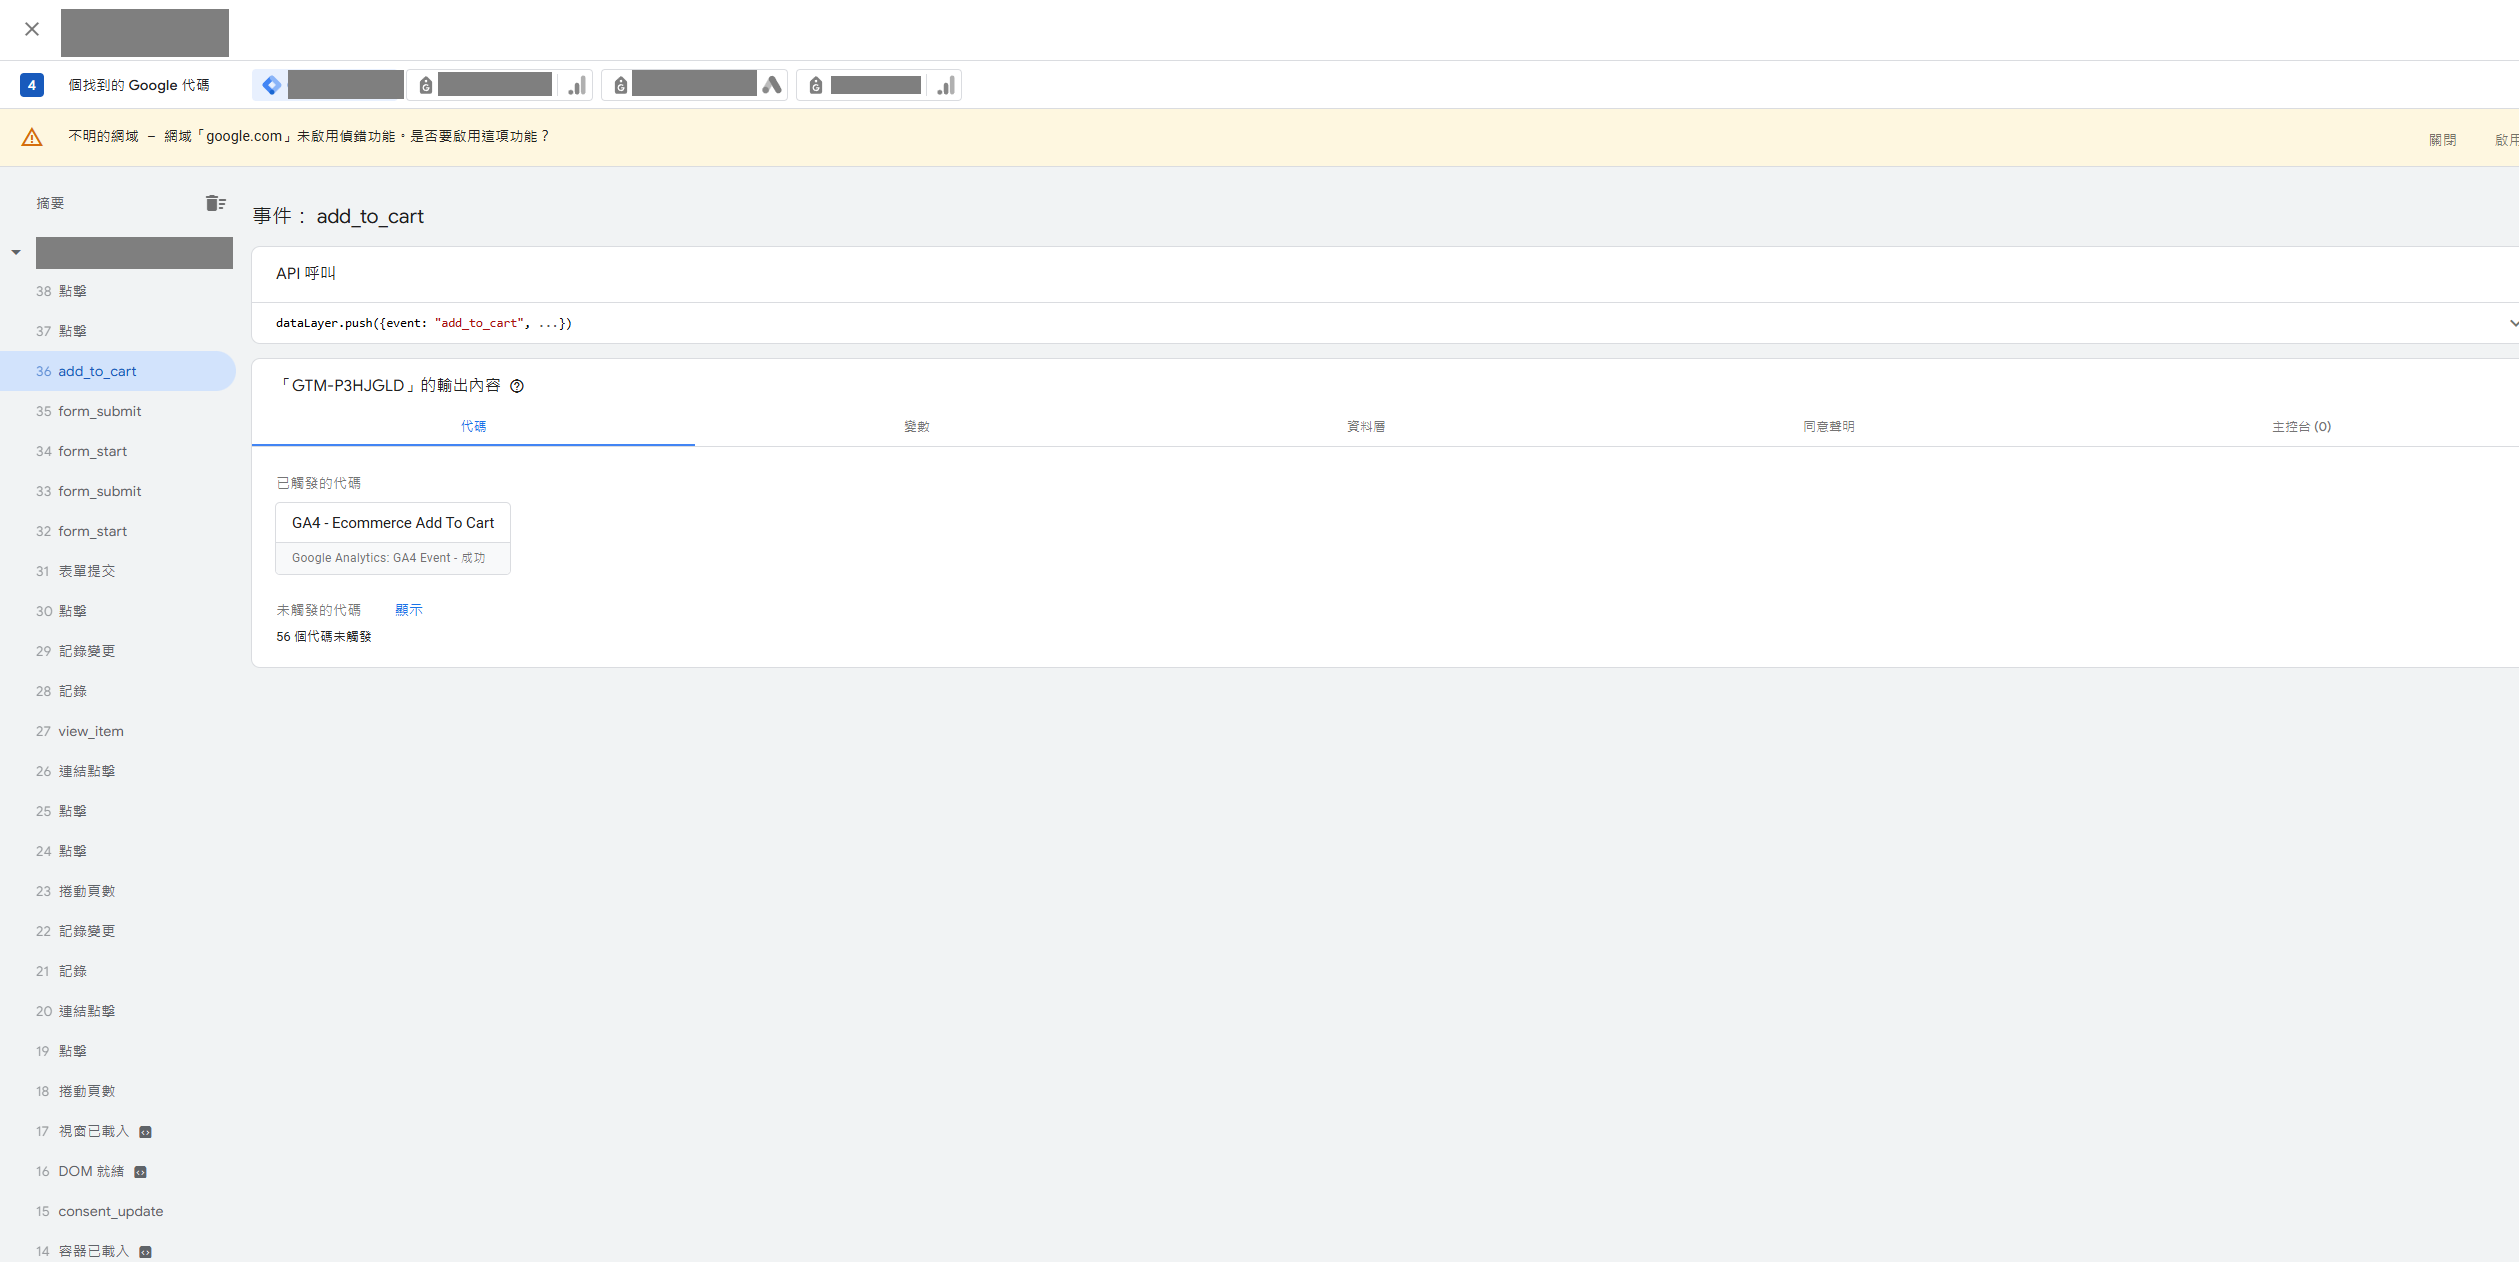
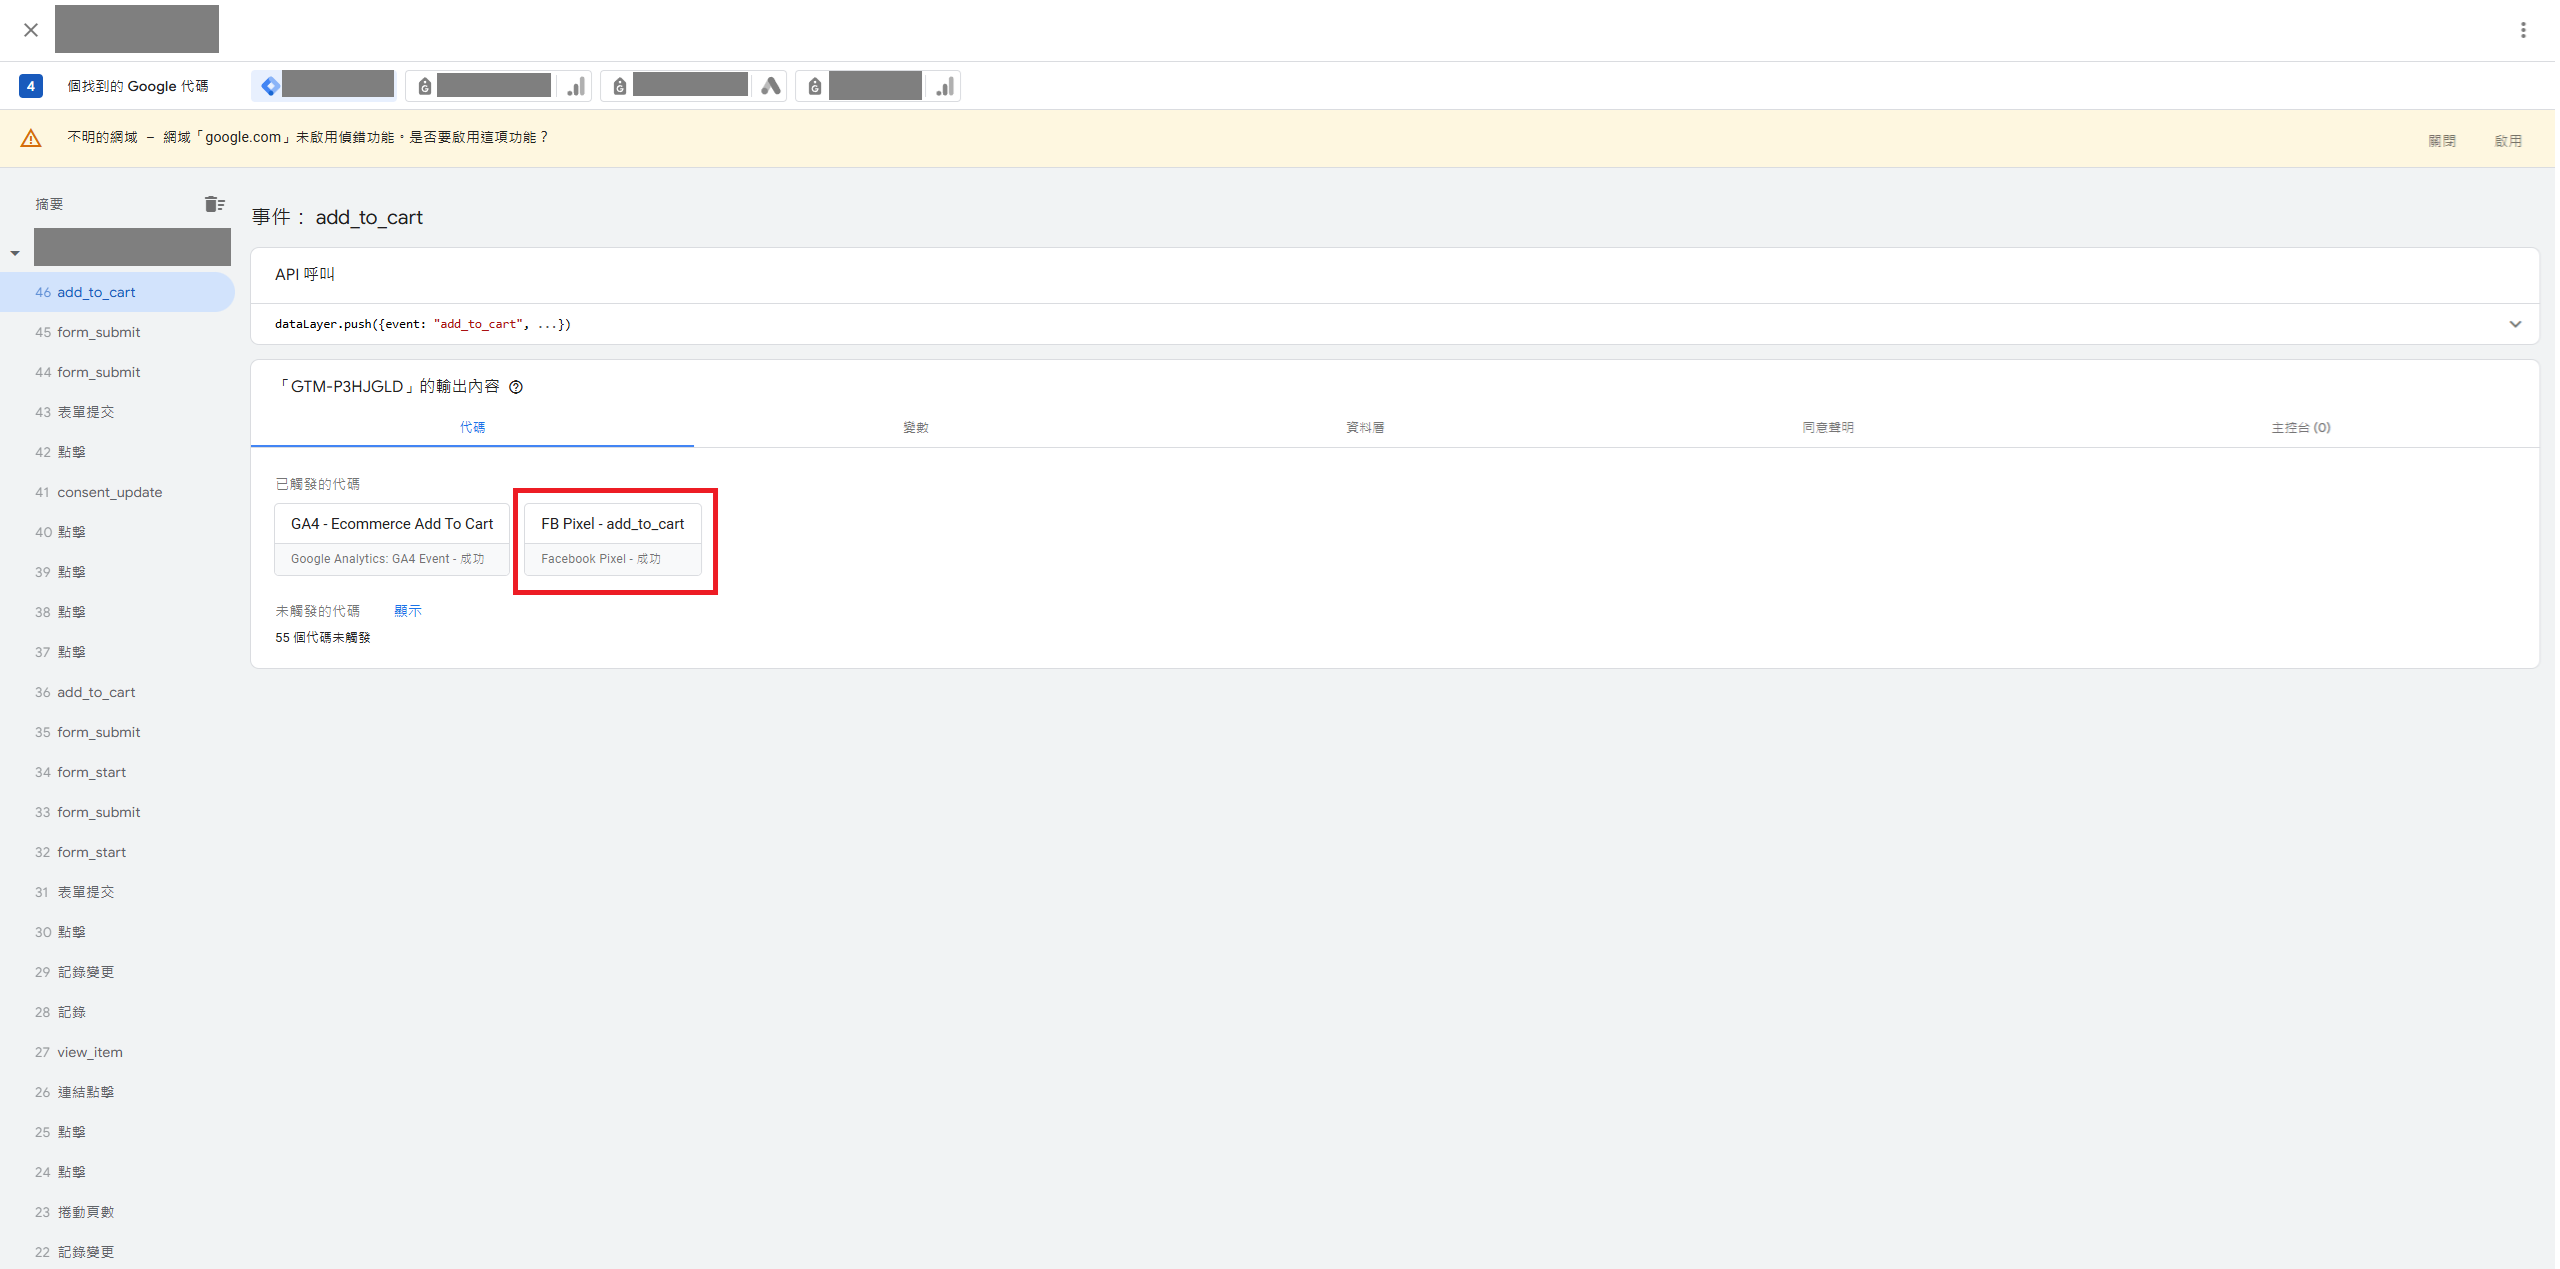
Once the setup is complete, you can use Tag Assistant to test it:
-
Simulate a user who has not clicked "Agree" Confirm that no tracking events are fired.
-
Simulate a user who has clicked "Agree" Confirm that all tracking events are successfully fired and data is sent.
Conclusion
GDPR might make ad targeting less precise, but achieving GDPR compliance is about more than just following the law; it's also a safeguard for consumers. By correctly configuring GTM and implementing Consent Mode, you can continue to acquire the data your business needs while protecting user privacy.


Comments