

Introduction
I've previously explored integrating Jenkins with Kubernetes on Windows Desktop, and this time, I'm going to try integrating Jenkins with Kubernetes on Linux.
Prerequisites
- Docker, Kubernetes, and a Registry installed on Ubuntu
- Jenkins
- A Next.js project with its YAML configuration file ready.
First, Install Kubernetes Dashboard, Generate a ServiceAccount, and Get the Token (this token will be used by Jenkins)
Install Kubernetes Dashboard
kubectl apply -f https://raw.githubusercontent.com/kubernetes/dashboard/v2.7.0/aio/deploy/recommended.yaml
Create an admin user
sudo vim dashboard-adminuser.yaml
Create an admin user
apiVersion: v1
kind: ServiceAccount
metadata:
  name: admin-user
  namespace: kubernetes-dashboard

---

apiVersion: rbac.authorization.k8s.io/v1
kind: ClusterRoleBinding
metadata:
  name: admin-user
roleRef:
  apiGroup: rbac.authorization.k8s.io
  kind: ClusterRole
  name: cluster-admin
subjects:
  - kind: ServiceAccount
    name: admin-user
    namespace: kubernetes-dashboard
Create service account
kubectl apply -f dashboard-adminuser.yaml
Get admin token
kubectl -n kubernetes-dashboard create token admin-user --duration=876000h
Start the Proxy
kubectl proxy
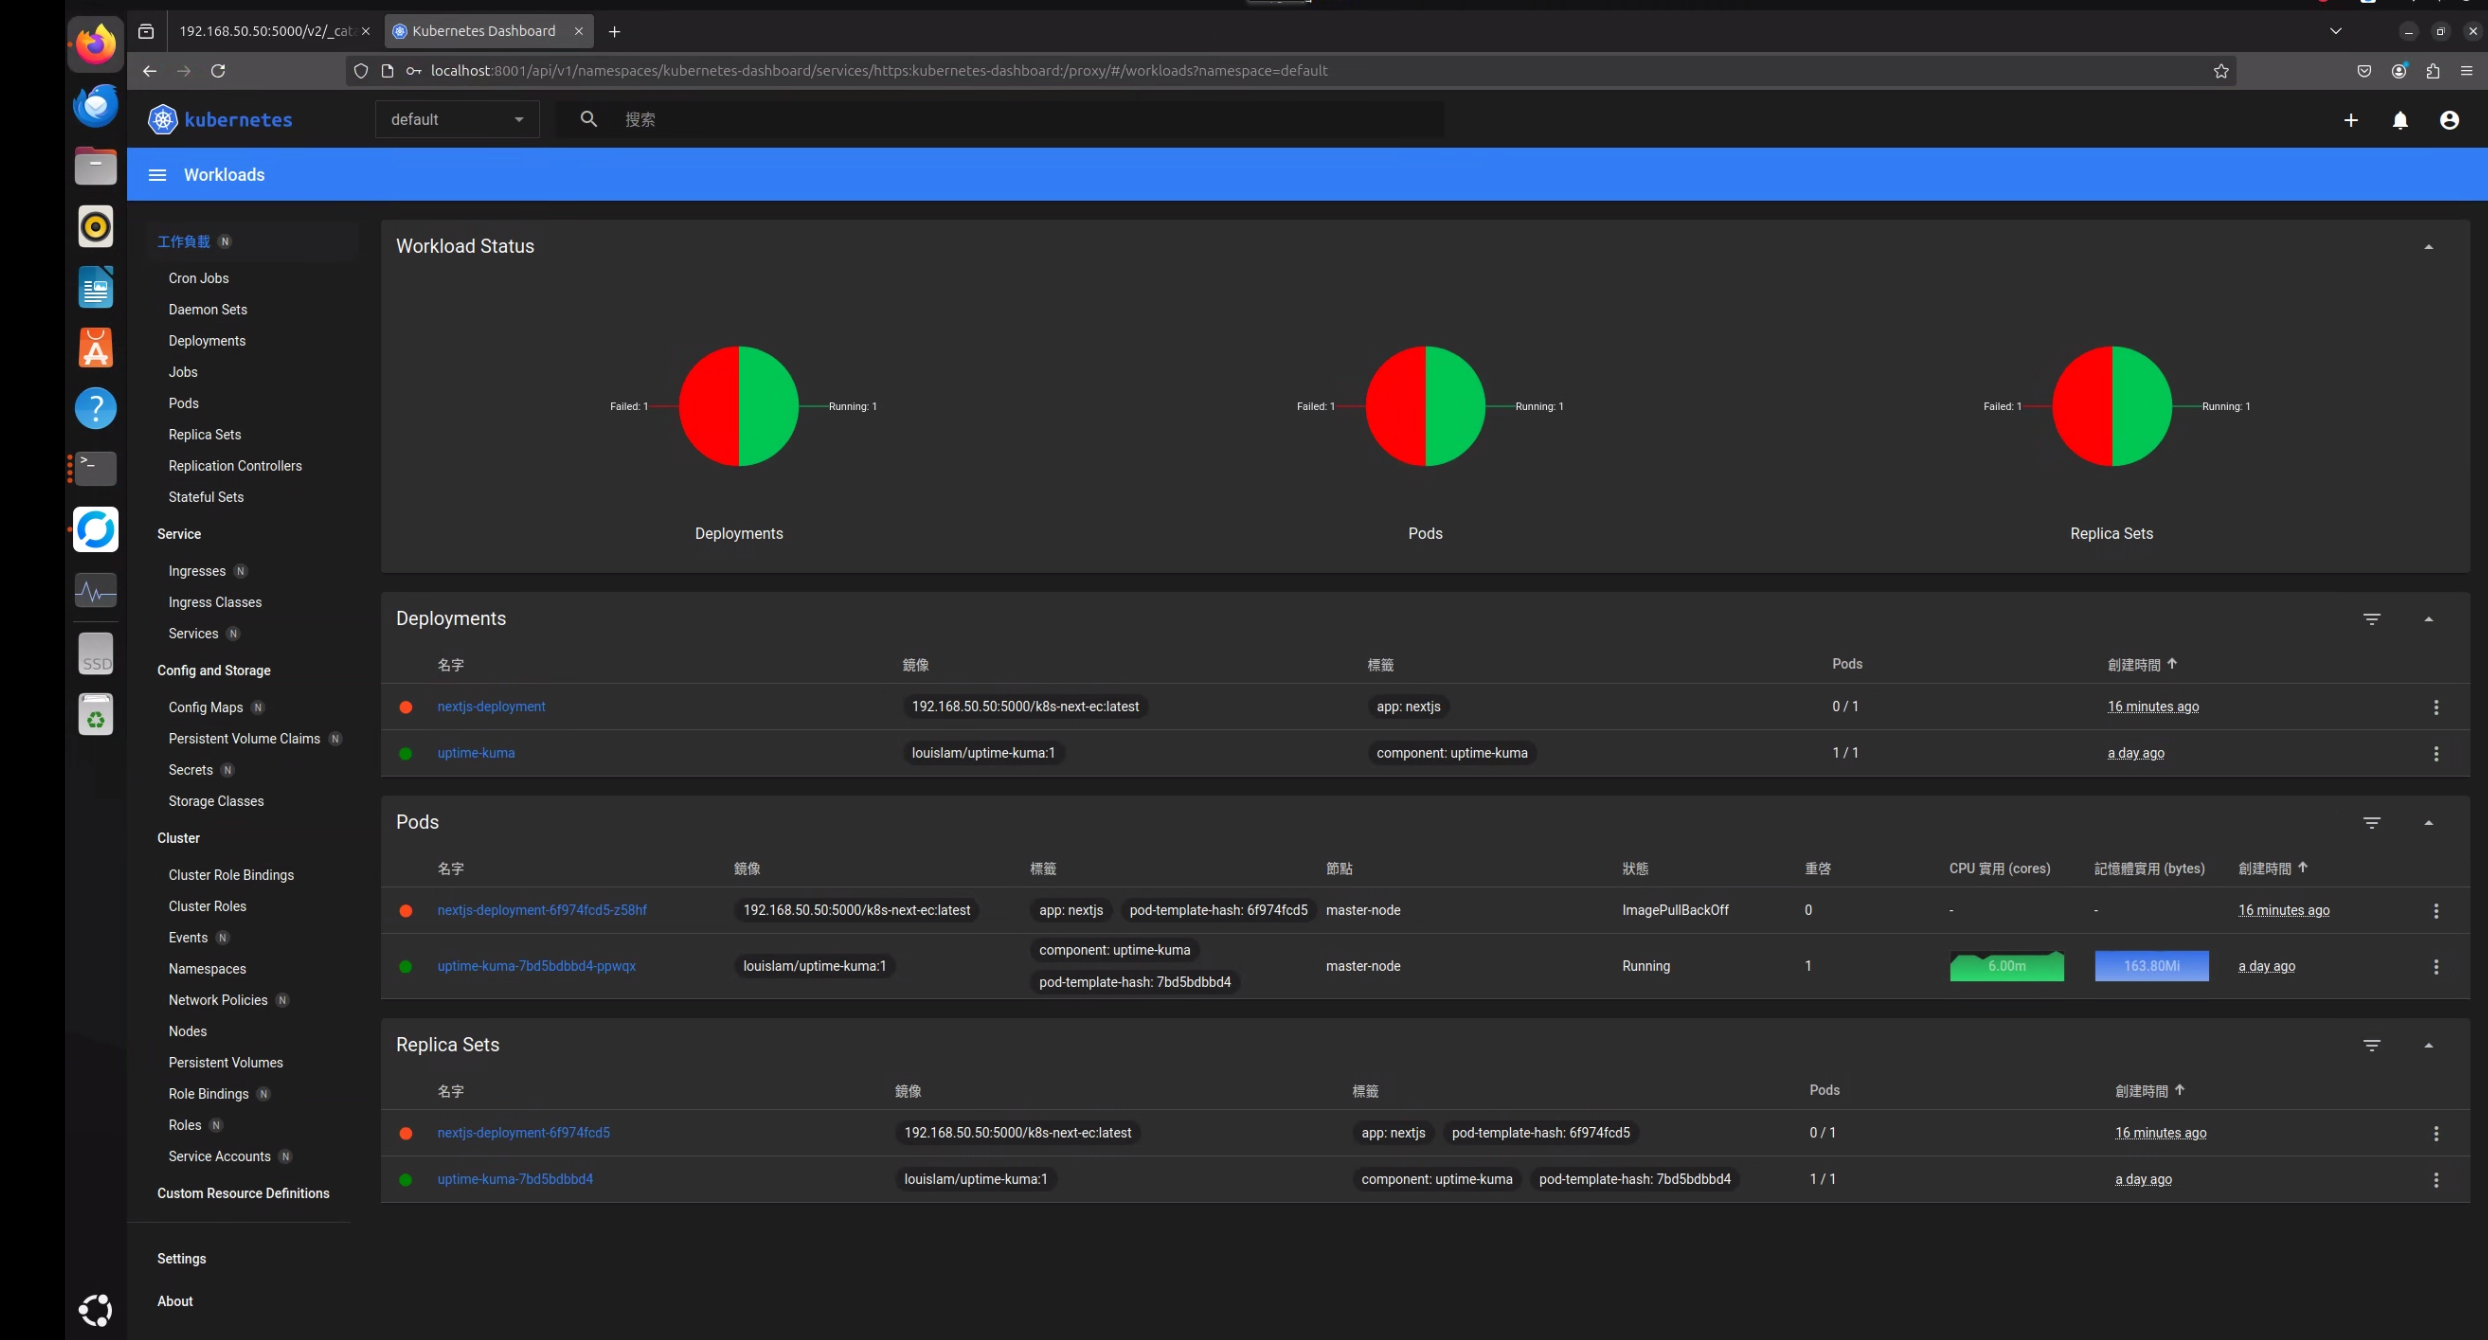
You can now visit the following link to log in to the Dashboard
http://localhost:8001/api/v1/namespaces/kubernetes-dashboard/services/https:kubernetes-dashboard:/proxy/#/login
Install Jenkins
Refer to my previous article for instructions.
Install kubectl in the Jenkins container
docker exec -it -uroot jenkins bash // 進入jenkins 容器中
curl -LO https://storage.googleapis.com/kubernetes-release/release/v1.29.1/bin/linux/amd64/kubectl // 下載 kubectl
chmod +x ./kubectl // 給予權限
mv ./kubectl /usr/local/bin/kubectl // 複製到系統環境資料夾
kubectl version --client // 查詢版本
P.S. It's best if the kubectl versions on Ubuntu and in the Jenkins container match.
Copy kubectl configuration to the Jenkins container (execute line by line)
docker exec -it -uroot jenkins /bin/bash
mkdir -p /.kube
exit
docker cp ~/.kube/config jenkins:/root/.kube
Connect Jenkins to Kubernetes via the Kubernetes CLI
- To connect Jenkins to Kubernetes, you need to install a few plugins. Go to Manage Jenkins > Manage Plugins.
- Kubernetes plugin
- Kubernetes CLI Plugin

- Set up cloud
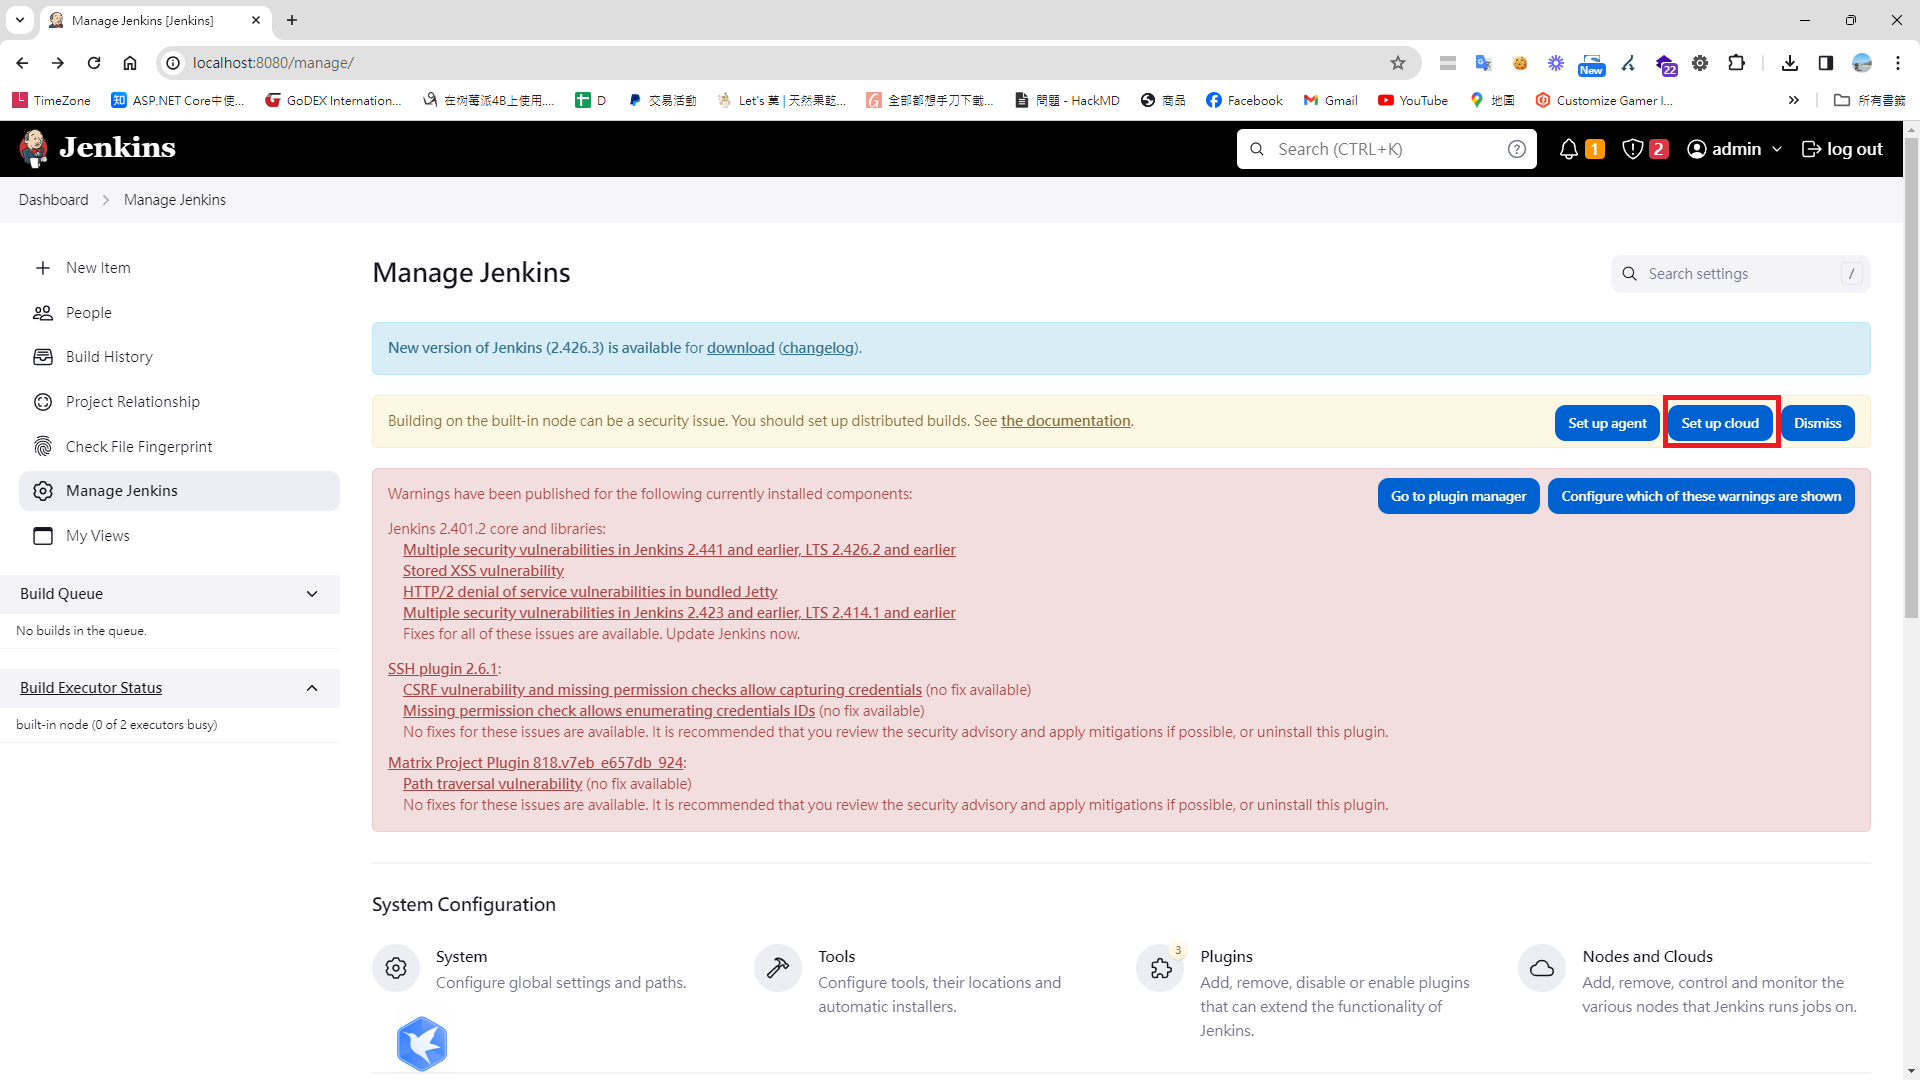
- Set Disable https certificate check => true
 4. Kubernetes URL =>
On Ubuntu, you can find the URL with
4. Kubernetes URL =>
On Ubuntu, you can find the URL with kubectl cluster-info.

https://192.168.50.50:6443 // 192.168.50.50是我家的Ubuntu 內網的主機IP
- Jenkins URL Jenkins URL:http://host.docker.internal:8080/ Jenkins tunnel:https://192.168.50.50:50000
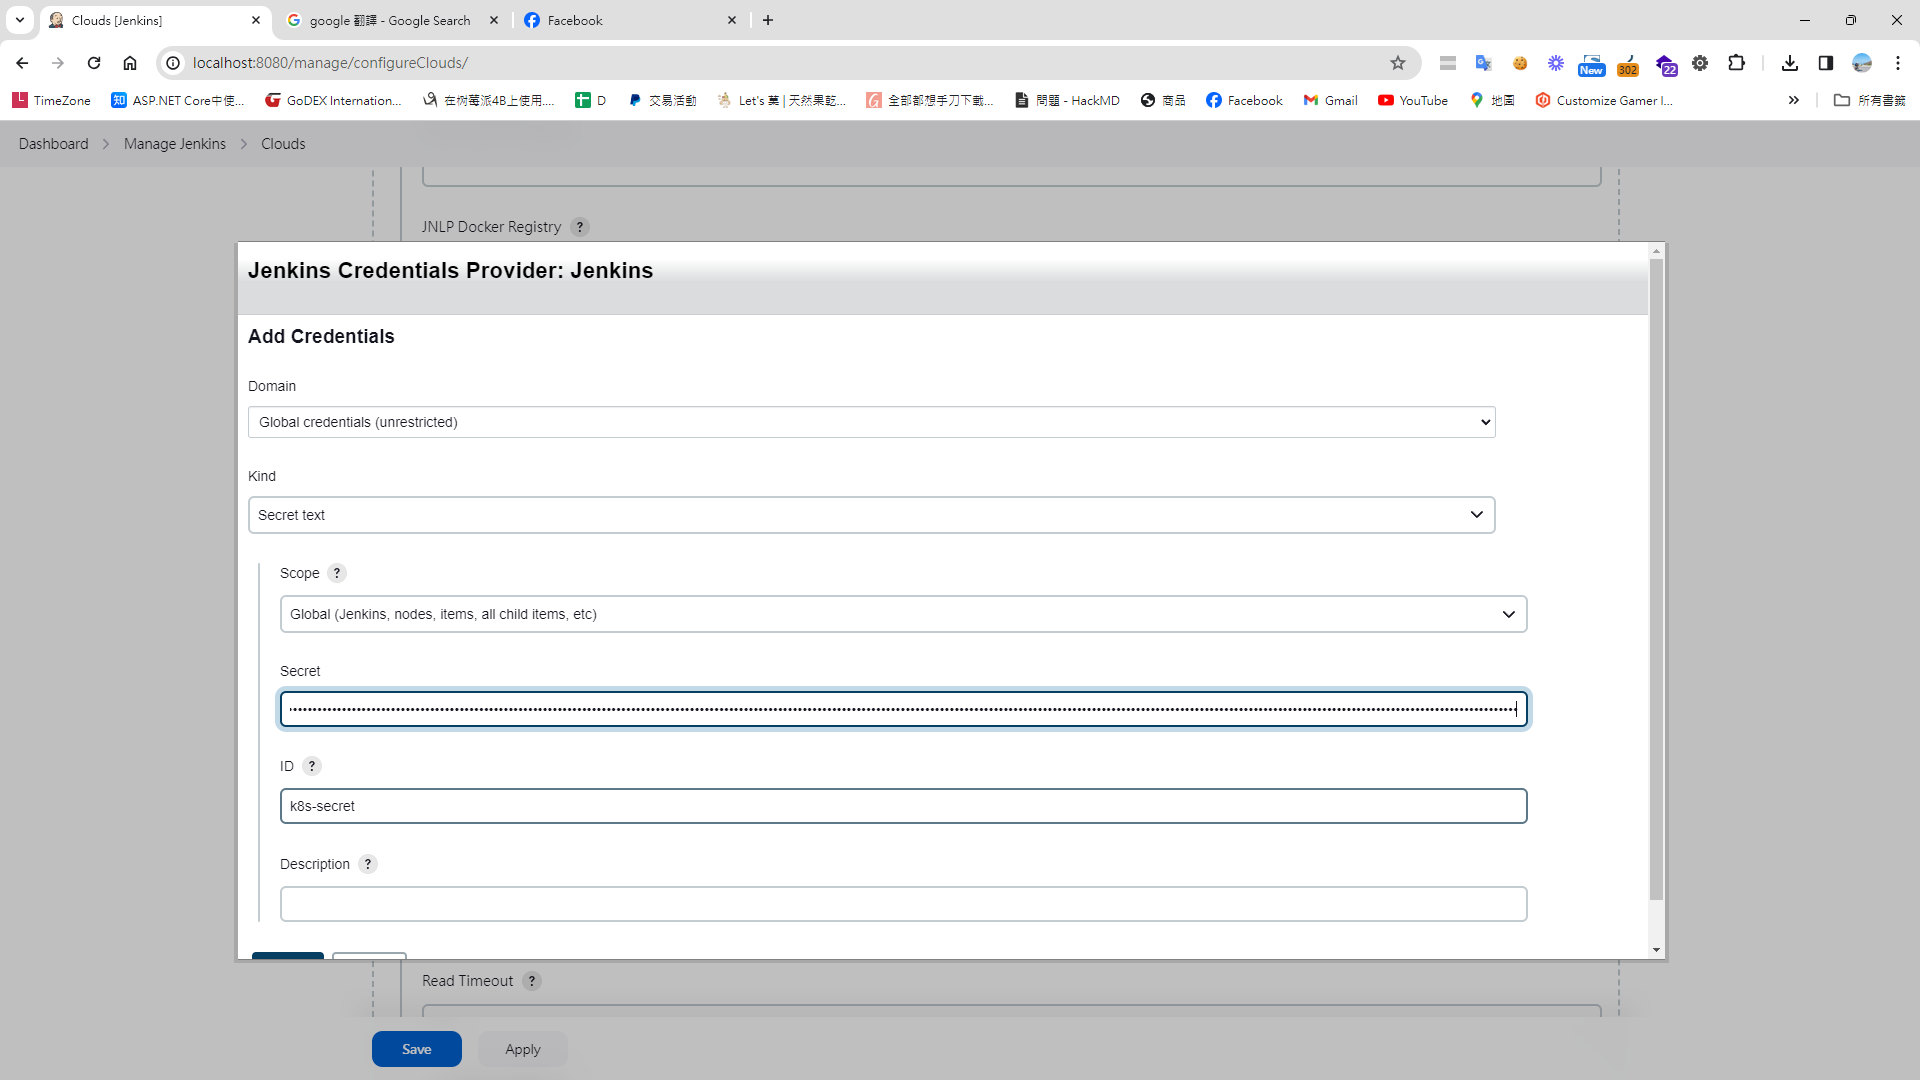
- Credentials =>
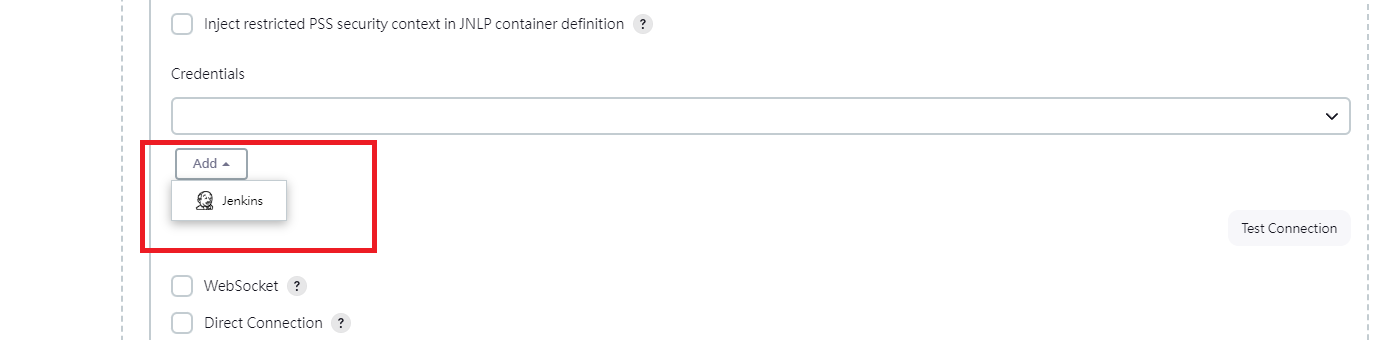
- Copy dashboard token to here
Write the Jenkins pipeline
properties([pipelineTriggers([githubPush()])])
pipeline {
    agent any

    environment {
        tag = ':latest'
        imageShortName = 'k8s-next-ec'
        imageName = "${imageShortName}${tag}"
        containerName = "${imageShortName}-1"
        dockerfile = "./Dockerfile"
        registryUrl = "192.168.50.50:5000"
        registry = "${registryUrl}/${imageShortName}"

    }

    stages {
        stage("GitHub Pull") {
             steps {
                git branch: 'main',
                credentialsId: 'e85233ad-a3c5-448b-a6ea-9f53e4f9b3f1',
                url:  '[email protected]:markku636/ec.git/'
            }

        }

          stage("Building Docker Image") {
			steps {
				script {
					dockerImage = docker.build "$registry${tag}"
				}
			}
		}

		stage("Deploying to Registry Server") {
			steps {
			    script {
				    docker.withRegistry("","") {
					  dockerImage.push("latest")
					}
			    }
			}
		}

        stage("Cleaning Up") {
            steps {
                sleep(time: 3, unit: "SECONDS")

                sh "docker rmi --force $registry:latest"
            }
        }

        stage("Deply") {
             steps {
                    withKubeConfig([credentialsId: 'k8s-secret', serverUrl: 'https://192.168.50.50:6443']) {
                     sh 'kubectl apply -f ./next-js-deployment.yaml'
					 sh 'kubectl rollout restart deployment/k8s-next-ec'
                    }

             }
        }
    }
}
Create the Kubernetes YAML deployment configuration file (next-js-deployment.yaml) in the Github next-ec project
apiVersion: apps/v1
kind: Deployment
metadata:
  name: k8s-next-ec
  labels:
    app: k8s-next-ec
spec:
  selector:
    matchLabels:
      app: k8s-next-ec
      tier: web
  template:
    metadata:
      labels:
        app: k8s-next-ec
        tier: web
    spec:
      containers:
      - name: k8s-next-ec-app
        image: 192.168.50.50:5000/k8s-next-ec:latest
        ports:
        - containerPort: 3000
---

apiVersion: v1
kind: Service
metadata:
  name: k8s-next-ec
  labels:
    app: k8s-next-ec
spec:
  selector:
    app: k8s-next-ec
  type: NodePort
  ports:
    - name: http
      protocol: TCP
      port: 3000
      targetPort: 3000
      nodePort: 30066
Now, run the build in Jenkins, and you should see it succeed.
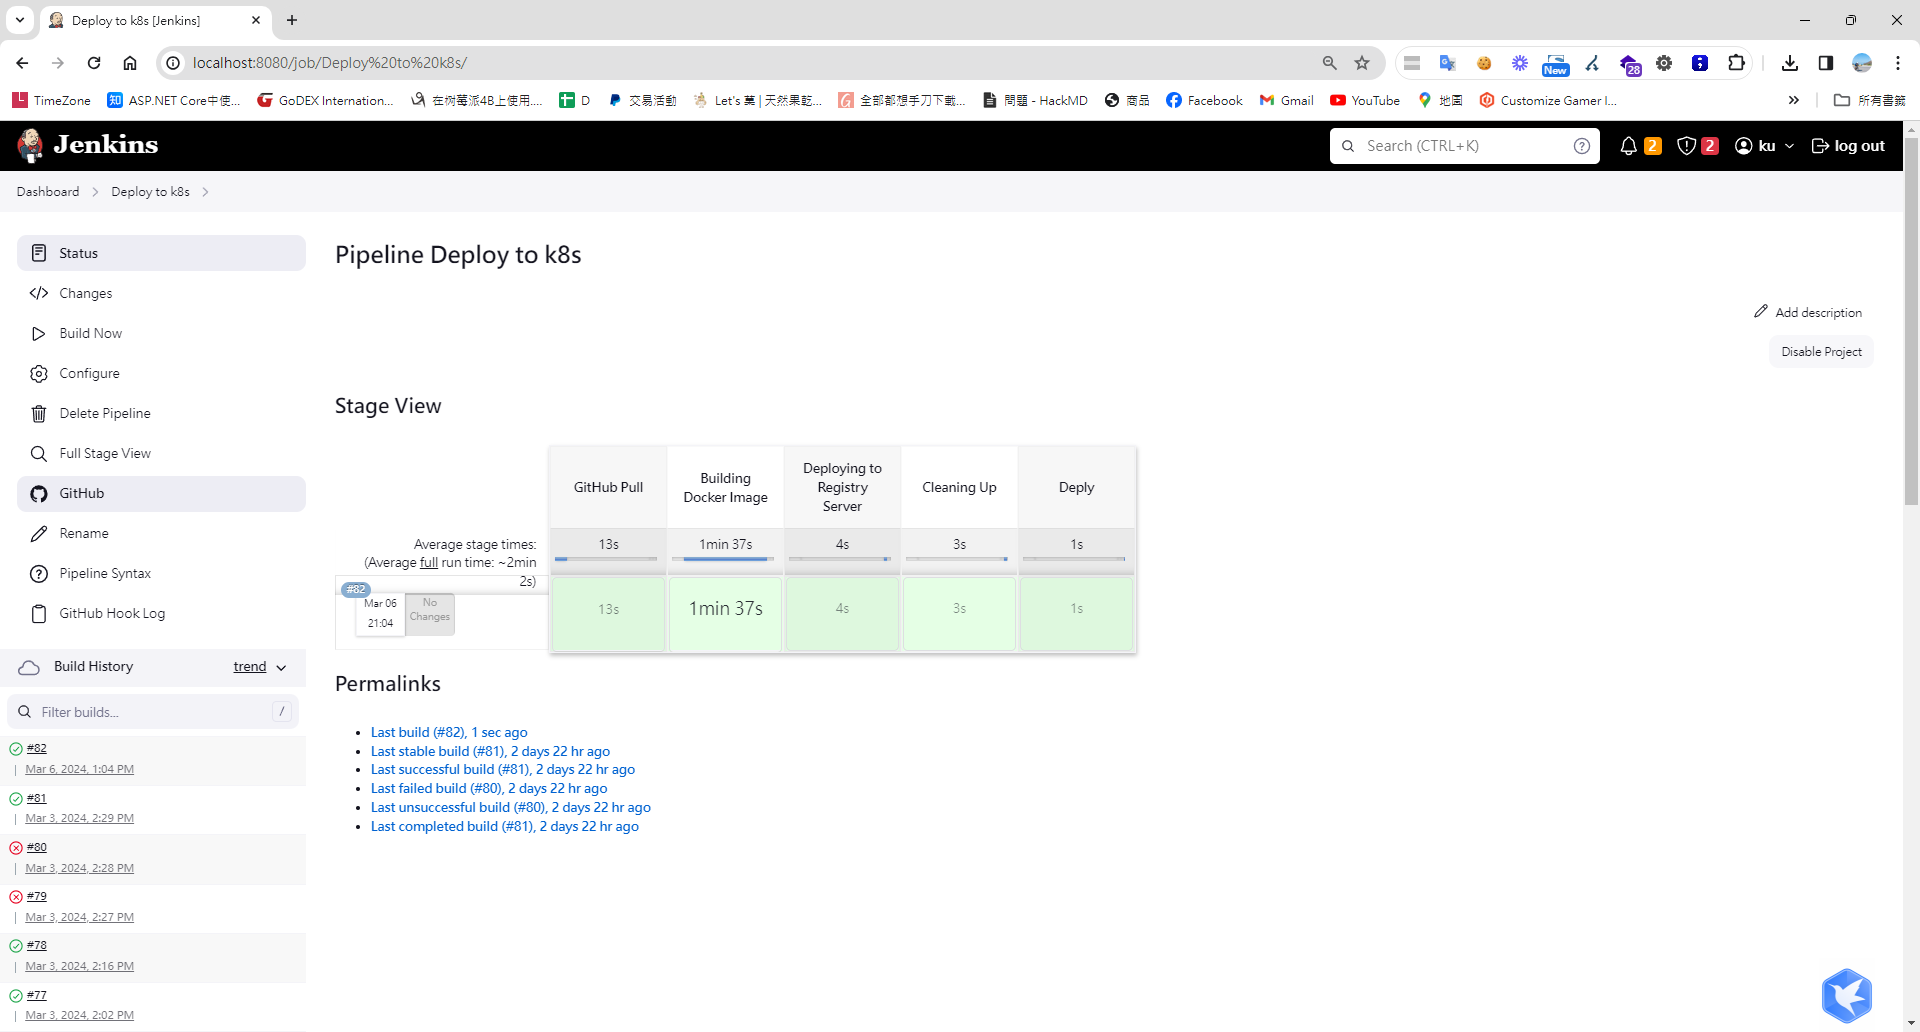
Appendix - If you encounter a permission error like the one below
ERROR: permission denied while trying to connect to the Docker daemon socket at unix:///var/run/docker.sock: Head "http://%2Fvar%2Frun%2Fdocker.sock/_ping": dial unix /var/run/docker.sock: connect: permission denied Quick fix
sudo chmod 777 /var/run/docker.sock
Permanent fix
sudo nano /etc/systemd/system/docker-sock-permission.service
[Unit]
Description=Set permission on /var/run/docker.sock
After=docker.service
Requires=docker.service

[Service]
Type=oneshot
ExecStart=/bin/chmod 777 /var/run/docker.sock
RemainAfterExit=true

[Install]
WantedBy=multi-user.target
Reload systemd and enable the service
sudo systemctl daemon-reexec
sudo systemctl daemon-reload
sudo systemctl enable docker-sock-permission.service
sudo systemctl start docker-sock-permission.service
sudo systemctl status docker-sock-permission.service


Comments