
時空背景
因為公司的容器越來越多,好幾台的Docker desktop ,實在不好調度及橫向擴展,因此花了些時間研究,如何在 Docker Desktop for windows 裡安裝jenkins 整合 K8s。
為什麼要用 Kubernetes
- 按需的垂直擴展,新的服務器(node)能夠輕易的增加或刪除,叢集內的溝通
- 依據需自動橫向擴展,縮減資源能力
- 服務及效能監控
- Auto Recovery
- 伺服器資源,最佳化
- 負載平衡 ( 分流 )
- 服務融斷
- 自動部署和回滾,如果應用狀態錯誤,可以實現自動回滾
- 混合雲佈署
為什麼使用Windows kubernetes
公司沒Linux Server ,多數成員不擅長用 Linux
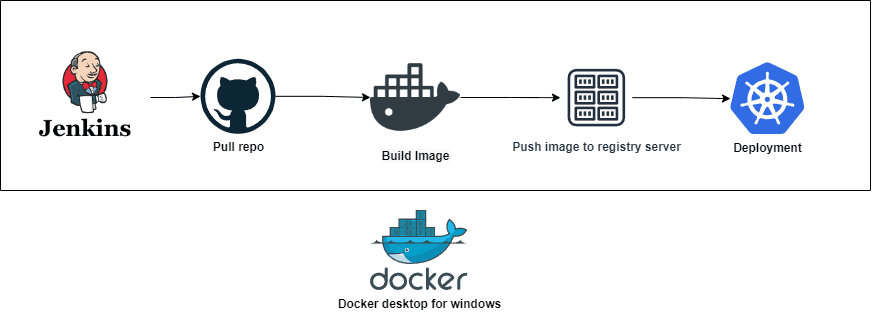
佈署流程
預先準備
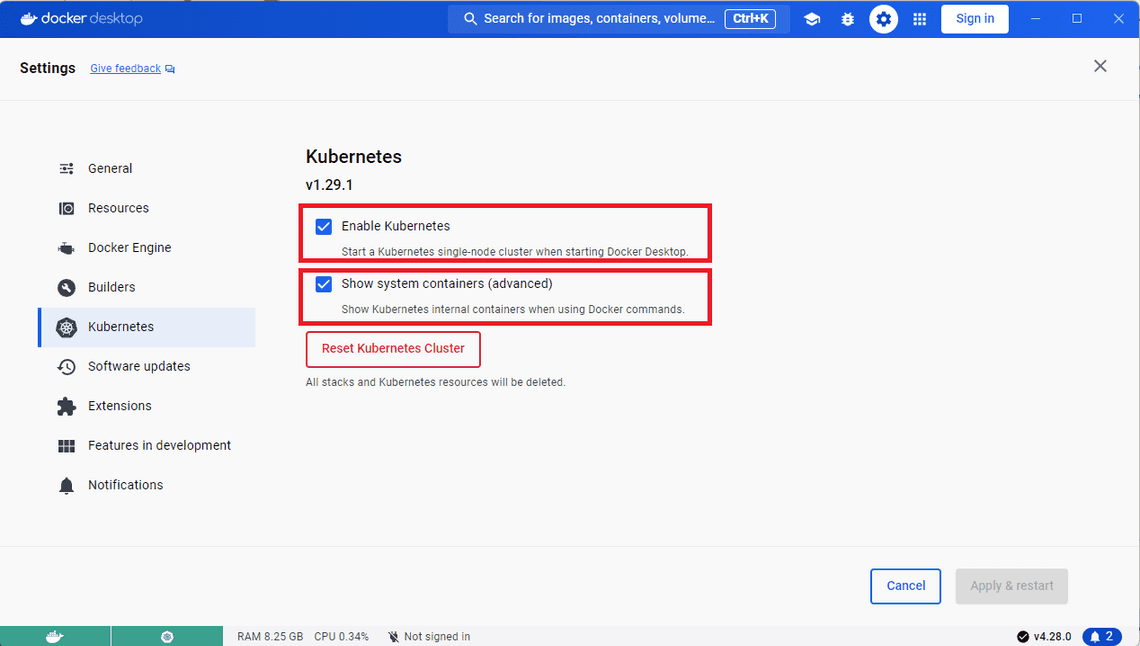
1.安裝Docker Desktop,並勾選 Kubernetes 及 Show system containers
2. 架設Private Docker registry server
docker run -d -p 5000:5000 -e REGISTRY_STORAGE_DELETE_ENABLED=true --name registry registry:2
docker update --restart always registry
3. 設定 Docker Engine,加入private ip
 "insecure-registries": [
    "192.168.50.49:5000"
  ]
P.S. 192.168.50.49 為我的實驗機IP,可透過訪問 http://192.168.50.49:5000/v2/_catalog 檢查目前私有的docker hub 有那些映像檔
設定 Kubernetes
Dashboard
kubectl apply -f https://raw.githubusercontent.com/kubernetes/dashboard/v2.7.0/aio/deploy/recommended.yaml

kubectl get pod -n kubernetes-dashboard

kubectl proxy

訪問此目錄
http://127.0.0.1:8001/api/v1/namespaces/kubernetes-dashboard/services/https:kubernetes-dashboard:/proxy/#/login
首先我們來,建立 Token (這個token 是要拿去給jenkins 用的)
kubectl describe secrets -n kube-system (kubectl get secrets -n kube-system | Select-String "dashboard" | ForEach-Object { $_ -split " " | Select-Object -First 1 })
查詢 Token
$TOKEN=((kubectl -n kube-system describe secret default | Select-String "token:") -split " +")[1]
kubectl config set-credentials docker-for-desktop --token="${TOKEN}"
echo $TOKEN
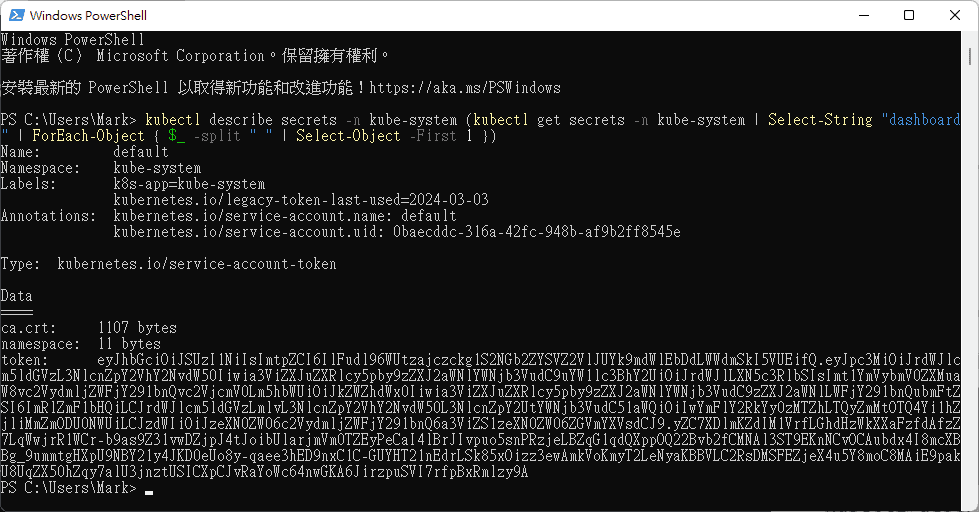
也可以透過config 查詢 token
kubectl config view // 同等於訪問 C:\Users\Mark\.kube\config
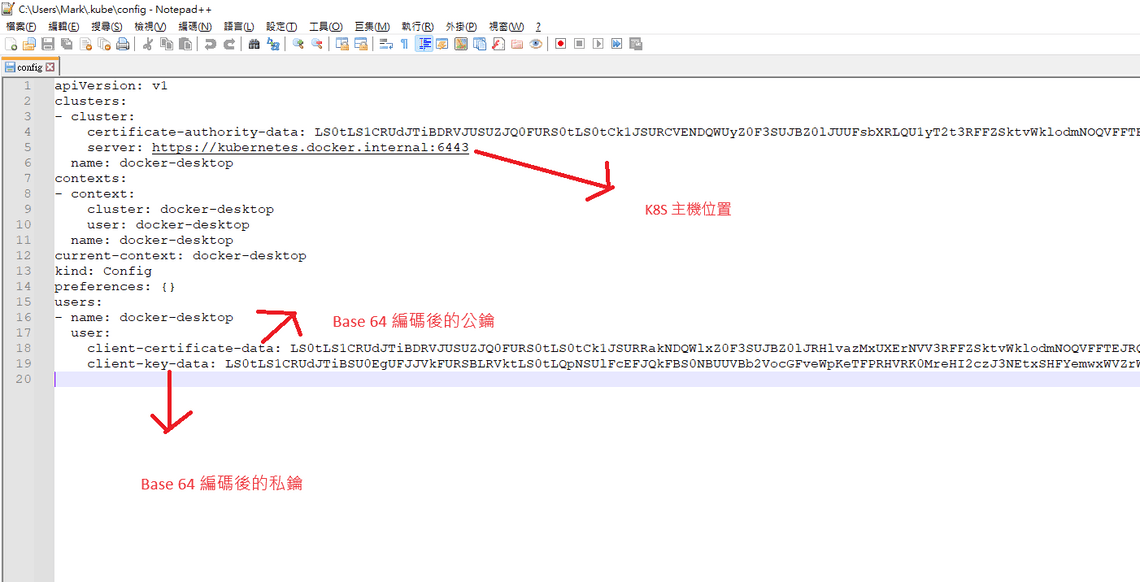
Jenkins 配置 Kubernetes
安裝 Jenkins
參考先前撰寫的文章
在Jenkins 容器中中安裝 kubectl
docker exec -it -uroot jenkins bash // 進入jenkins 容器中
curl -LO https://storage.googleapis.com/kubernetes-release/release/v1.29.1/bin/linux/amd64/kubectl // 下載 kubectl
chmod +x ./kubectl // 給予權限
mv ./kubectl /usr/local/bin/kubectl // 複製到系統環境資料夾
kubectl version --client // 查詢版本
P.S. Docker Desktop 和 Jenkins 容器的 kubectl 版本最好一致
複製 kubectl 設定至 Jenkins 容器中 (需要逐行執行)
docker exec -it -uroot jenkins /bin/bash
mkdir -p /.kube
exit
docker cp C:/Users/Mark/.kube jenkins:/root/.kube // 複製檔案到 Jenkins 容器中
Jenkins 透過 Kubernetes CLI 連線 kubernetes
- 要想把jenkins關聯到Kubernetes中需要安裝幾個最件,打開 系統管理 > 套件管理
- Kubernetes plugin
- Kubernetes CLI Plugin
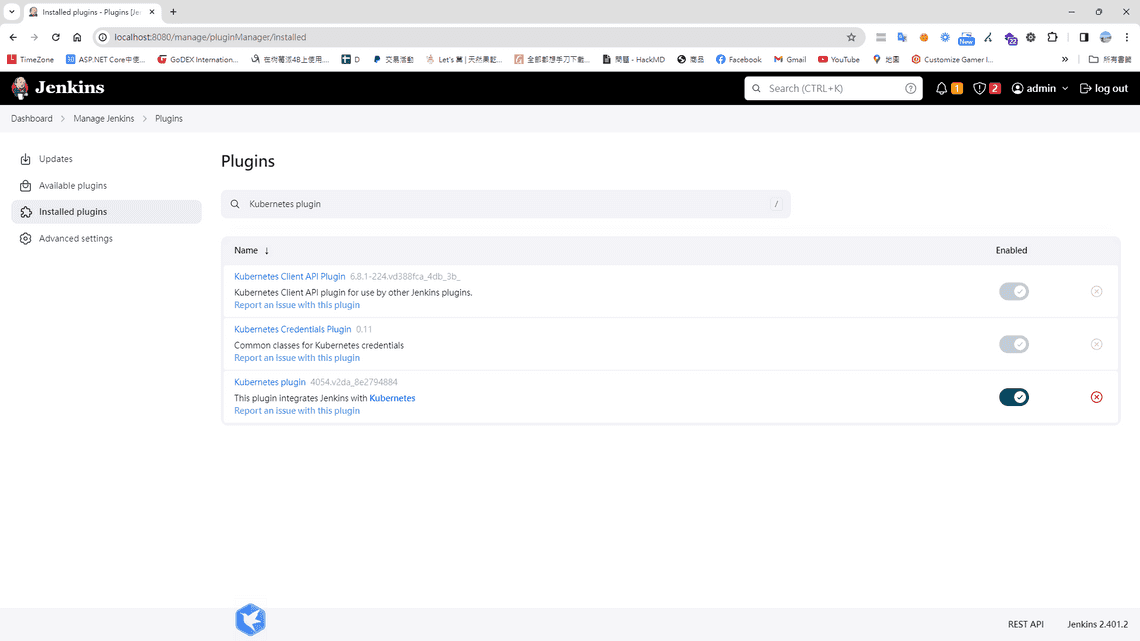
install kubernetes plugin
- set up cloud
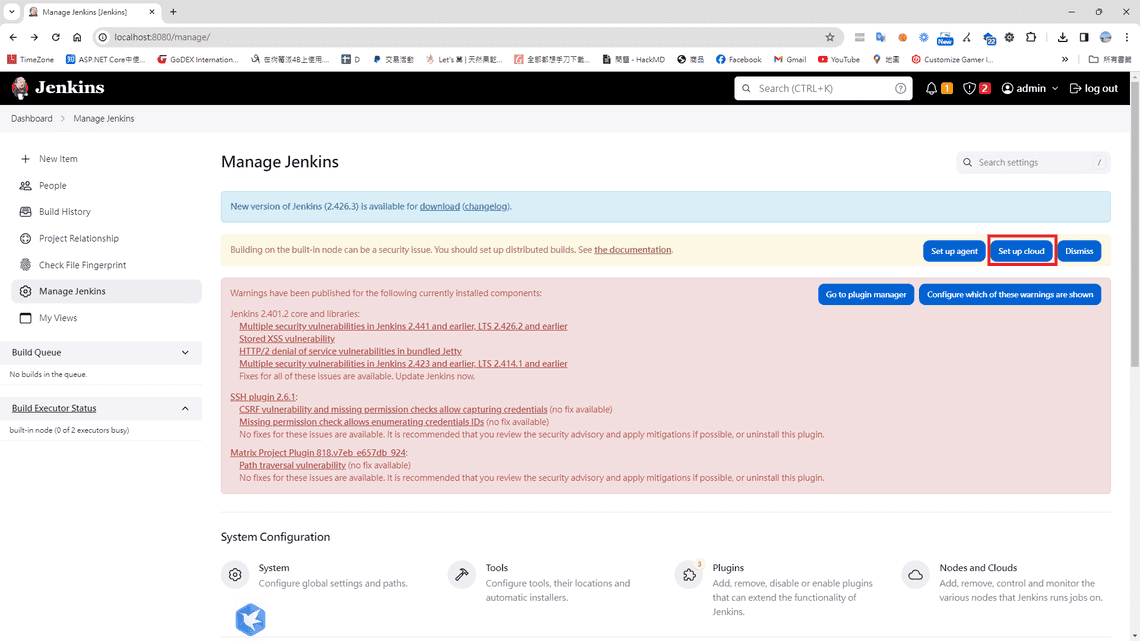
set up cloud - set Disable https certificate check => true

disable http certificate check - Kubernetes URL => kubectl cluster-info https://host.docker.internal:6443
- Jenkins URL Jenkins URL:http://host.docker.internal:8080/ Jenkins tunnel:host.docker.internal:50000
- Credentials =>

add public key to jenkins - Copy dashboard token to here
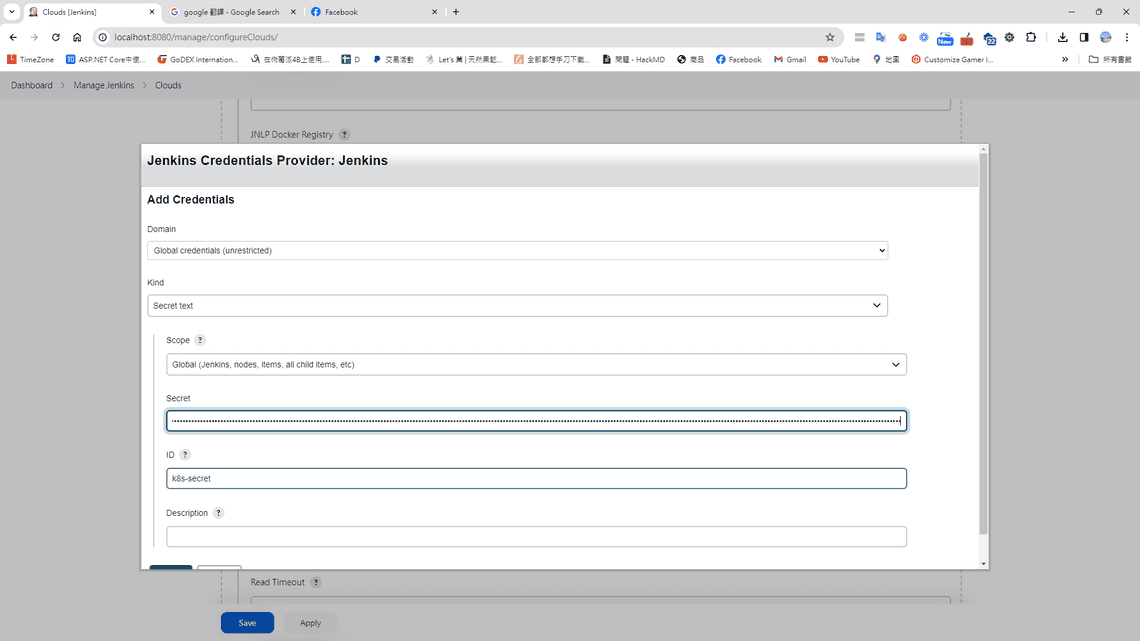
Copy dashboard token to here
撰寫 Jenkins pipeline
properties([pipelineTriggers([githubPush()])])
pipeline {
    agent any

    environment {
        tag = ':latest'
        imageShortName = 'de-next-ap'
        imageName = "${imageShortName}${tag}"
        containerName = "${imageShortName}-1"
        containerUrl = "192.168.50.49:2376"
        dockerfile = "./Dockerfile"
        registry = "192.168.50.49:5000/next-ec"

    }

    stages {
        stage("GitHub Pull") {
             steps {
                git branch: 'main',
                credentialsId: '946a703f-dff7-4138-84b2-0aba700dedca',
                url:  '[email protected]:markku636/ec.git/'
            }

        }

        stage("Building Docker Image") {
            steps {
                script {
                    dockerImage = docker.build "$registry:latest"
                }
            }
        }

        stage("Deploying to Registry Server") {
            steps {
                script {
                    docker.withRegistry("http://192.168.50.49:5000", "") {
                        dockerImage.push()
                    }
                }
            }
        }

        stage("Cleaning Up") {
            steps {
                sleep(time: 3, unit: "SECONDS")

                sh "docker rmi --force $registry:latest"
            }
        }

        stage("Deply") {
             steps {
                    withKubeConfig([credentialsId: 'k8s-secret', serverUrl: 'https://host.docker.internal:6443']) {
                     sh 'kubectl apply -f ./next-js-deployment.yaml'
                    }

             }
        }
    }
}
在 Github next-ec 專案裡建立 Kubernetes 的 YAML 佈署設定檔(next-js-deployment.yaml)
apiVersion: v1
kind: Deployment
metadata:
  name: nextjs-deployment
  labels:
    app: nextjs
spec:
  replicas: 1
  selector:
    matchLabels:
      app: nextjs
  template:
    metadata:
      labels:
        app: nextjs
    spec:
      containers:
      - name: nextjs
        image: 192.168.50.49:5000/next-ec:latest
        ports:
        - containerPort: 80
        resources:
          limits:
            memory: "128Mi"
            cpu: "500m"

---

apiVersion: v1
kind: Service
metadata:
  name: nextjs-service
spec:
  type: NodePort
  selector:
    app: nextjs
  ports:
  - protocol: TCP
    port: 80
    targetPort: 80
    nodePort: 30099
此時執行 Jenkins 執行建置,應該己經可以執行成功。

結論
K8S 功能及配置還蠻複雜的,光配置就花蠻多時間,蠻多細節還需要花些時間實驗及測試。
其他遇到問題
1. no matcher for kind “Deploy” in version v1 問題
yaml 檔改了幾次版本,請依據官方文件撰寫最新的 YAML 佈署檔


