

What Is Horizontal Scaling?
Continuing from the previous article on deploying a Next.js app to Google Kubernetes Engine, this post focuses on horizontal scale-out and scale-in in GKE.
Think of it like an organization: even the most capable person can only sustain peak performance for about 16 hours before hitting a wall. When the workload becomes too heavy for one person to handle, you hire more people to share the load — that's horizontal scaling in a nutshell.
The same principle applies in tech. No matter how powerful a single server is, its processing capacity has a ceiling. When load exceeds what the server can handle, simply upgrading the hardware (vertical scaling) may not be enough. That's when horizontal scaling (Scaling Out) becomes the right solution.
What Are Kubernetes Pods?
In Kubernetes, Pods are the smallest deployable unit, responsible for hosting containerized applications and their runtime environment.
Which Web Applications Are Good Candidates for Horizontal Scaling?
Not every service is suited for horizontal scaling. Services that scale well are typically stateless, such as Web APIs or microservices, where load can be distributed easily across instances.
Services with local state — such as databases or session-based web apps not designed for distribution — may face consistency issues that prevent horizontal scaling. In those cases, consider Vertical Pod Autoscaler (VPA), which increases the resources of a single Pod to handle higher load instead.
Advantages of GKE
Compared to self-managed Kubernetes, Google Kubernetes Engine (GKE) offers far more convenient cluster management. For example, GKE does not require a separate installation of metrics-server to monitor CPU and memory usage of containers, significantly lowering the barrier to entry.
Issue Encountered When Creating a Cluster for Autoscaling
As mentioned in the previous article, GKE offers two cluster modes:
- Standard Cluster: Highly flexible, suitable for users who need fine-grained control, but requires manual resource and configuration management.
- Autopilot Cluster: Simplified management with automatic resource adjustment, ideal for teams focused purely on application deployment.
In practice, I found that Standard Cluster does not enable Metrics by default. As a result, running kubectl get hpa would not return CPU or memory utilization, and autoscaling would not work until metrics were explicitly enabled.


Essential kubectl Commands for Kubernetes Horizontal Scaling
Check resource usage of containers
The following commands display CPU and memory utilization for nodes or Pods:
kubectl top nodes
kubectl top pods
Check Horizontal Pod Autoscaler (HPA) status
kubectl get hpa
Manually Scaling Containers
To scale manually:
kubectl scale deployment nextjs-blog-deployment --replicas=5
kubectl get pods
Configuring Automatic Horizontal Scaling (HPA)
There are three ways to configure HPA: via a YAML file, via CLI commands, or through the GKE web UI.
1. Define HPA in a YAML File
Create a YAML file and apply it:
kubectl apply -f nextjs-blog-hpa.yaml
Example YAML:
apiVersion: autoscaling/v2
kind: HorizontalPodAutoscaler
metadata:
  name: nextjs-blog-hpa
  namespace: default
spec:
  scaleTargetRef:
    apiVersion: apps/v1
    kind: Deployment
    name: nextjs-blog
  minReplicas: 1
  maxReplicas: 5
  metrics:
  - type: Resource
    resource:
      name: cpu
      target:
        type: Utilization
        averageUtilization: 50
Key fields:
scaleTargetRef: specifies which Deployment the HPA monitors.minReplicas: always keep at least 1 Pod running.maxReplicas: scale out to a maximum of 5 Pods.metrics: trigger scaling when CPU utilization exceeds 50%.
2. Configure HPA via CLI
kubectl autoscale deployment nextjs-blog-deployment --cpu-percent=50 --min=1 --max=5
3. Configure HPA via the GKE Web UI
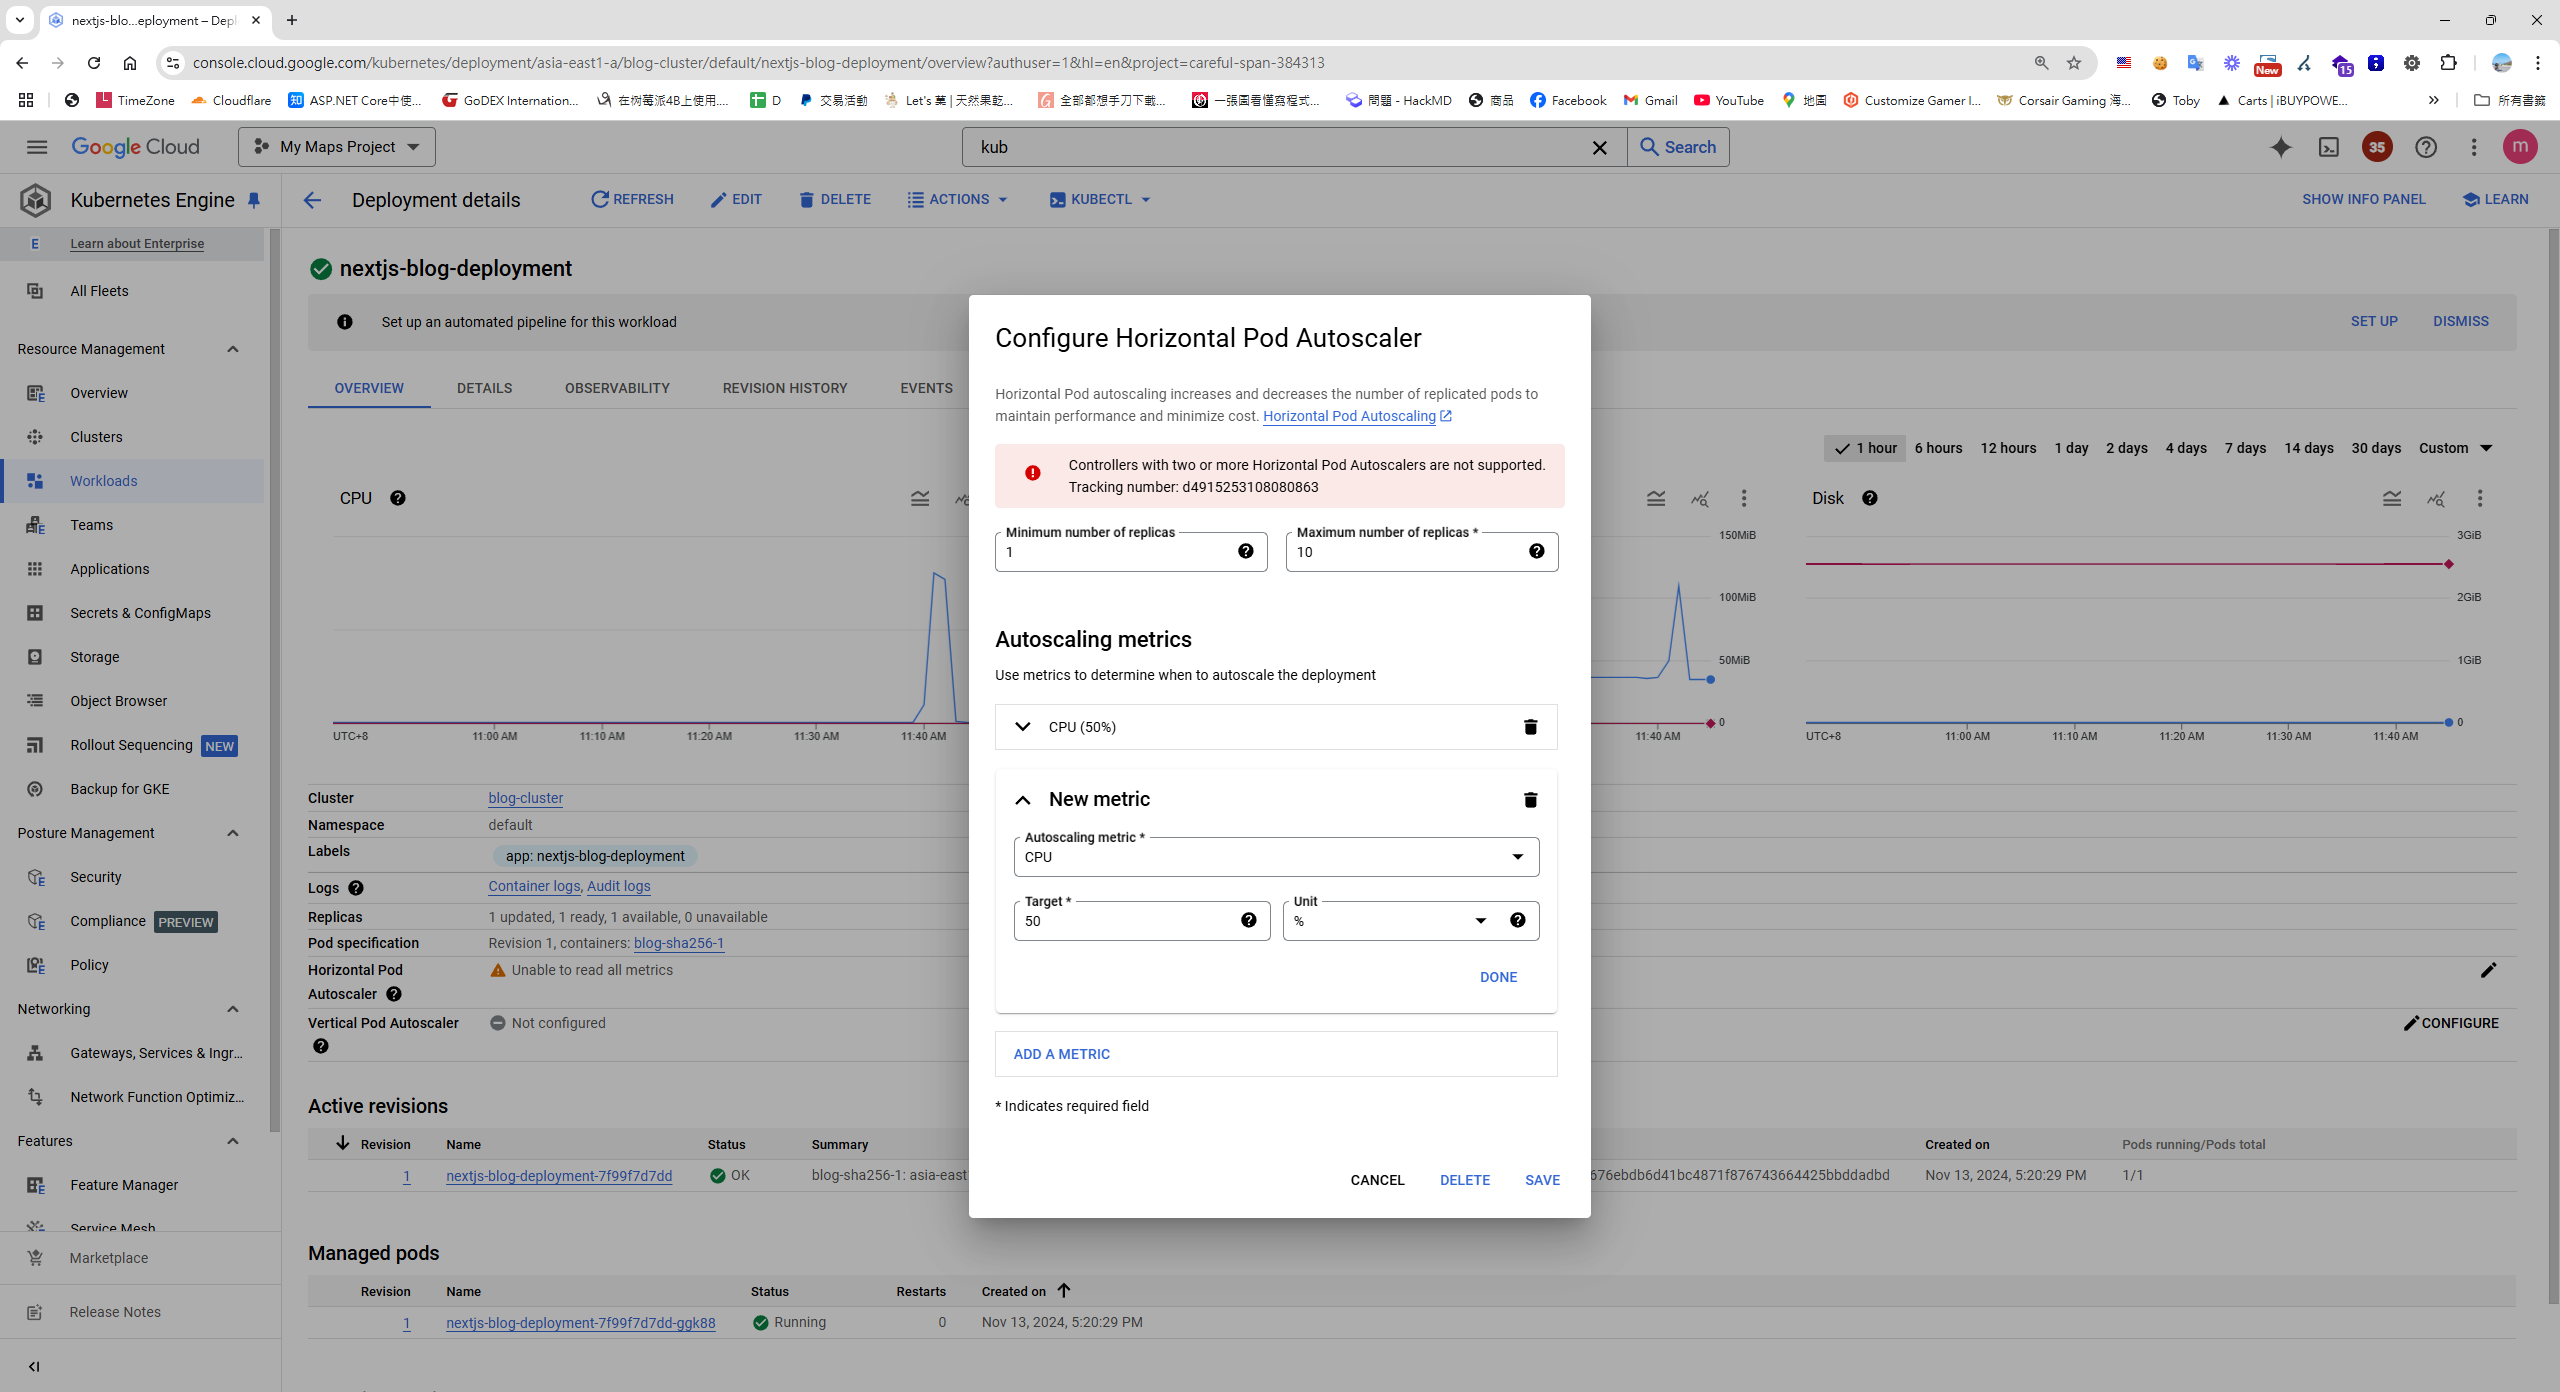
Testing the Autoscaling Configuration
For load testing I used Grafana's K6 tool.
Write a Load Test Script
import http from 'k6/http';
import { check, sleep } from 'k6';

export const options = {
  stages: [
    { duration: '30s', target: 3000 },  // 負載測試從 0 個虛擬使用者增加到 20 個,並持續30 秒
    { duration: '1m30s', target: 3000 }, 3000 // 維持 3000 個虛擬使用者持續 1 分 30 秒
    { duration: '20s', target: 0 },
  ]
};
// options 第一階段模擬快速增加負載,第二階段保持穩定負載,第三階段緩慢減少負載。
export default function () {
  const res = http.get('http://your-domain/');
  check(res, { 'status was 200': (r) => r.status == 200 });
  sleep(1);
Run K6 via Docker (no installation needed — --rm removes the container after the test completes)
// Windows 腳本
cat script.js | docker run --rm -i grafana/k6 run -
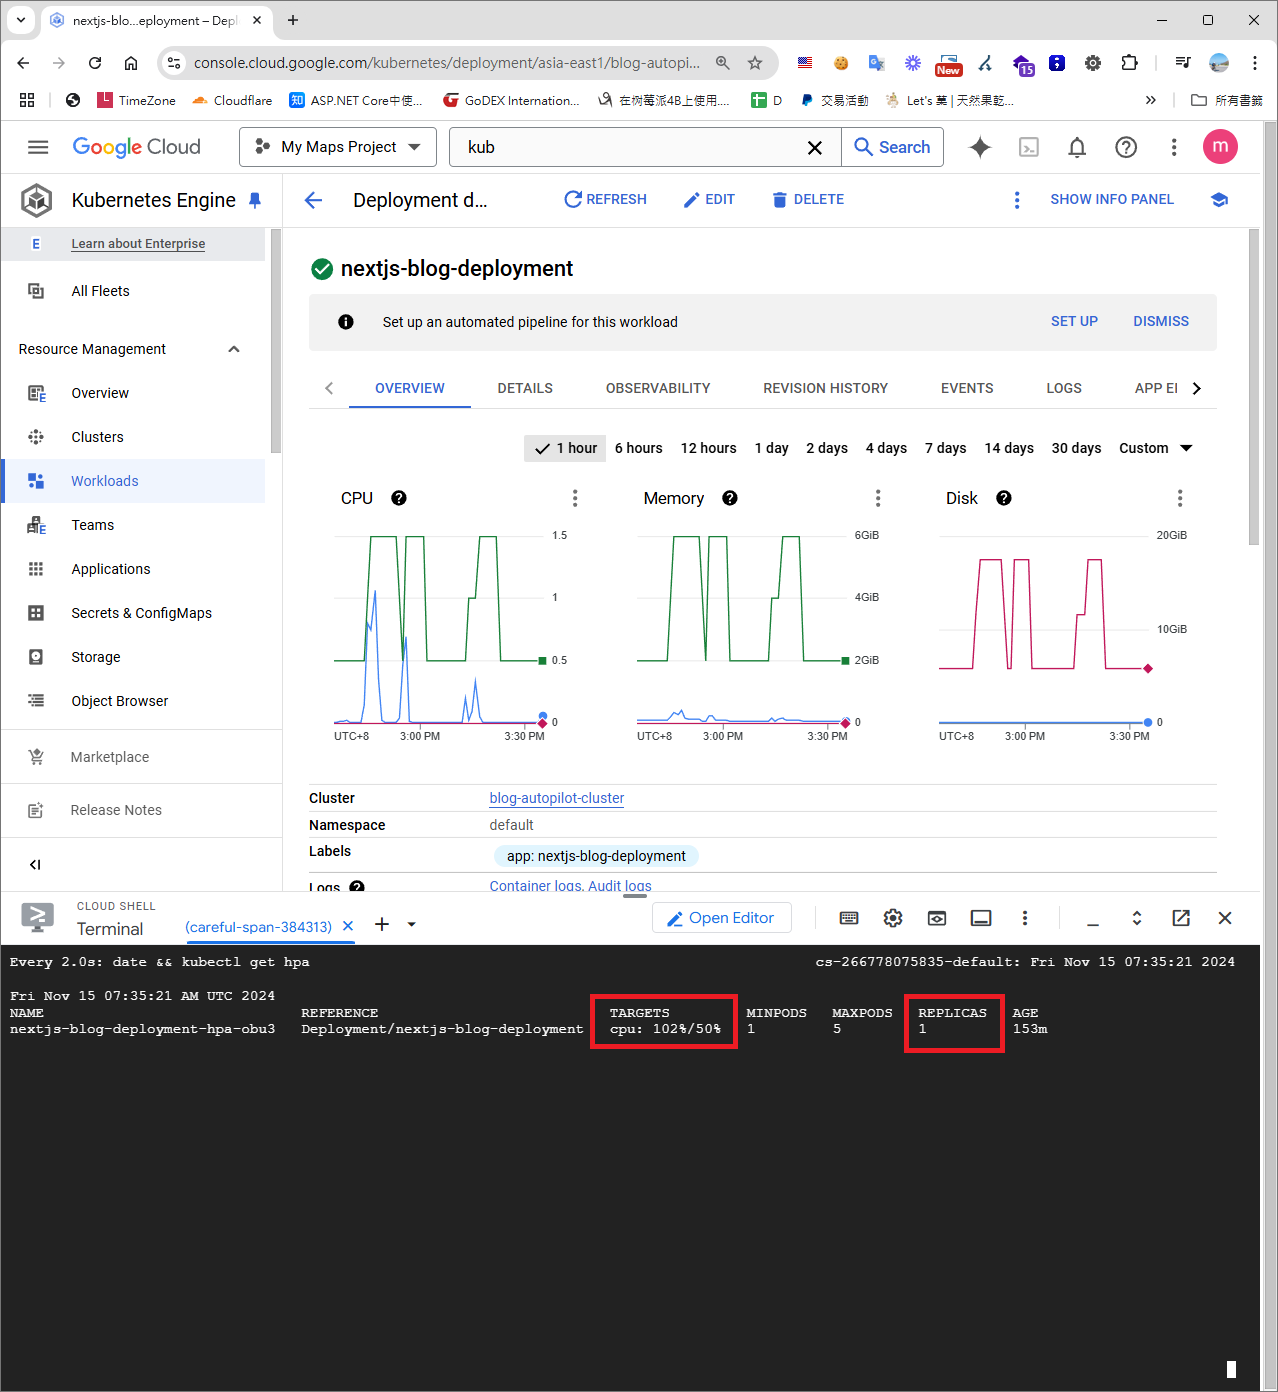
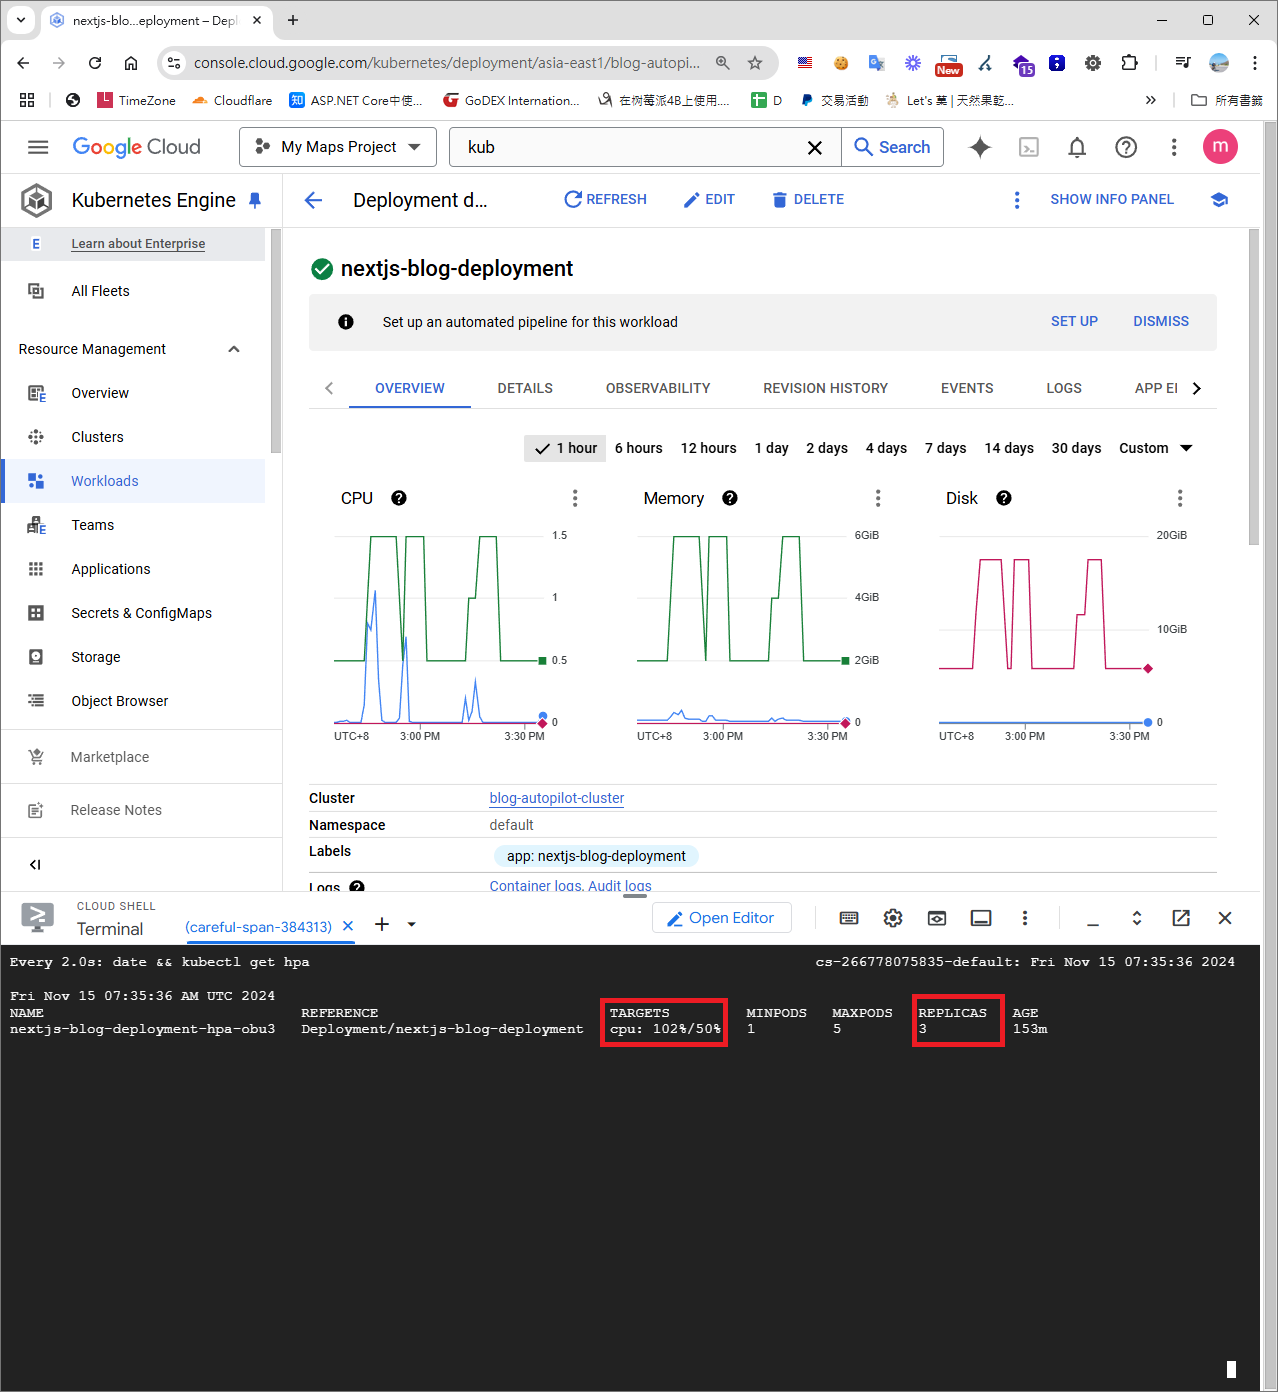
At the same time, run the following command in Google Cloud Shell. The watch command prints the current HPA status every two seconds, letting you verify that autoscaling is working correctly:
watch -n 2 'date && kubectl get hpa'
Test Results
When container CPU utilization instantly spiked to 102%, the new Pods may not have fully started yet because the load rose too quickly.
When CPU utilization reached 150%, the system automatically scaled out to 3 Pods to share the load.
When CPU utilization exceeded 200%, the system automatically scaled out to the configured maximum of 5 Pods.
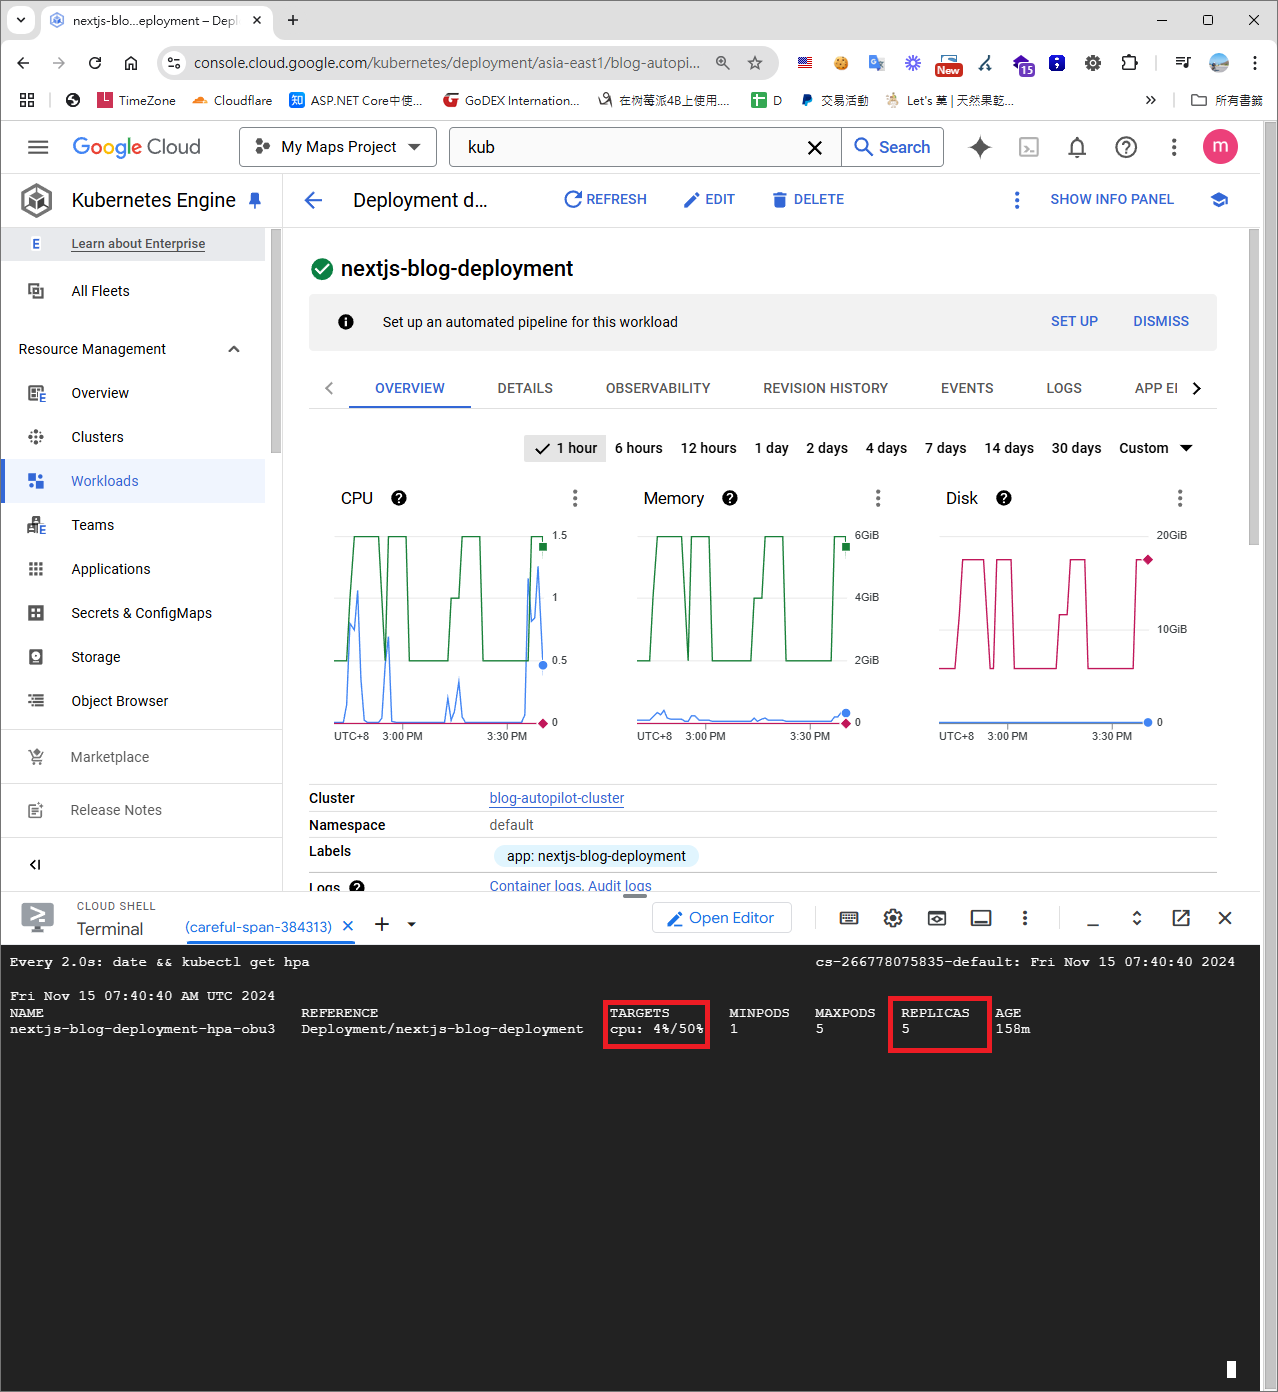
After CPU utilization dropped, the system scaled back down to the configured minimum number of Pods.

Reflections
Working with GKE is genuinely exciting. Its flexibility and convenience mean I don't need to manage a complex on-premises infrastructure at all. Looking back at my journey from infrastructure management to software engineering, all those accumulated experiences turned out to make learning cloud technologies and Kubernetes surprisingly approachable.


Comments