
Introduction
I used to be particularly interested in self-hosting servers, with most of my experience concentrated in on-premises environments. I've worked with everything from self-hosting Windows Server and Linux Server to using Hyper-V and vSphere, and have dabbled in technologies from Windows Docker Containers to Linux Docker Containers. With the development of container technology and the increasing convenience of the cloud, more and more companies are adopting cloud servers, which has sparked my interest in further exploring the possibilities of cloud deployment.
On-Premises vs. Cloud Container Deployment Flow
-
On-Premises Deployment Flow
Docker Build Image → Push Image to Private Registry → Docker Run -
Cloud Deployment Flow
Docker Build Image → Push Image to Google Artifact Registry → Google Cloud Run
Environment Setup
- Operating System: Windows 11, with Docker Desktop installed locally.
- A containerizable project with a pre-existing Dockerfile.
- GCP Project ID: gcr-my-project01 Link to get your Project ID
- Google Artifact Registry host location: asia-east1-docker.pkg.dev (Found in Artifact Registry > Check your Registry > Setup Instructions)
Installing the Google Cloud CLI
- Download and install the Google Cloud CLI
(New-Object Net.WebClient).DownloadFile("https://dl.google.com/dl/cloudsdk/channels/rapid/GoogleCloudSDKInstaller.exe", "$env:Temp\GoogleCloudSDKInstaller.exe")
& $env:Temp\GoogleCloudSDKInstaller.exe
- During the Windows installation, an installation window will pop up. Just follow the prompts and click "Next" all the way through.
- After installation, you will be asked if you want to log in and select a Google project (of course, you can also log in via the command line, e.g.,
gcloud auth login).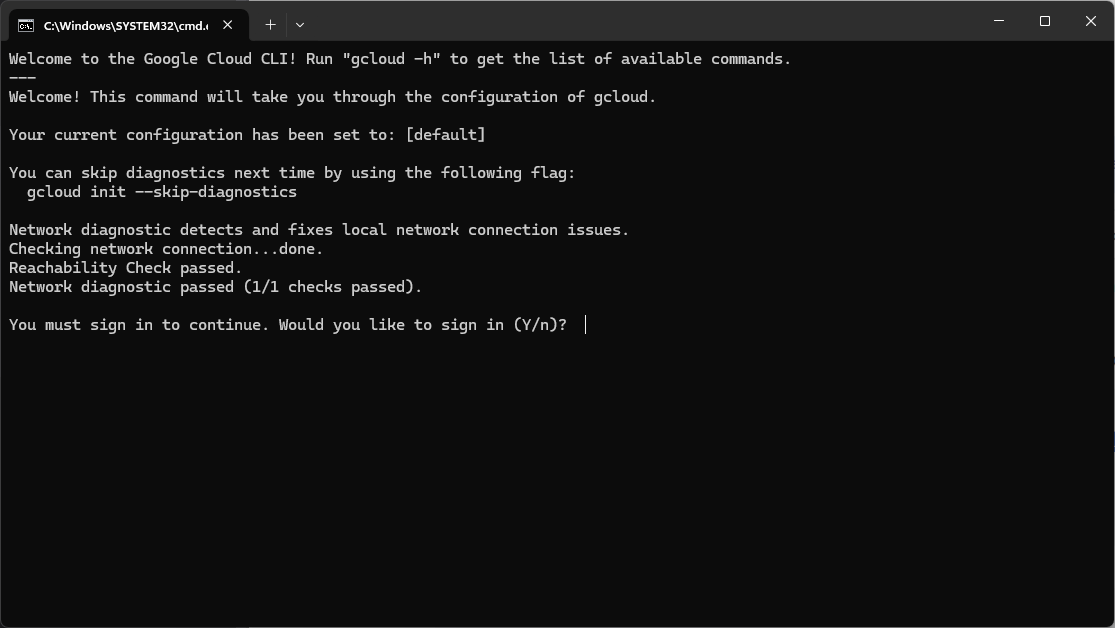
gcloud auth login
gcloud projects list
gcloud config set project PROJECT_ID
Creating an Artifact Registry
Go to Artifact Registry and get the URL for your registry.
-
Create a repository
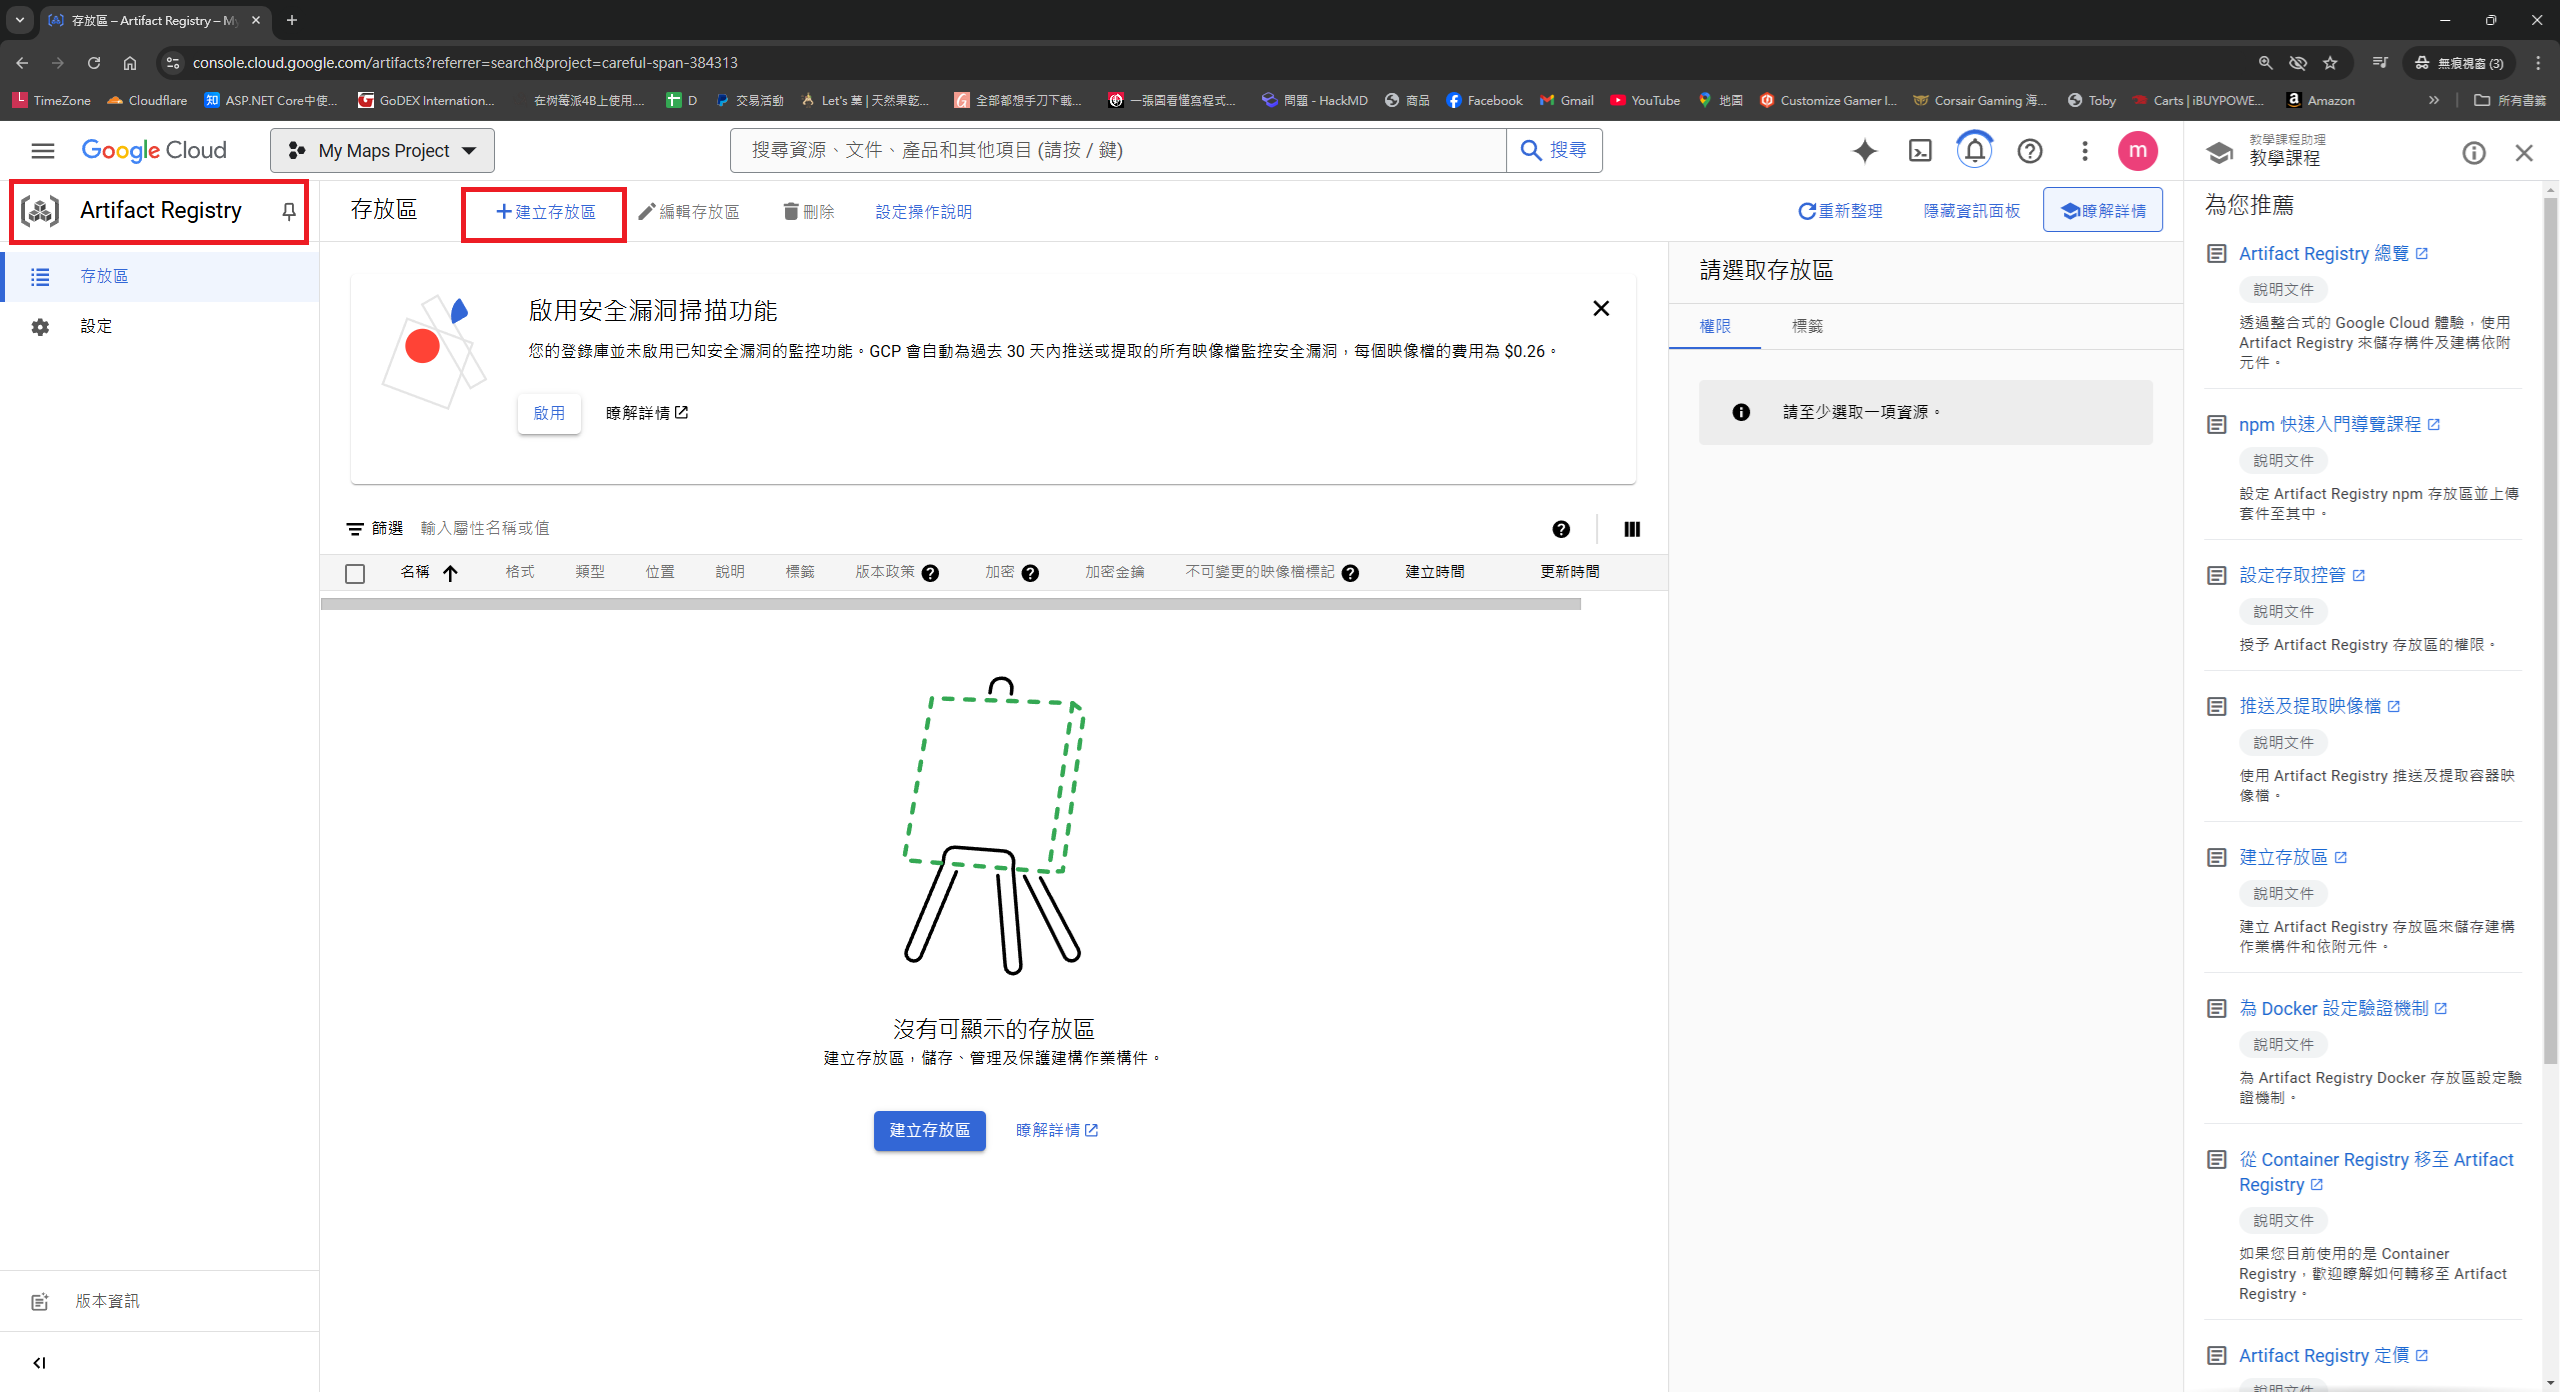
-
Make minor adjustments to the default settings > Create
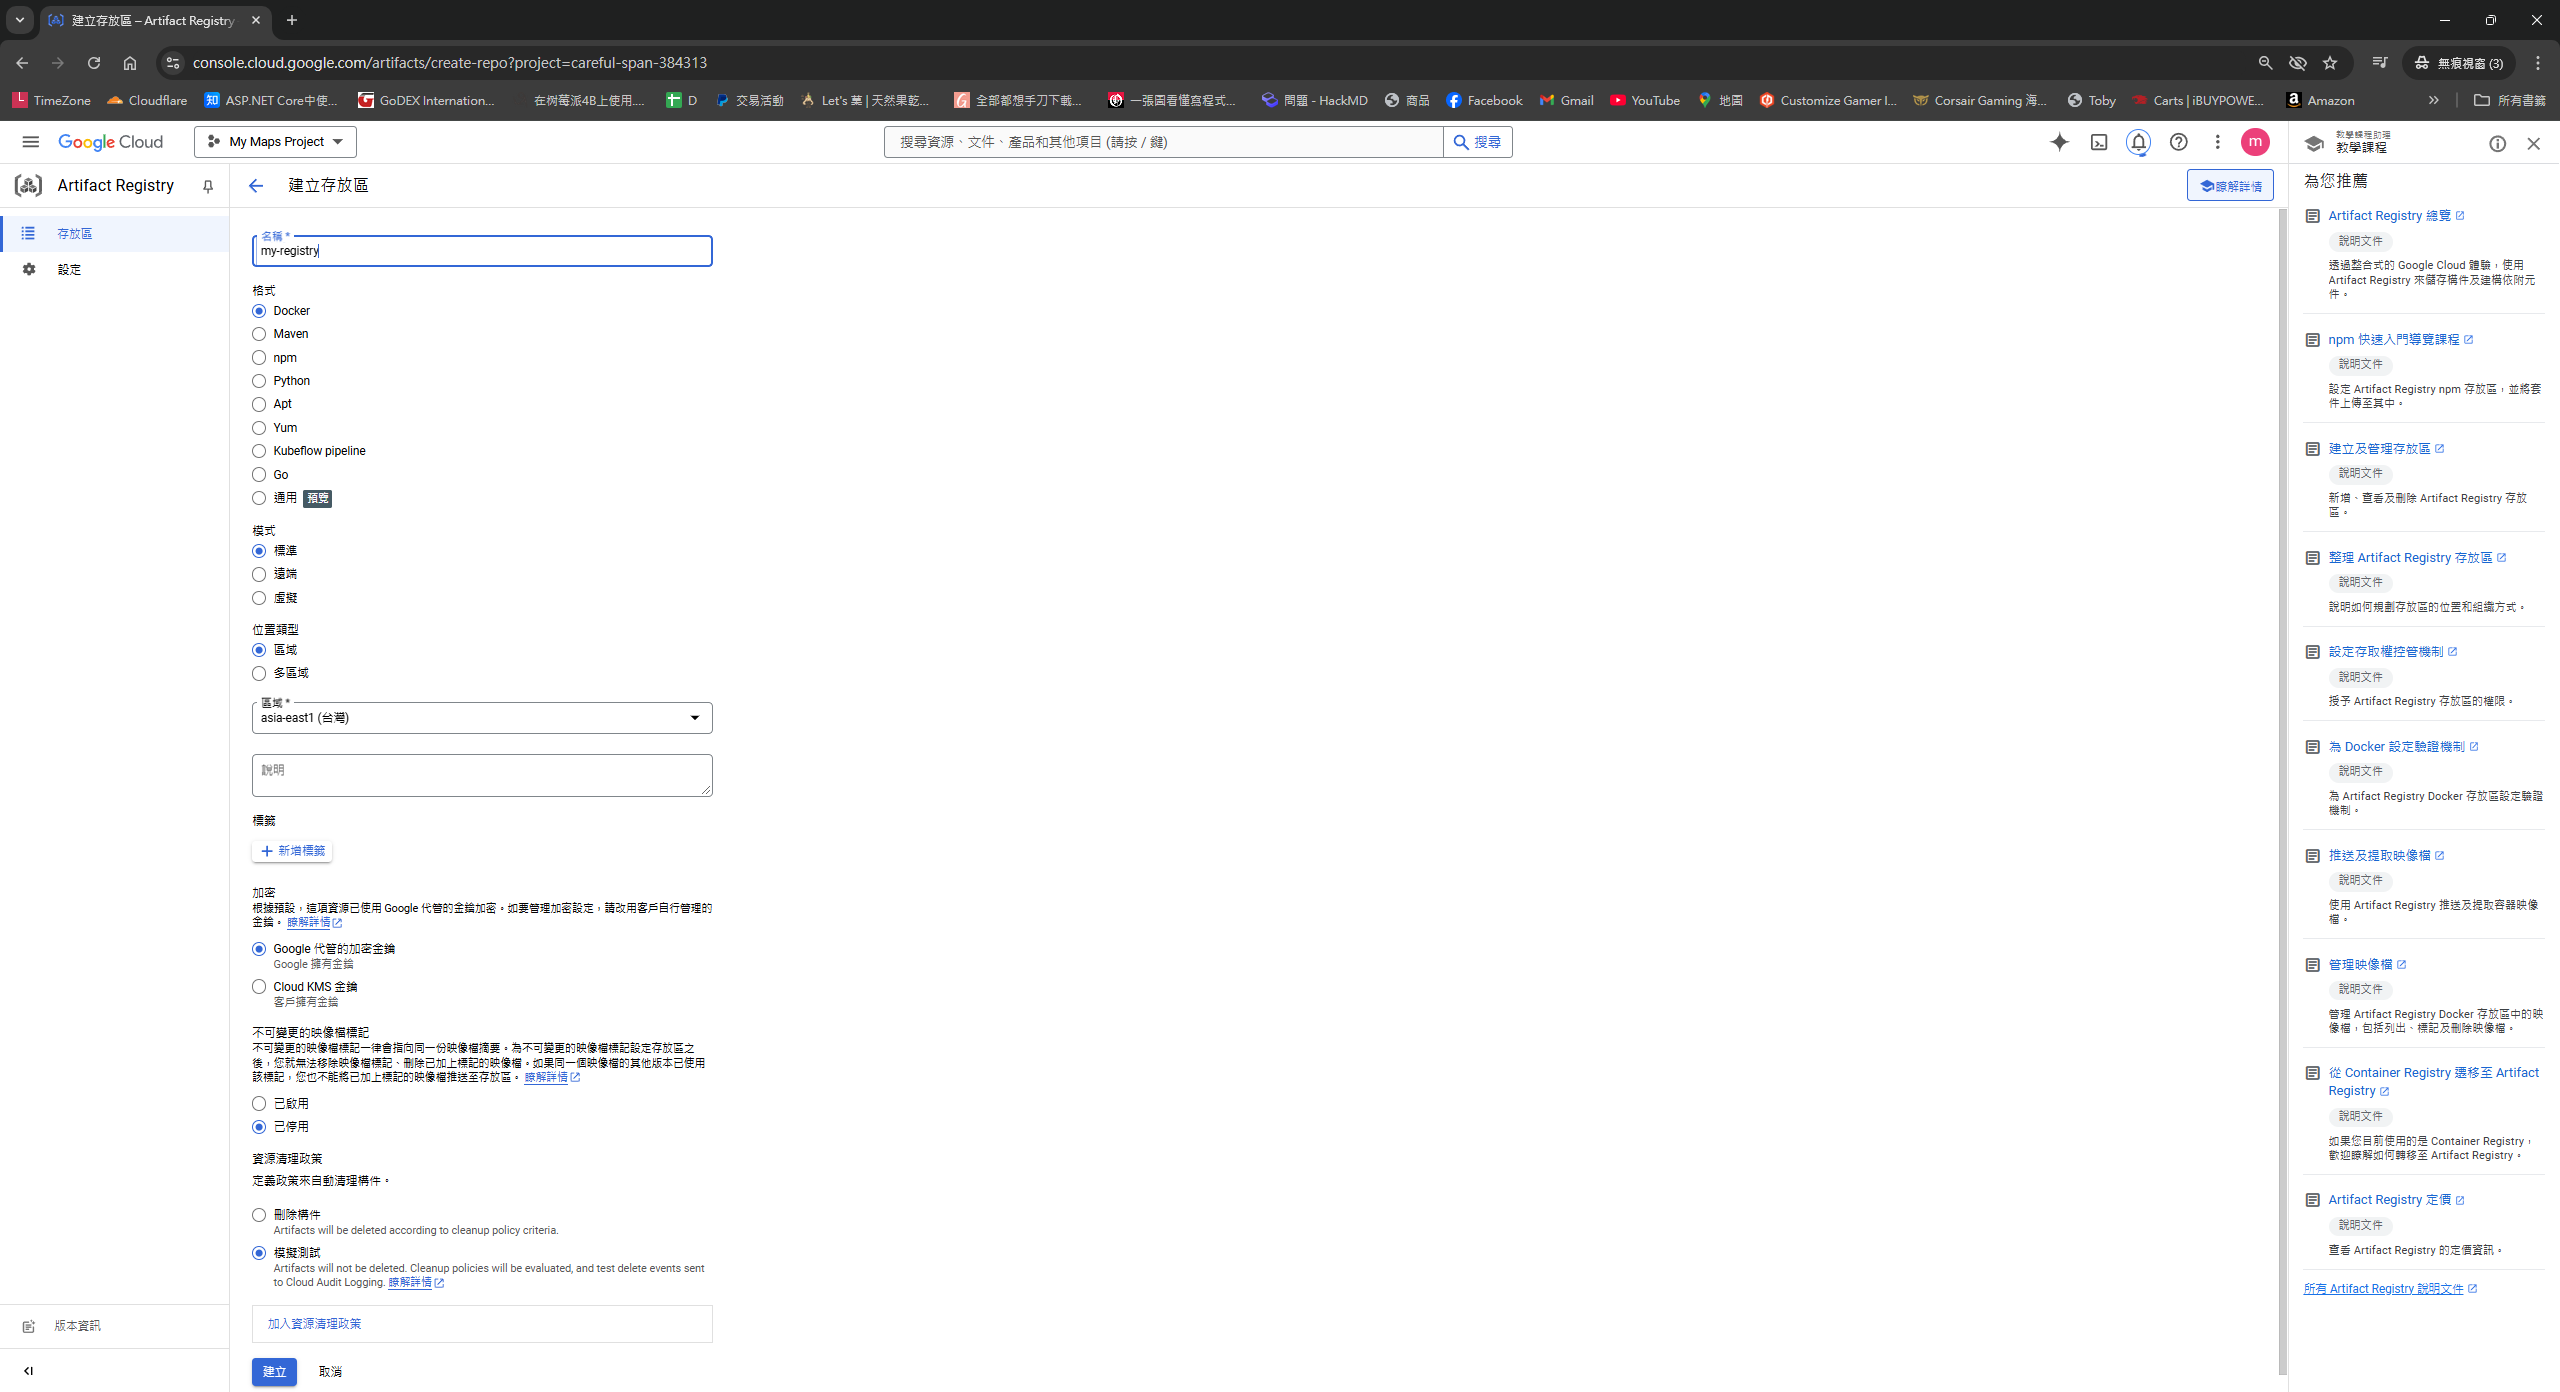
-
Select the created registry > Setup instructions > Copy the configuration command
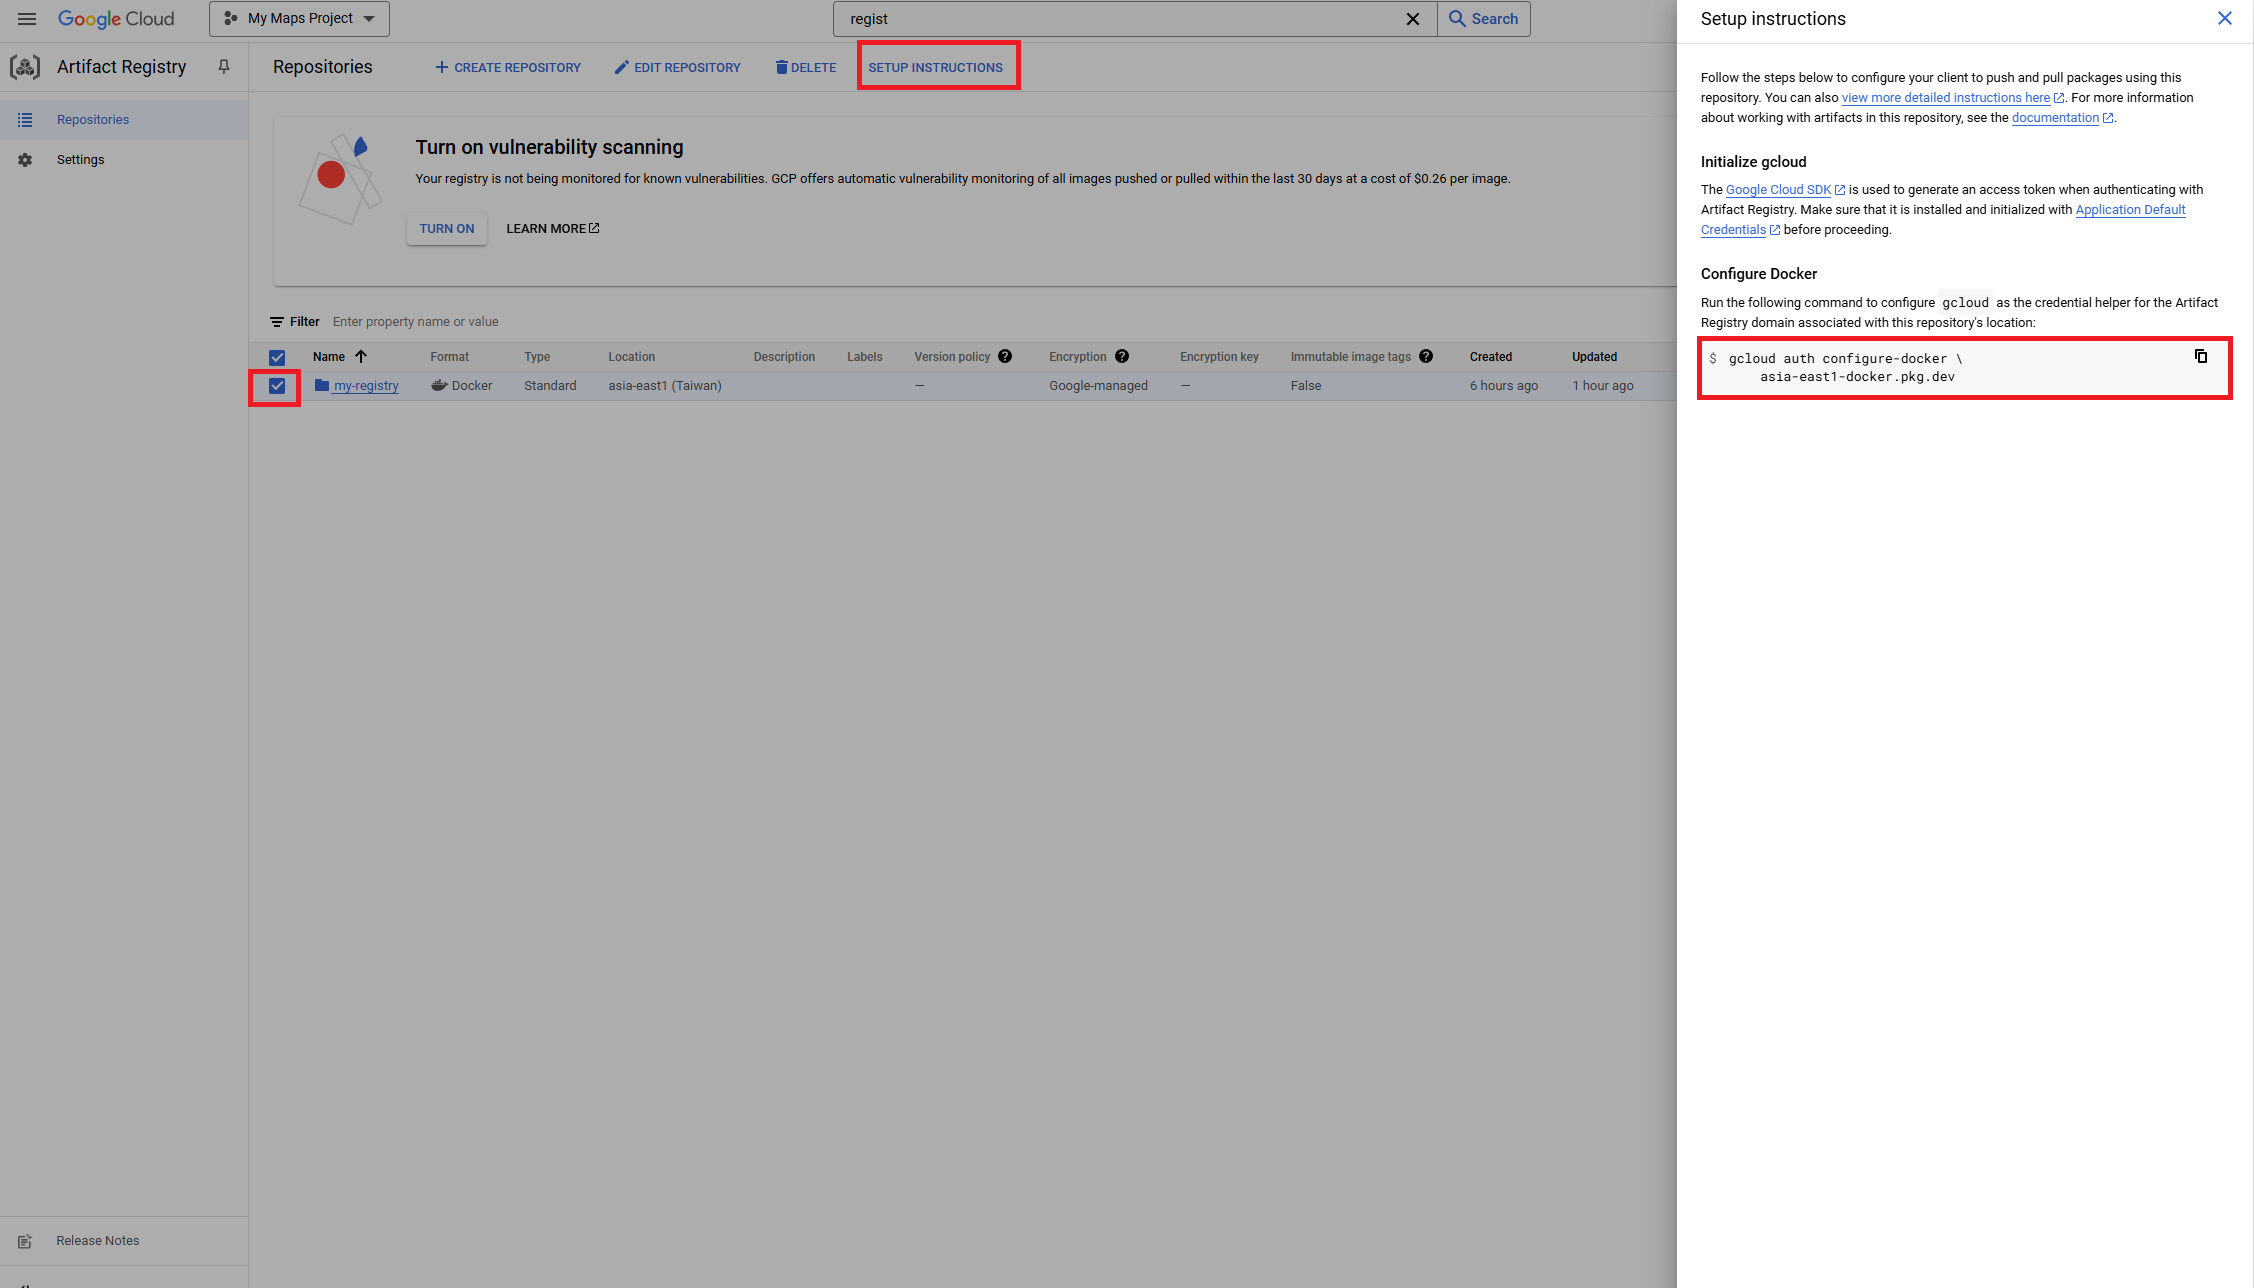 Note: Windows users should remove
 \to make the command a single line. -
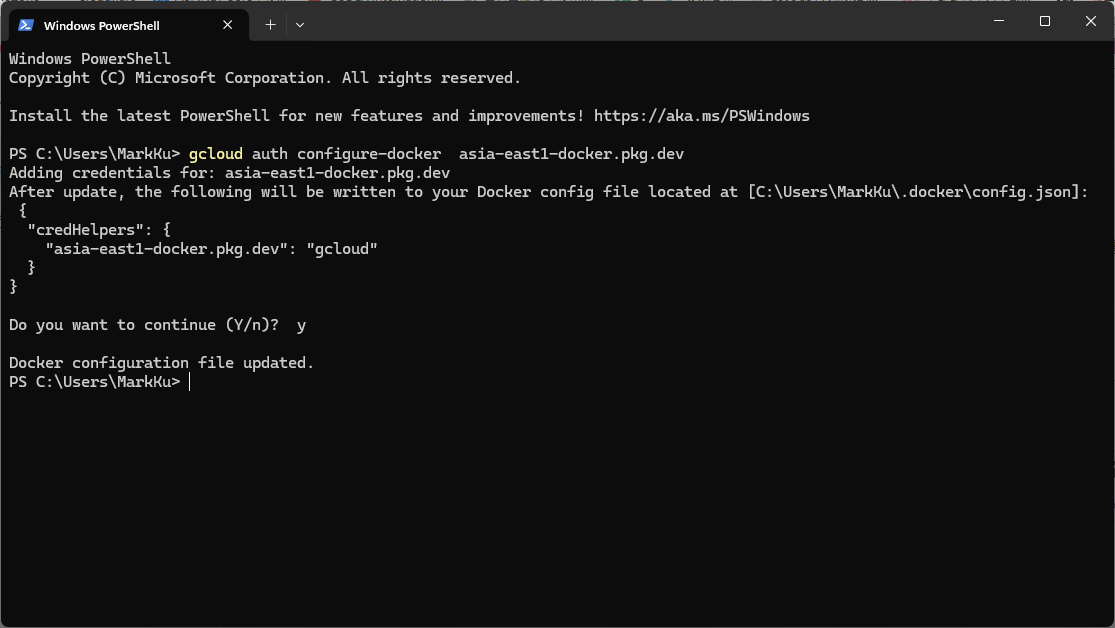
Configure Google Artifact Registry on your local machine:
gcloud auth configure-docker asia-east1-docker.pkg.dev
Building and Verifying the Docker Image
- First, use the command line to navigate to your containerizable project, which should already have a Dockerfile.
- Use the following command to build the Docker image:
docker build -t asia-east1-docker.pkg.dev/gcr-my-project01/my-registry/ec:v2 .
- Run the image to test it locally:
docker run -d -p 8888:80 asia-east1-docker.pkg.dev/gcr-my-project01/my-registry/ec:v2
- Visit localhost:8888 to test the container service and check for any issues.

Pushing the Image to Artifact Registry
docker push asia-east1-docker.pkg.dev/gcr-my-project01/my-registry/ec:v2
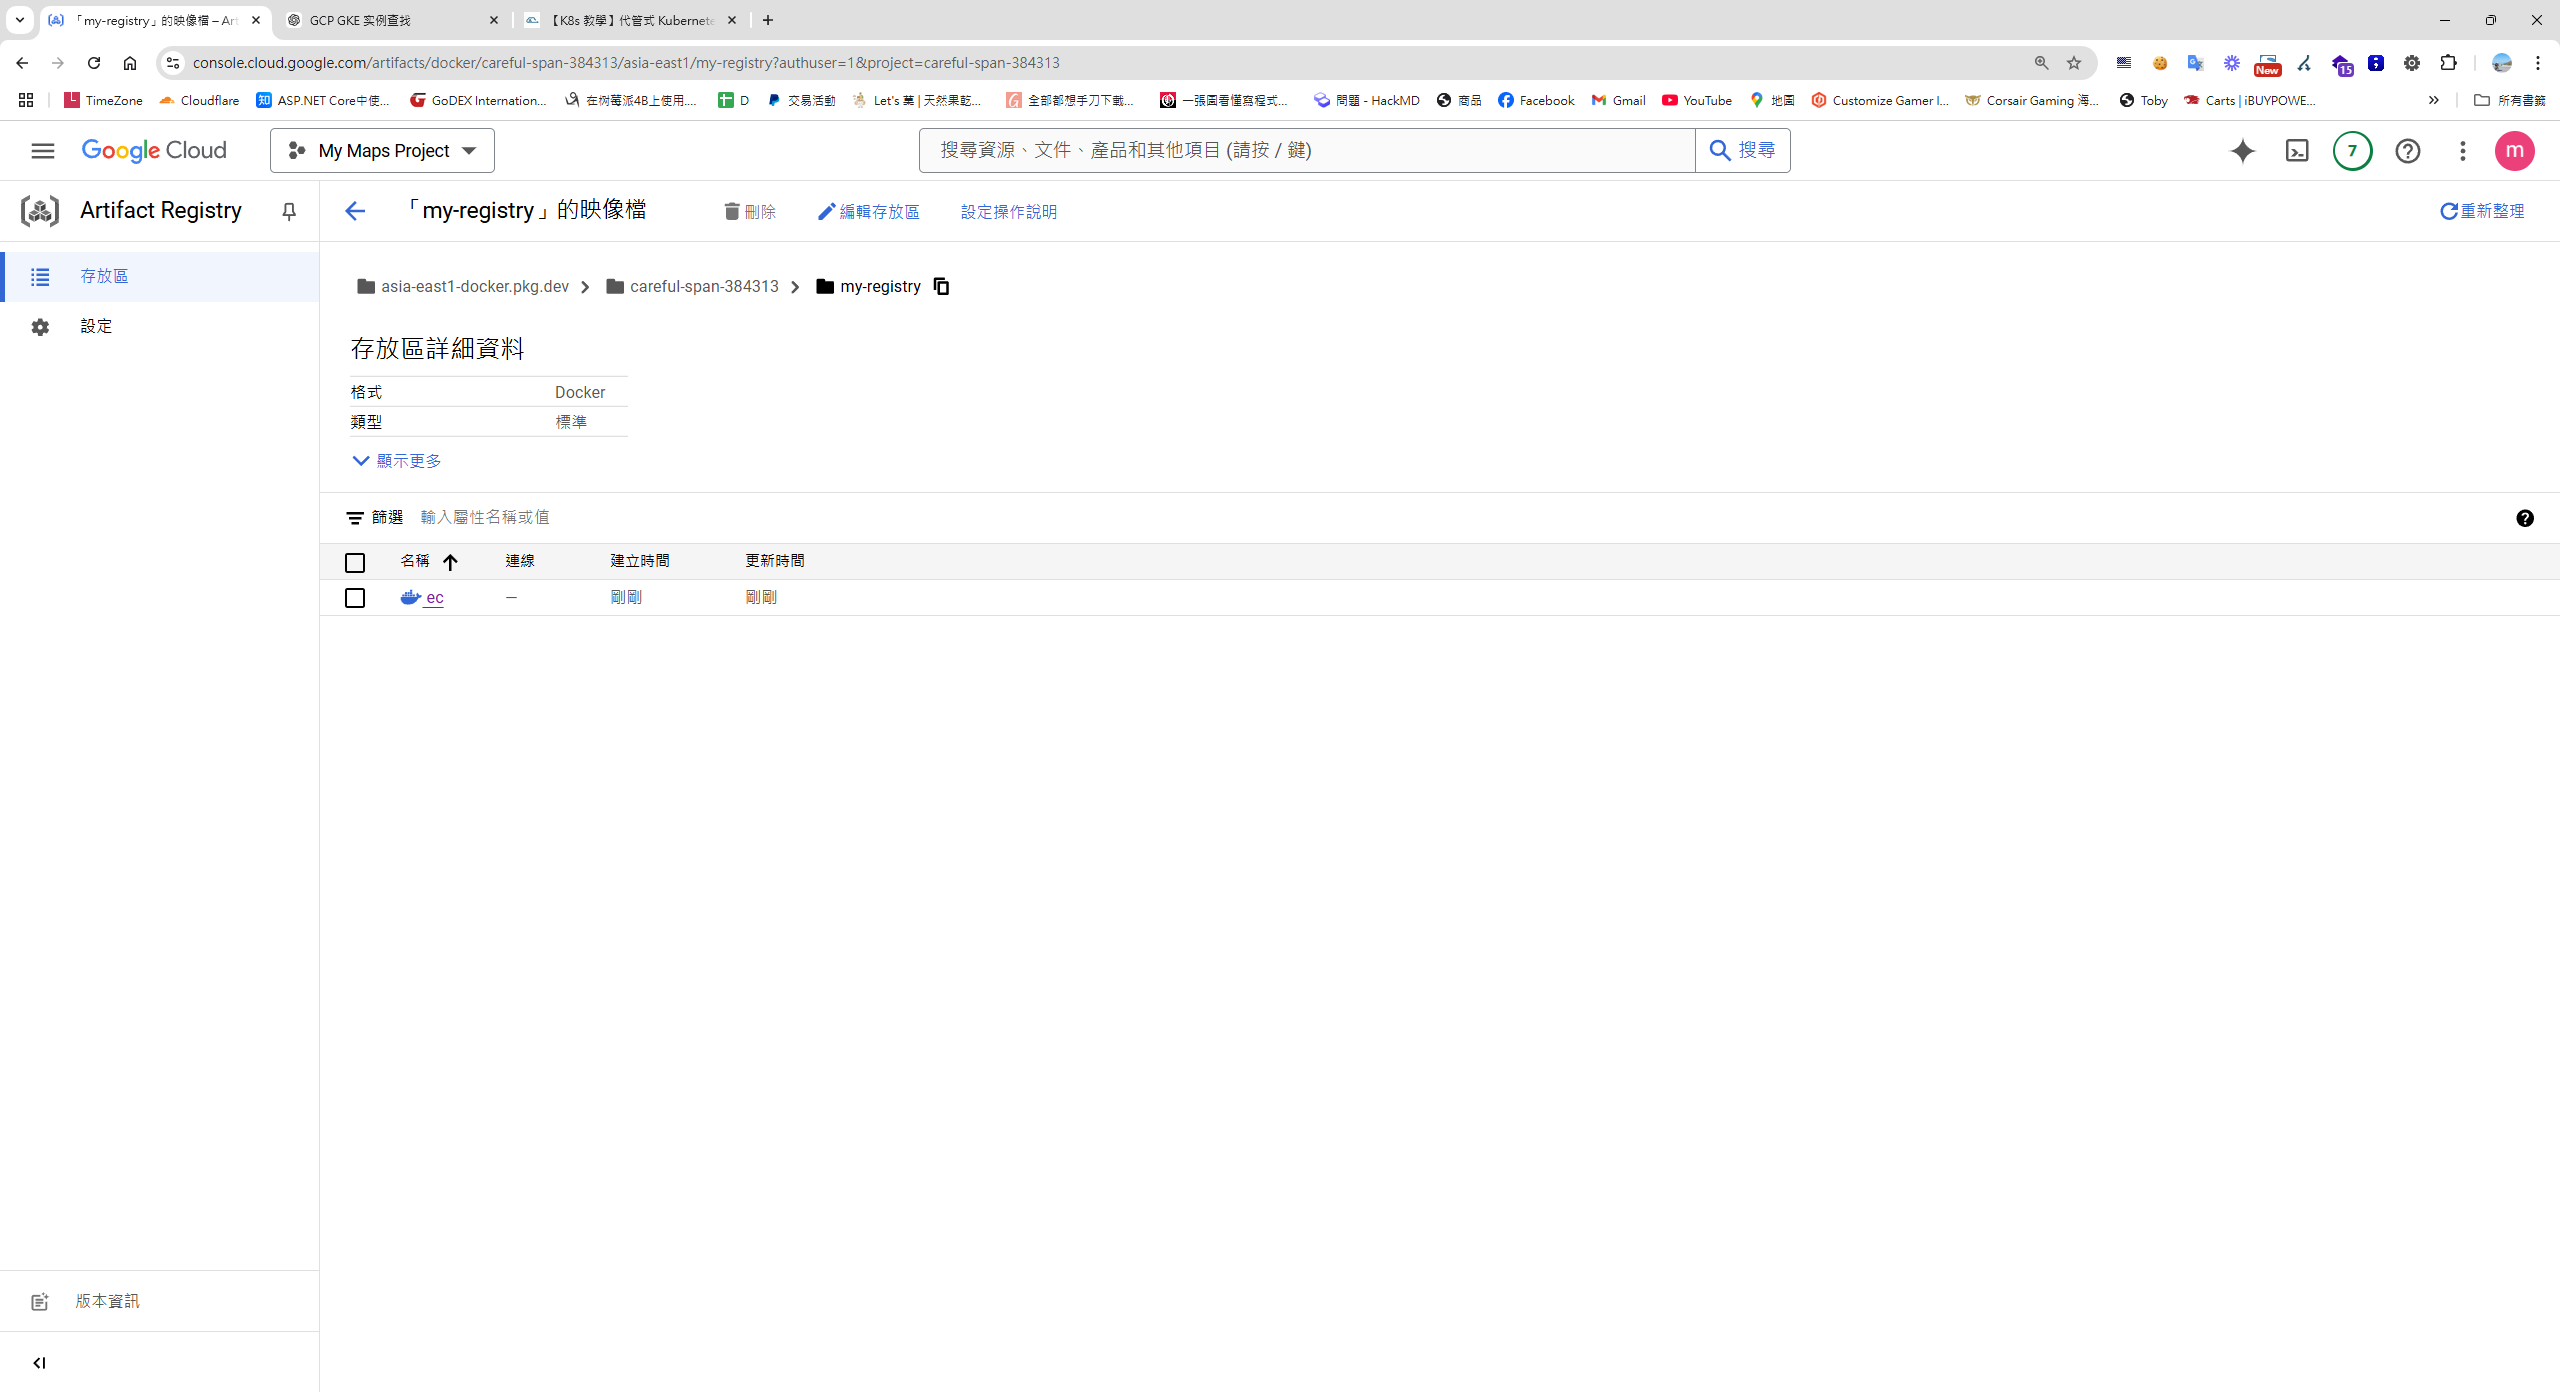
At this point, you should be able to see the Docker image you just pushed in your registry.
Deploying to Google Cloud Run
Google Cloud Run supports both manual deployment via the web UI and deployment using command-line scripts.
Manual Deployment from the Web UI
-
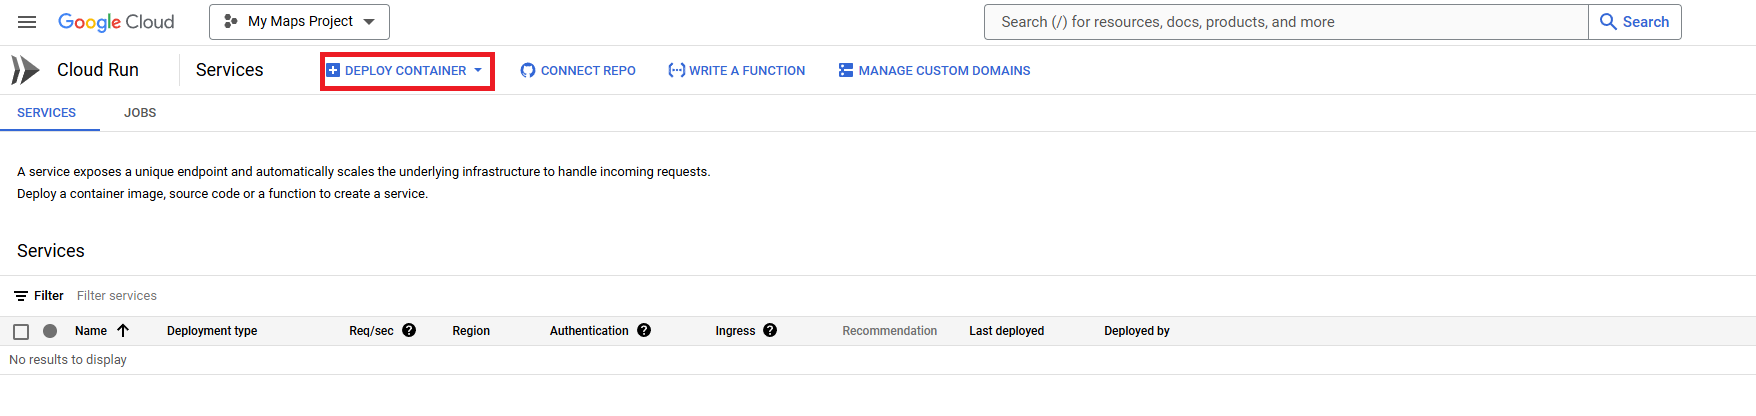
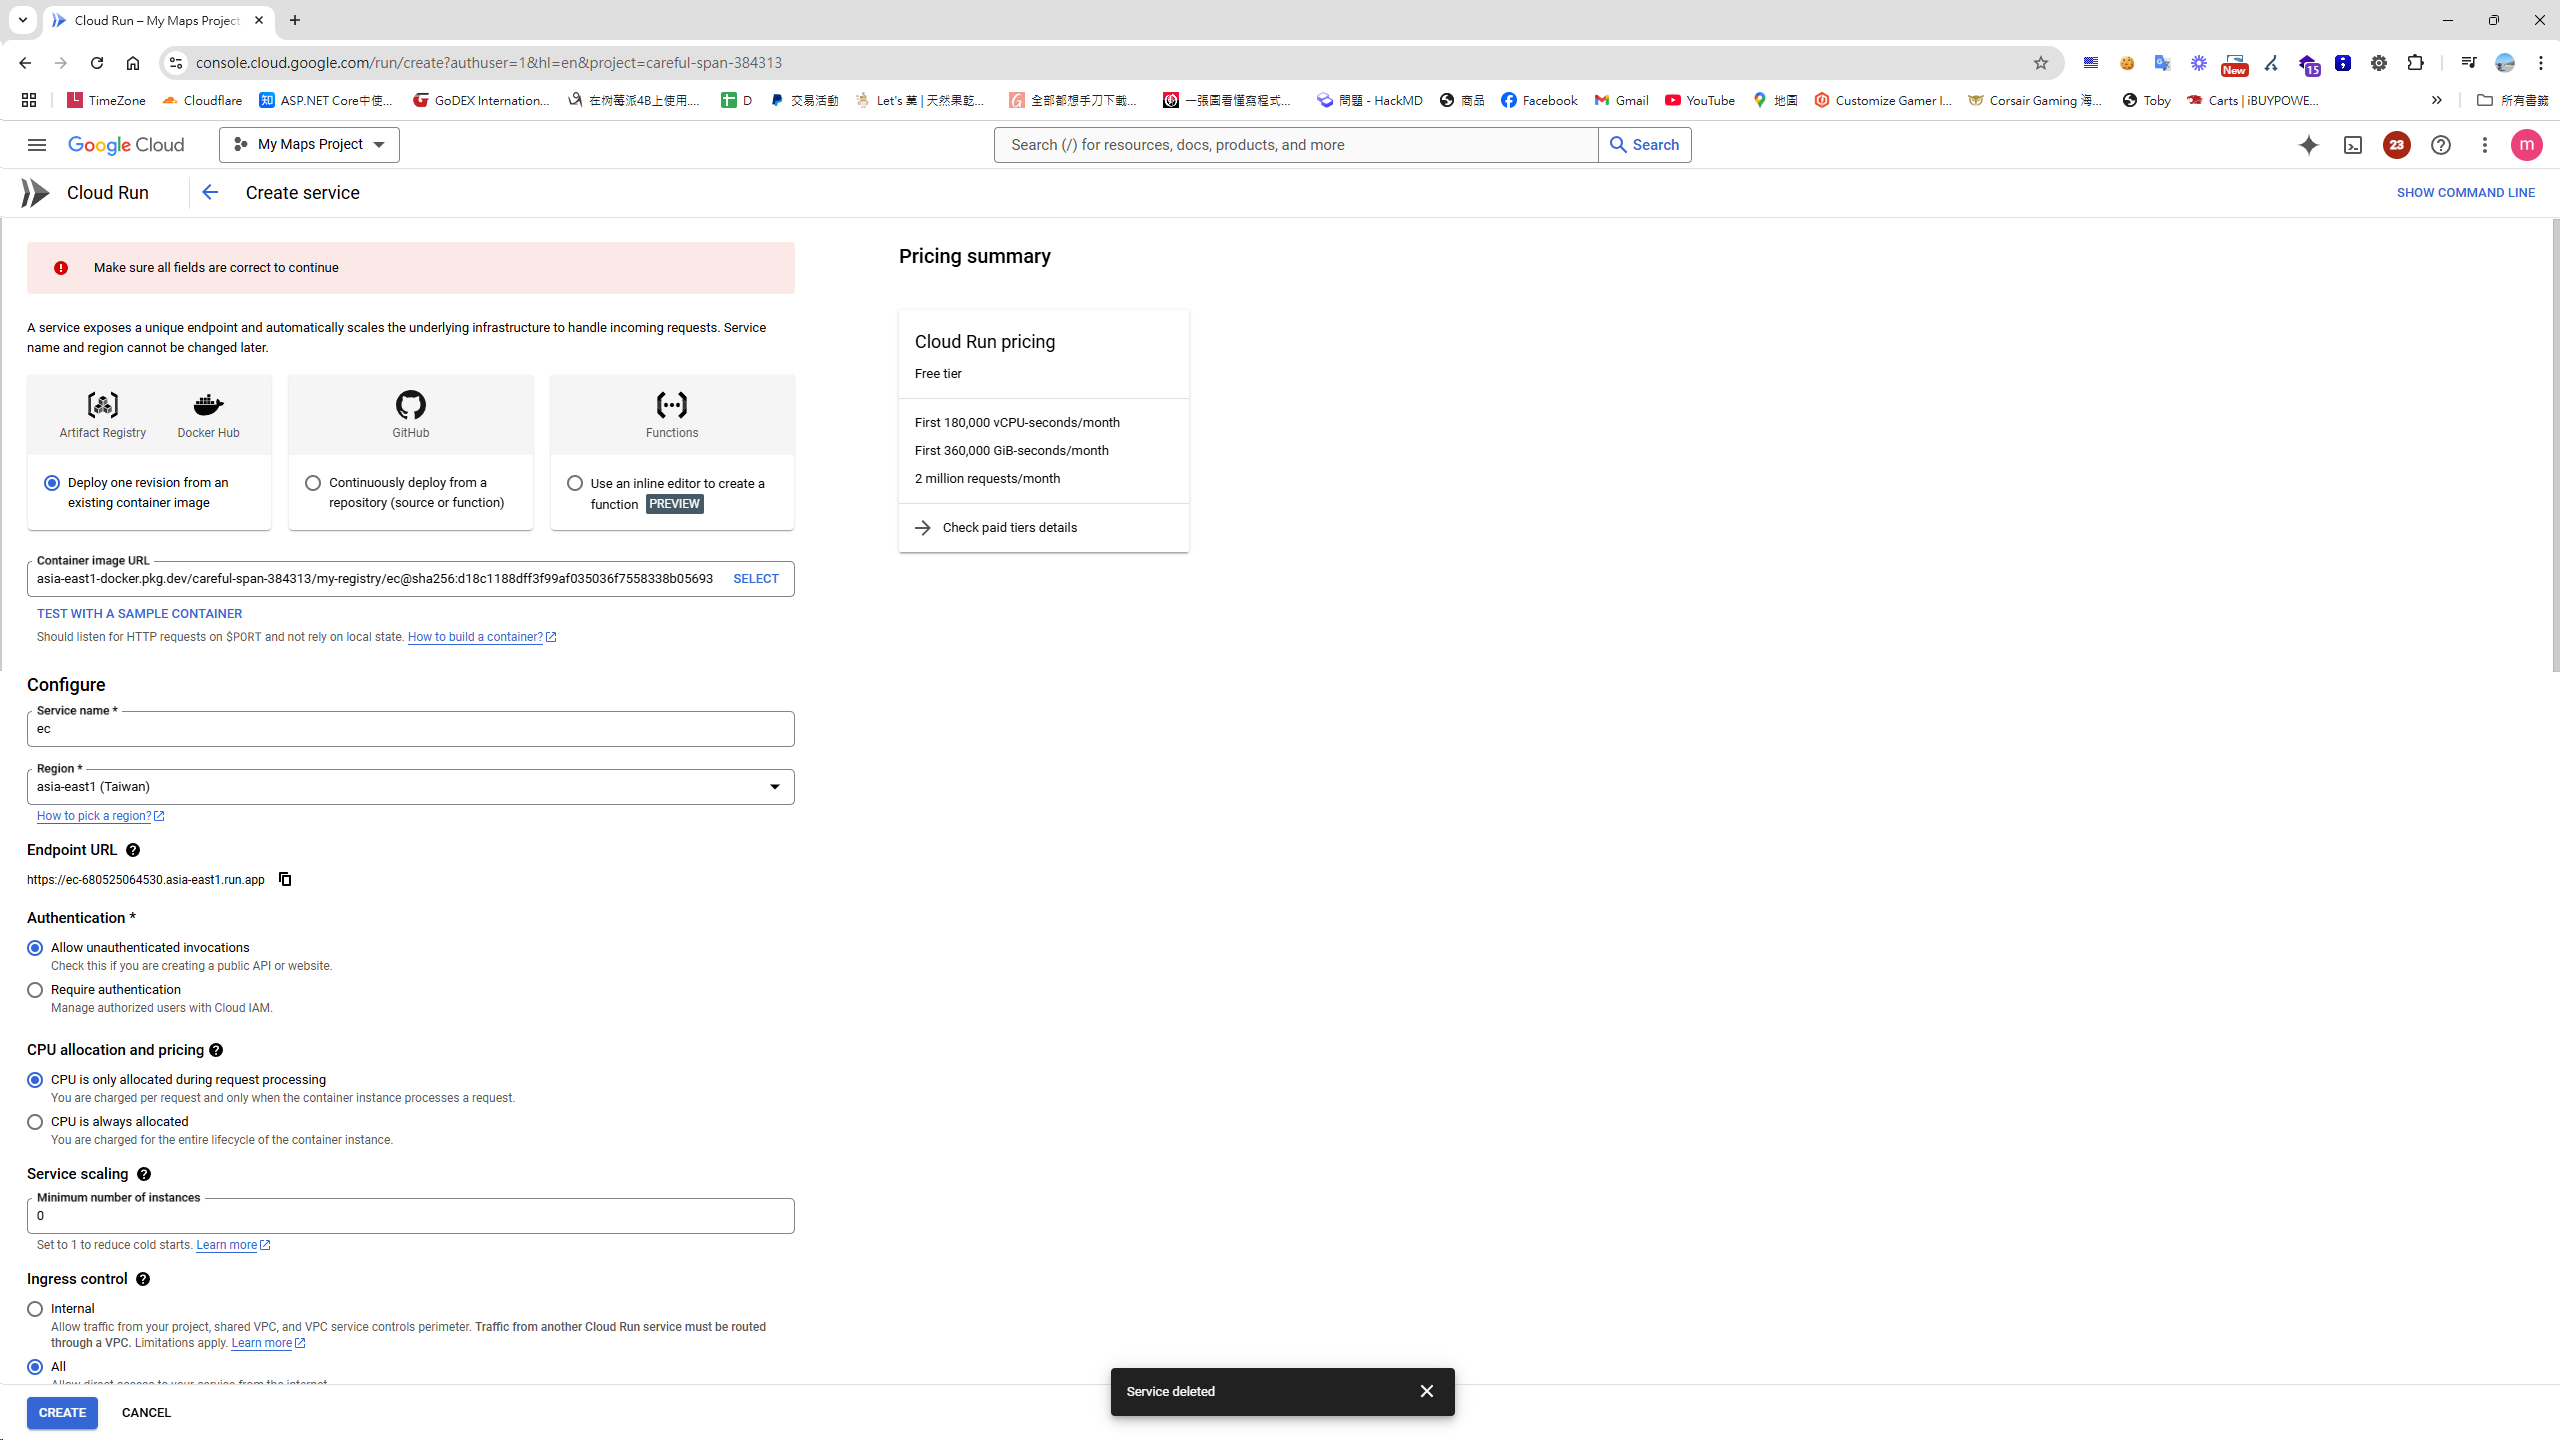
In Cloud Run, select "+Deploy Container".
-
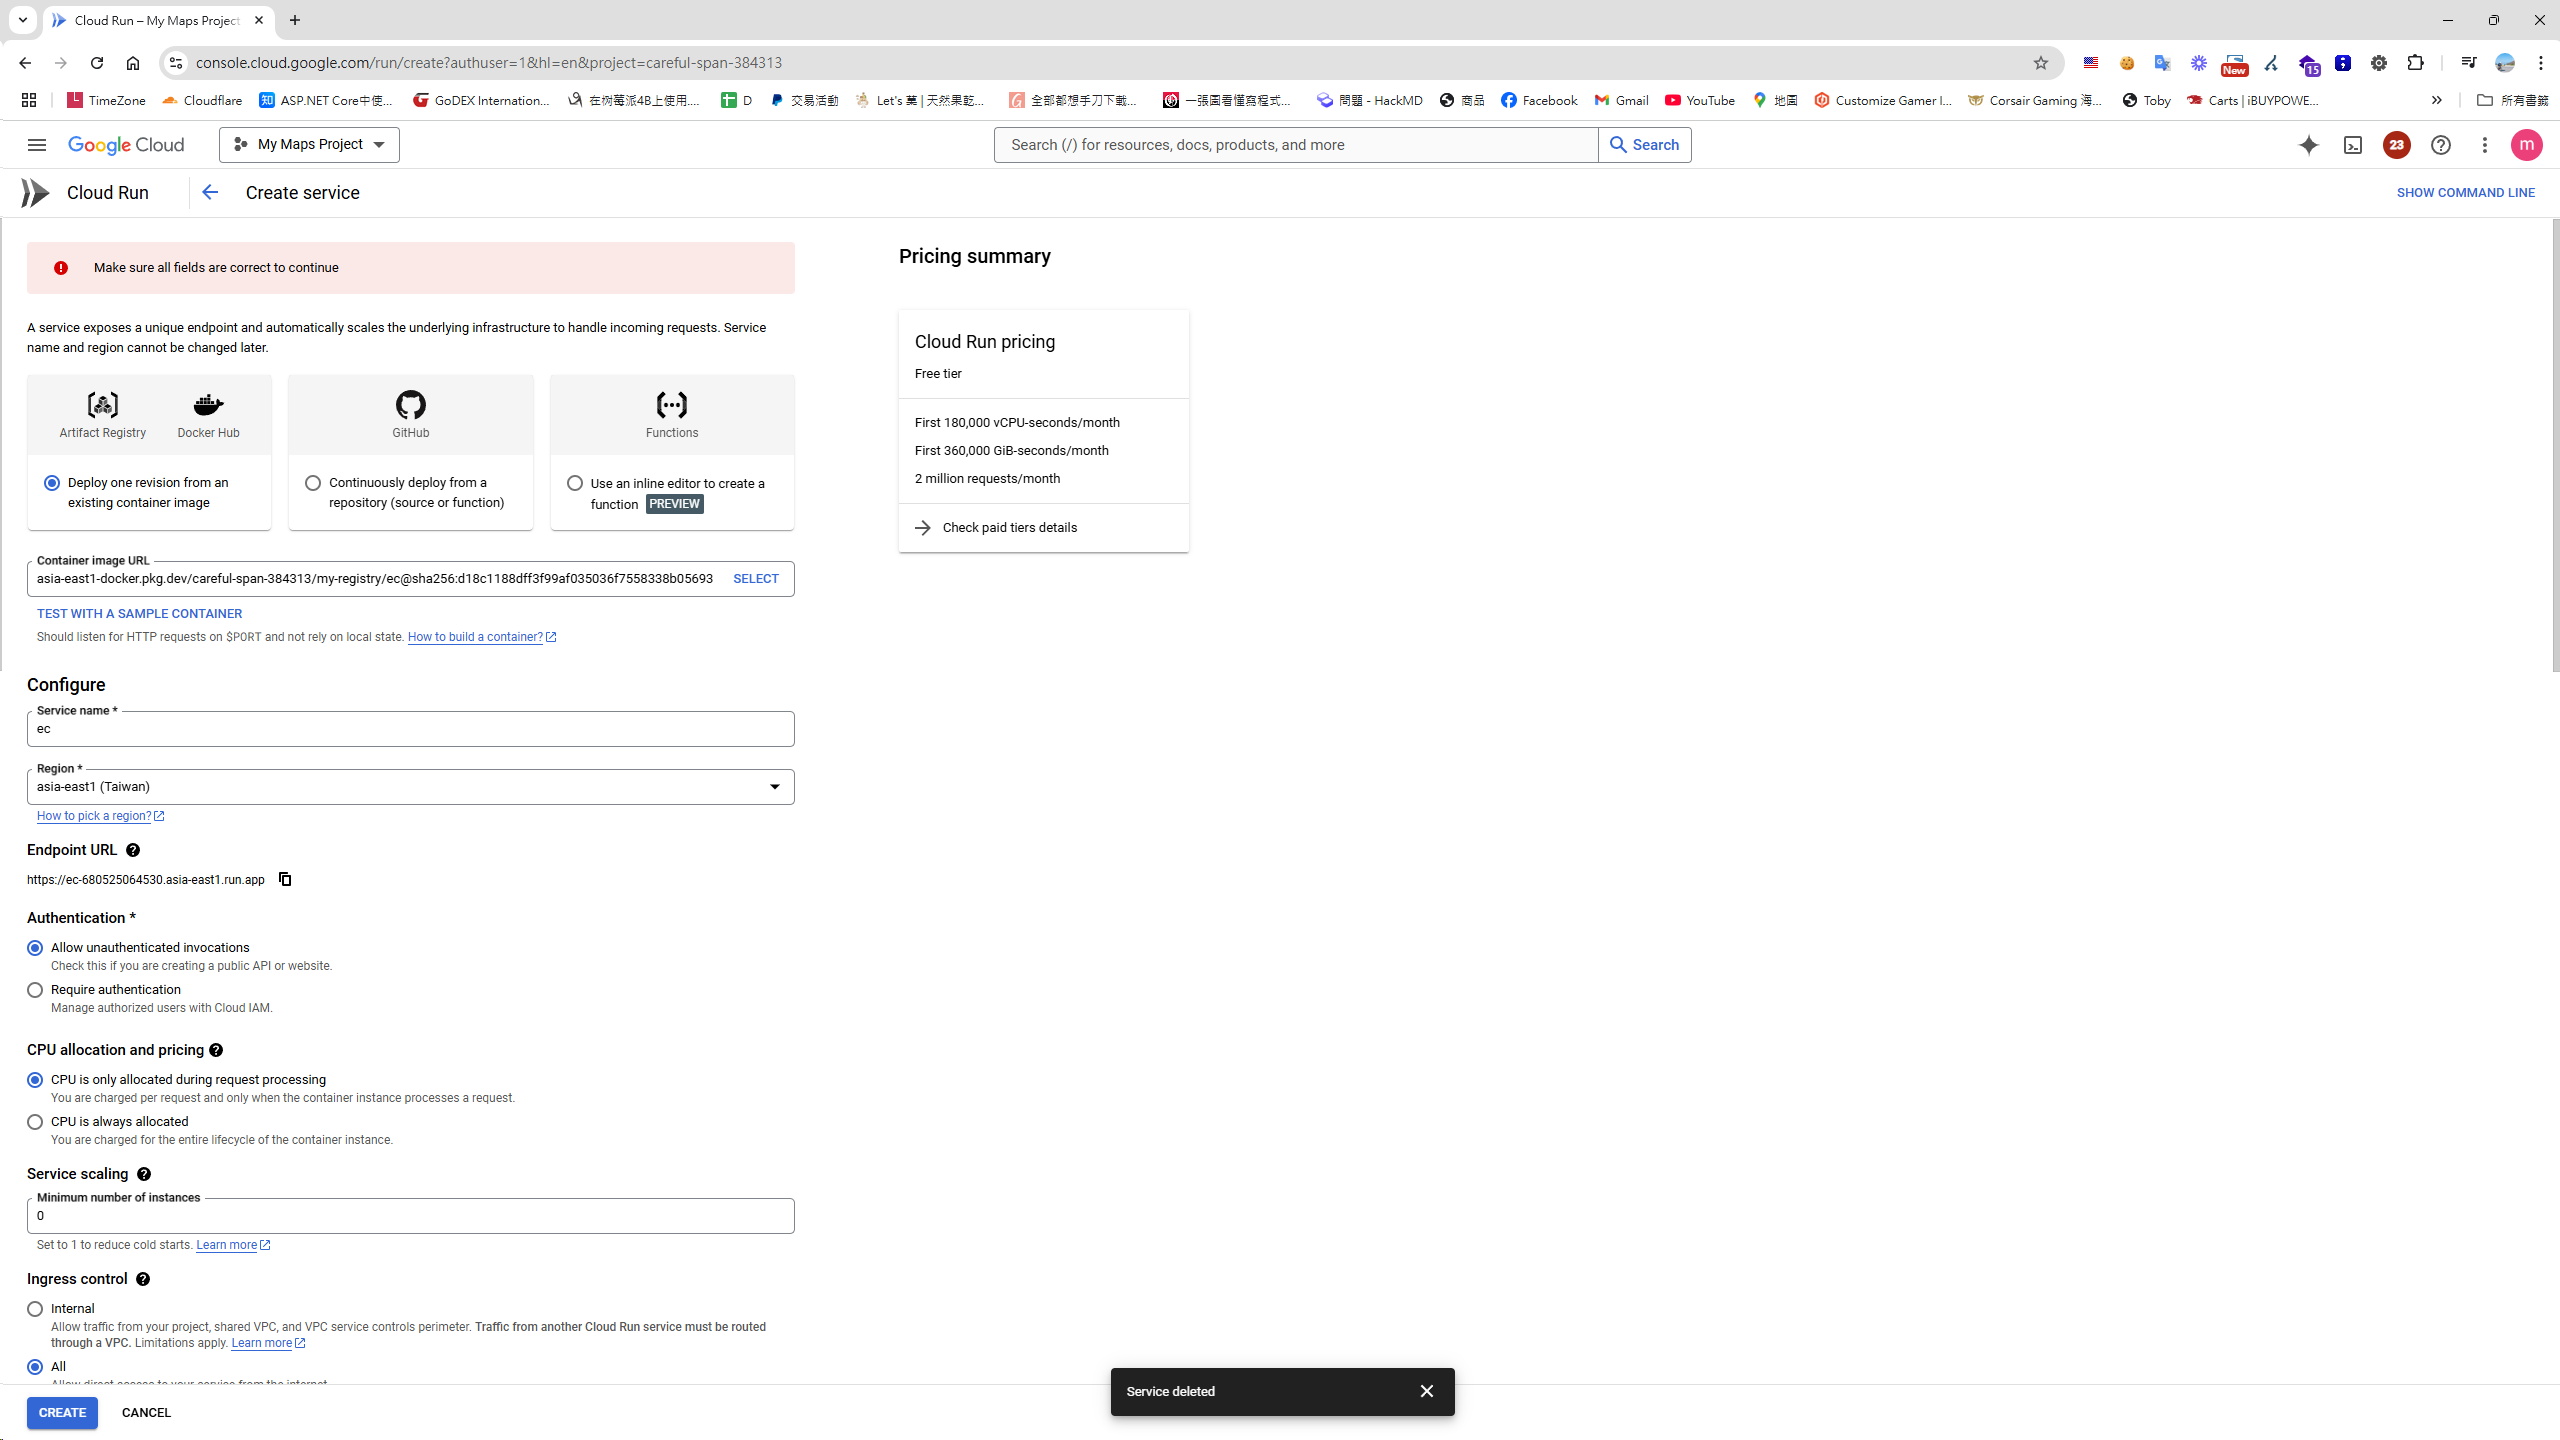
Follow the on-screen instructions to complete the setup.
-
Go into Cloud Run, configure parameters like Container(s), Volumes, Networking, and Security, and set the Container port to 80.
Alternatively, Deploy to Cloud Run Using a Script
gcloud run deploy my-service --image=asia-east1-docker.pkg.dev/gcr-my-project01/my-registry/ec:v2 --platform managed --allow-unauthenticated --region=asia-east1 --port=80
- Additional info - Gcloud run deploy parameter documentation
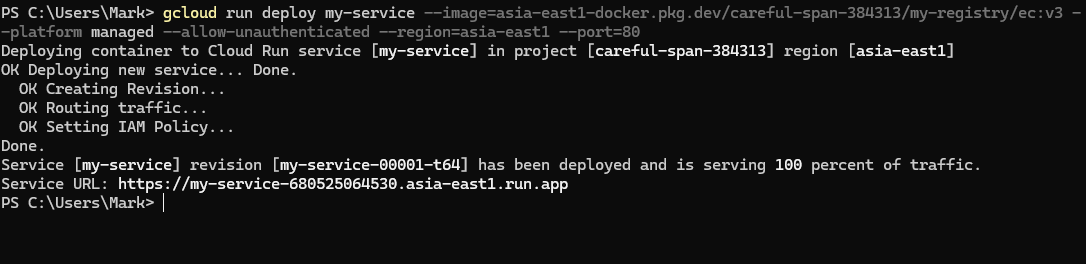 Now, visit this URL to check your container application. You can also see the status of this container service in Google Cloud Run.
Conclusion
After using the GCP CLI, I found that its operation is quite similar to on-premises commands, which significantly lowered the learning curve. For small and medium-sized enterprises, a cloud tool like this is particularly attractive. It not only eliminates the cost of purchasing physical servers but also removes the hassle of software updates. For a smaller company where the daily maintenance workload isn't enough to justify a full-time network administrator, GCP's flexible plans allow us to scale resources up or down as needed, enabling more agile use of our IT budget.
Addendum - Updating an Image by Redeploying the Service
Method 1: Update the Image Using the Google Cloud Console Website
- Go to the Google Cloud Console.
- Navigate to Cloud Run.
- Click on the service you want to update.
- Click EDIT AND DEPLOY NEW REVISION or Deploy New Revision.
- In the Container image URL field, enter the new container image (e.g.,
gcr.io/<project-id>/<image-name>:<tag>). - Configure other settings (if needed), then click Deploy.
Method 2: Update the Image Using the gcloud CLI
If you are using the command-line tool, you can use the gcloud run deploy command to update the image:
gcloud run deploy <SERVICE_NAME> \
  --image gcr.io/<PROJECT_ID>/<ARTIFACT_REGISTRY_URL>/<IMAGE_NAME>:<TAG> \
  --region <REGION>


Comments