
Introduction
Following up on the previous article, Deploying to GKE with Google Cloud SDK Scripts, this time I'll show how to automate GKE deployments using Jenkins.
Prerequisites
Before you begin, please ensure the following environment and resources are ready:
- Kubernetes Master Node: At least one available K8s Master Node.
- Jenkins: Installed and running.
- Docker: To containerize the application.
- Google Artifact Registry: An Artifact Registry created beforehand in GCP.
- Next.js Project: The project must include the necessary K8s YAML configuration files.
- GitHub: A webhook configured to automatically trigger a Jenkins build on push.
Install Google Cloud CLI
-
Install Google Cloud CLI according to the official tutorial: Refer to the official Google documentation for installation.
-
Log in to Google Cloud: Run the following command:
gcloud auth login --no-launch-browserThe system will generate a verification URL (as shown in the image below), which you can use to complete the login process on another device with a browser.

get login url
Create a Google Service Account
-
Go to the GCP Console:
- Navigate to IAM & Admin > Service Accounts.
- Click CREATE SERVICE ACCOUNT.
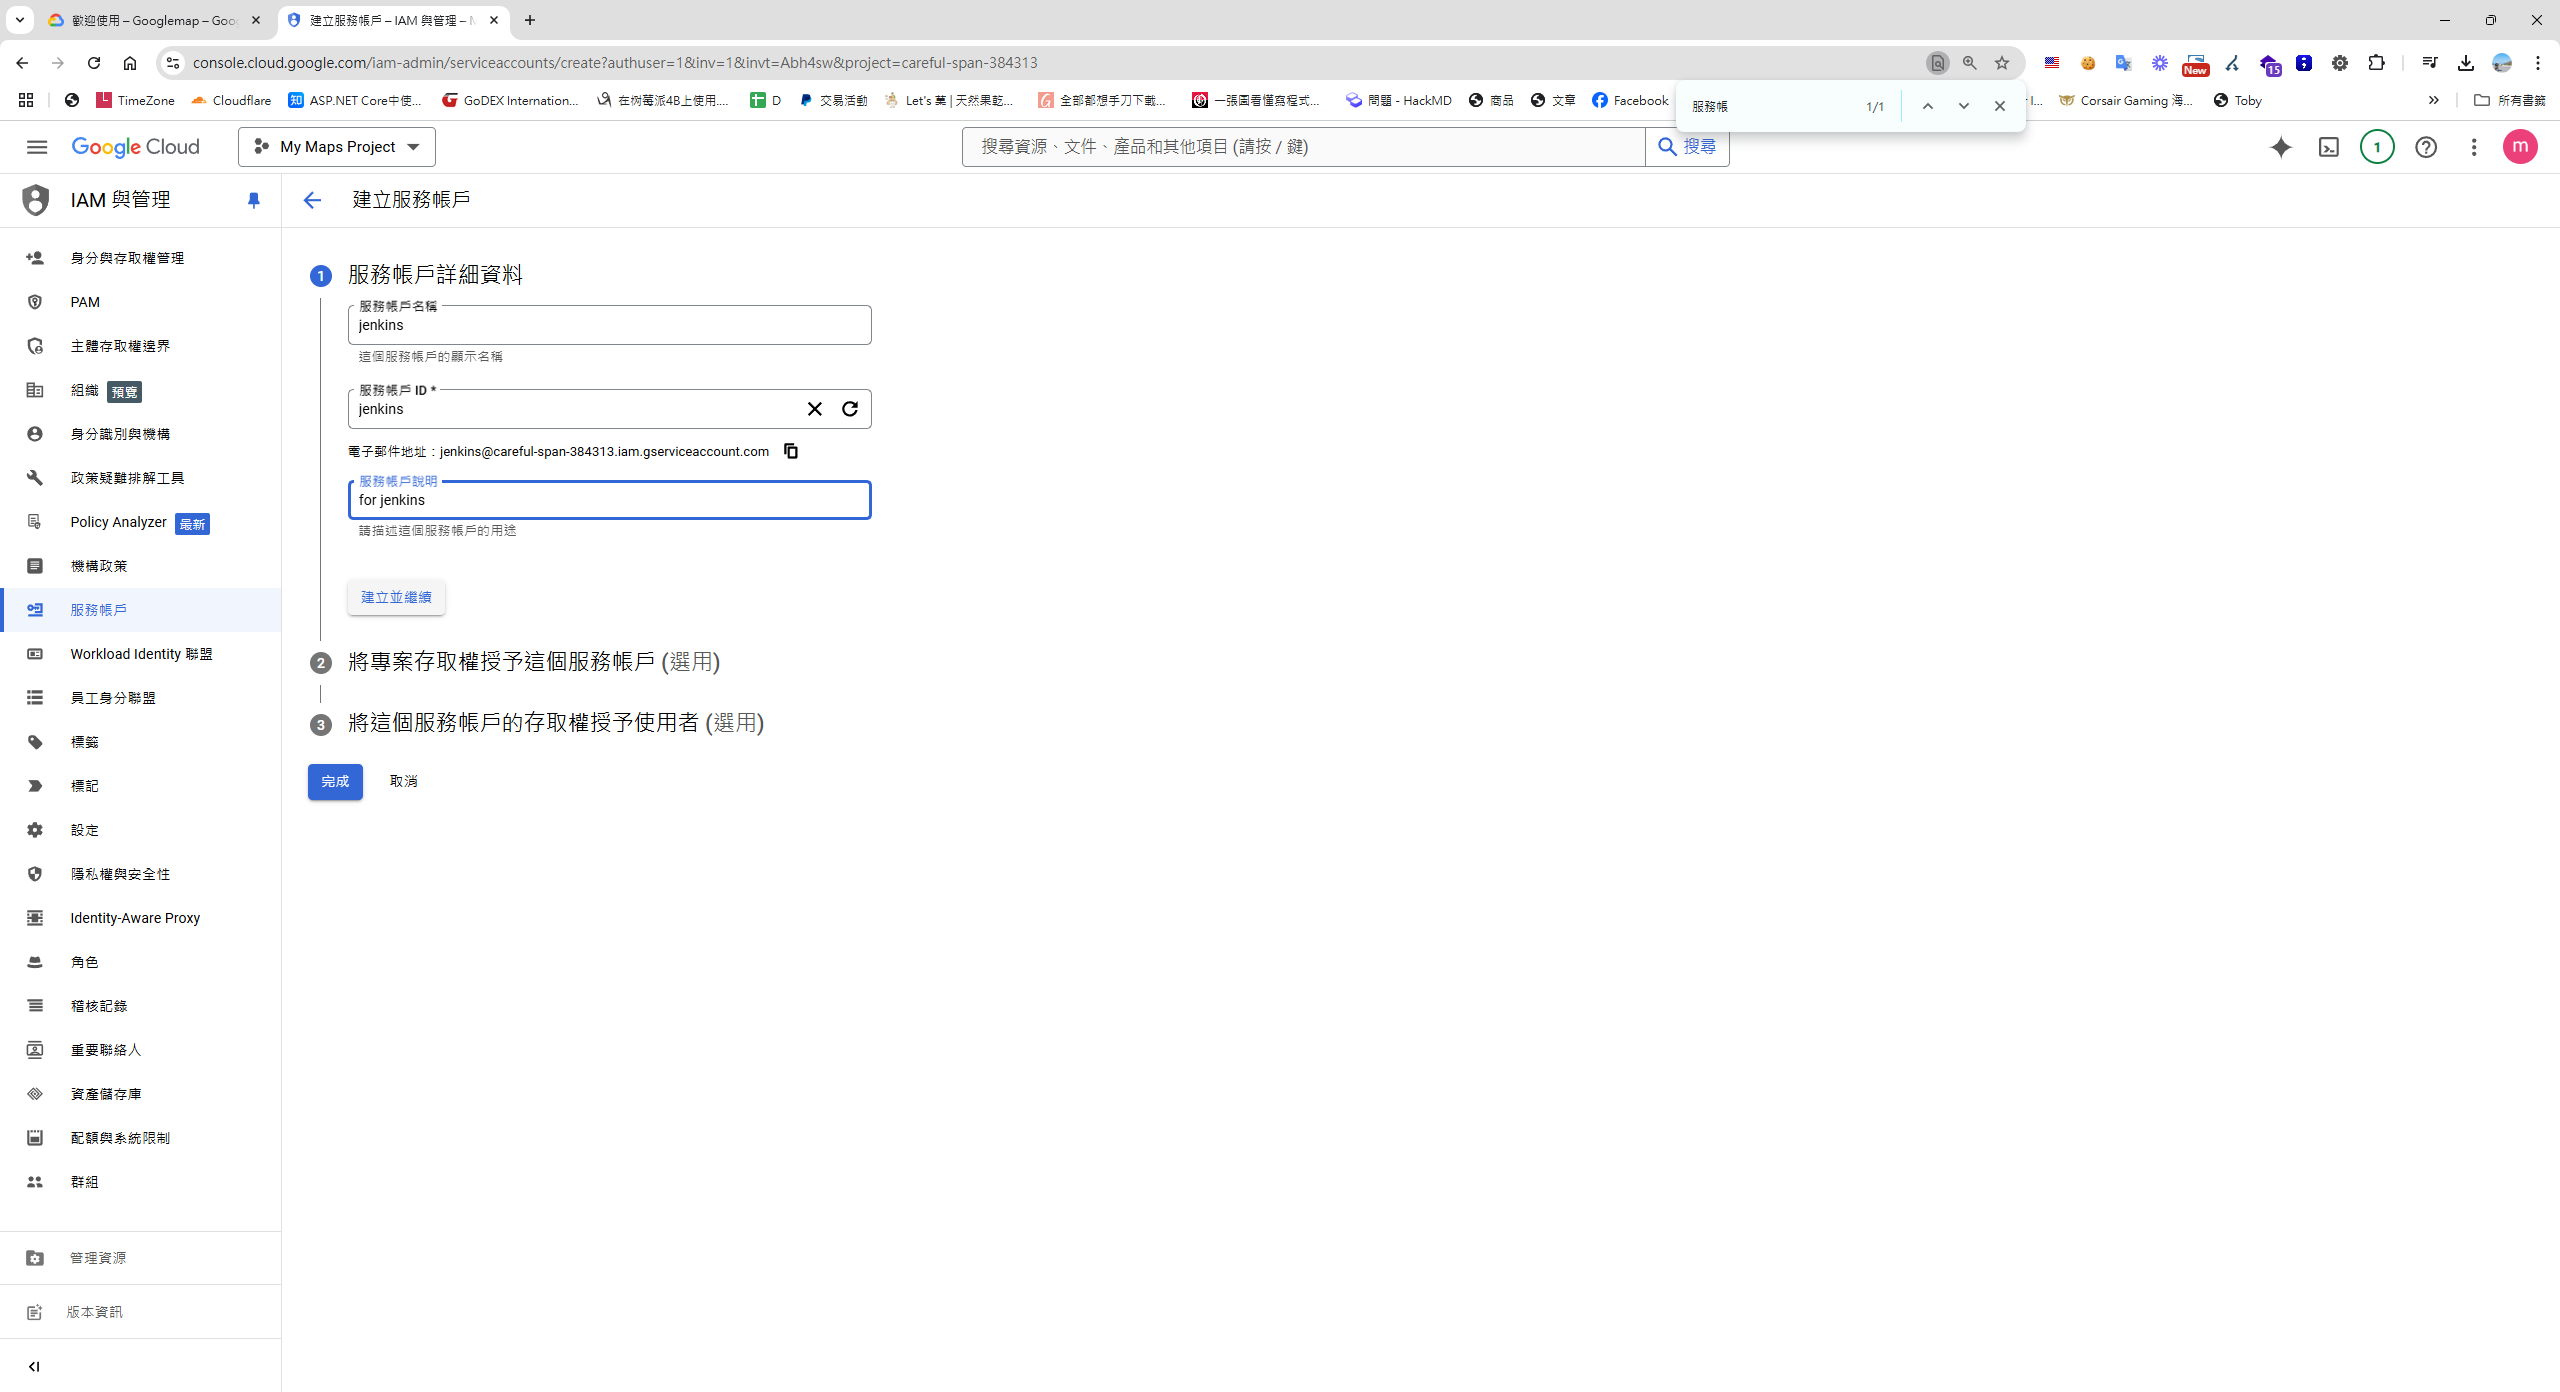
create service account -
Set the role:
- Set the role to Owner.
- Click DONE.
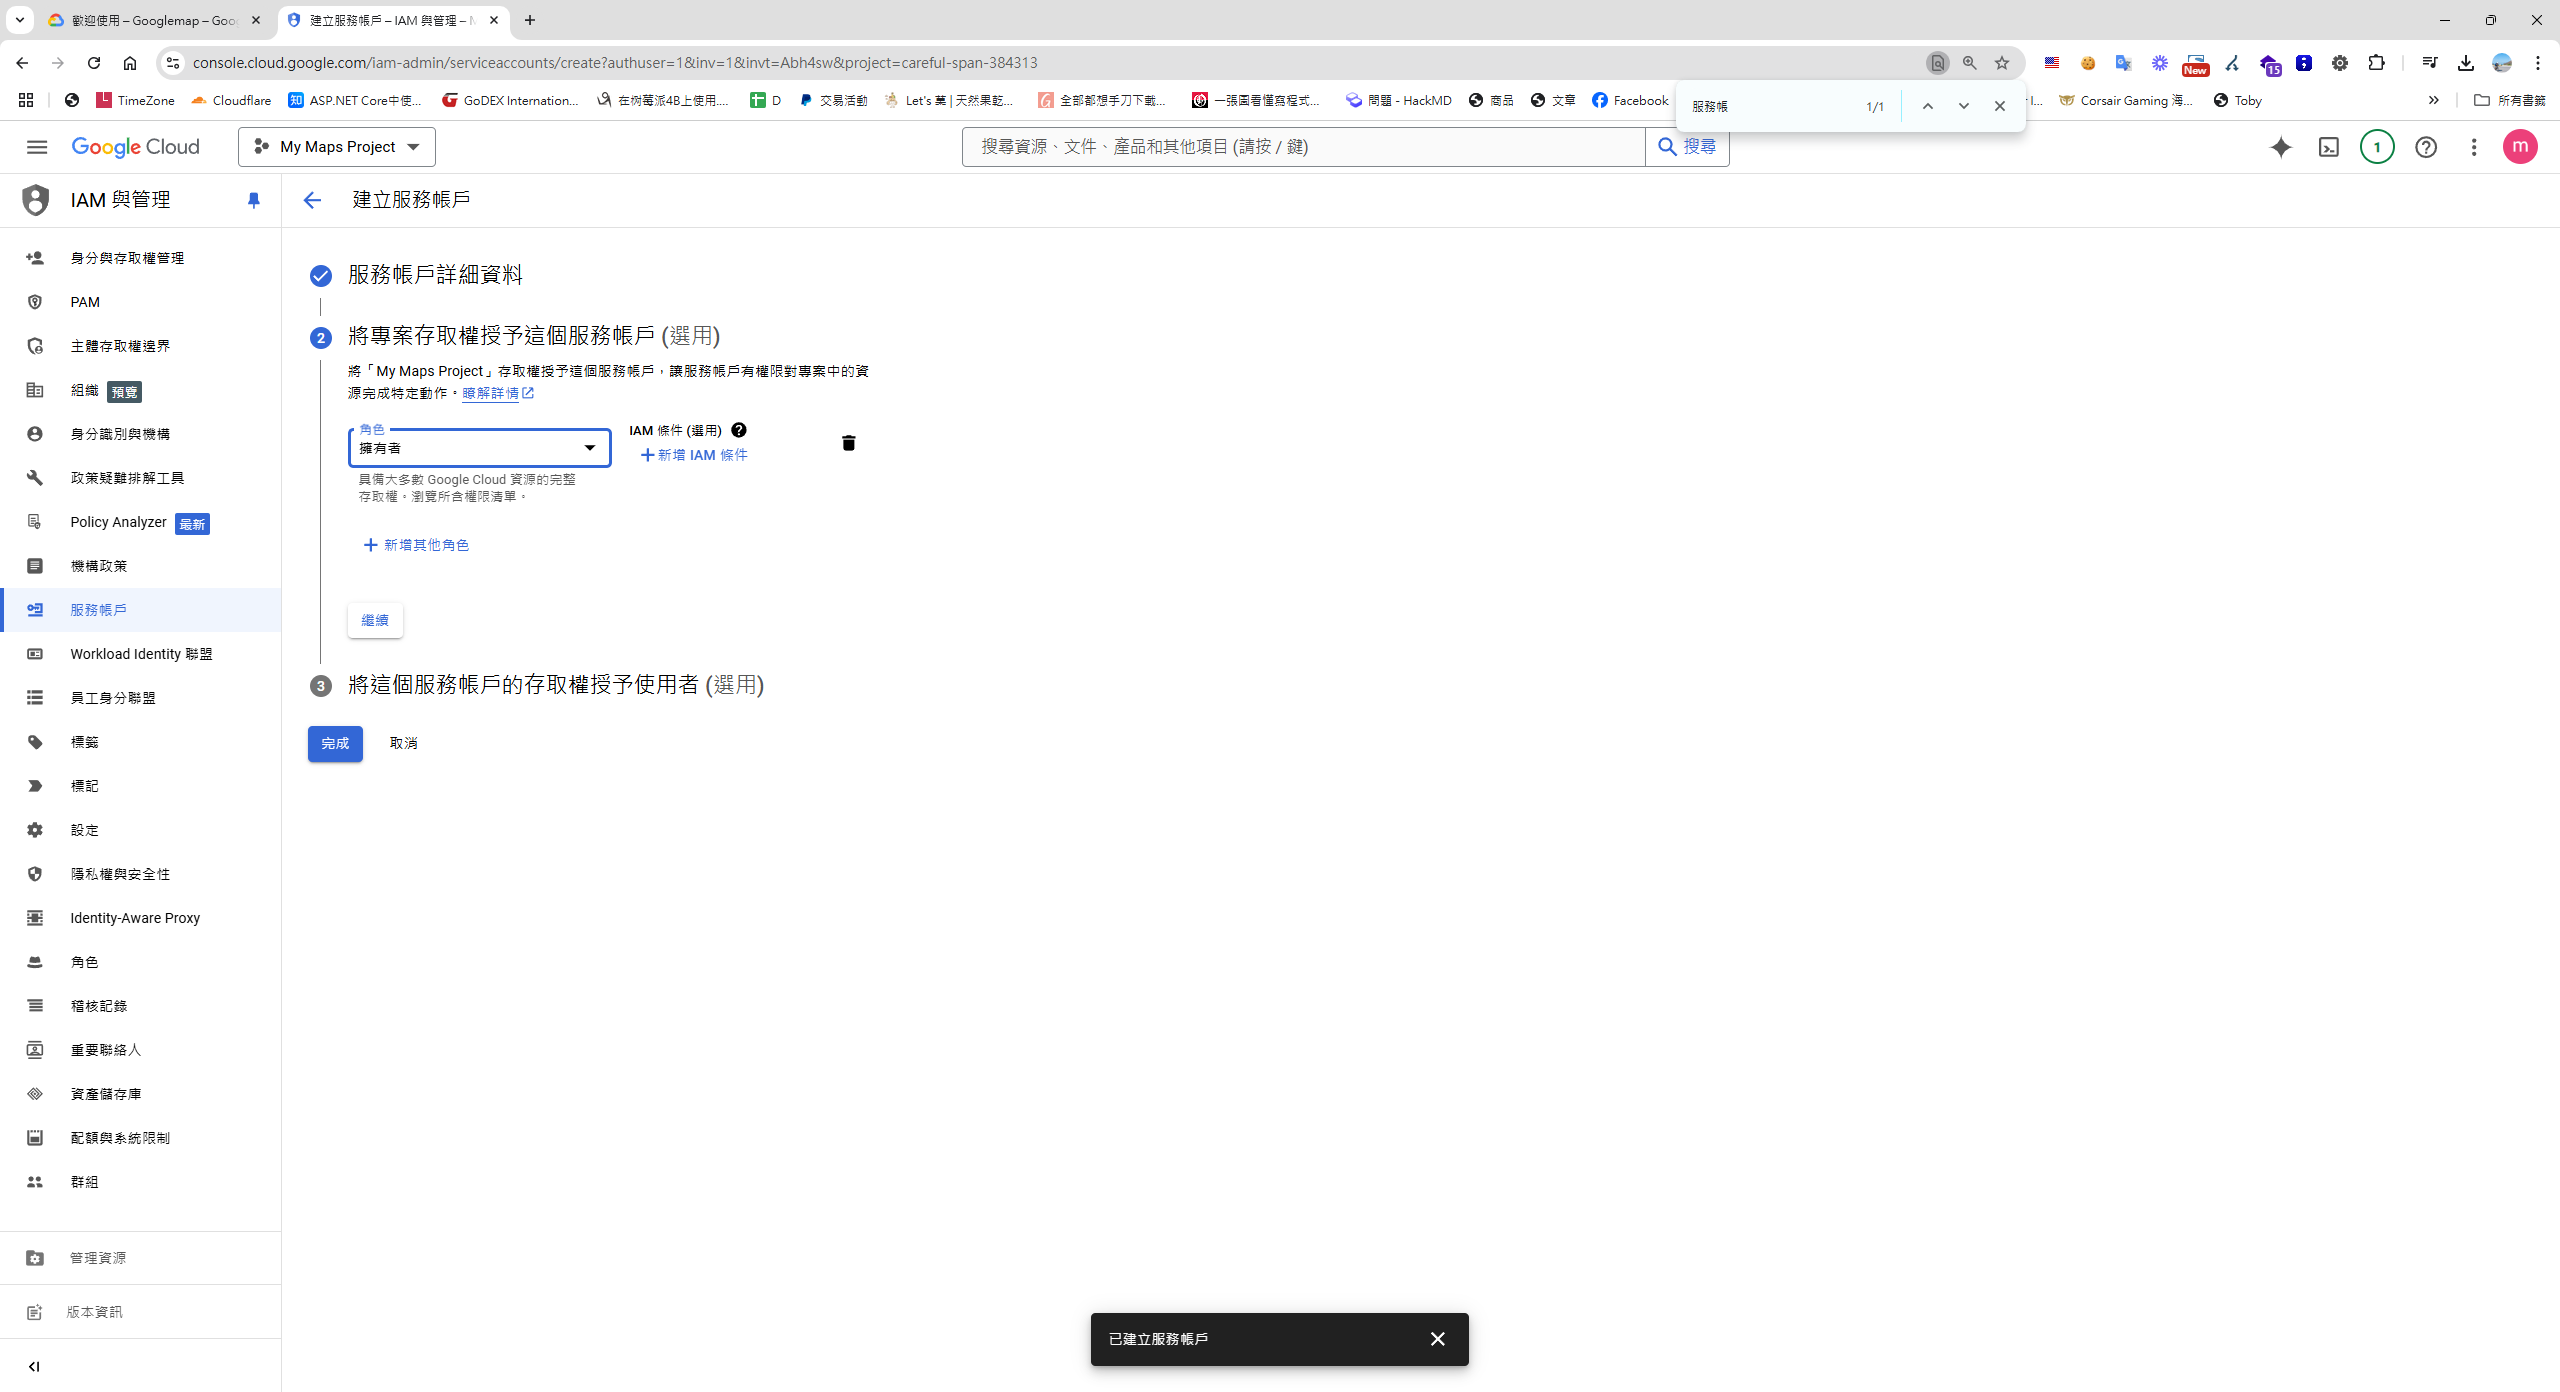
give the owner permission -
Download the service account key:
- In the Service accounts > select your service account > KEYS tab:
- Click ADD KEY, select JSON format, and download the key.
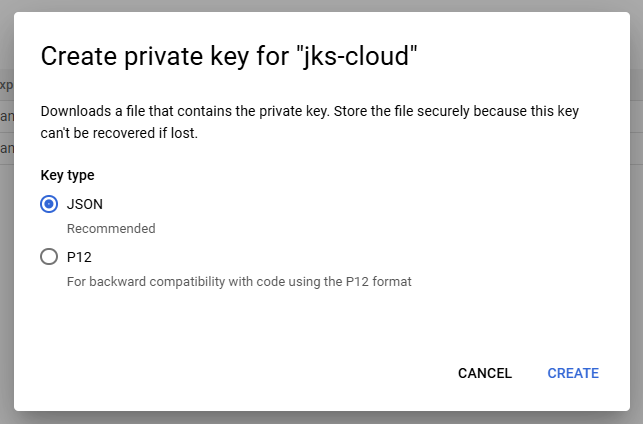
add-key - In the Service accounts > select your service account > KEYS tab:
Jenkins Configuration
-
Install necessary plugins:
- In the Jenkins Dashboard, navigate to Manage Jenkins > Plugin Manager and install the following plugins:
- Google Kubernetes Engine Plugin
- Kubernetes CLI Plugin
- Pipeline: AWS Steps Plugin
- In the Jenkins Dashboard, navigate to Manage Jenkins > Plugin Manager and install the following plugins:
-
Add credentials:
- Upload the downloaded GCP key to Jenkins:
- Navigate to Dashboard > Manage Jenkins > Credentials > System > Global credentials (unrestricted).
- Click Add Credentials, select the Secret file type, and upload the JSON key file.
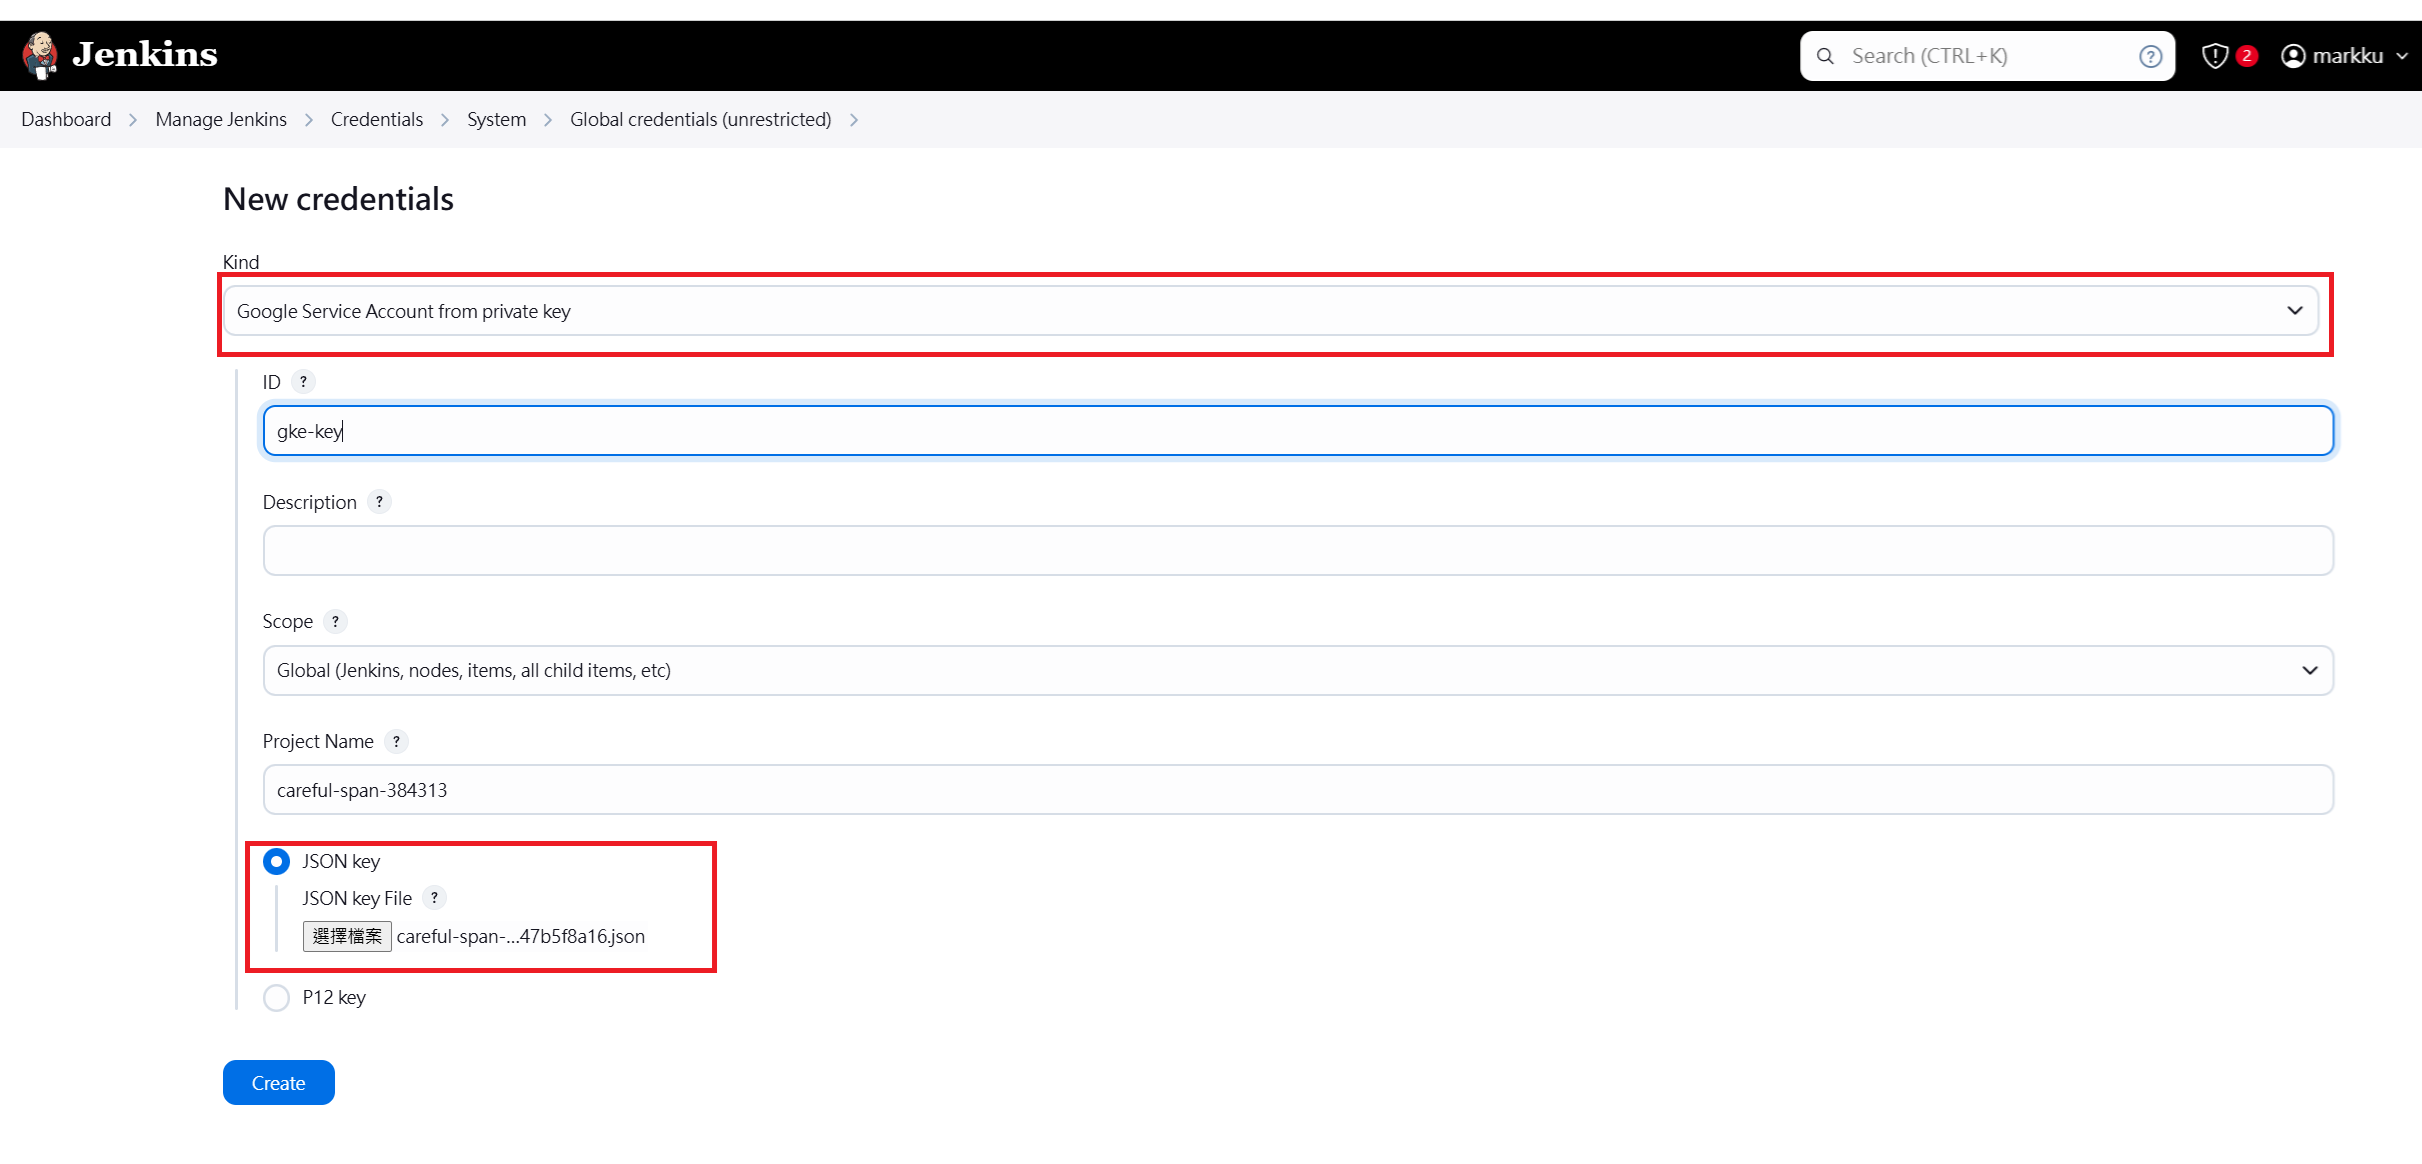
set up service account key Note: You need to upload two keys here, one for each of the following purposes:
- SSH Username with private key (gke-ssh): Used by
withCredentials. - Google Service Account from private key (gke-gsa): Used by the Kubernetes Engine Builder.
- Upload the downloaded GCP key to Jenkins:
Create a Jenkins Pipeline
-
Create a new Pipeline:
- Navigate to Dashboard > New Item.
- Select Pipeline and name it
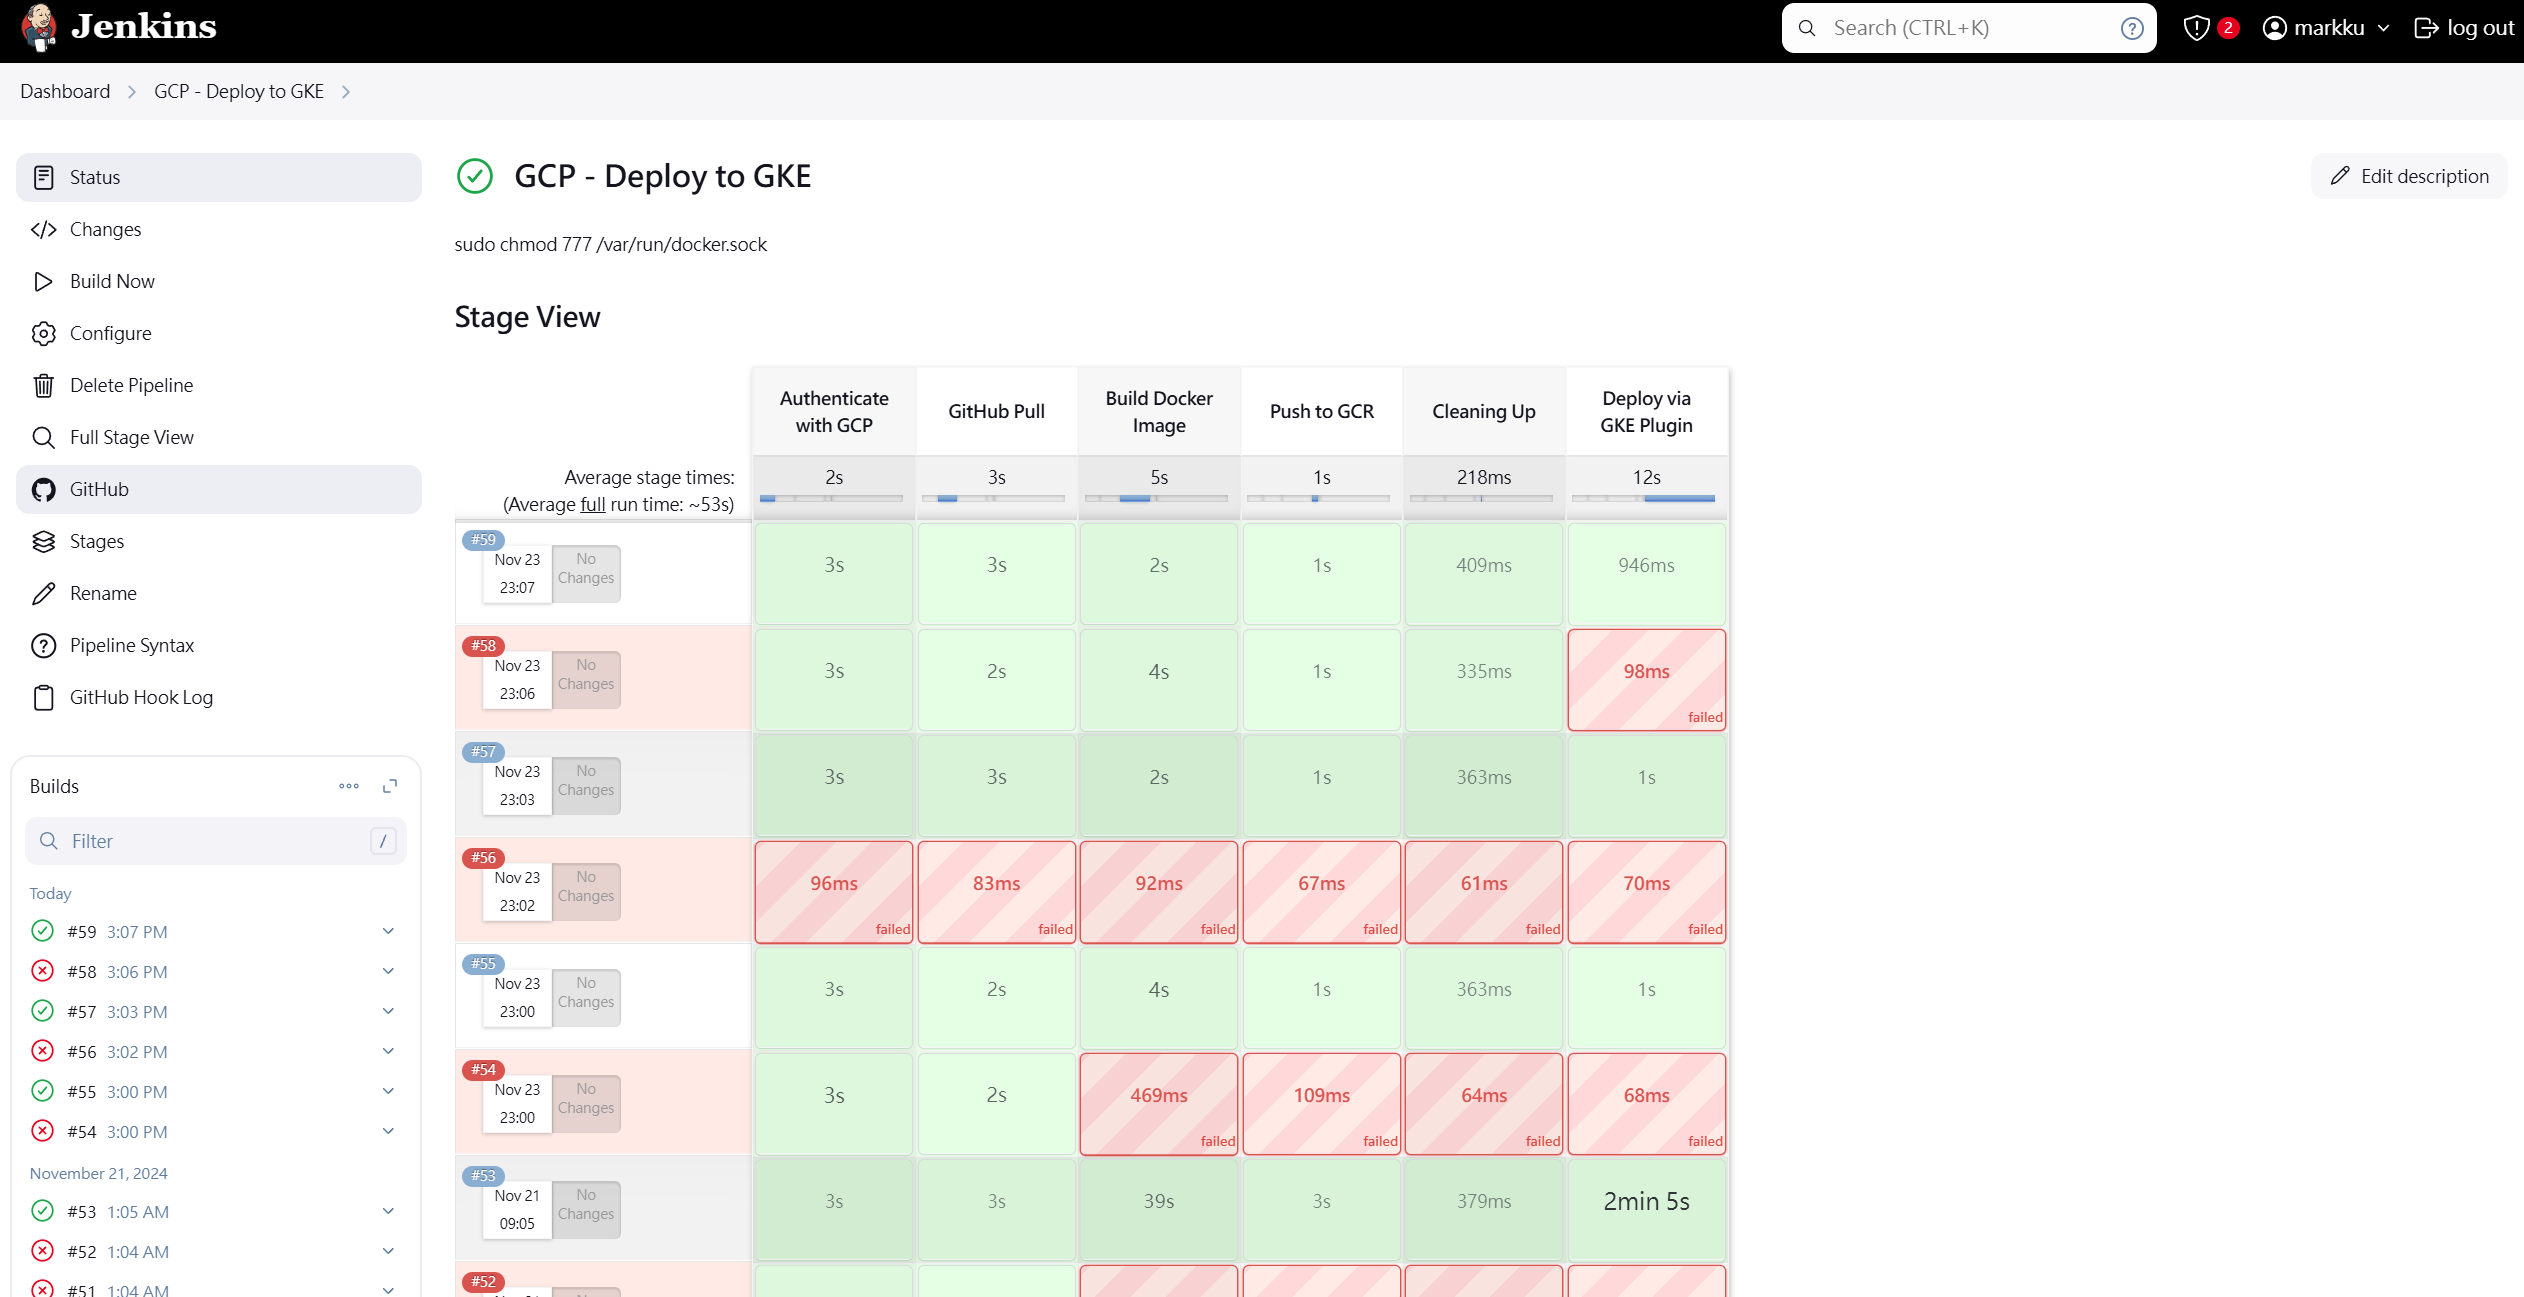
GCP - Deploy to GKE.
-
Write the Pipeline script: Here is an example script:
properties([
    pipelineTriggers([githubPush()])
])

pipeline {
    agent any

    environment {
        TAG = ':latest'
        IMAGE_SHORT_NAME = 'k8s-next-ec'
        IMAGE_NAME = "${IMAGE_SHORT_NAME}${TAG}"
        CONTAINER_NAME = "${IMAGE_SHORT_NAME}-1"
        DOCKERFILE_PATH = './Dockerfile'
        REGISTRY_URL = 'asia-east1-docker.pkg.dev/careful-span-384313/my-registry'
        REGISTRY = "${REGISTRY_URL}/${IMAGE_SHORT_NAME}"
        GCP_PROJECT_ID = 'careful-span-384313'
        GIT_REPO_URL = '[email protected]:markku636/ec.git'
        GIT_BRANCH = 'main'
        GKE_CLUSTER_NAME = 'blog-autopilot-cluster'
        GKE_LOCATION = 'asia-east1'
        DEPLOYMENT_MANIFEST = './gc-next-js-deployment.yaml'
    }

    stages {
        stage('Authenticate with GCP') {
            steps {
                withCredentials([file(credentialsId: 'gke-ssh', variable: 'GCLOUD_CREDS')]) {
                    sh '''
                        gcloud version
                        gcloud auth activate-service-account --key-file="$GCLOUD_CREDS"
                        gcloud config set project $GCP_PROJECT_ID
                        gcloud auth configure-docker asia-east1-docker.pkg.dev
                    '''
                }
            }
        }

        stage("GitHub Pull") {
            steps {
                git branch: "${GIT_BRANCH}",
                credentialsId: 'e85233ad-a3c5-448b-a6ea-9f53e4f9b3f1',
                url: "${GIT_REPO_URL}"
            }
        }

        stage('Build Docker Image') {
            steps {
                sh "docker build -t ${IMAGE_NAME} -f ${DOCKERFILE_PATH} ."
            }
        }

        stage('Push to GCR') {
            steps {
                sh "docker tag ${IMAGE_NAME} ${REGISTRY}${TAG}"
                sh "docker push ${REGISTRY}${TAG}"
            }
        }

        stage("Cleaning Up") {
            steps {
                sh "docker rmi --force ${REGISTRY}${TAG}"
            }
        }

        stage('Deploy via GKE Plugin') {
            steps {
                step([
                    $class: 'KubernetesEngineBuilder',
                    projectId: "${GCP_PROJECT_ID}",
                    clusterName: "${GKE_CLUSTER_NAME}",
                    location: "${GKE_LOCATION}",
                    manifestPattern: "${DEPLOYMENT_MANIFEST}",
                    credentialsId: 'gke-gsa',
                    verifyDeployments: true
                ])
                echo "Deployment Finished ..."
            }
        }
    }
}
Addendum: Deployment YAML Configuration in the Project Folder
Below is the sample content for ./gc-next-js-deployment.yaml:
apiVersion: apps/v1
kind: Deployment
metadata:
  name: k8s-next-ec
  labels:
    app: k8s-next-ec
spec:
  selector:
    matchLabels:
      app: k8s-next-ec
      tier: web
  template:
    metadata:
      labels:
        app: k8s-next-ec
        tier: web
    spec:
      containers:
      - name: k8s-next-ec-app
        image: asia-east1-docker.pkg.dev/careful-span-384313/my-registry/k8s-next-ec:latest
        imagePullPolicy: Always
        ports:
        - containerPort: 3000
---

apiVersion: v1
kind: Service
metadata:
  name: k8s-next-ec
  labels:
    app: k8s-next-ec
spec:
  selector:
    app: k8s-next-ec
  type: LoadBalancer
  ports:
    - name: http
      protocol: TCP
      port: 80
      targetPort: 3000
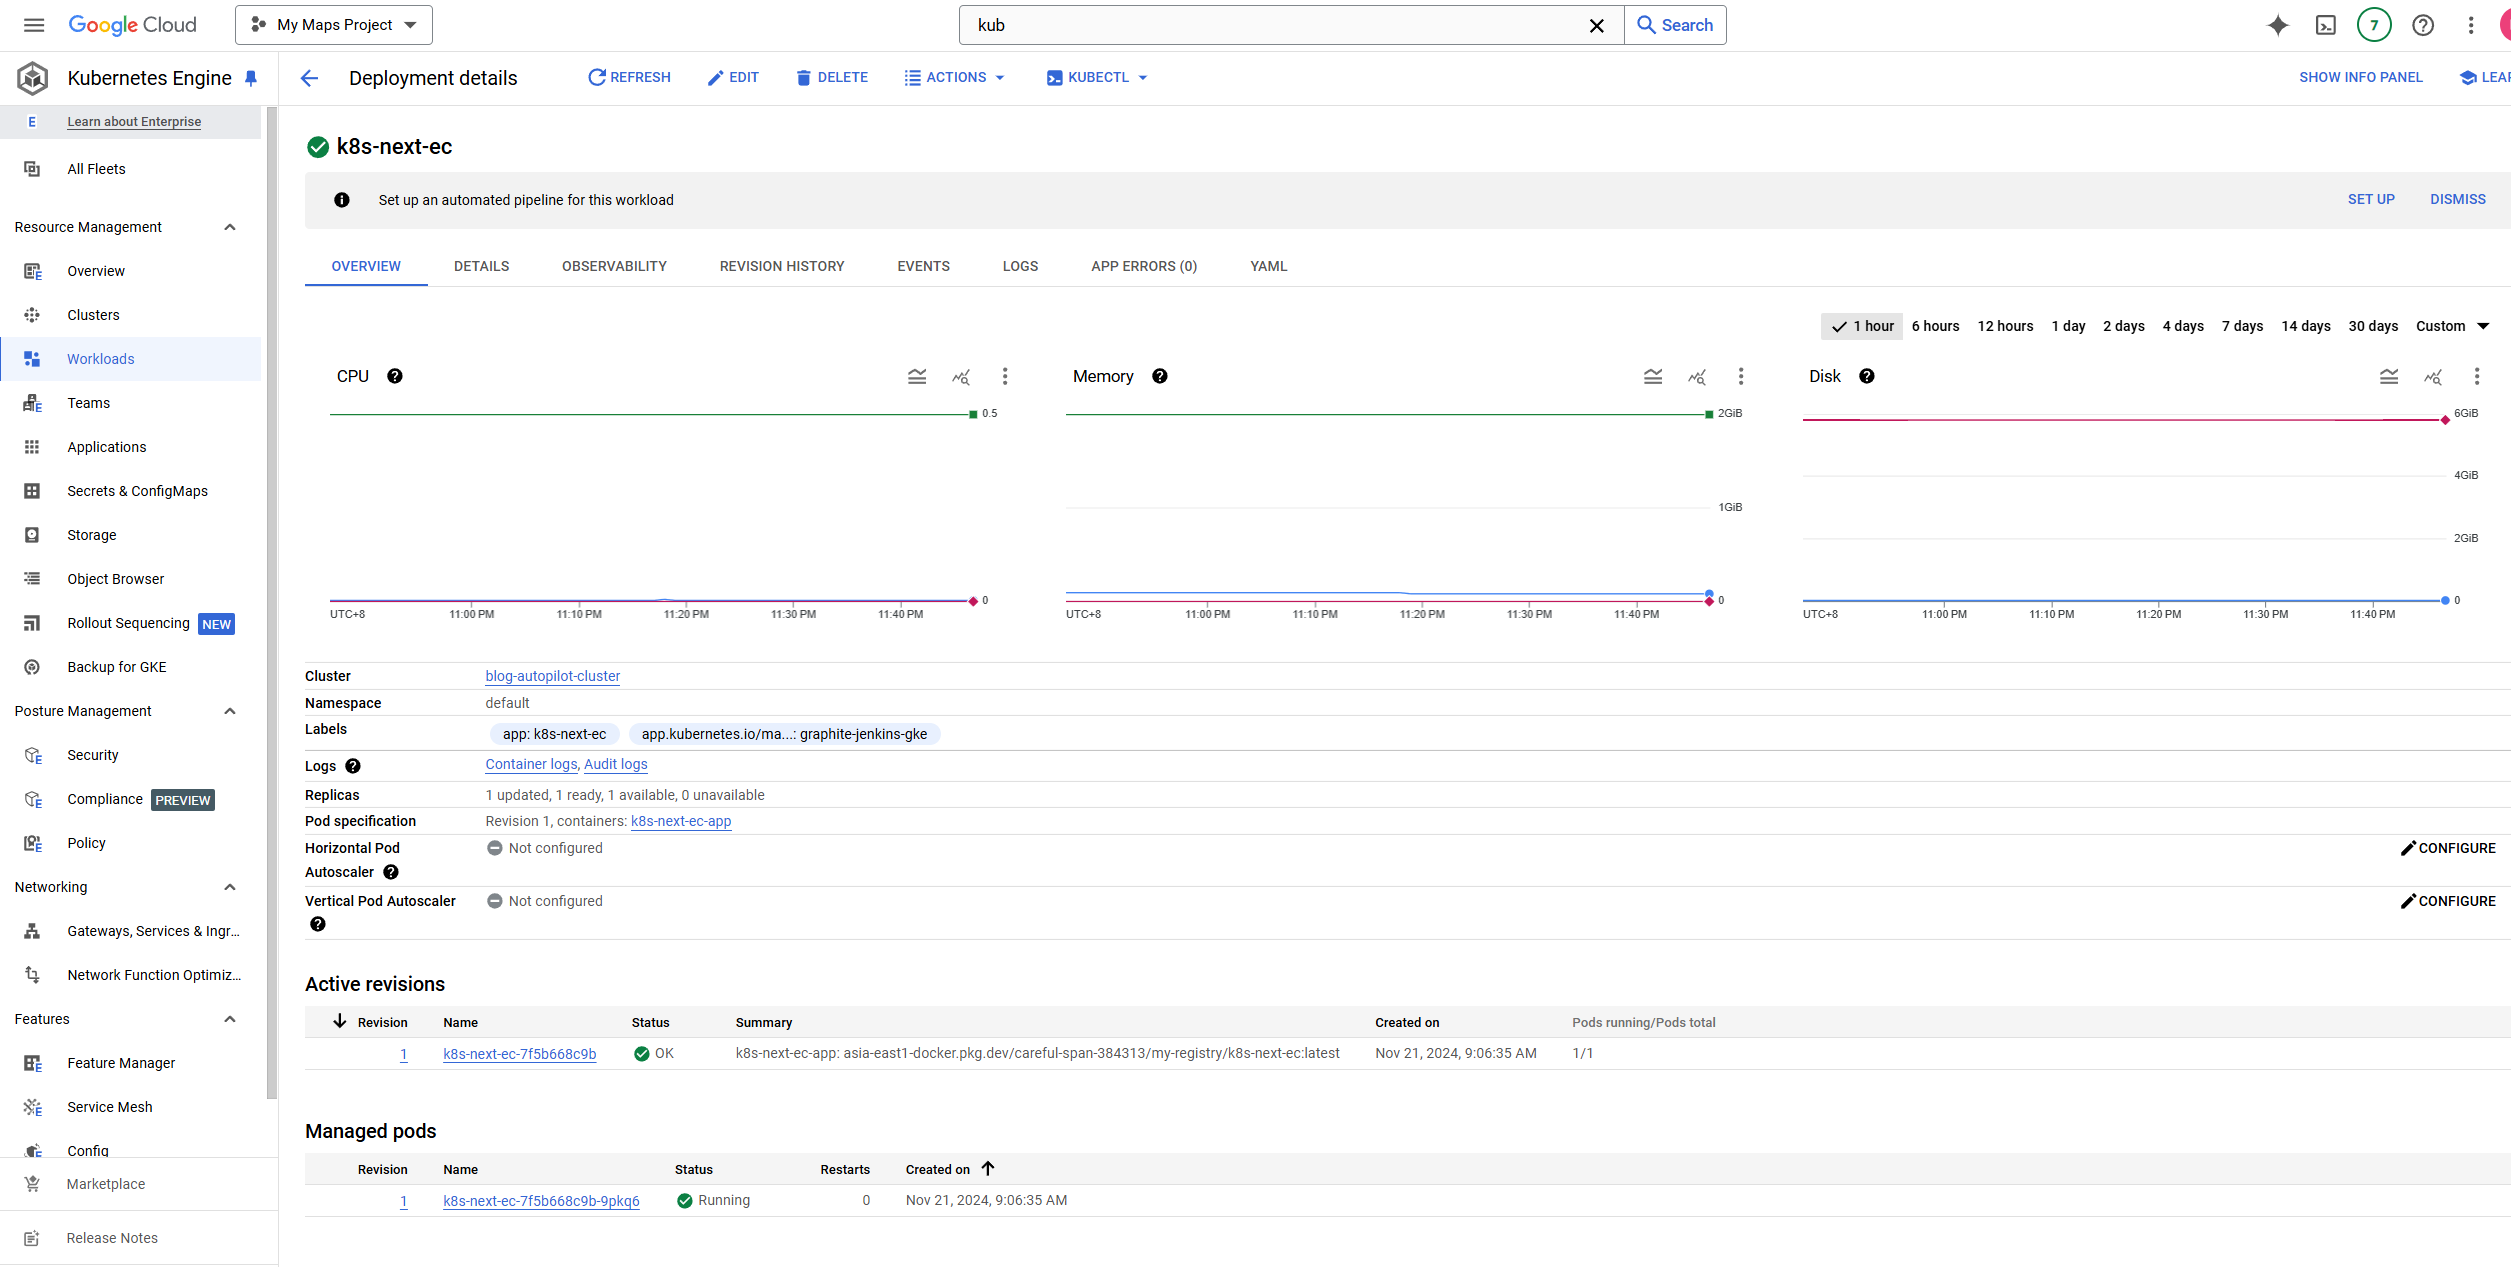
Final Result


Comments