
Solving the Problem
A previous article introduced how to use a free Frps reverse proxy server to expose an internal network website. However, because the free service is very unstable, my blog and demo sites often went down. Later, a netizen recommended Google's 90-day free trial, which includes a $300 credit. This article will show you how to set up your own NAT traversal server (FRPS) using GCP (Google Cloud).
First, sign up for a GCP account and link your credit card
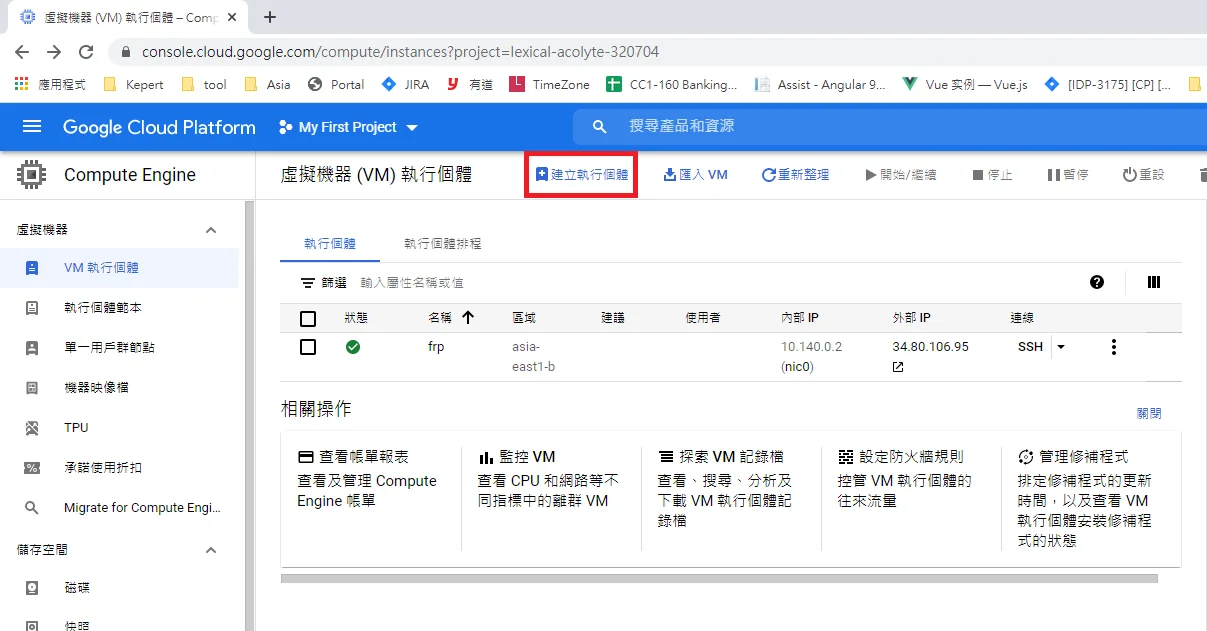
Log in to the GCP console > VM instances
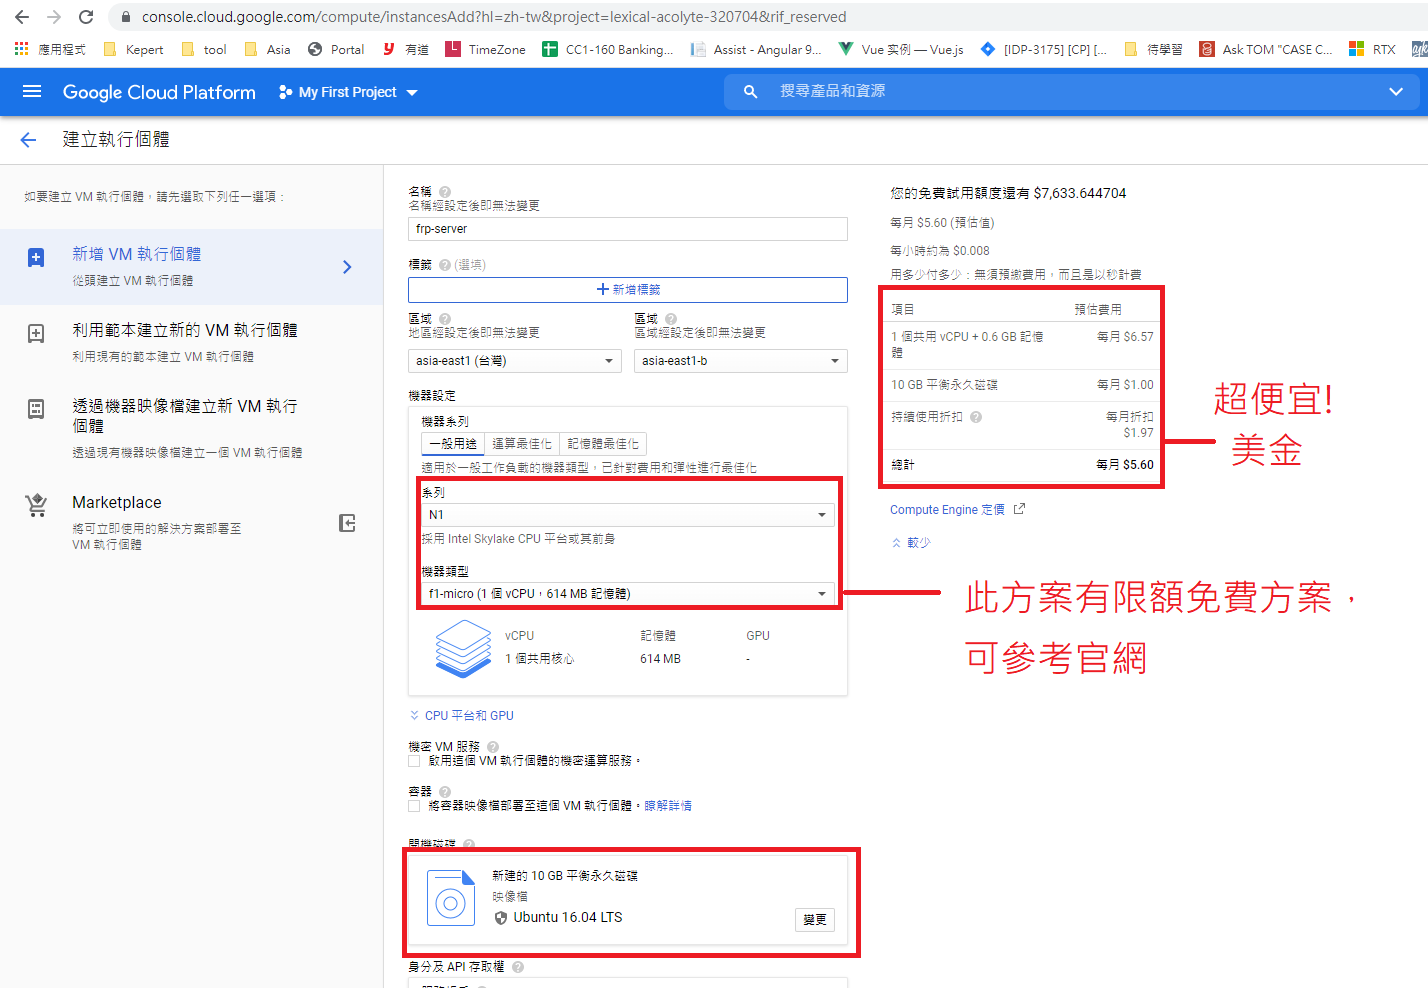
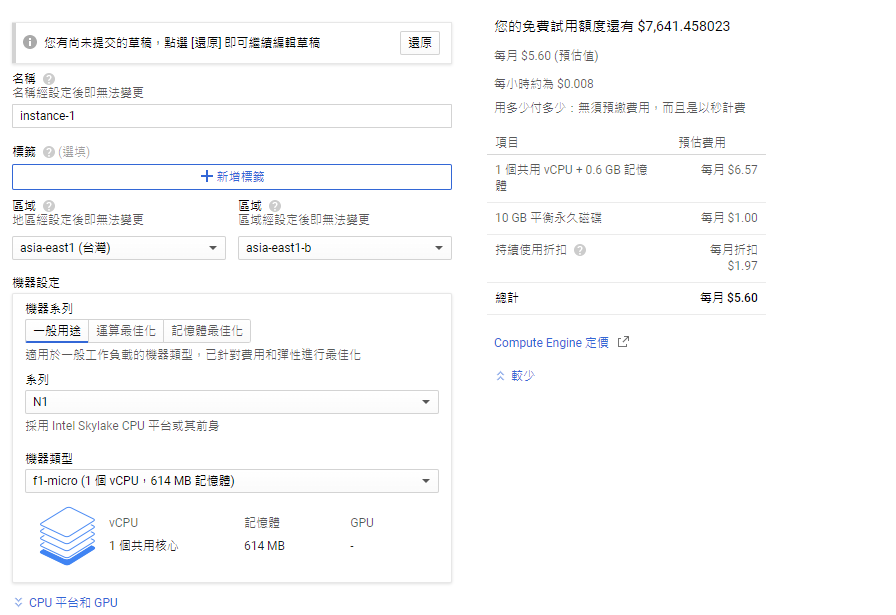
Select Taiwan as the region and Ubuntu as the operating system. Since I only need a reverse proxy and don't require complex computations, I'll choose the f1-micro instance. The estimated monthly cost is only about 15X NTD, which is quite affordable.
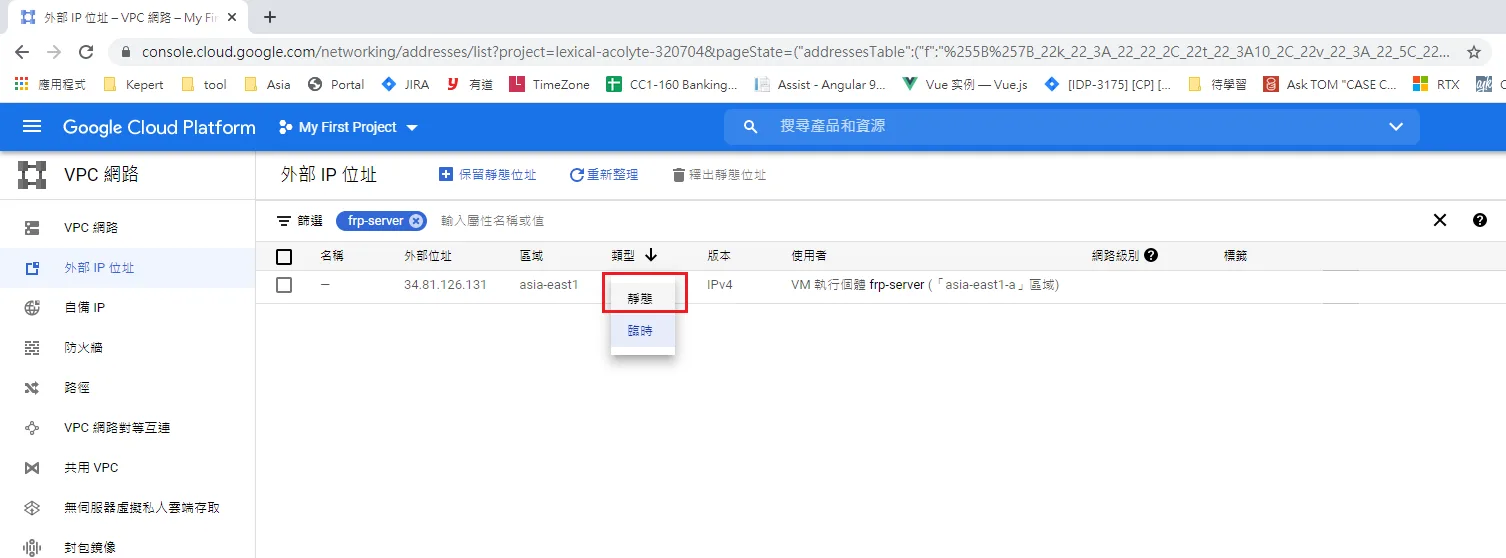
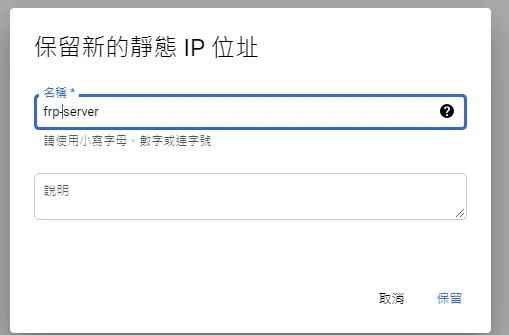
Once the instance is created, find "VPC network" in the menu and change the instance's IP to static. This will prevent the IP address from changing.
Go back to VM instances and open an SSH connection to the newly created instance.
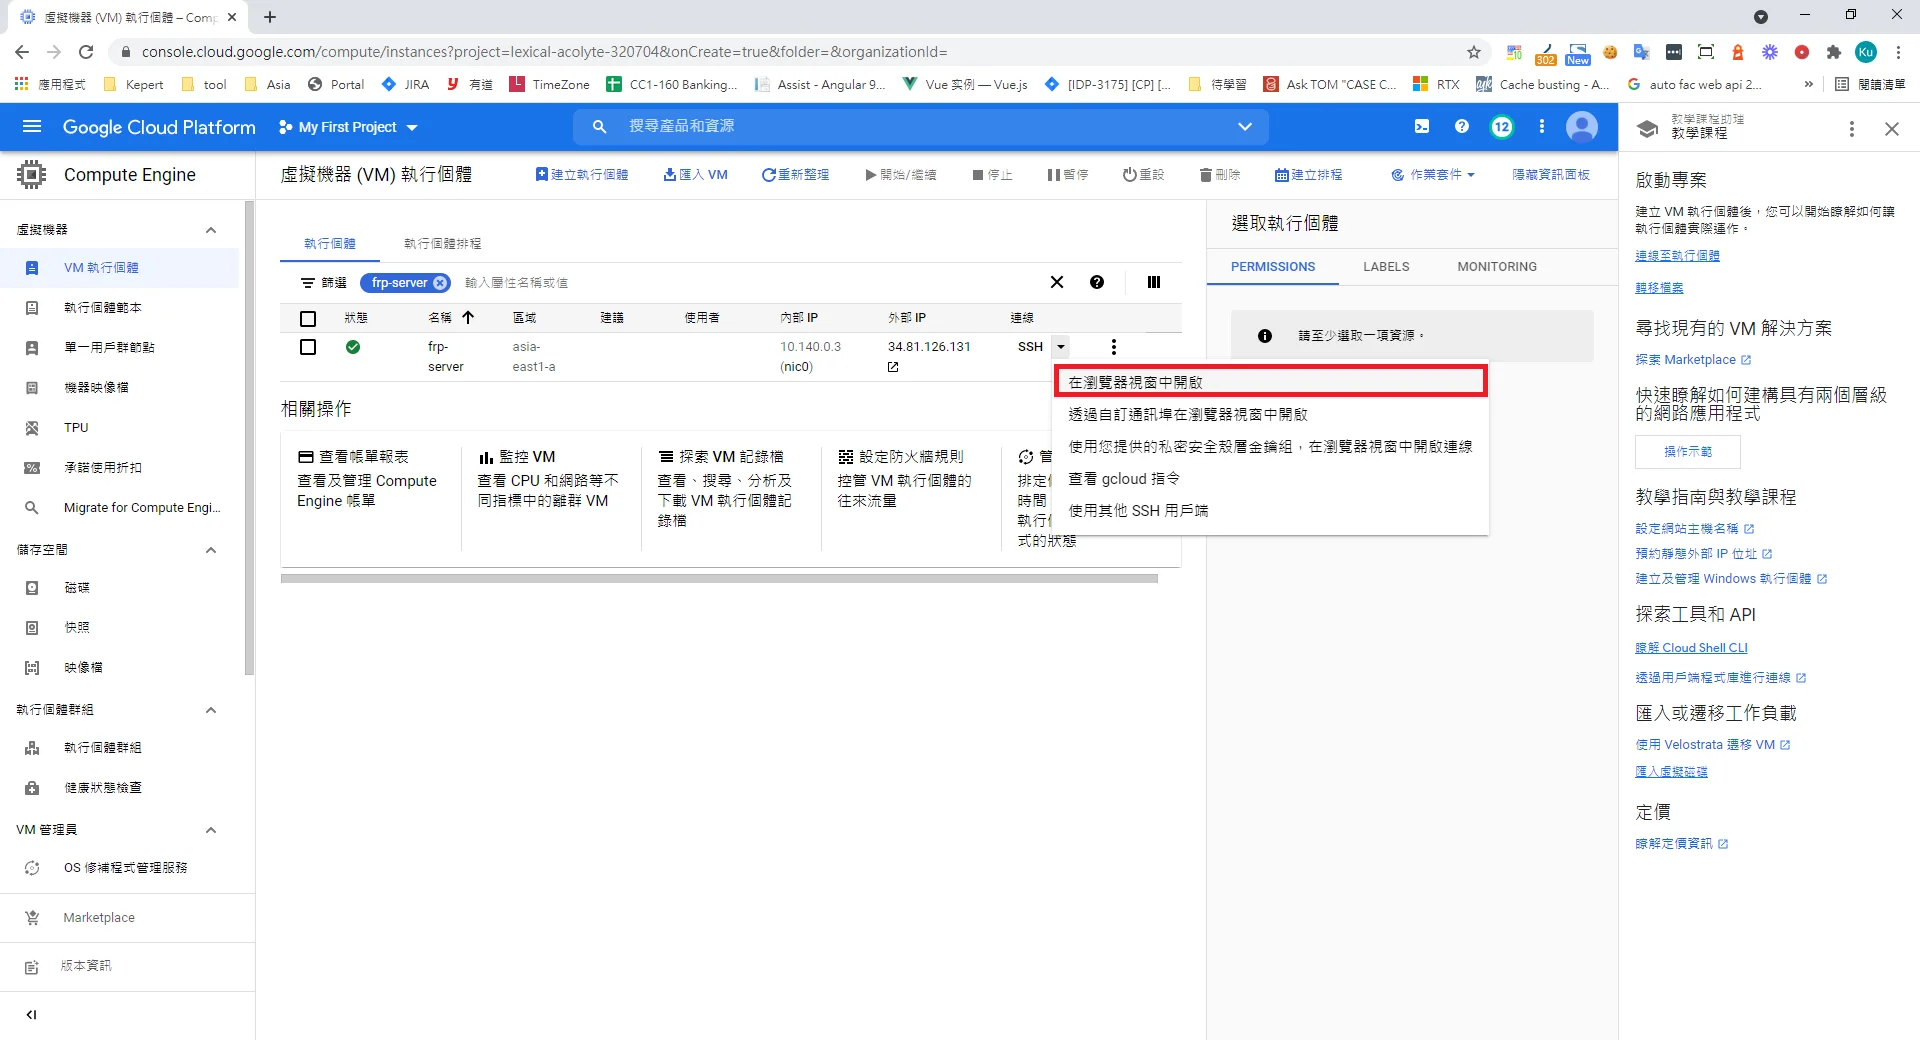
A browser-based SSH session will open. Enter the following Linux commands in order.
Update the system
sudo apt-get update
sudo apt-get upgrade
FRP is written in Go. Most Linux distributions come with Go pre-installed, but if yours doesn't, you can run the following command first:
sudo apt-get install bison ed gawk gcc libc6-dev make golang-go vim
Next, you need to go to the FRP GitHub repository to find the latest version of frps and download it.
wget https://github.com/fatedier/frp/releases/download/v0.62.1/frp_0.62.1_linux_amd64.tar.gz
Unzip the file and rename the folder to frp.
tar -zxvf frp_0.62.1_linux_amd64.tar.gz
sudo mkdir /var/frps
sudo mv frp_0.62.1_linux_amd64/* /var/frps/
cd /var/frps
Edit the frps configuration file (sudo vim frps.toml).
# frps.toml
bindAddr = "0.0.0.0"
bindPort = 7000
vhostHttpPort = 80
vhostHttpsPort = 443
webServer = { port = 7500, user = "admin", password = "your password", addr="0.0.0.0" }
auth.method = "token"
auth.token = "your token"
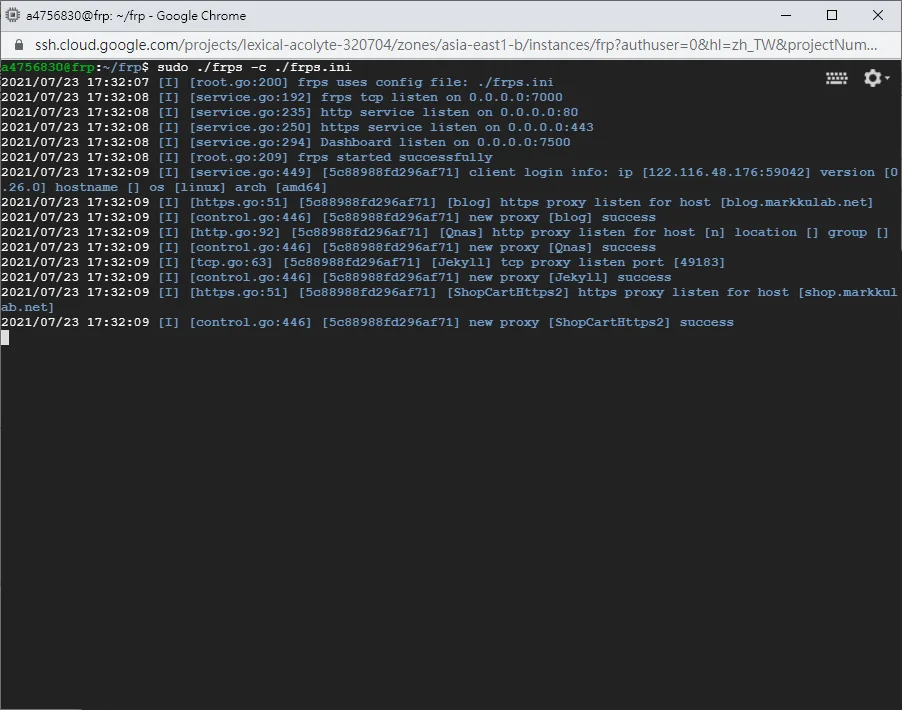
Run it.
sudo ./frps -c ./frps.toml
Configure the domain in your DNS host
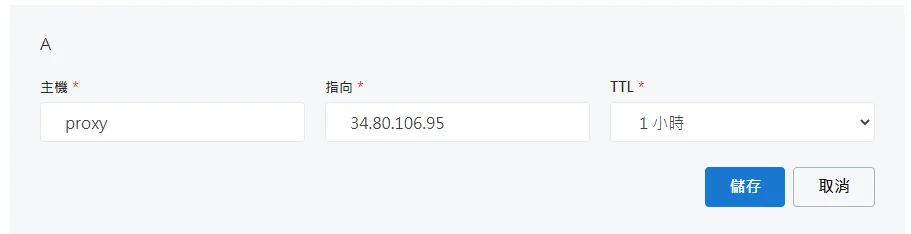
First, create a DNS A record to point proxy.markkulab.net to the external IP of the FRPS server.
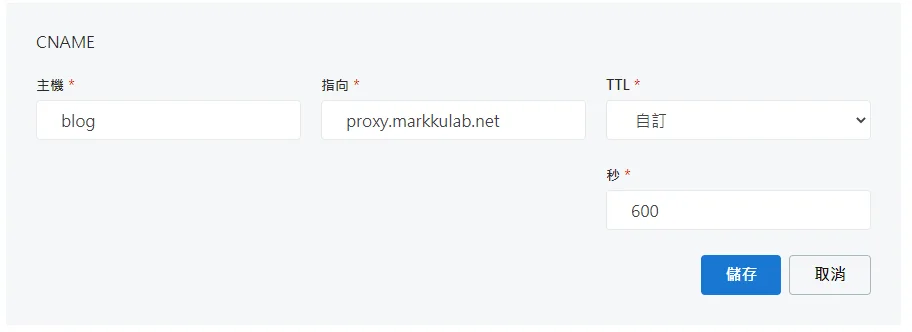
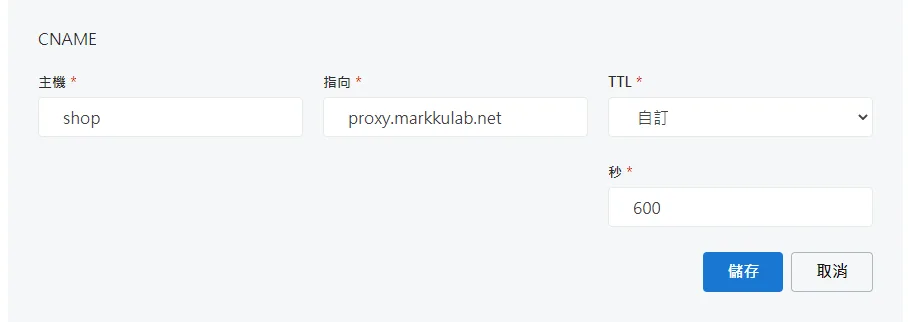
 Next, create a CNAME record. This way, when a visitor accesses
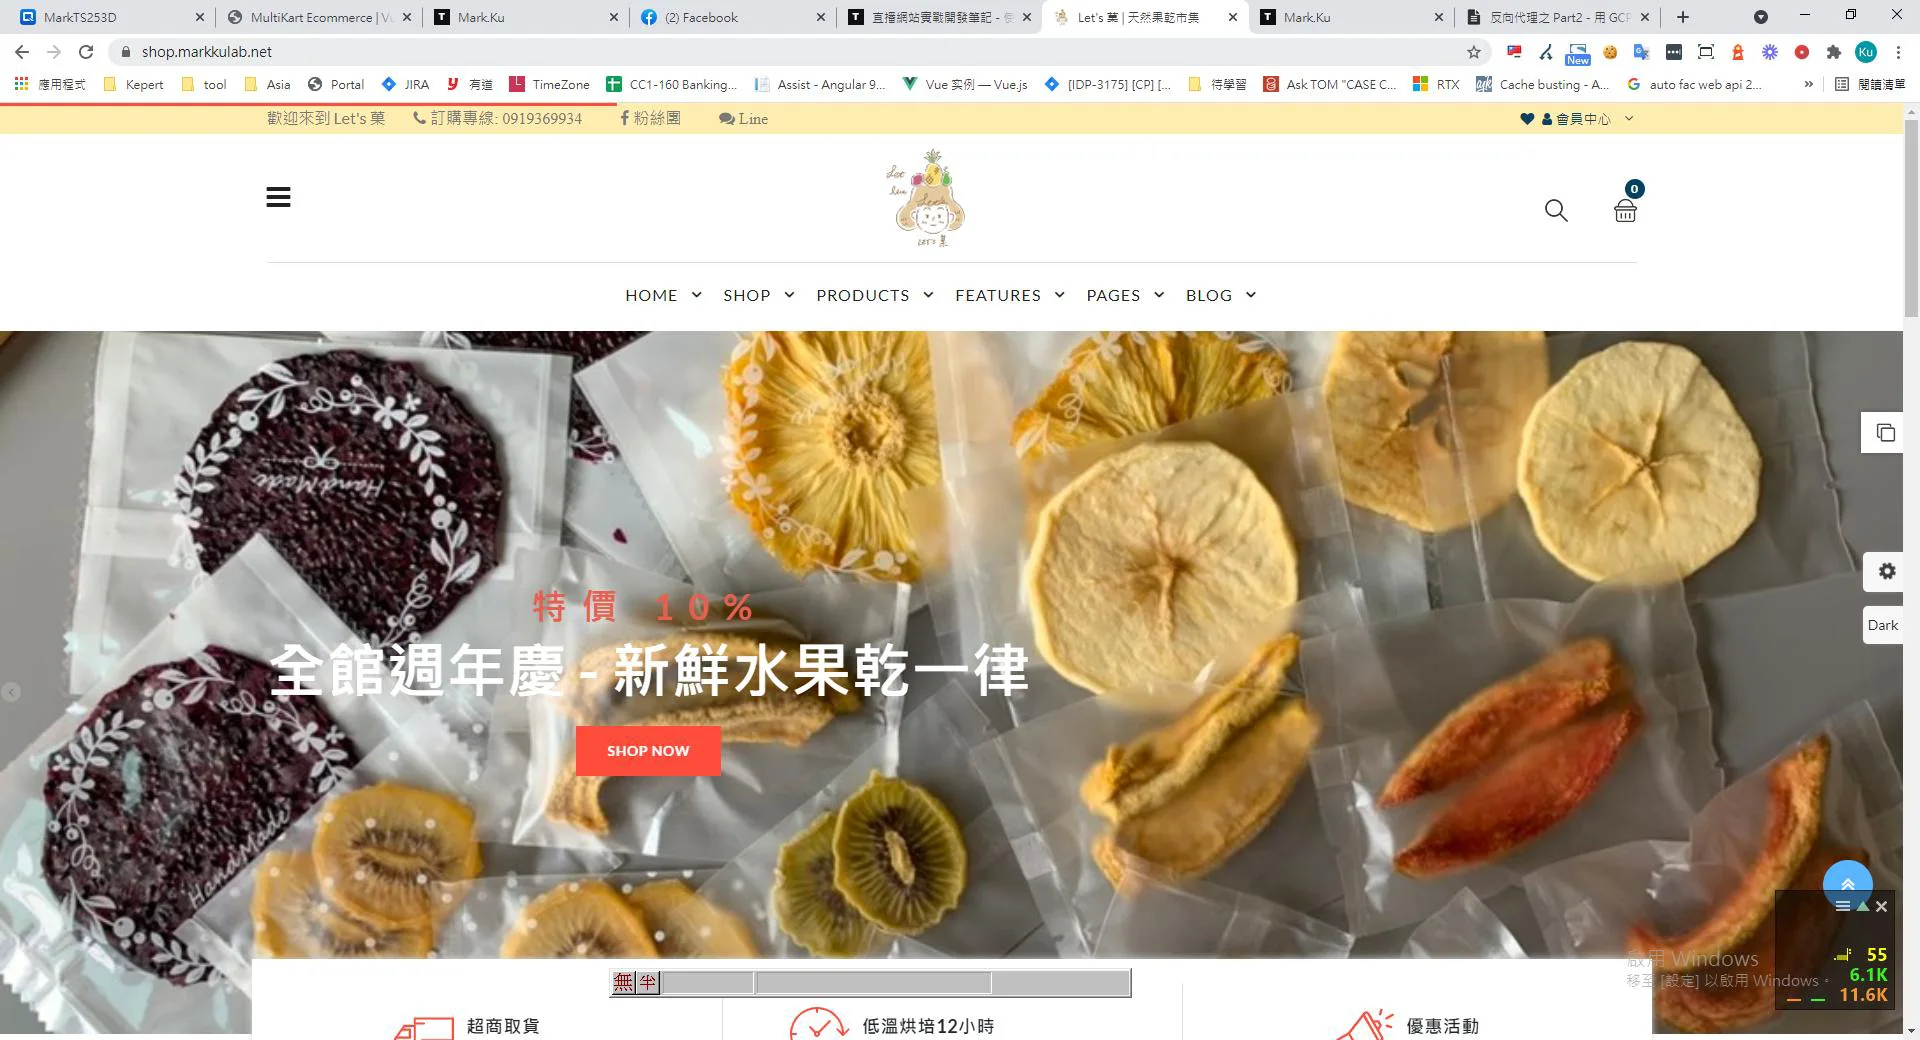
 blog.markkulab.net, frps will point them to the website mapped by the specified client.
frpc.toml Configuration
serverAddr = "35.223.172.254"
serverPort = 7000
auth.token = "your token"
transport.poolCount = 10000

[[proxies]]
name = "test-tcp"
type = "tcp"
localIP = "127.0.0.1"
localPort = 22
remotePort = 6000

[[proxies]]
name = "ShopCarthttps1"
type = "http"
customDomains = ["www.letgo.com.tw"]
localPort = 8896

[[proxies]]
name = "linebot"
type = "https"
customDomains = ["linebot.letgo.com.tw"]
[proxies.plugin]
type = "https2http"
localAddr = "127.0.0.1:48002"
crtPath = "/Public/!.letgo.com.tw/fullchain.crt"
keyPath = "/Public/!.letgo.com.tw/cert.key"
hostHeaderRewrite = "linebot.letgo.com.tw"
requestHeaders.set.x-from-where = "frp"
If you need it to start automatically on reboot, you need to register it as a service.
Add a configuration file in /lib/systemd/system/
sudo vim /lib/systemd/system/frps.service
Create the auto-start configuration file.
[Unit]
Description=FRP Server
After=network.target
Wants=network.target

[Service]
Restart=on-failure
RestartSec=5
ExecStart=/var/frps/frps -c /var/frps/frps.toml

[Install]
WantedBy=multi-user.target
Start the service
sudo systemctl daemon-reload  // reload service
sudo systemctl stop frps.service //停止 FRP Server 服務
sudo systemctl start frps.service //啟動 FRP Server 服務
sudo systemctl restart frps.service //重啟 FRP Server 服務
sudo systemctl disable frps.service //開機時不要啟動 FRP Server 服務
sudo systemctl enable frps.service //開機時自動啟動 FRP Server 服務
sudo systemctl status frps.service //查看FRP Server 狀態
Test if the firewall is disabled
Test if the firewall is disabled on Windows.
telnet 35.223.172.254 7000
Test if the firewall is enabled on Linux.
nc -zv 127.0.0.1 7000
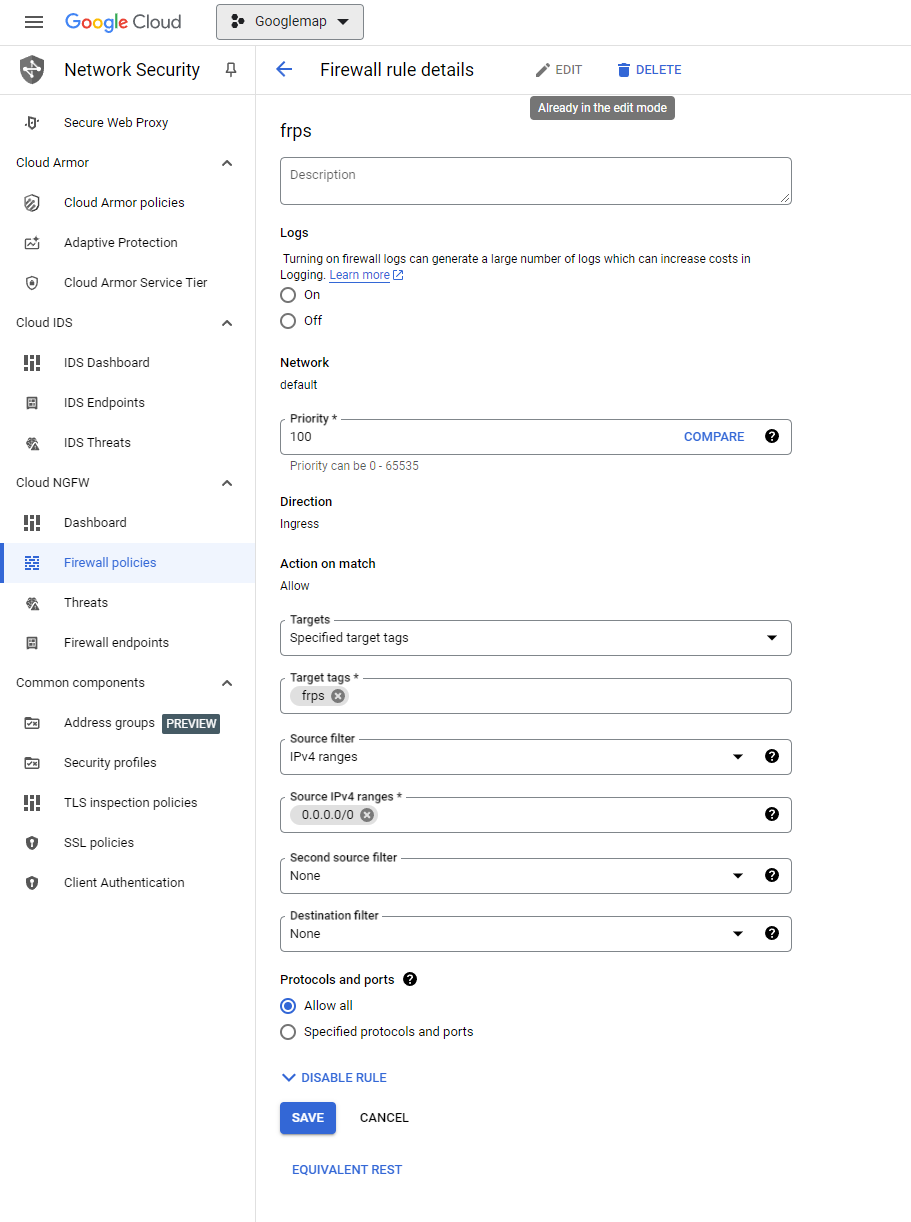
Remember to configure the GCP firewall, otherwise it won't be accessible from the public internet. Go back to the instance details and modify the "Network tags" for the changes to take effect.
Next, find an Ubuntu machine to install frpc
Create a directory
sudo mkdir -p /etc/frp
Download FRP 0.62.1 and unzip it
cd /etc/frp
sudo wget https://github.com/fatedier/frp/releases/download/v0.62.1/frp_0.62.1_linux_amd64.tar.gz
sudo tar -zxvf frp_0.62.1_linux_amd64.tar.gz --strip-components=1
Create the frpc.toml configuration file
sudo vim /etc/frp/frpc.toml
frpc.toml
serverAddr = "your server"
serverPort = 7000
auth.token = "your token"
transport.poolCount = 10000

[[proxies]]
name = "jks"
type = "https"
customDomains = ["jks.letgo.com.tw"]
[proxies.plugin]
type = "https2http"
localAddr = "127.0.0.1:8080"
crtPath = "/var/frpc/letgo/fullchain.crt"
keyPath = "/var/frpc/letgo/cert.key"
hostHeaderRewrite = "jks.letgo.com.tw"
requestHeaders.set.x-from-where = "frp"
Test
/etc/frp/frpc -c /etc/frp/frpc.toml
Set up auto-start on boot
sudo vim /lib/systemd/system/frpc.service
Create the auto-start configuration file
[Unit]
Description=FRP Client
After=network.target
Wants=network.target

[Service]
Restart=on-failure
RestartSec=5
ExecStart=/etc/frp/frpc -c /etc/frp/frpc.toml

[Install]
WantedBy=multi-user.target
Start the service
sudo systemctl daemon-reload  // reload service
sudo systemctl stop frpc.service //停止 FRP Server 服務
sudo systemctl start frpc.service //啟動 FRP Server 服務
sudo systemctl restart frpc.service //重啟 FRP Server 服務
sudo systemctl disable frpc.service //開機時不要啟動 FRP Server 服務
sudo systemctl enable frpc.service //開機時自動啟動 FRP Server 服務
sudo systemctl status frpc.service //查看FRP Server 狀態
Finally
In the end, I created the VM in the Taiwan region. I've heard Google's data center is in Chiayi, and the network speed is super fast and very stable. For about 150 NTD per month, you get a reverse proxy and a static IP, which is actually a pretty good deal.
Addendum - GCP Free Tier
After the free trial period ends, we can still use certain products for free within specified usage limits. For example, the popular Google Compute Engine offers the following free conditions:
Only in the US regions "us-central1", "us-east1", and "us-west1".
- 1 f1-micro instance per month
- 30 GB of HDD storage per month
- 1 GB of network egress per month (from North America to all regions except China and Australia)
Even if you host an f1 instance in Taiwan, the cost is only about 5.6 * 27.82 (USD exchange rate) = ~155 NTD per month.


Comments