
Setting Up Your Own Jekyll Markdown Blog with QNAP NAS Container Station
The Problem
- Everyone on the team maintains their own Markdown documents. Over time, as the number of docs grows, there is no effective way to manage them.
- There are too many scattered HackMD links, and new team members spend extra time just organizing them.
- There is no way to categorize or search across documents.
Why Jekyll?
- Helps the team manage technical knowledge and documentation
- Has built-in pagination and search
- Tags allow effective categorization
- Uses Markdown syntax
- Free
- Stable and widely used (42.5k+ GitHub stars)
Drawbacks
- No built-in live online editor
Hardware
QNAP TS-253D running Container Station
Installation Steps
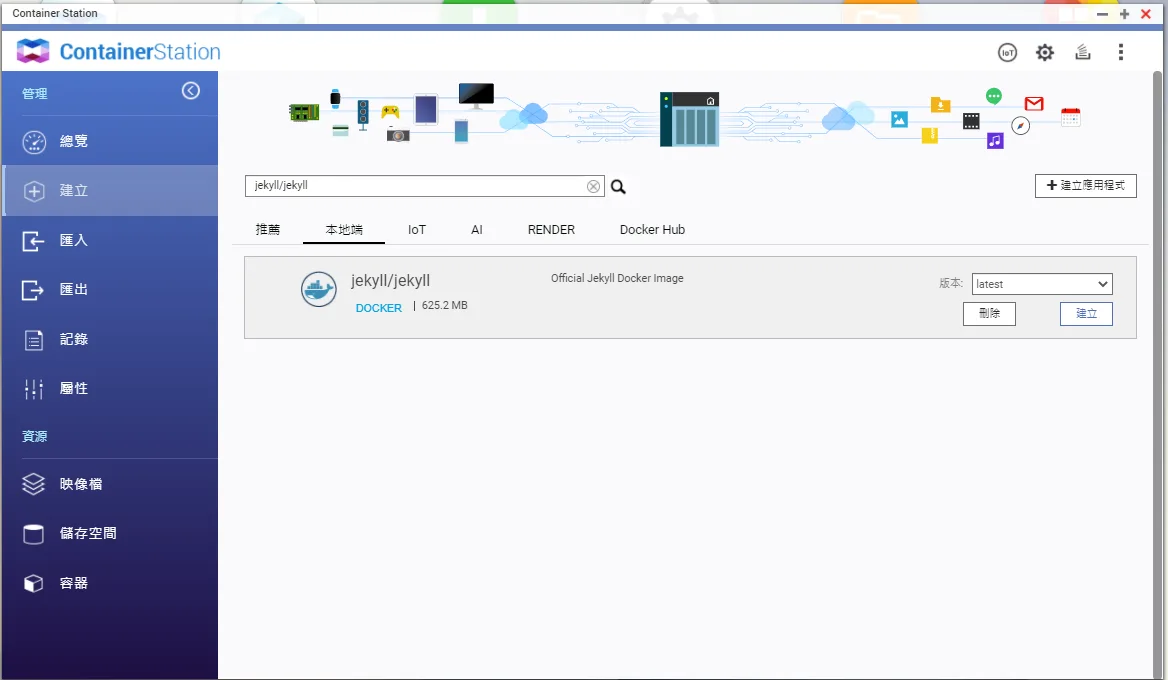
- Go to Create > Search, and pull the
jekyll/jekyllimage from Docker Hub.
-
Under Command, enter the startup command and set the Blog document directory:
jekyll serve --source /jekyll_data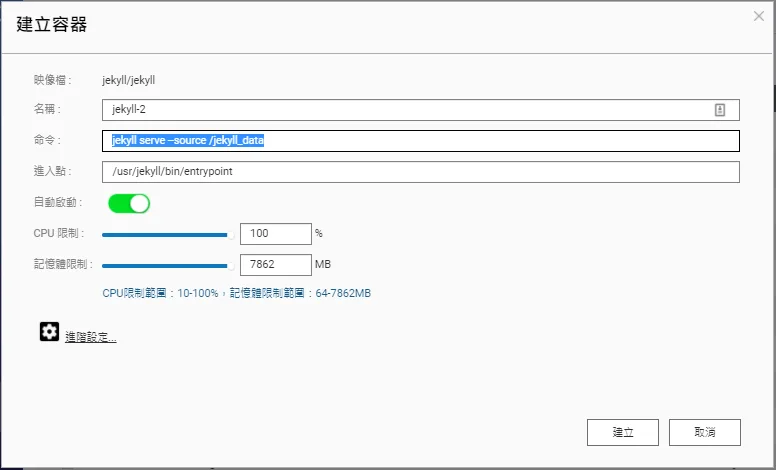
QNAP Container Station form setting Jekyll blog directory command -
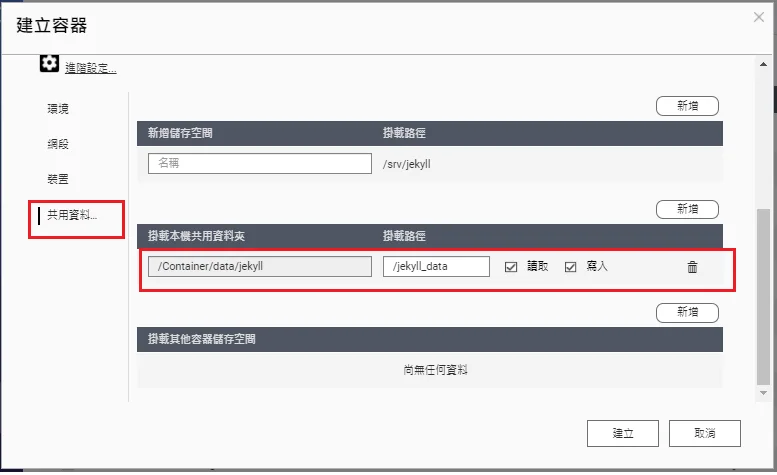
Mount a local disk path to the Blog document storage location.
-
After Docker starts, open the terminal and install the tagging gem required by the theme:
gem install jekyll-tagging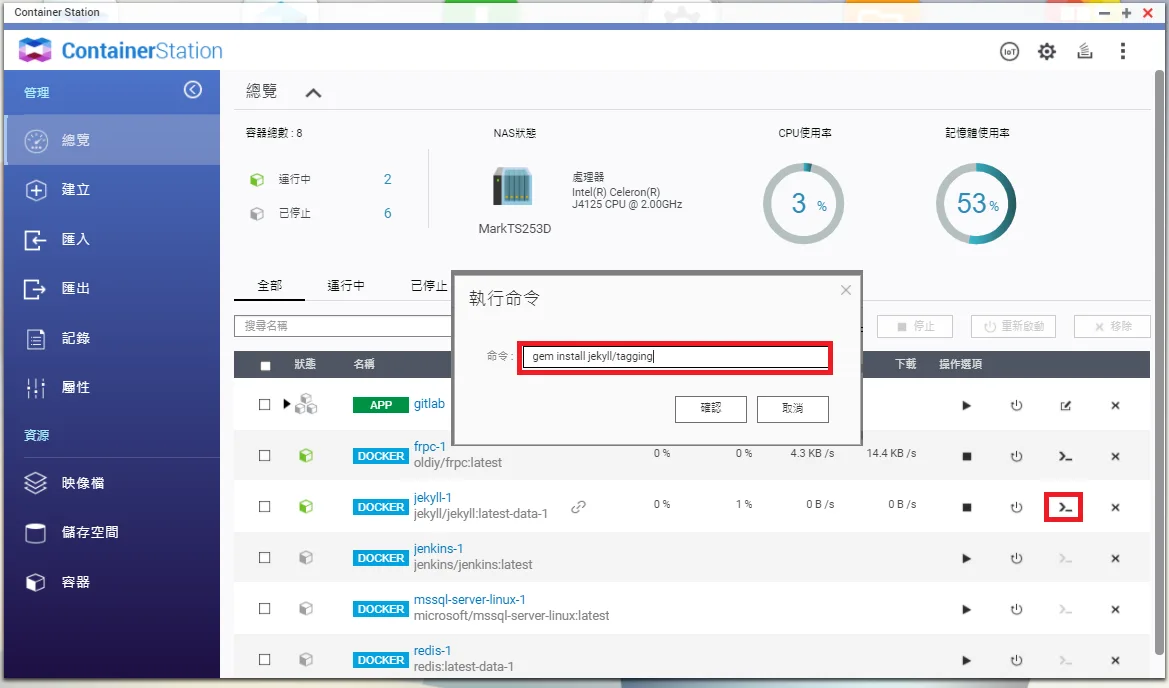
QNAP Container Station: gem install jekyll/tagging command input -
Find a theme you like on a Jekyll themes site. This example uses the zolan theme — download and extract it into the mapped local directory.
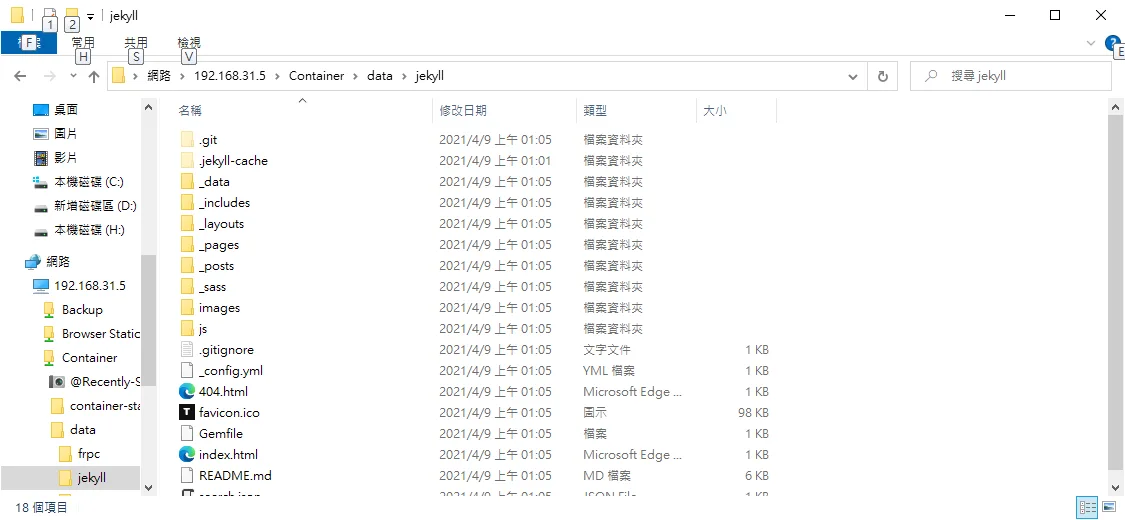
- Restart your Docker container, then click the Connect link — your Markdown Blog should now be live.

Theme Resources
- Free: http://jekyllthemes.org/
- Paid: https://jekyllthemes.io/


Comments