
Solving the Problem
I currently work at a B2C e-commerce company with significant traffic. To avoid accidentally breaking the checkout screen without it being noticed, I started researching UI testing to protect our checkout flow. We had previously used Playwright for SEO pre-rendering, and after evaluating several UI testing frameworks, I found that Playwright's ecosystem has become very complete and simple in recent years, making it a perfect fit for us. Its advantages are as follows:
- An open-source UI-Test framework from Microsoft
- Integrates with Jest
- Supports development and debugging in VS Code
- Integrates with GitHub by default
- Provides comprehensive reports
- Supports Node.js
My Expected Workflow

Steps
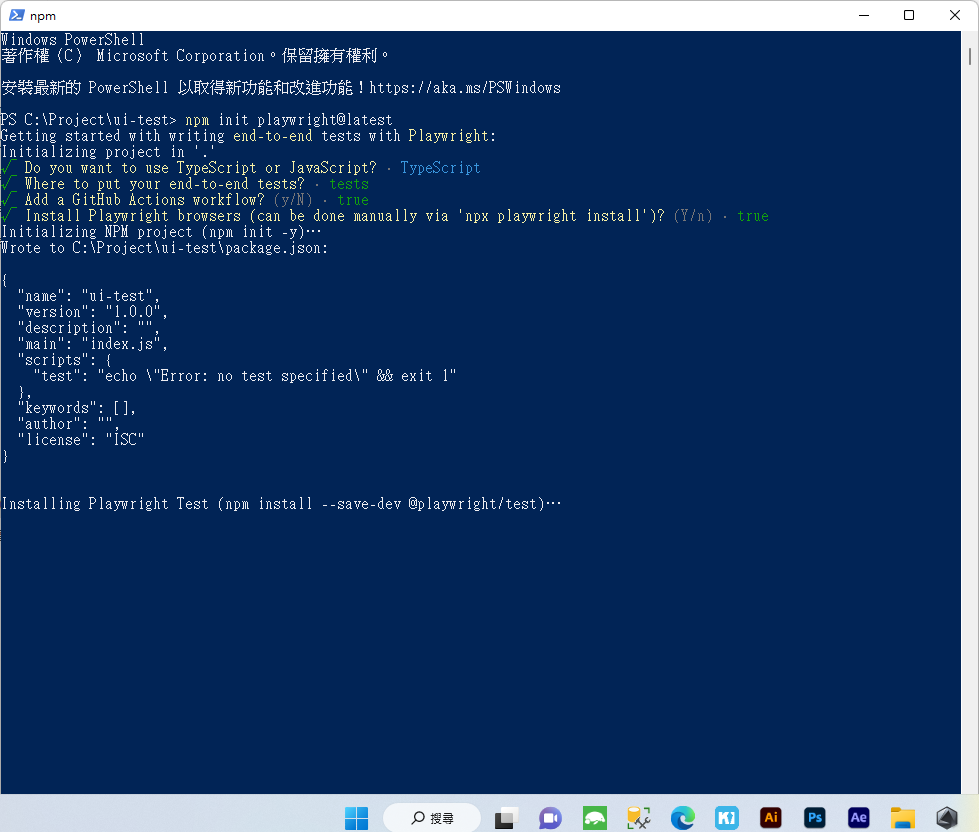
First, let's create a Playwright test project Official Docs
npm init playwright@latest
Choose TypeScript and GitHub Actions flow integration
Open the test project you just created. You'll find that basic test examples are already included in the folder.
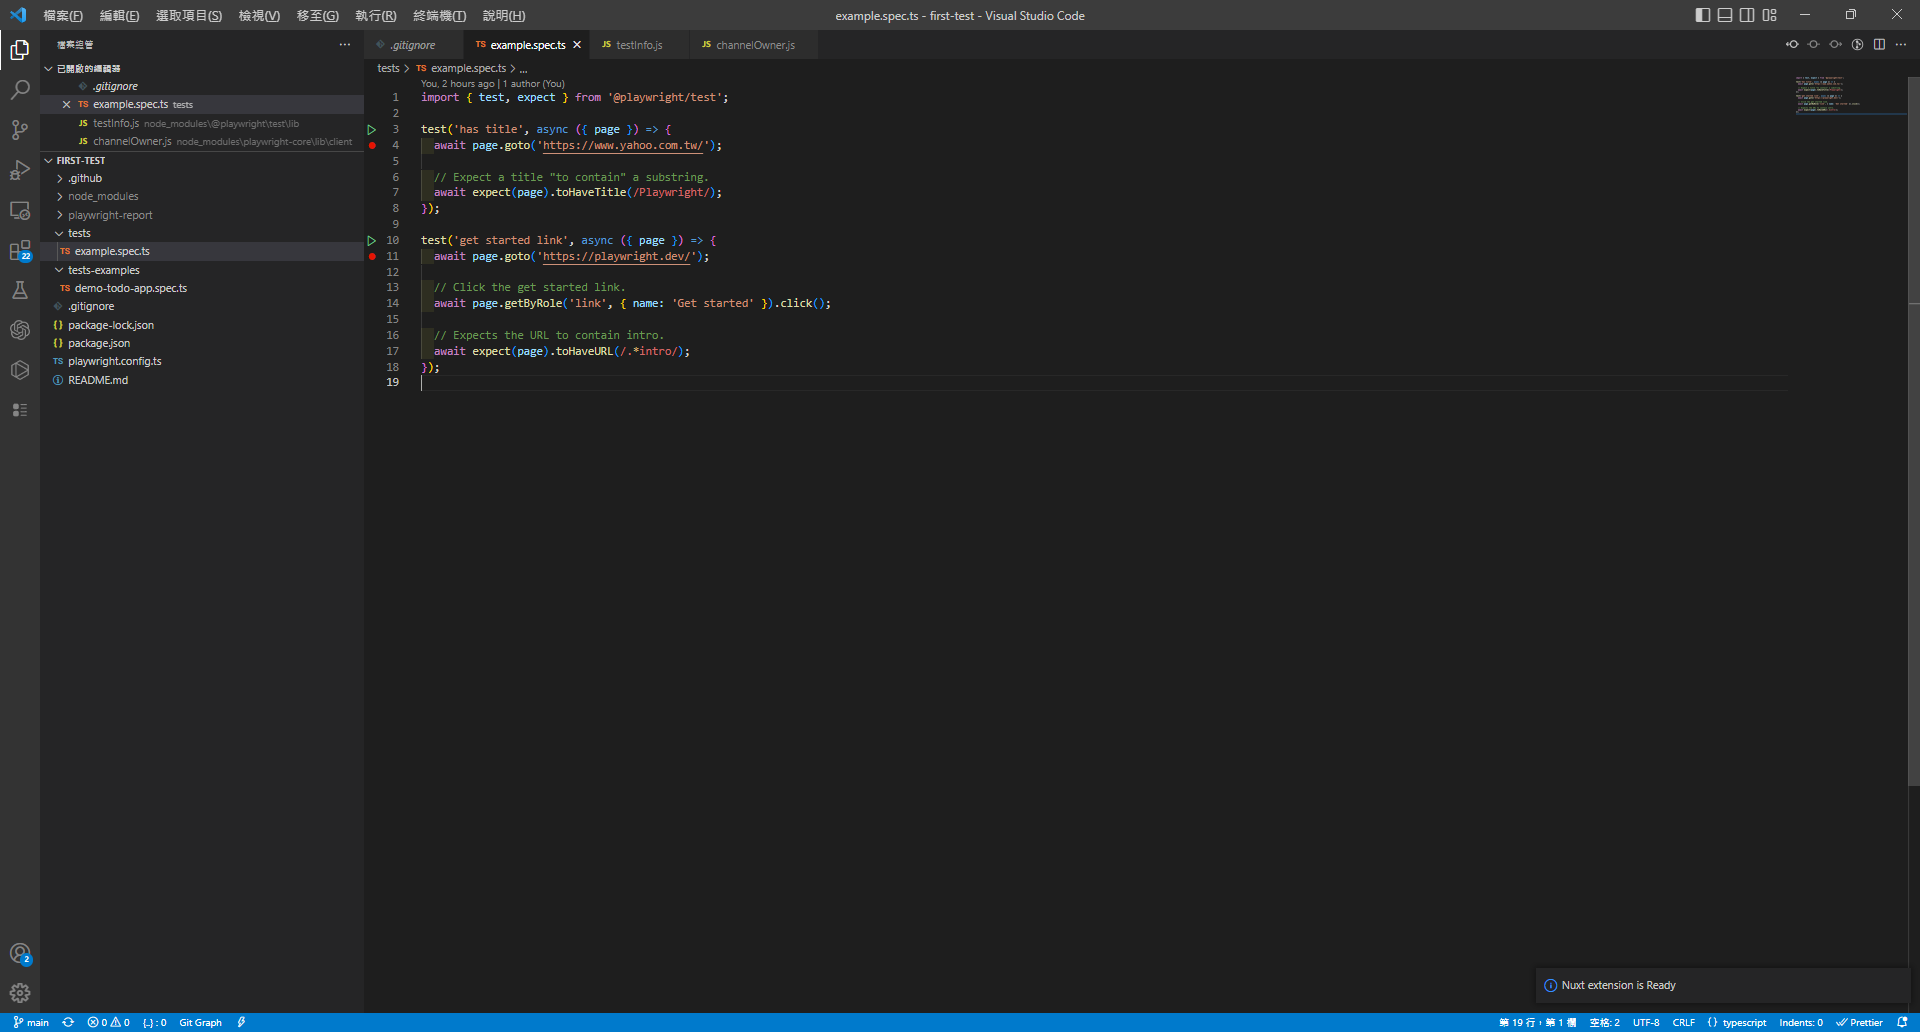
First, install the Jest extension and the Playwright Test for VSCode extension in VS Code.
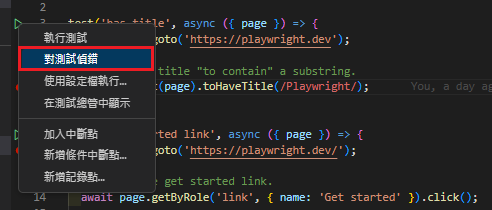
Add a breakpoint, then right-click the green play arrow > Debug Test.
A browser window will pop up, allowing you to debug line by line.
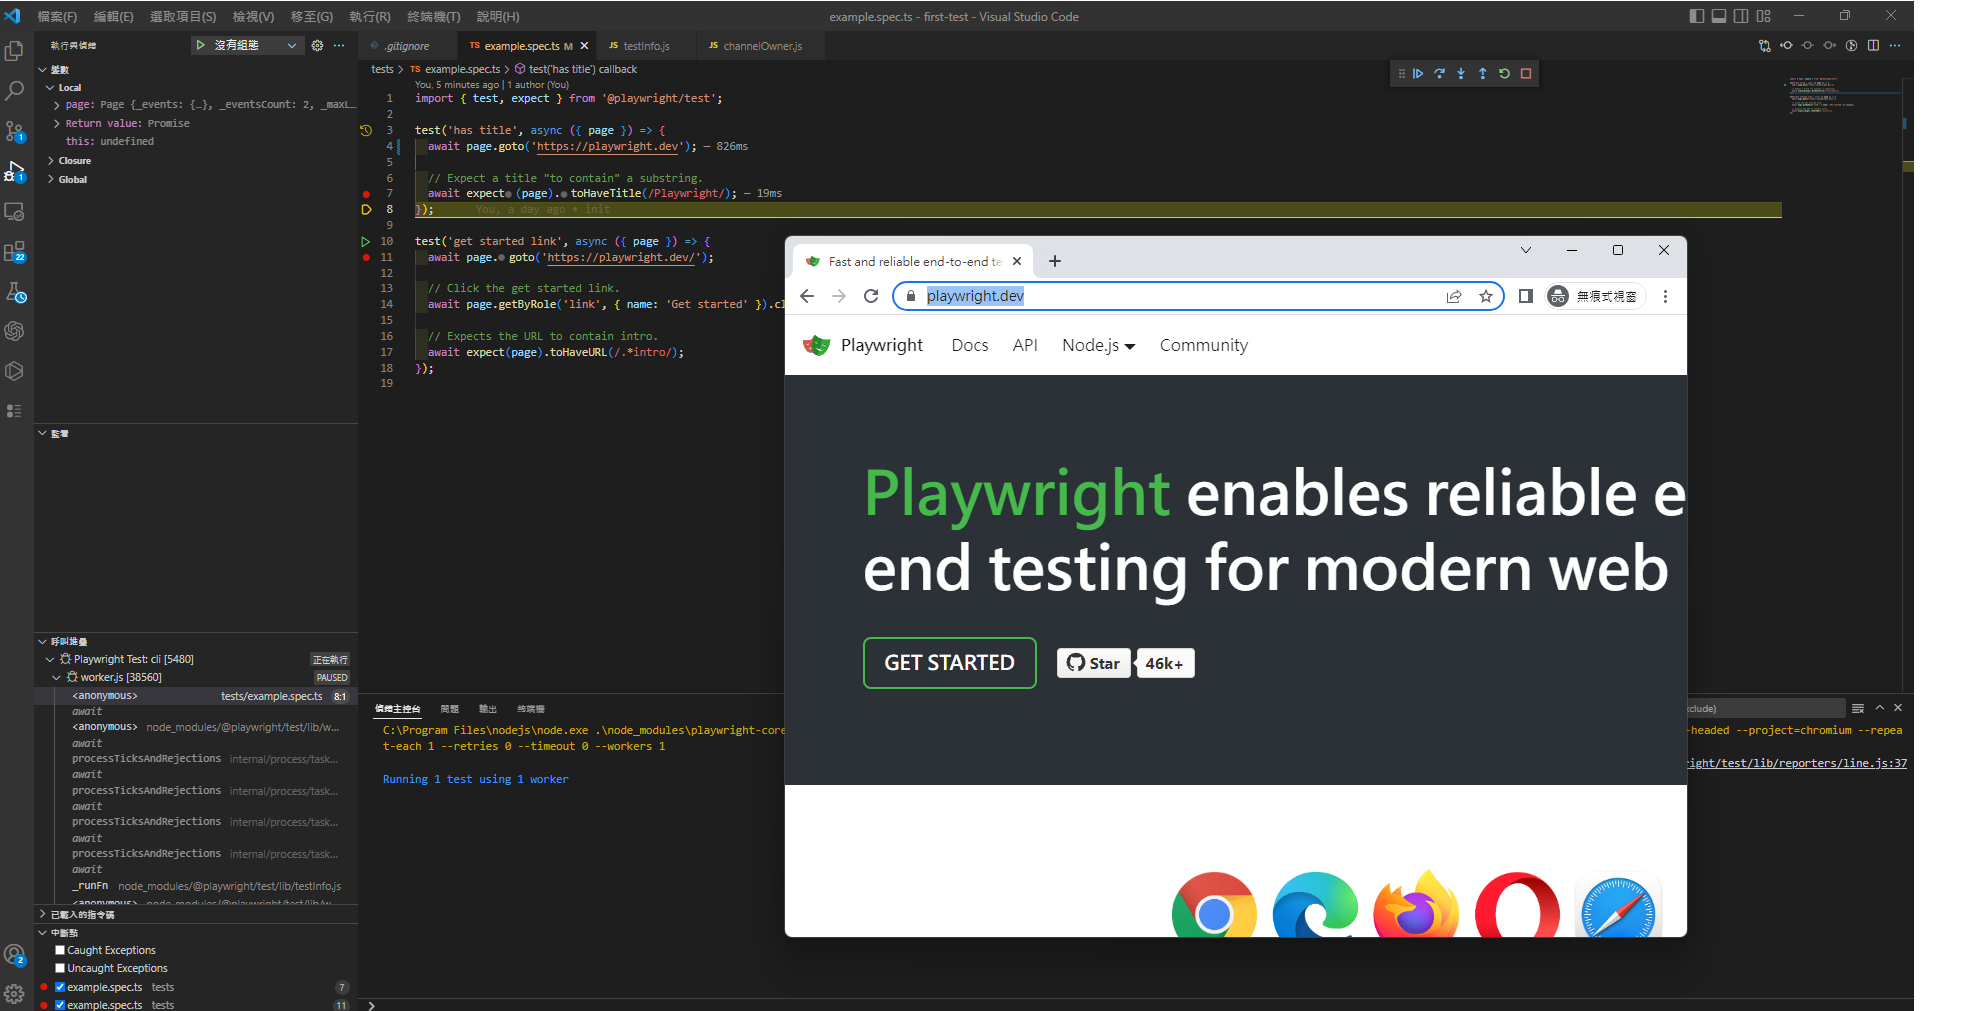
The developer experience here is fantastic. In the past, when I wrote Python with Selenium, I had to spend a lot of time configuring the system environment.
Next, push your project to GitHub. This will automatically trigger a build (test). Click on the job history.
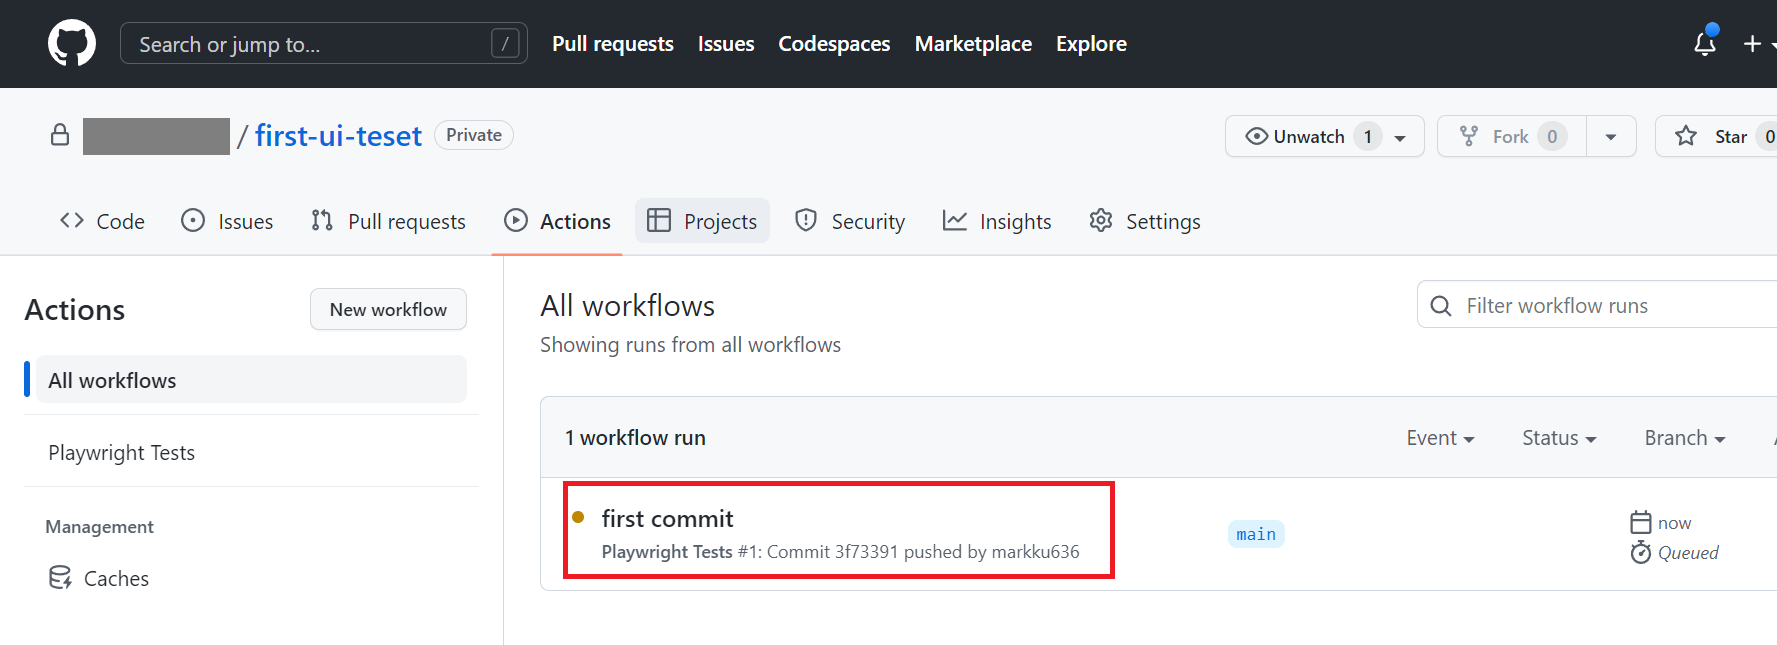
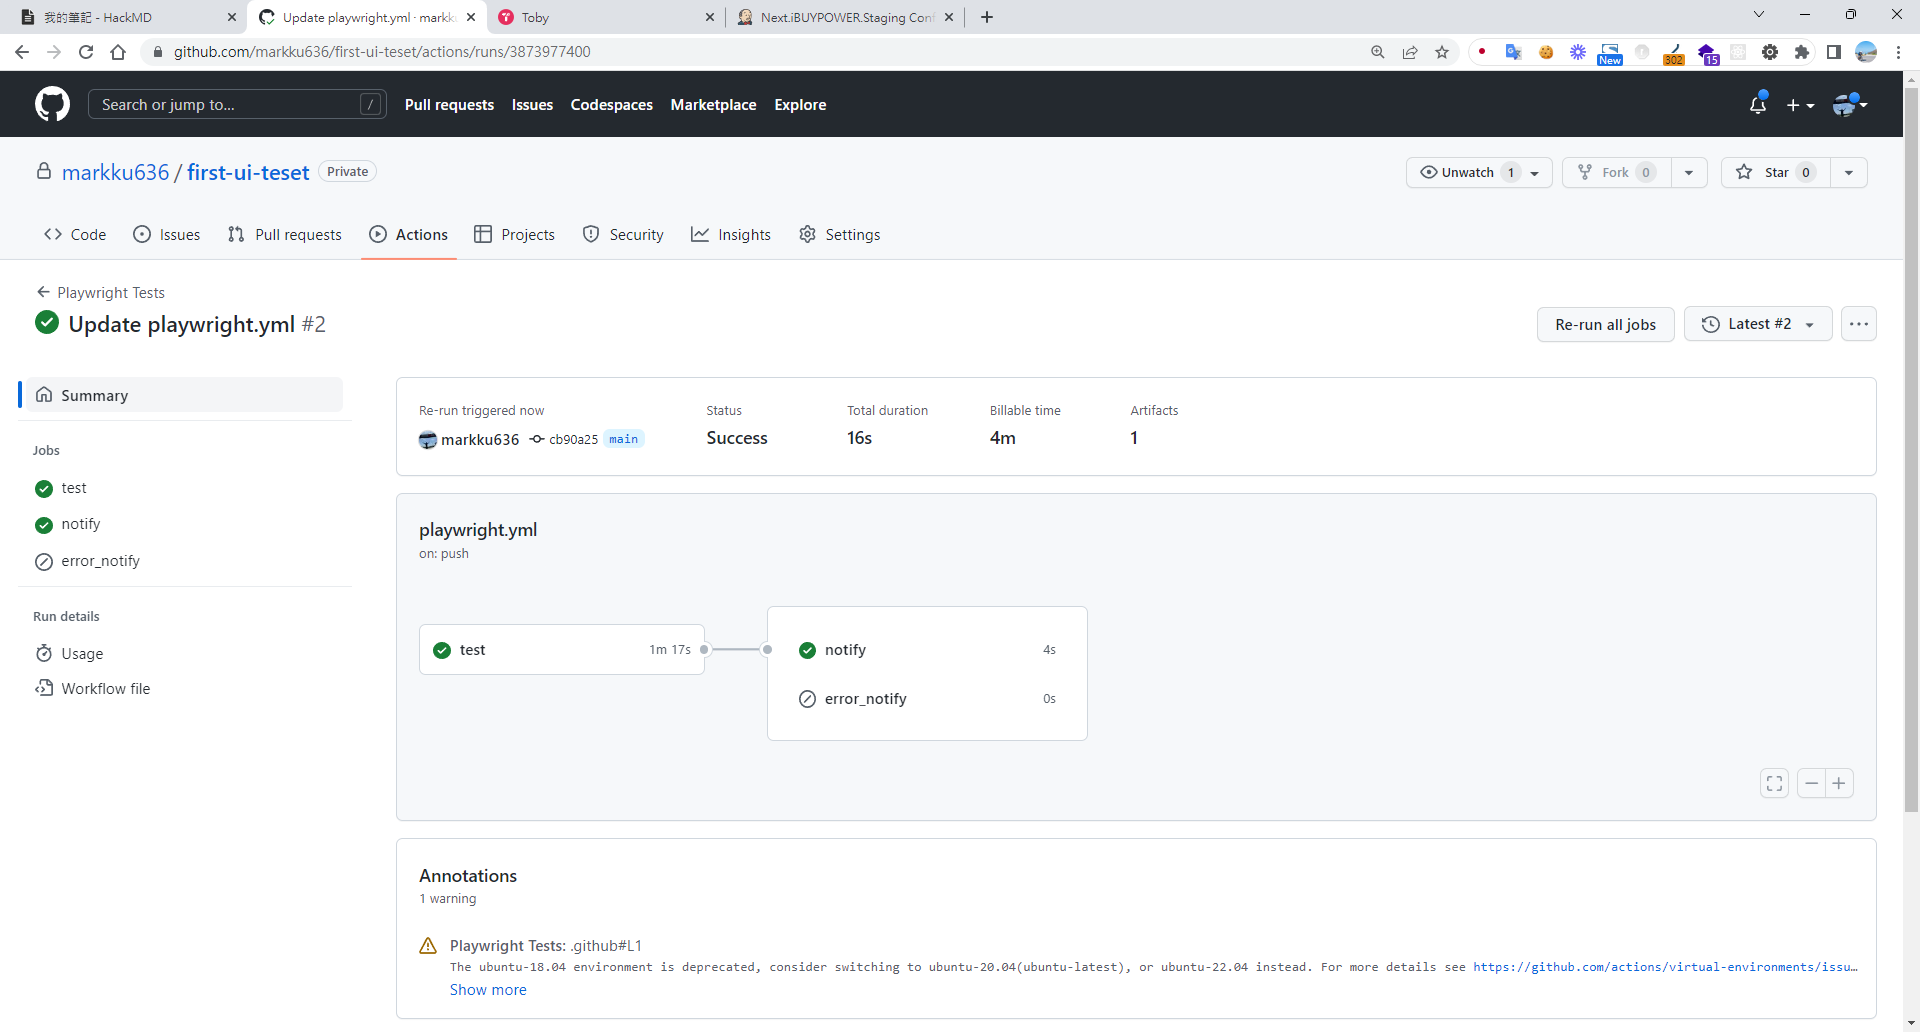
You'll see that the test build has completed successfully, and you'll find links to the console and the report.
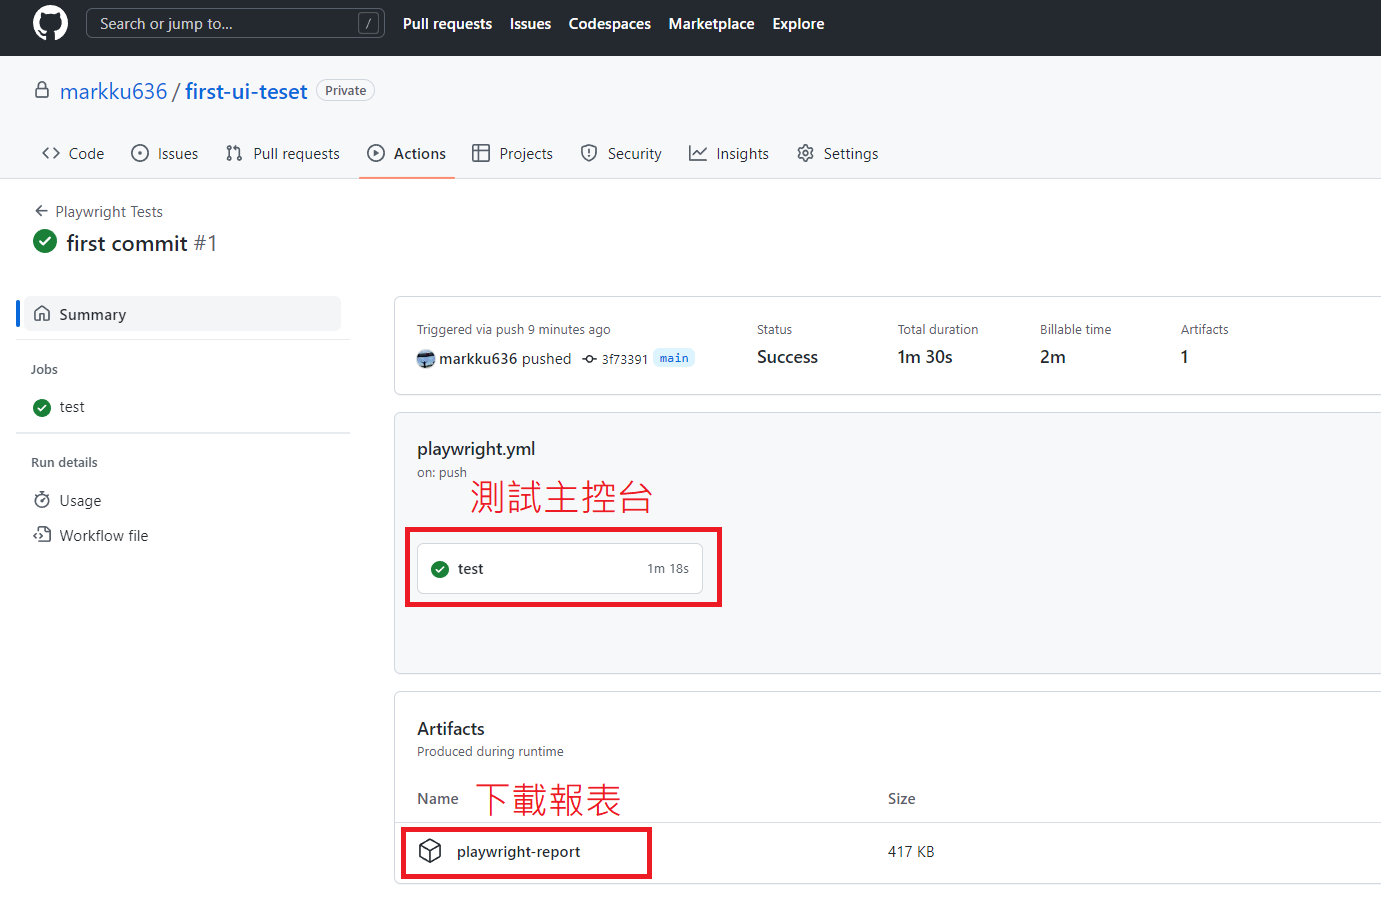
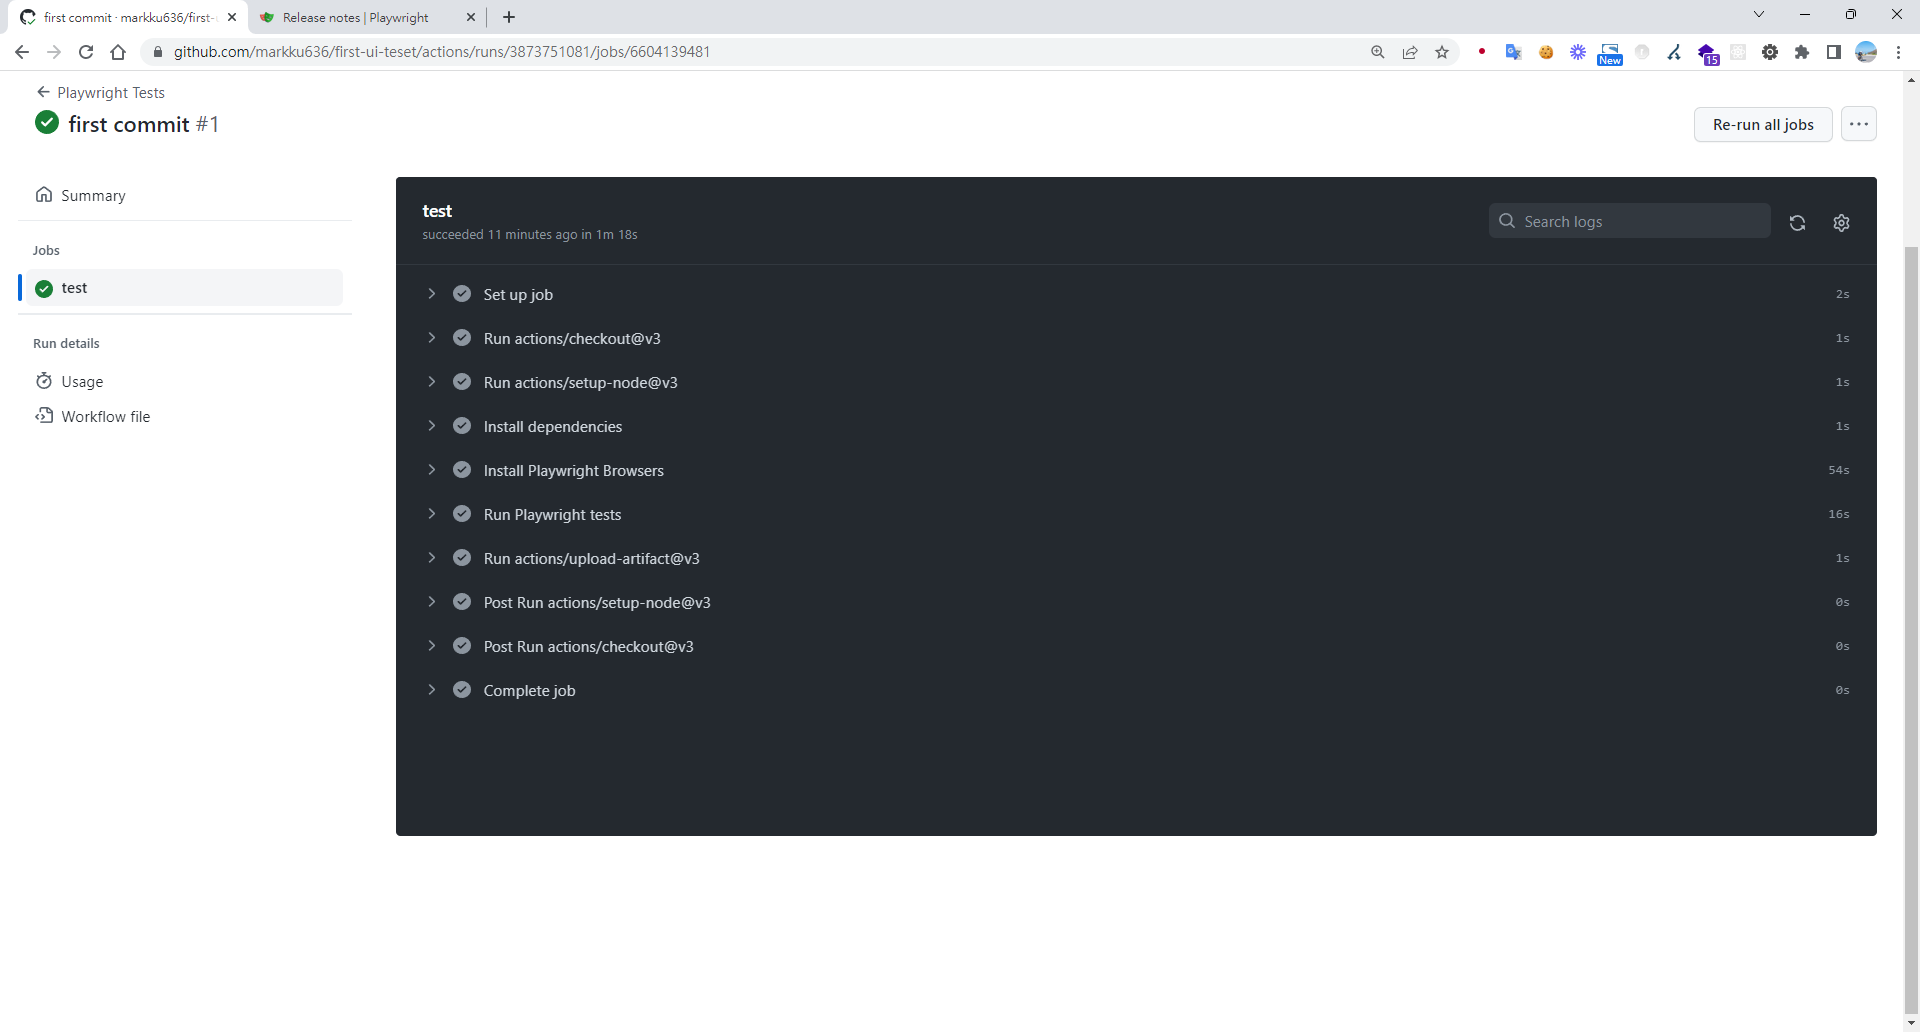
Click to enter the test console to see what the job executed.
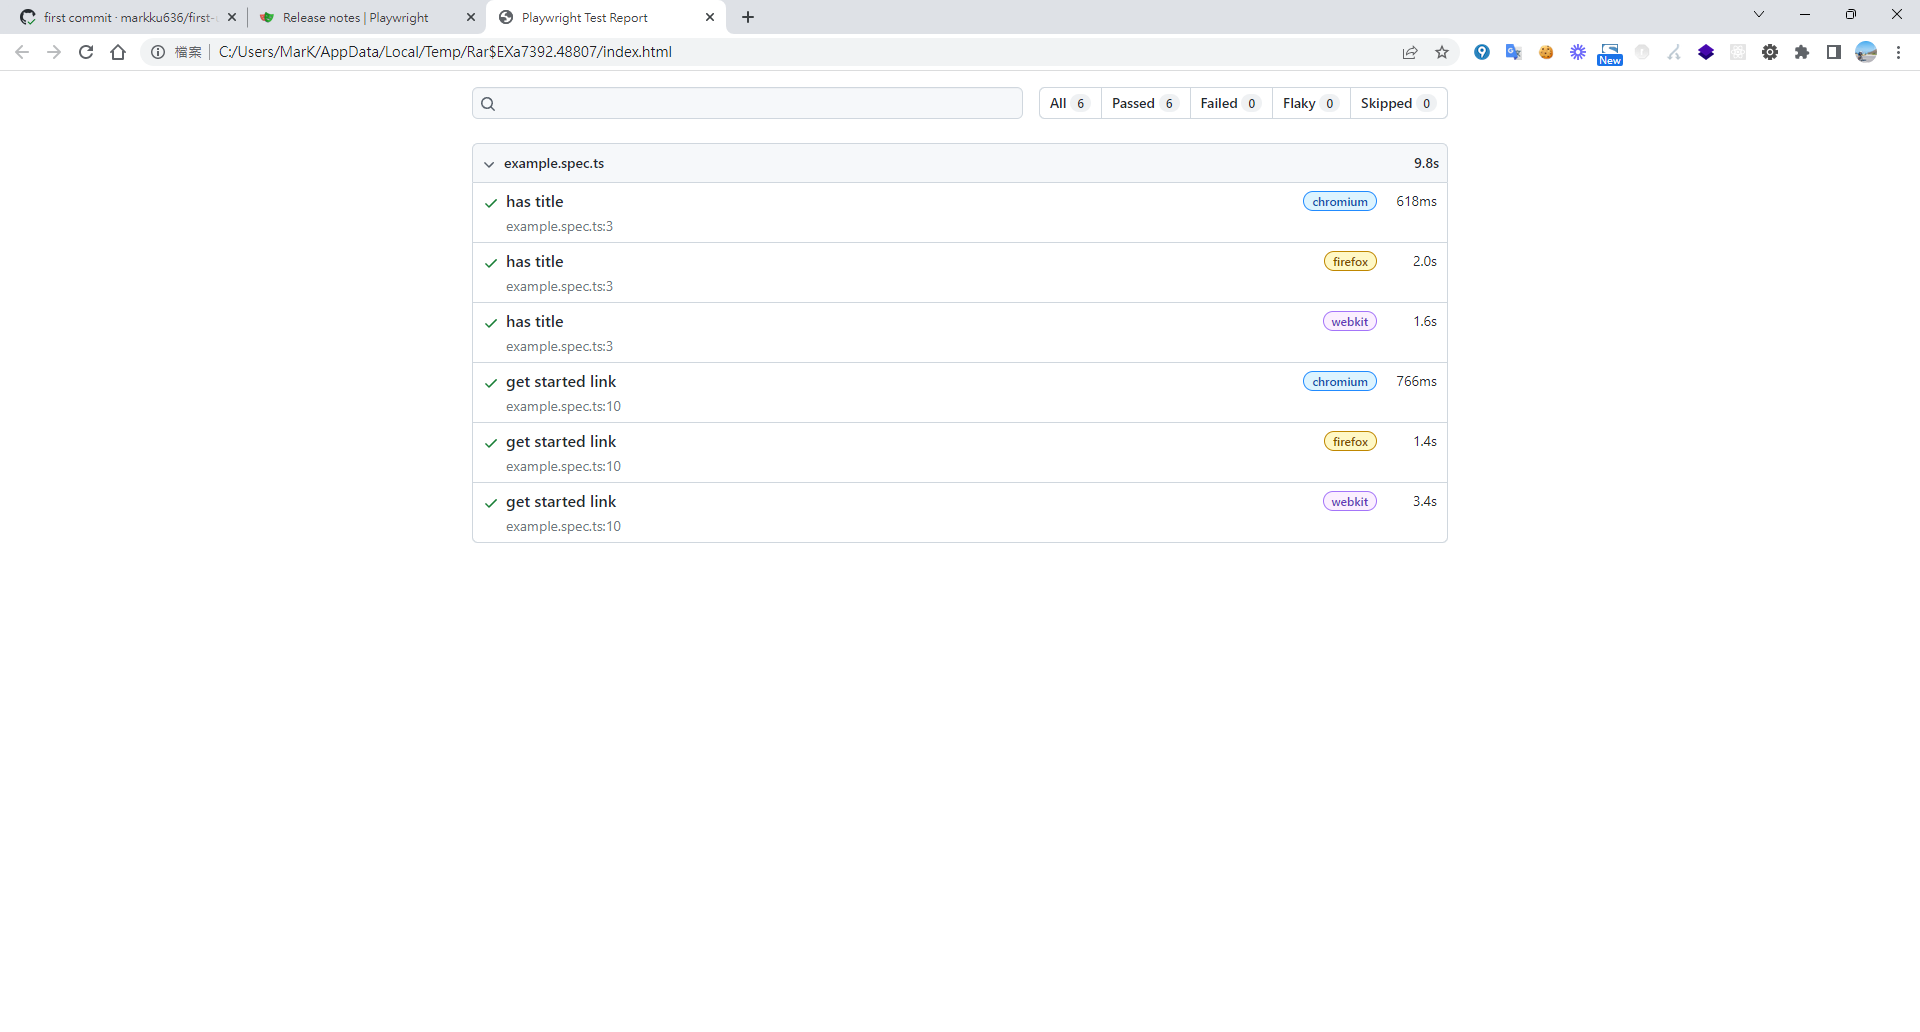
Open the downloaded report.
Next, since we want to push the test results and report to Teams:
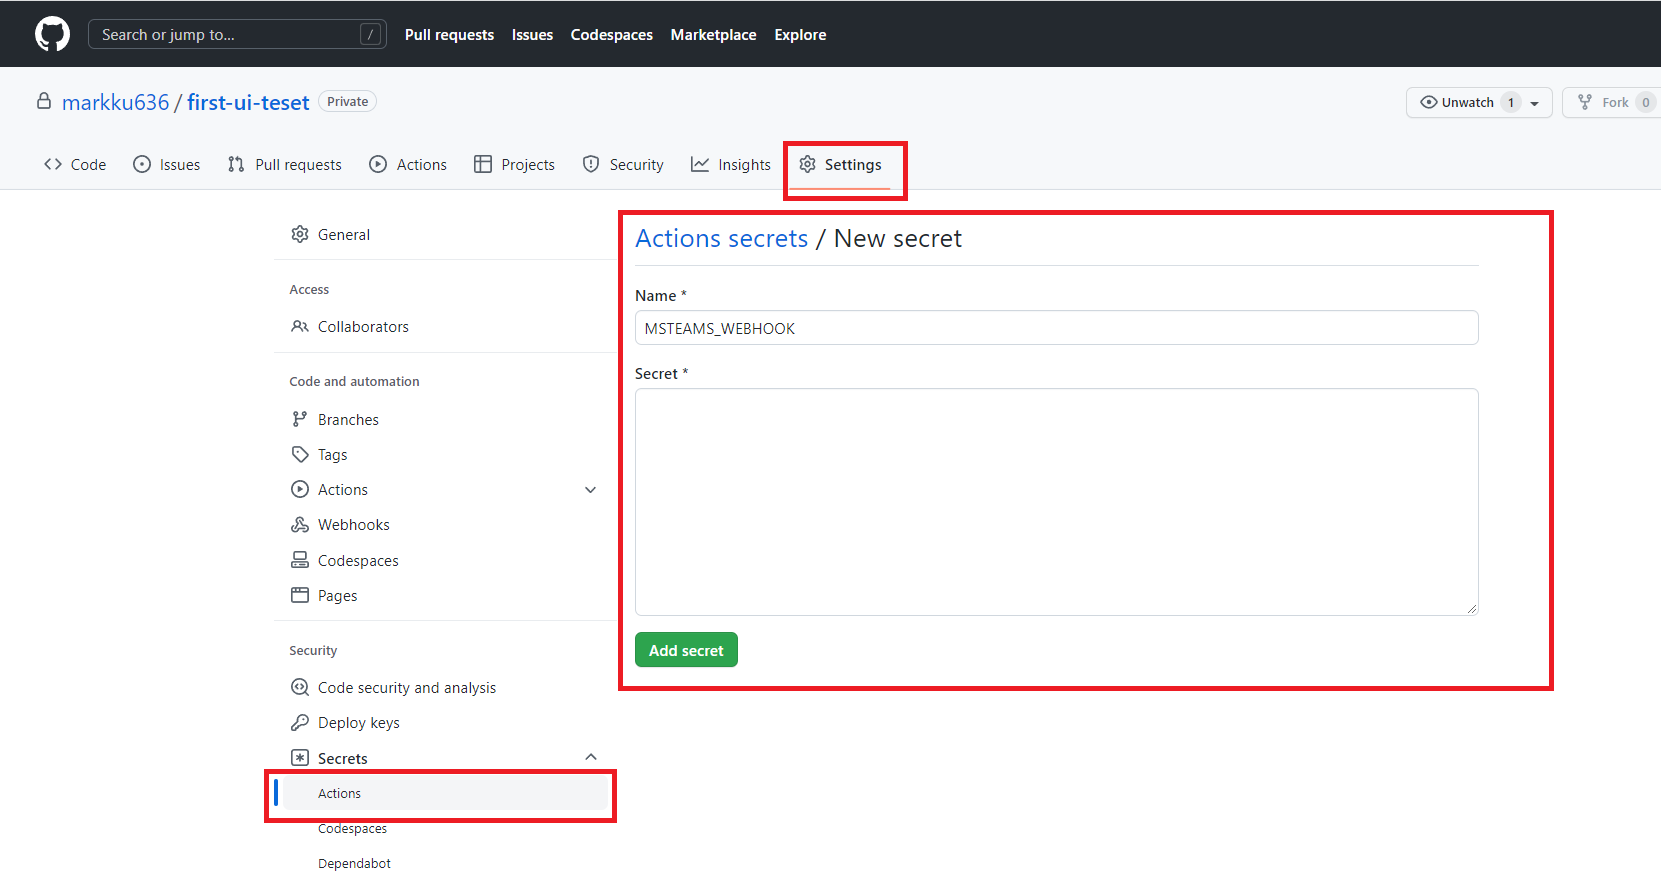
First, go to your GitHub repo's Settings > Secrets > and create Actions secrets.
Modify .github/workflows/playwright.yml by referencing the code below to add notifications.
name: Playwright Tests
on:
  repository_dispatch:
    types: remote-trigger-ui-test
  push:
    branches: [ main, master ]
  pull_request:
    branches: [ main, master ]
jobs:
  test:
    timeout-minutes: 60
    runs-on: ubuntu-latest
    steps:
    - uses: actions/checkout@v3
    - uses: actions/setup-node@v3
      with:
        node-version: 16
    - name: Install dependencies
      run: npm ci
    - name: Install Playwright Browsers
      run: npx playwright install --with-deps
    - name: Run Playwright tests
      run: npx playwright test
    - uses: actions/upload-artifact@v3
      if: always()
      with:
        name: playwright-report
        path: playwright-report/
        retention-days: 30
  success_notify:
    needs: test
    name: notify
    runs-on: ubuntu-18.04
    steps:
      - name: 📣 Send teams notification
        uses: simbo/msteams-message-card-action@v1
        with:
          webhook: ${{ secrets.MSTEAMS_WEBHOOK }}
          title: 😊 UI - Test Success
          message: <p>UI - Test Success<strong>\   /</strong></p>
          color: 007FFF
          buttons: |
            See Test Report! ${{ github.server_url }}/${{ github.repository }}/actions/runs/${{ github.run_id }}
  error_notify:
    needs: test
    name: error_notify
    if: ${{ always() && needs.test.result == 'failure' }}
    runs-on: ubuntu-18.04
    steps:
      - name: Send fail notification
        uses: simbo/msteams-message-card-action@v1
        with:
          webhook: ${{ secrets.MSTEAMS_WEBHOOK }}
          title: 💩UI - Test Fail
          message: <p>Ba Be Q ...<strong>= =...</strong></p>
          color: FF0000
          buttons: |
            See Test Report! ${{ github.server_url }}/${{ github.repository }}/actions/runs/${{ github.run_id }}
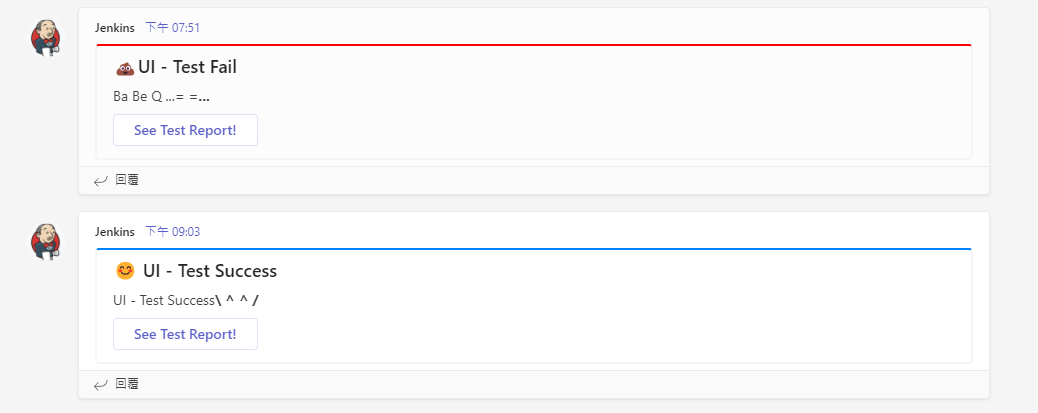
The resulting card after the test run completes.
In your application, add an external trigger for the workflow. You can refer to this article on how to trigger a GitHub Action remotely, and replace the parameters in the code below.
:owner/:repo => markku636/first-ui-teset
:token => GitHub token, click here to apply
on: push
jobs:
  test-curl-action:
    name: "Call Test CICD"
    runs-on: ubuntu-latest
    steps:
      - name: "Call Github API"
        uses: indiesdev/[email protected]
        id: api2
        with:
          url: https://api.github.com/repos/:owner/:repo/dispatches
          method: "POST"
          accept: 200,201,204
          headers: '{ "authorization": "token :token", "accept": "application/vnd.github.everest-preview+json","content-type":"application/x-www-form-urlencoded" }'

          # you can use multiline format to construct json data object, the content should be yml format.

          # this format apply to inputs: body, headers and params
          "body": '{ "event_type": "remote-trigger-ui-test" }'
          log-response: true
      - name: "Use response"
        run: echo ${{ steps.api.outputs.response }}
Recording a Script
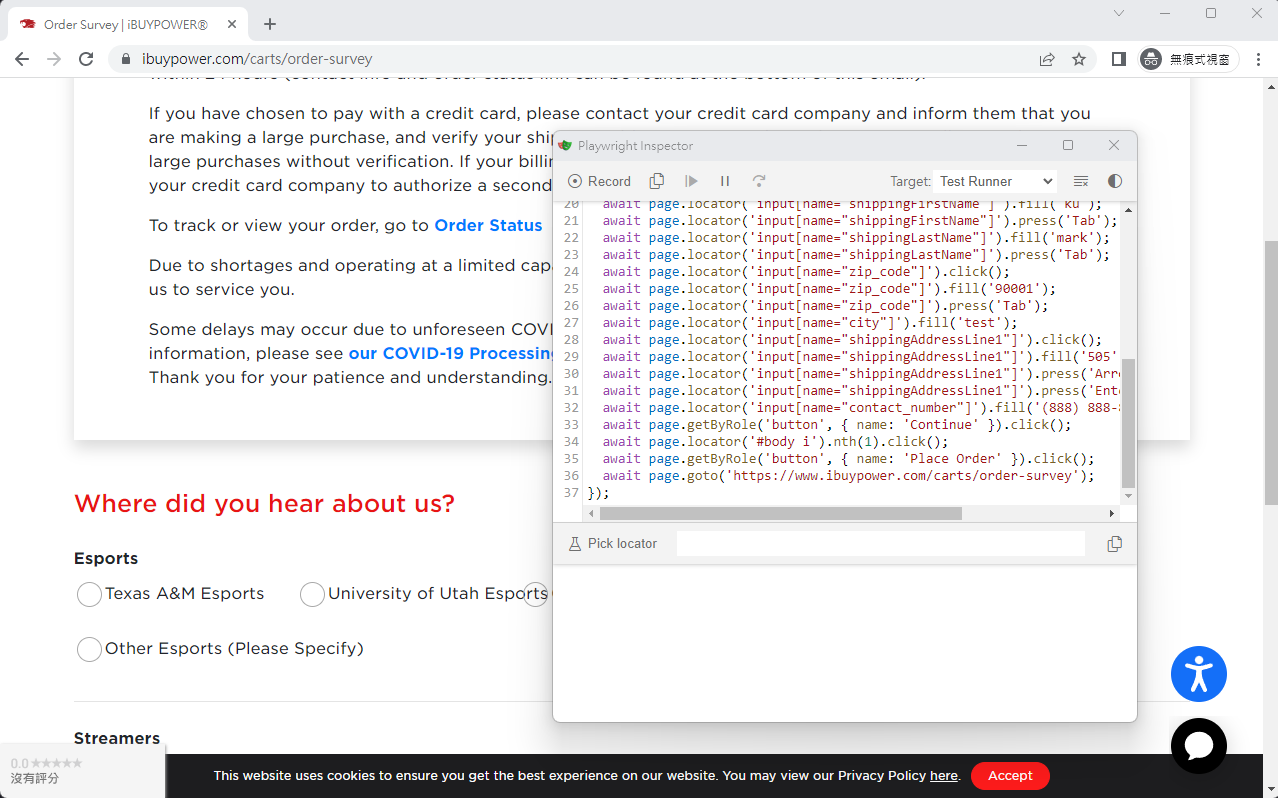
This is super cool. Without any special environment configuration, it can pop up a browser and start recording. It's incredibly useful.
npx playwright codegen www.ibuypower.com --output ./tests/ibuypower.spec.ts
Conclusion
The biggest advantage of using Playwright is that Microsoft leverages its complete ecosystem to integrate the entire workflow. I was able to integrate VS Code + GitHub + Teams in a very short amount of time, and the experience was fantastic.
Additional Notes
If you can't debug Jest test files in VS Code, please run the following command:
npm i -D @playwright/test
npx playwright install
npm install -D jest jest-playwright-preset playwright
code --install-extension Orta.vscode-jest
code --install-extension ms-playwright.playwright
References
GitHub Actions felt too slow after going live, so I later moved it to run in our own Jenkins pipeline.
pipeline {
    agent any

    tools {nodejs "Node Core"}

    options {
        buildDiscarder logRotator(artifactDaysToKeepStr: '', artifactNumToKeepStr: '20', daysToKeepStr: '', numToKeepStr: '20')
        timeout(time: 10, unit: 'MINUTES')
    }

    stages {
        stage("GitHub Pull") {
            steps {
                git branch: "main", url: "https://[email protected]/iBuypowerUS/iBuypower.UI.Test.git"
            }
        }


        stage("Test and Report") {
            steps {
                script {
                    def errorEncountered = false
                    try {
                        bat "npm install"
                        bat "npm run testCase"
                    } catch(Exception e) {
                        errorEncountered = true
                        echo "Error during testing: ${e.getMessage()}"
                    } finally {
                        publishHTML([
                            alwaysLinkToLastBuild: true,
                            allowMissing: false,
                            keepAll: true,
                            reportDir: 'playwright-html-report',
                            reportFiles: 'index.html',
                            reportName: 'HTML Report',
                            reportTitles: 'HTML Report'
                        ])
                        if (errorEncountered) {
                            error "npm run testCase encountered an error."
                        }
                    }
                }
            }
        }
    }
}
P.S. To display reports in Jenkins, you need to install the 'HTML Publisher plugin'. If the HTML report content doesn't display, you'll need to run the following in the Jenkins Script Console:
System.setProperty("hudson.model.DirectoryBrowserSupport.CSP", "")


Comments