Mark Ku's Blog

Setting Up Cloudflare CDN for Your Website

Why Use Cloudflare CDN?

Cloudflare operates a globally distributed network, partnering with local ISPs to deploy data center resources at backbone nodes worldwide. This gives Cloudflare excellent bandwidth capacity and helps balance origin server traffic.

  1. Offload server traffic and I/O — Static files are cached at the nearest CDN edge node and delivered from there, reducing load on your origin.
  2. Hide your real server IP — Cloudflare acts as a reverse proxy, shielding your origin from DDoS attacks and intrusion attempts while adding a layer of security on top of performance.
  3. Free HTTPS — SSL/TLS certificates are provisioned automatically at no cost.

Note: Cloudflare's free tier has no traffic or request limits, which is why I chose it as my primary CDN. Note: Due to unresolved peering agreements with Chunghwa Telecom, users on that ISP may be routed to a US West Coast edge node.

How Cloudflare CDN Works

Cloudflare is built on top of a reverse proxy architecture, so you need to delegate your DNS management to Cloudflare.

1. Client requests a static file → Cloudflare DNS → nearest CDN cache → response returned to client.

2. Client requests dynamic data → Cloudflare DNS → your origin server → response returned to client.

Setup Steps

1. Create an Account

Cloudflare sign-up page with email and password fields

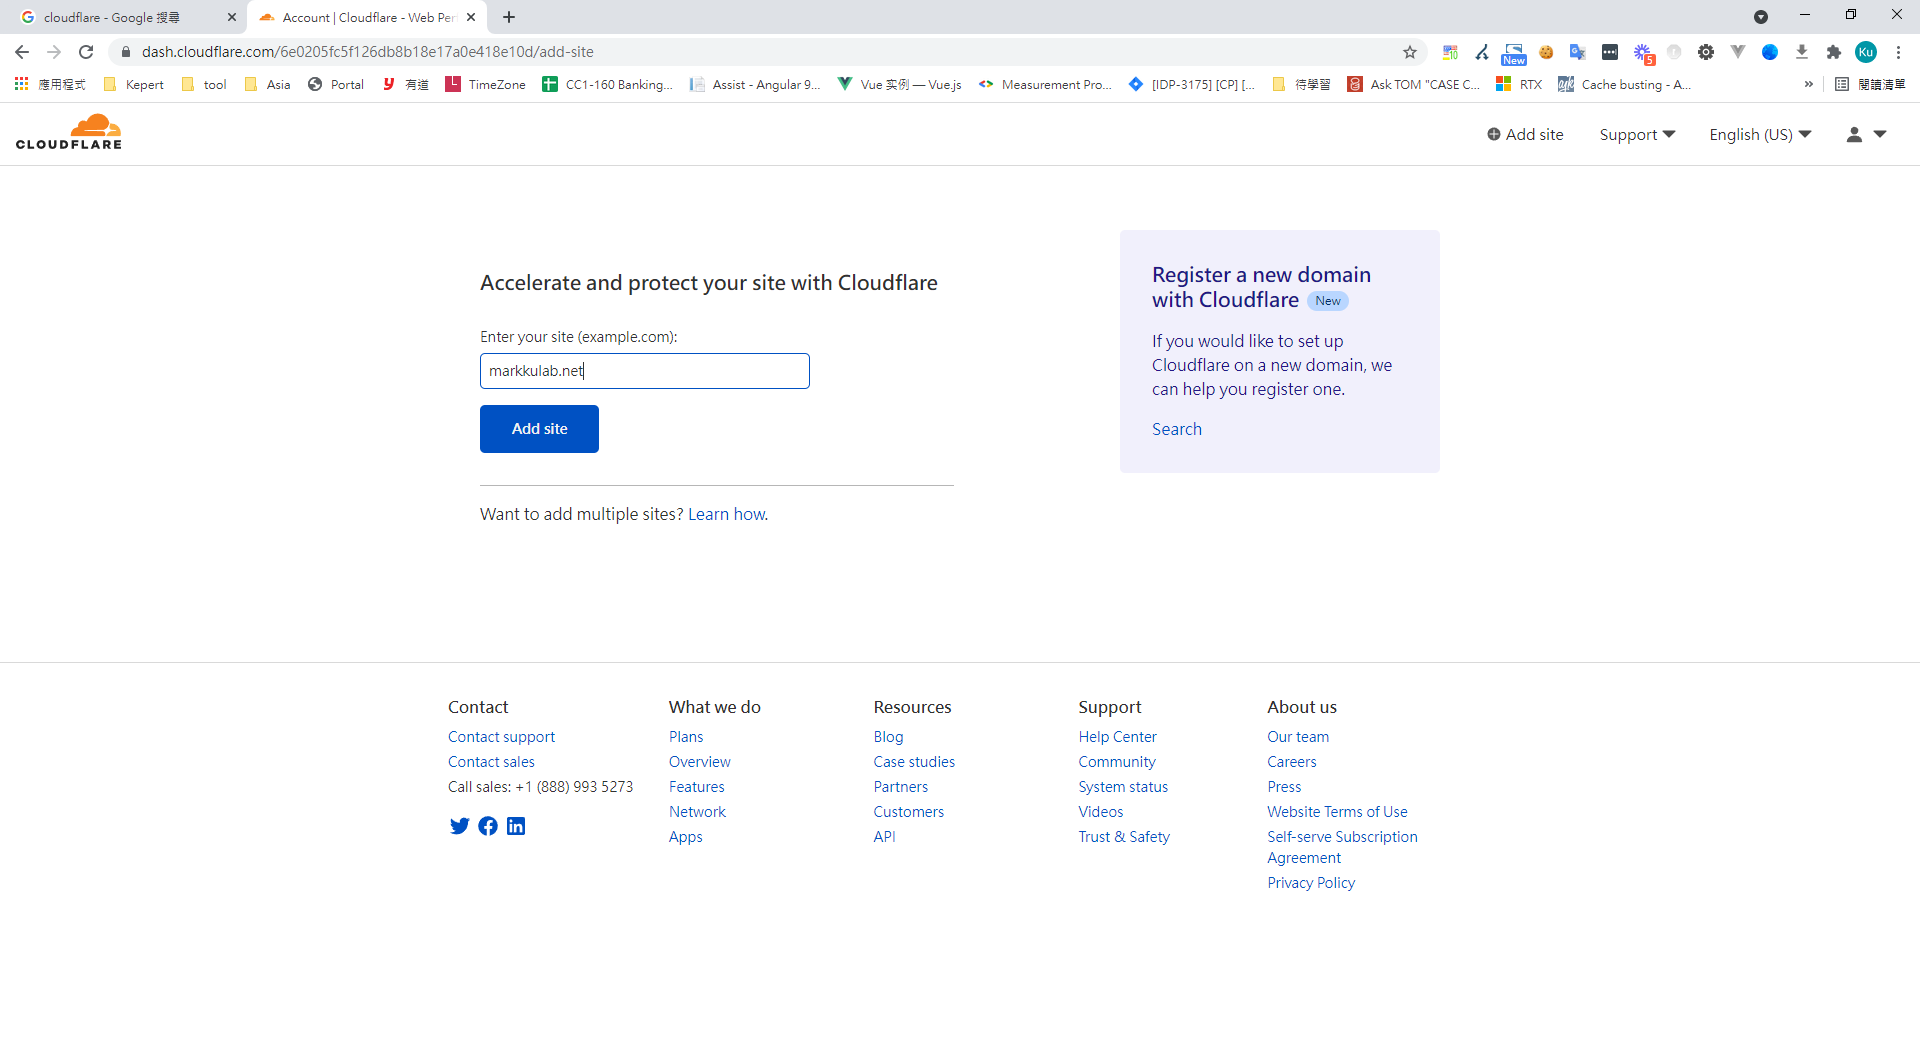
2. Add a Site — Enter Your Domain

Cloudflare add site page with markkulab.net entered

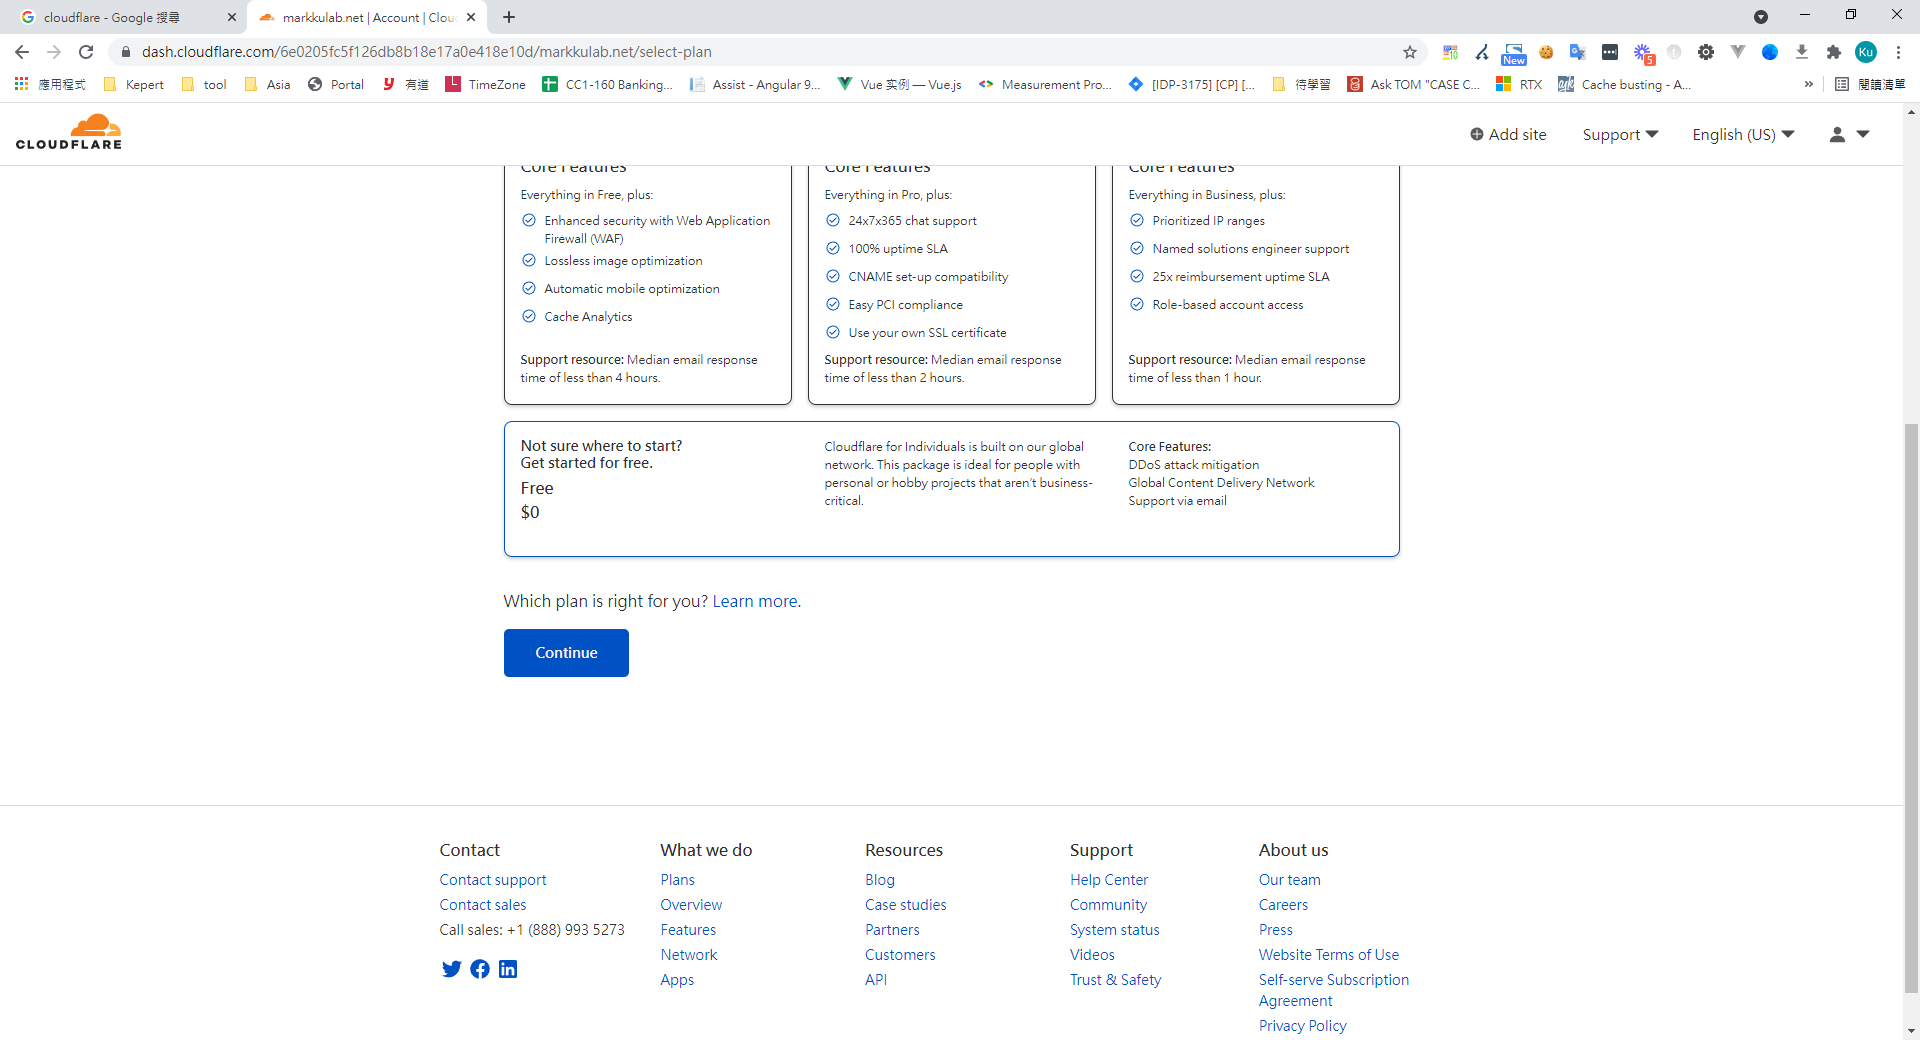
3. Select the Free Plan

Cloudflare plan selection interface highlighting the Free plan option

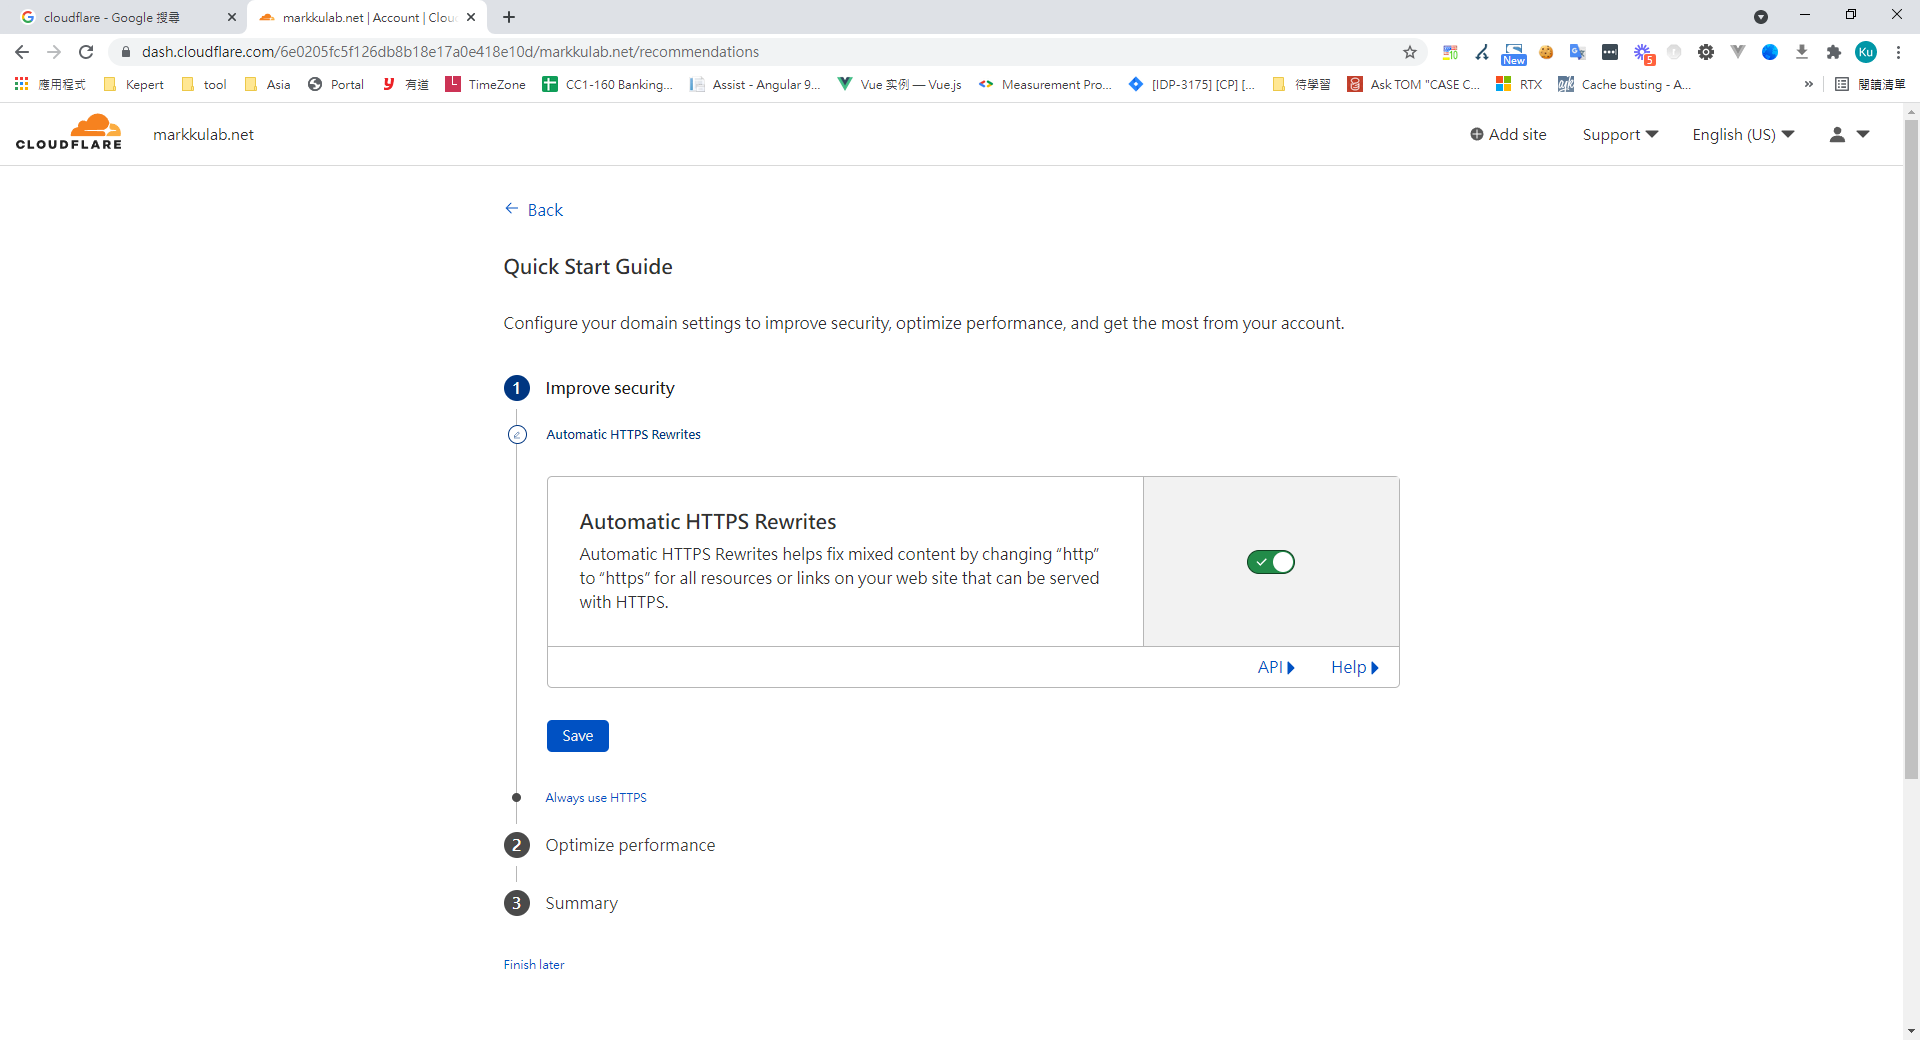
4. Continue

Cloudflare Quick Start Guide with Automatic HTTPS Rewrites enabled

5. Delegate DNS to Cloudflare — You will be prompted to update your nameservers to point to Cloudflare
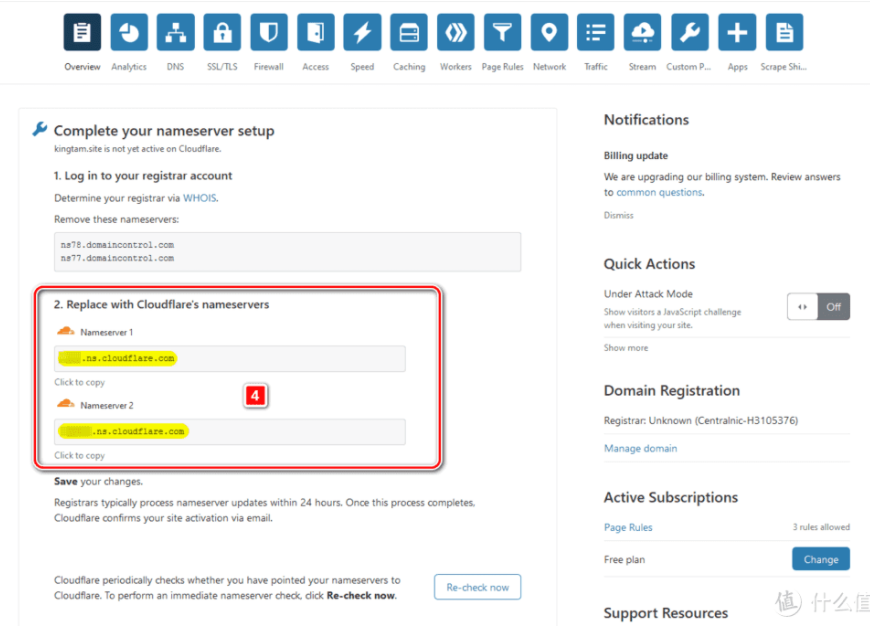
Cloudflare nameserver setup showing highlighted Cloudflare nameservers

6. Enable Auto-Minify for Static Assets
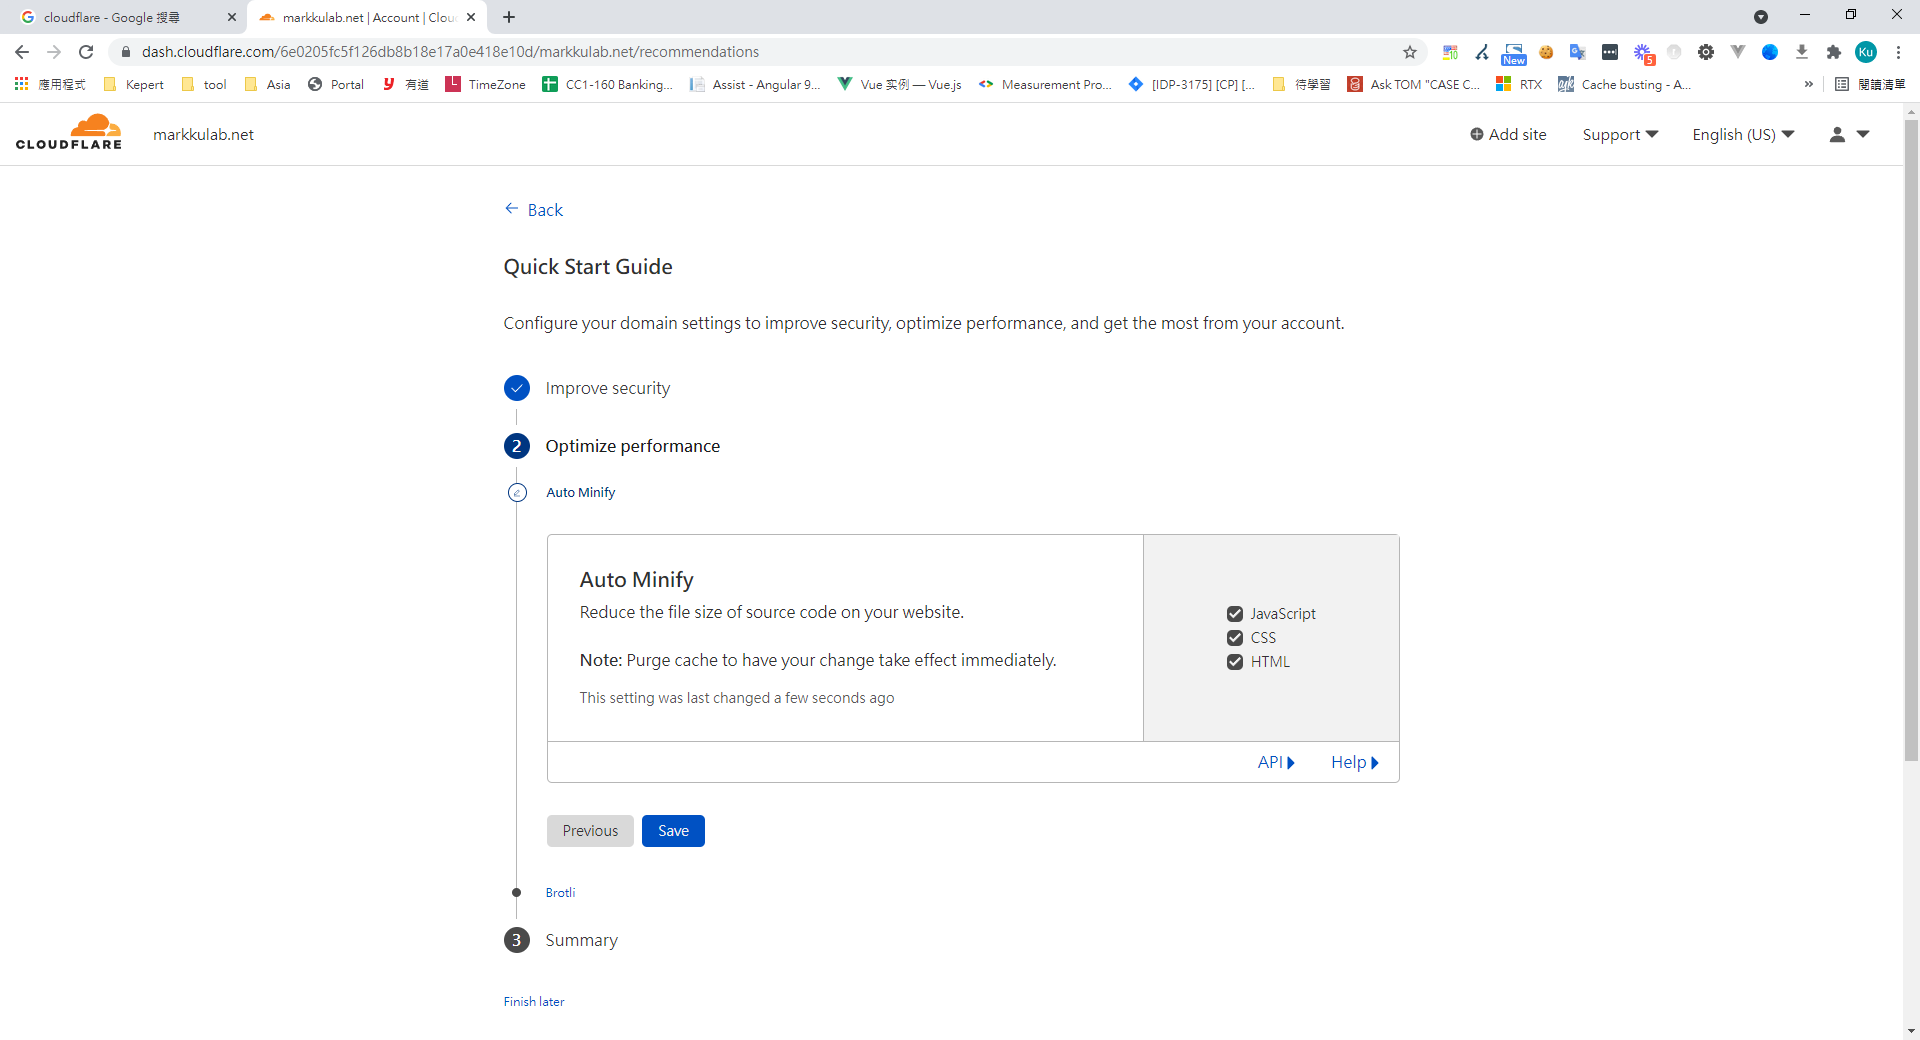
Cloudflare Auto Minify settings with JavaScript, CSS, HTML checked

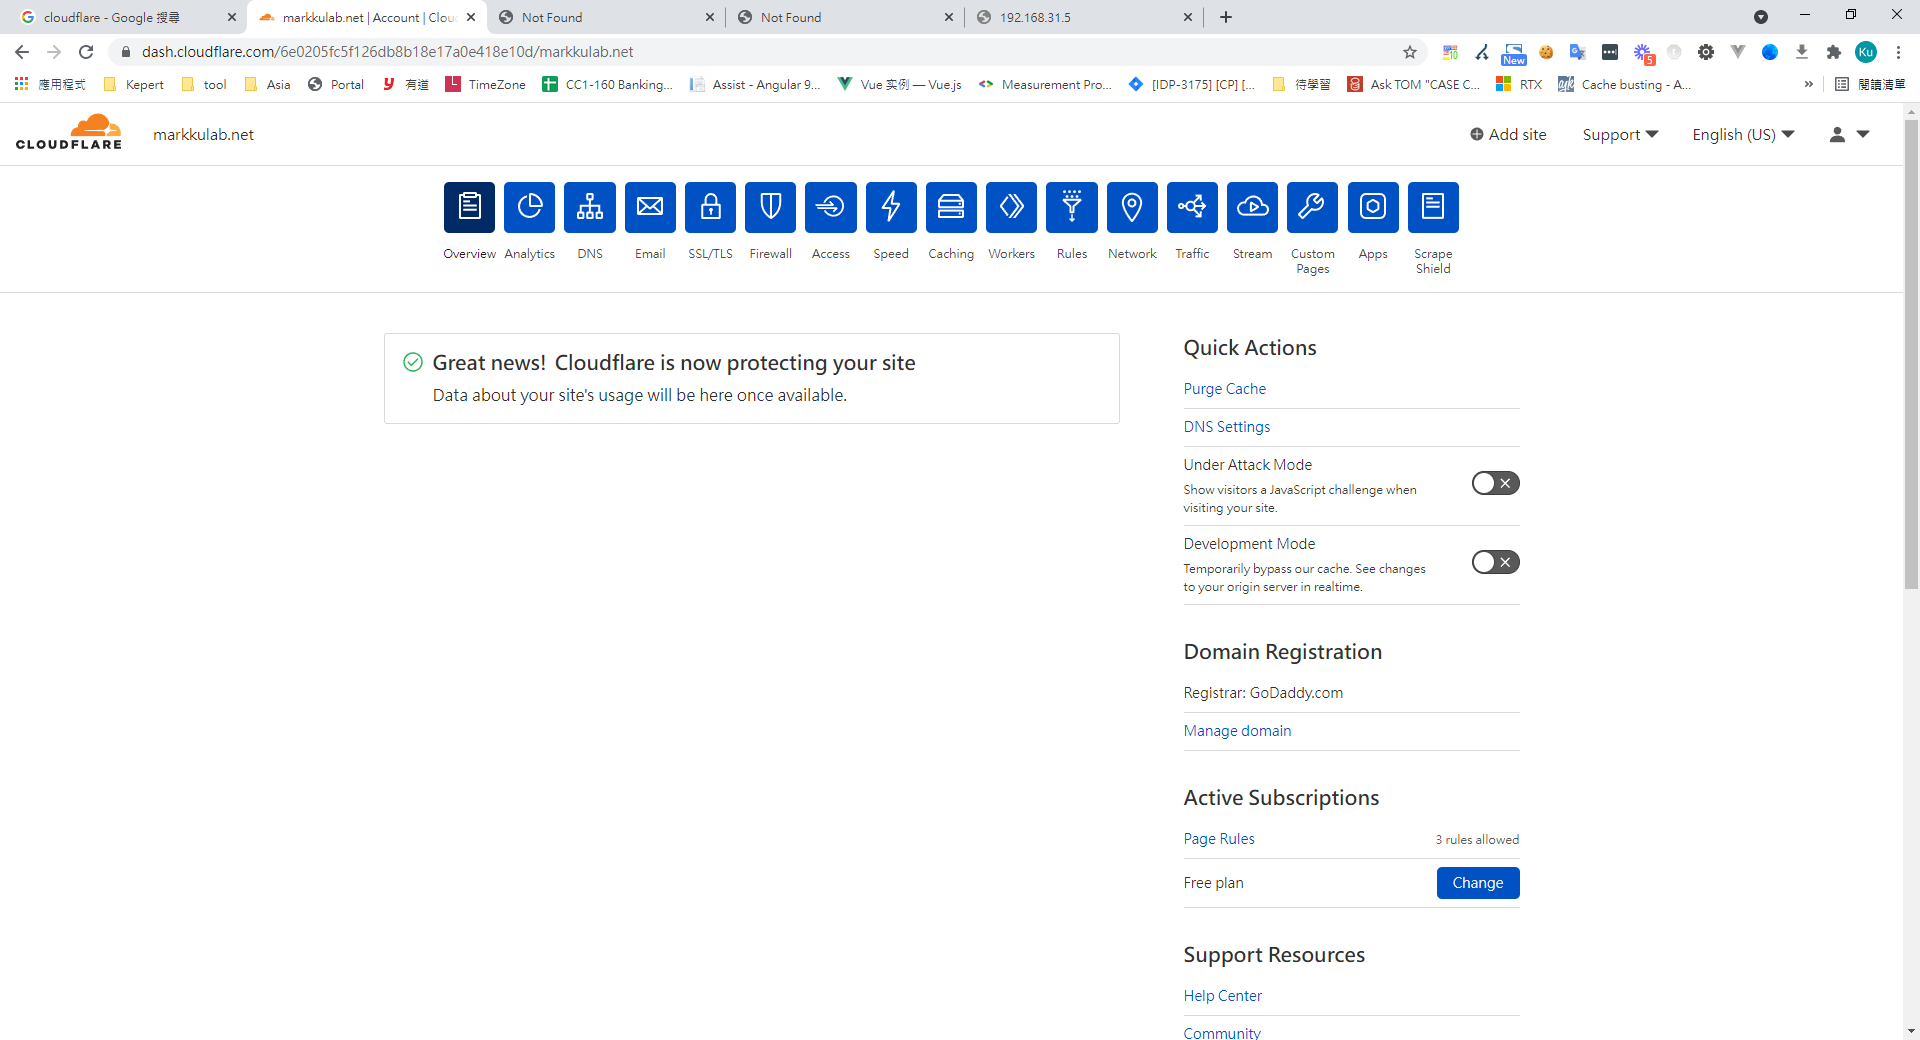
7. Setup Complete

Cloudflare dashboard displaying site protection confirmation message

8. Enable HTTPS — Wait a few minutes. All requests under this domain will then be served through Cloudflare CDN with HTTPS.
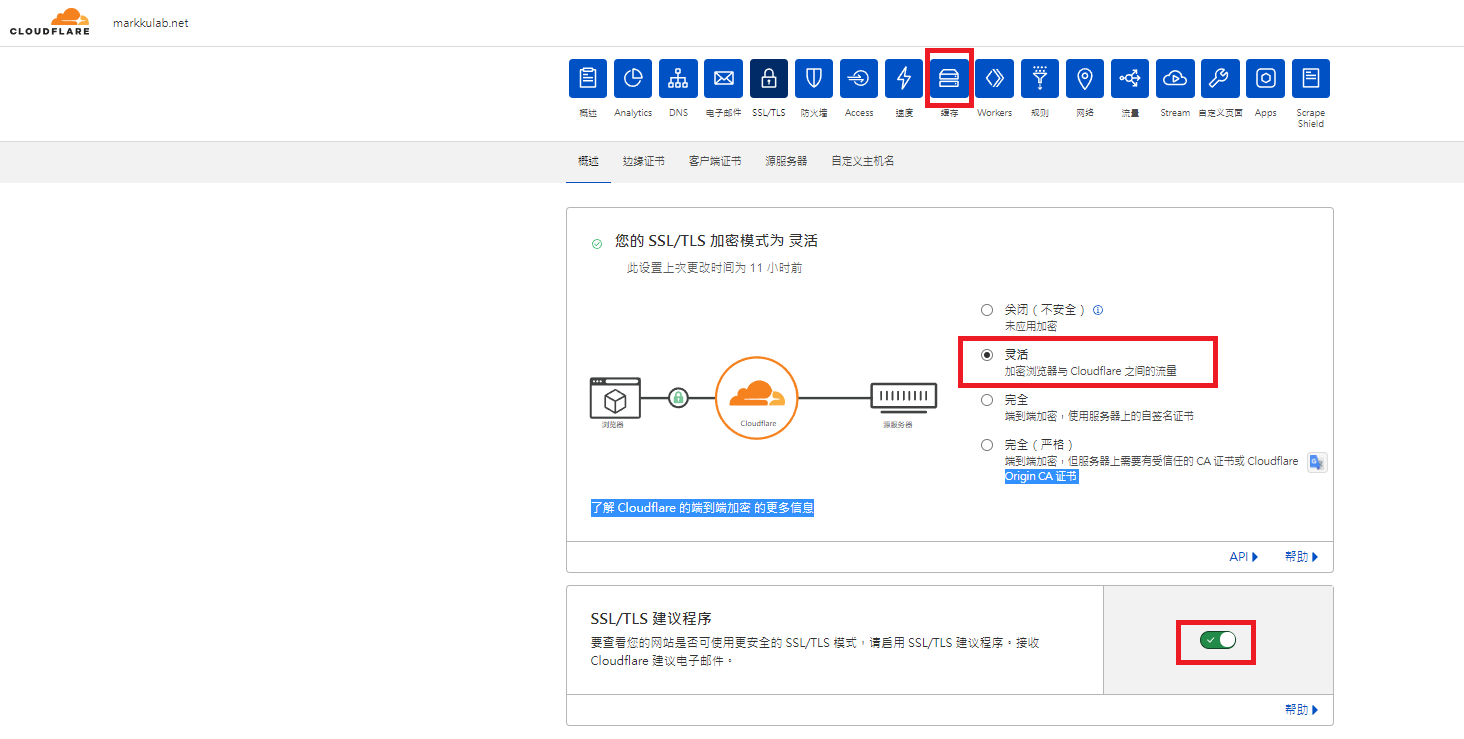
Cloudflare dashboard showing Flexible SSL/TLS encryption mode selected

9. Once active, response headers for static file requests will include Cloudflare-specific fields
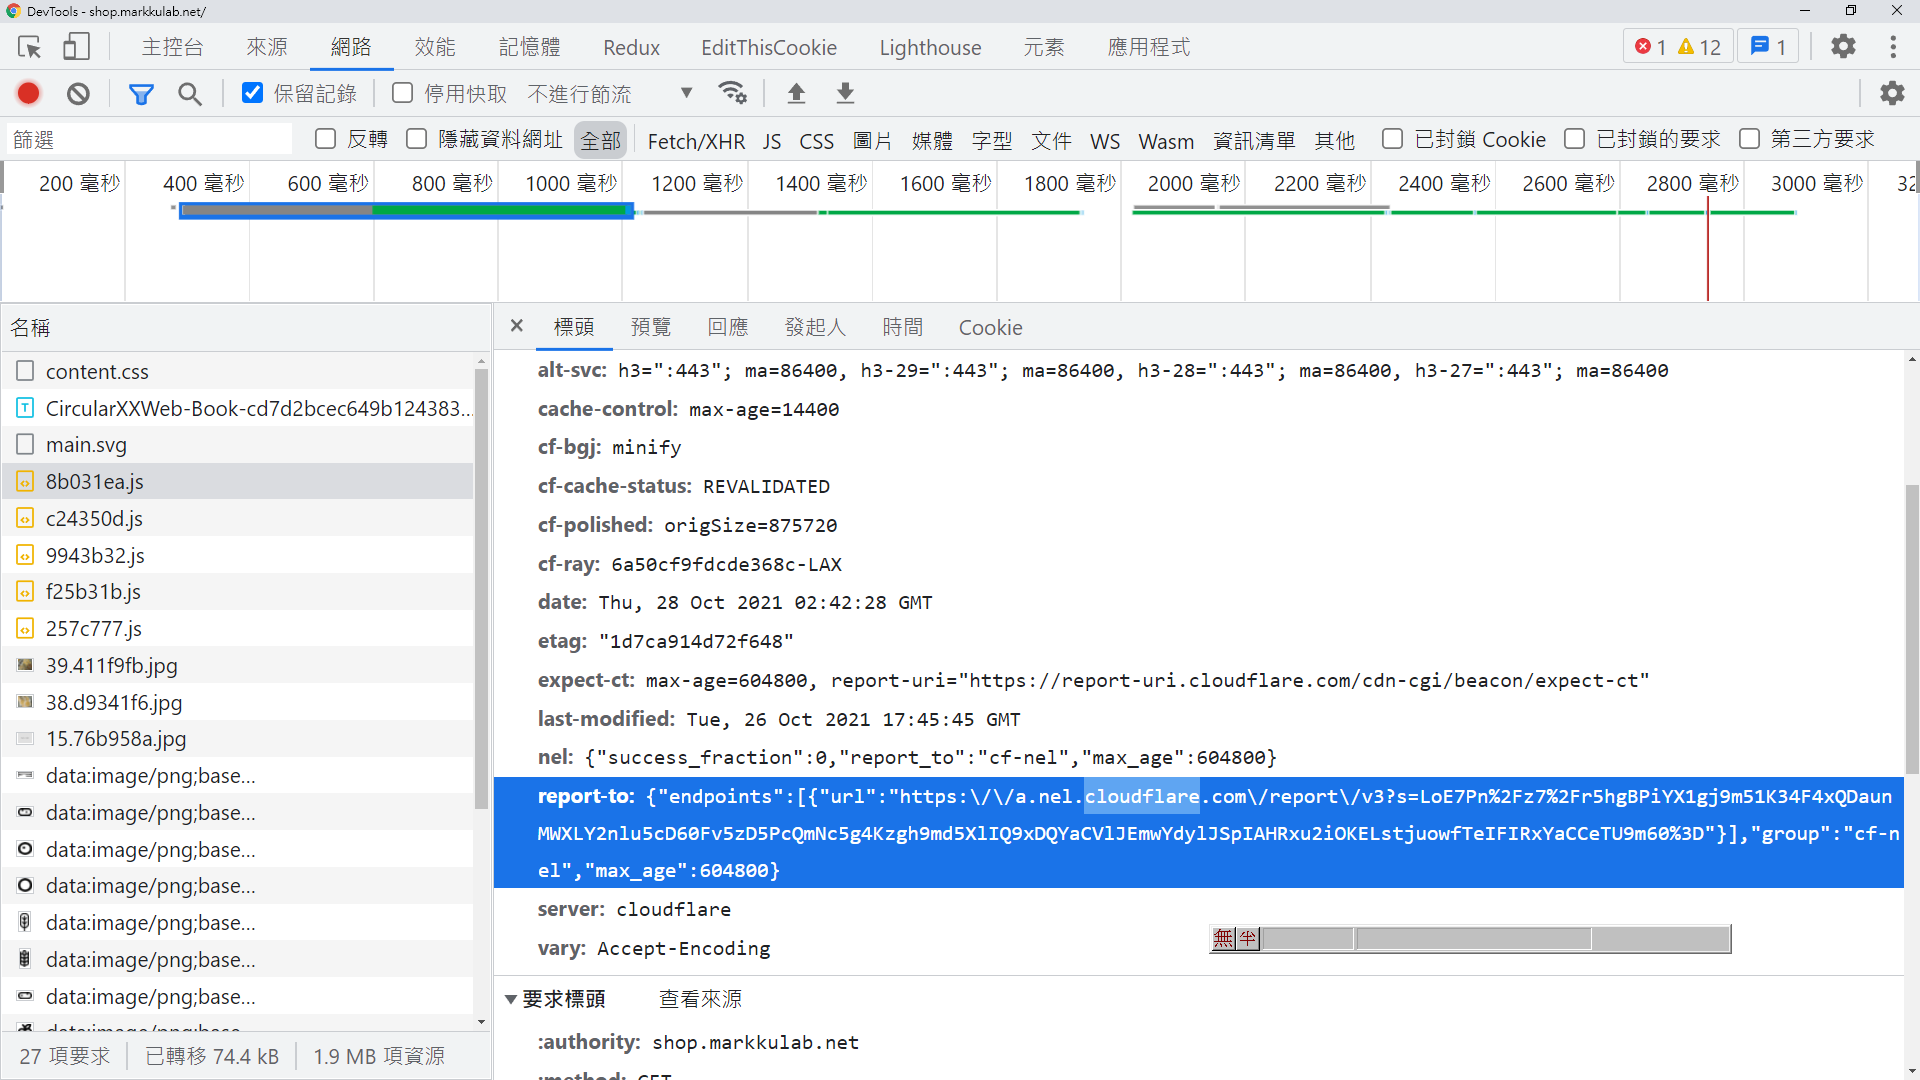
Cloudflare-specific response headers in Chrome DevTools Network tab

10. Check which CDN node you are connected to — look at the colo field

https://yourdomain/cdn-cgi/trace Cloudflare CDN trace output showing colo LAX
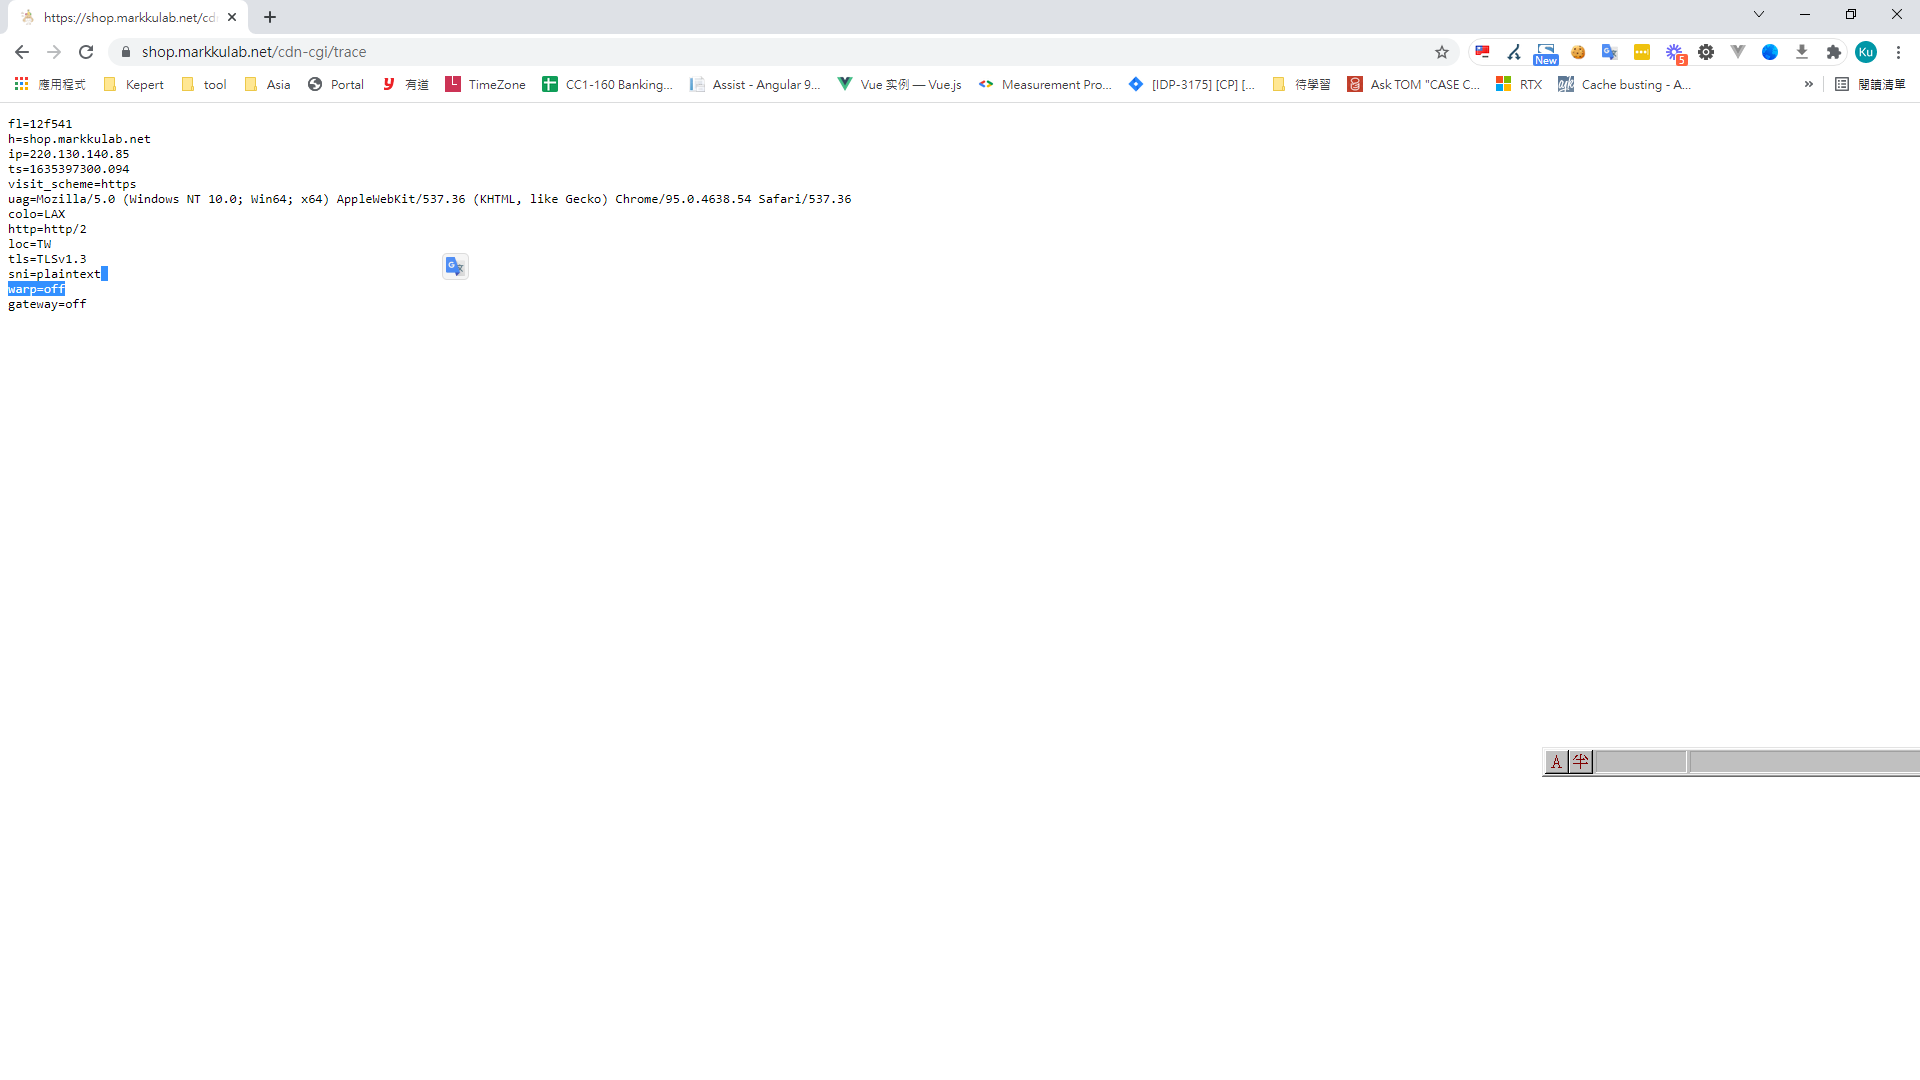
11. You can also use tracert to see the route your traffic takes

tracert markkulab.net
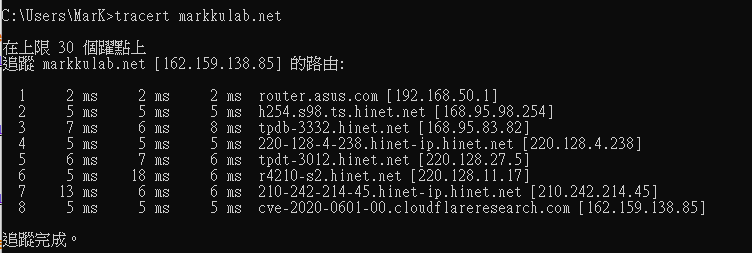
Command line output of tracert to markkulab.net via Cloudflare

Additional Tips

1. Enable Development Mode to temporarily bypass the CDN cache
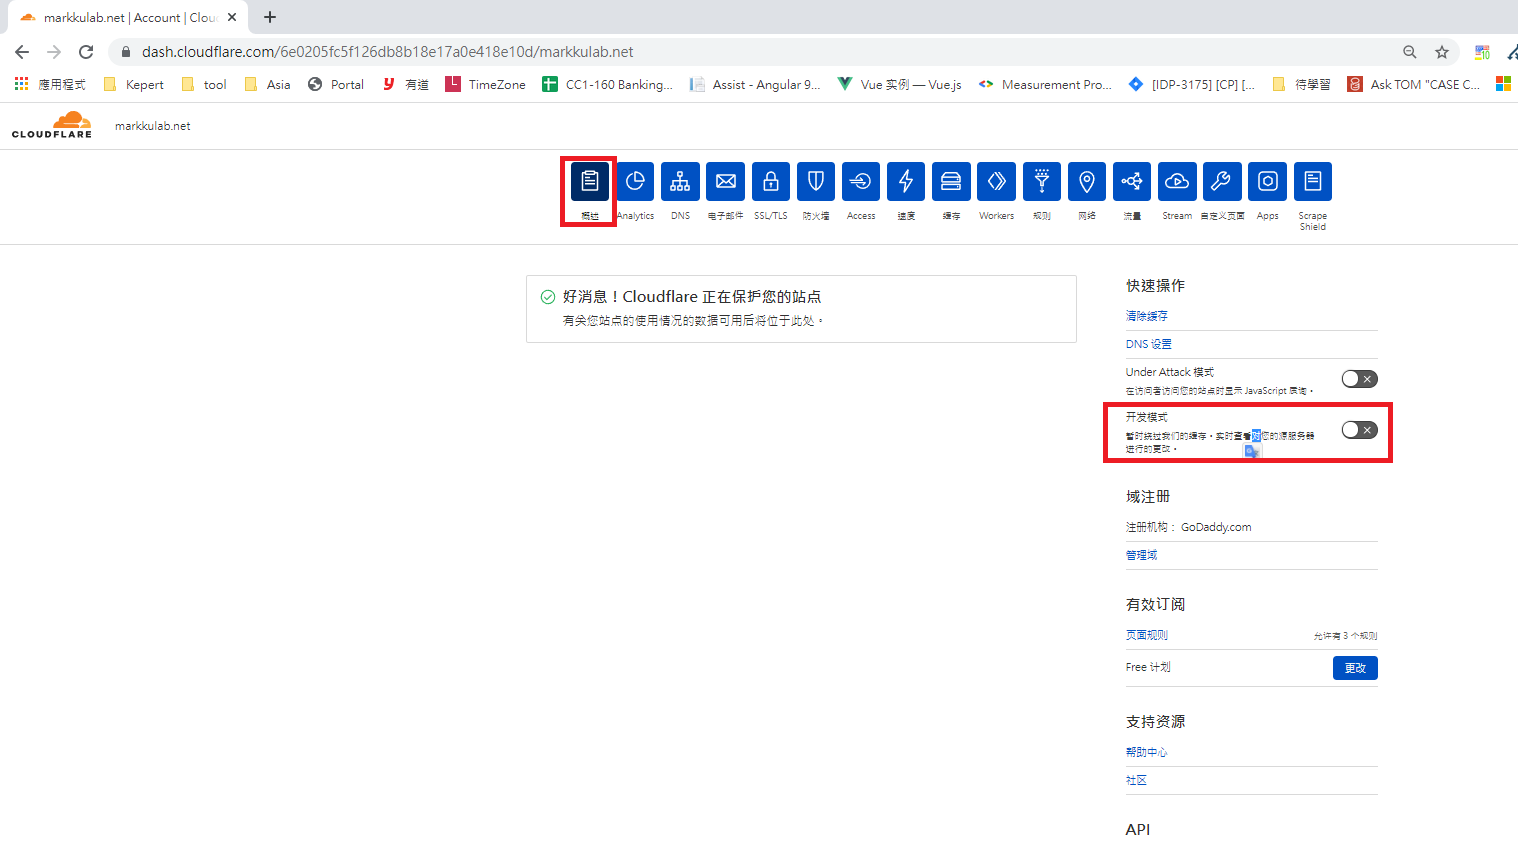
Cloudflare dashboard showing highlighted Development Mode toggle disabled

Author

Mark Ku

擁有 10+ 年經驗的資深軟體工程師,現為 AI 應用 Builder,專注於大型平台架構與簡化複雜系統設計,從電商系統到訂閱與收費平台,結合 AI Agent、AI 整合與自動化開發,打造高效率且可持續演進的產品技術基礎。Read More

Found this useful?

The author's free tools, daily podcasts and newsletter are all here.

Mark Ku · This article is licensed under CC BY 4.0. Credit the author and link back to the original when reusing it.

Comments

Subscribe to Newsletter

Subscribe to get new posts delivered instantly — never miss a tech share.

By submitting, you agree to receive emails. You can anytime.

Popular Posts

View all
Mark Ku
··602

Oracle Cloud Always Free Tier: Linux Host and Static IP for a $0 Cloud Solution

Oracle Cloud Always Free Tier: Linux Host and Static IP for a $0 Cloud Solution
Mark Ku
··490

Say Goodbye to Postman's Fee Trap! A Hands-on Guide to Bruno, the Open-Source Git-Native API Testing Powerhouse.

Say Goodbye to Postman's Fee Trap! A Hands-on Guide to Bruno, the Open-Source Git-Native API Testing Powerhouse.
Mark Ku
··333

A Free, Open-Source, Notion-like Knowledge Base — A Complete Guide to Deploying and Backing Up Outline Wiki

A Free, Open-Source, Notion-like Knowledge Base — A Complete Guide to Deploying and Backing Up Outline Wiki
Mark Ku
··264

Training Your Own AI Voice: Hardware Requirements, Open-Source Model Comparison, and LoRA Fine-Tuning

Training Your Own AI Voice: Hardware Requirements, Open-Source Model Comparison, and LoRA Fine-Tuning
Mark Ku
··221

Building an Efficient API Management Platform: Deploying Kong Gateway from Scratch - Part 1

Building an Efficient API Management Platform: Deploying Kong Gateway from Scratch - Part 1
Mark Ku
··215

Setting Up Samba on Ubuntu to Share Folders with Windows 11

Setting Up Samba on Ubuntu to Share Folders with Windows 11