
Introduction
In a world where multilingual communication keeps growing in importance, picking up a foreign language has become a common goal. The catch is that language learning takes time, patience, and—most importantly—effective opportunities to practice. This post walks through how to combine Microsoft Azure Speech Recognition with OpenAI's ChatGPT to build a tool that translates and responds in real time, making it easier to learn and apply a new language.
Prerequisites
Before getting started, you'll need:
- A Python environment to run the script.
- A Microsoft Azure subscription for the Speech service.
- An Azure OpenAI API key for generating ChatGPT responses.
How It Works
At its core, the system pairs Azure's speech recognition with OpenAI's language understanding. The flow breaks down into the following steps:
- Voice input: the system captures audio through the microphone.
- Speech recognition: Azure's Speech service transcribes the audio into text.
- Response generation: the recognized text is sent to ChatGPT, which produces three short example sentences.
- Display: the responses are shown to the user in real time.
Code Implementation Below is a simple Python script that shows how to wire up Azure Speech and the OpenAI ChatGPT model:
import os
import azure.cognitiveservices.speech as speechsdk
from langchain.prompts import ChatPromptTemplate
from langchain_openai import AzureChatOpenAI

# 設定OpenAI環境變數
os.environ["AZURE_OPENAI_ENDPOINT"] = "https://xxx.openai.azure.com/"
os.environ["AZURE_OPENAI_API_VERSION"] = "2024-02-15-preview"
os.environ["AZURE_OPENAI_CHAT_DEPLOYMENT_NAME"] = "gpt3-turbo"

# 初始化OpenAI模型
model = AzureChatOpenAI(
    openai_api_version=os.environ["AZURE_OPENAI_API_VERSION"],
    azure_deployment=os.environ["AZURE_OPENAI_CHAT_DEPLOYMENT_NAME"],
)

# 為OpenAI設定聊天模板
chat_template = ChatPromptTemplate.from_messages(
    [
        ("system", "你是一個國中英文老師.善於用簡單的單詞溝通."),
        ("human", "關於英文問題{question}, 給我怎麼回覆的三個句子,並給中文翻譯. 比較音節困難的單字額外給音標,音標放在單字後面"),
    ]
)

def get_responses(question):
    message = chat_template.format_messages(question=question)
    response = model.invoke(message)
    return response.content

def translate_speech_to_text_continuous():
    # 用於語音翻譯的Azure訂閱金鑰和服務區域
    speech_key = "<Your-Azure-Speech-Key>"
    service_region = "eastus"
    from_language = "en-US"
    to_language = "zh-Hant"

    # 創建語音翻譯配置和識別器
    translation_config = speechsdk.translation.SpeechTranslationConfig(
        subscription=speech_key, region=service_region,
        speech_recognition_language=from_language)
    translation_config.add_target_language(to_language)

    recognizer = speechsdk.translation.TranslationRecognizer(translation_config=translation_config)

    with open("translation_log.txt", "w", encoding="utf-8") as log_file:
        def recognized_handler(evt):
            result = evt.result
            if result.reason == speechsdk.ResultReason.TranslatedSpeech:
                recognized_text = f"Recognized: {result.text}\n"
                translated_text = f"Translated into Traditional Chinese: {result.translations['zh-Hant']}\n"
                print(recognized_text)
                print(translated_text)
                log_file.write(recognized_text)
                log_file.write(translated_text)

                # 如果識別的文字是問題,獲得簡單的例句回答
                responses = get_responses(result.text)
                print("例句:\n")
                print(responses)
                log_file.write(f"Responses: {responses}\n")

            elif result.reason == speechsdk.ResultReason.NoMatch:
                no_match_text = "No speech could be recognized\n"
                print(no_match_text)
                # log_file.write(no_match_text)
            elif result.reason == speechsdk.ResultReason.Canceled:
                cancellation_details = result.cancellation_details
                canceled_text = f"Speech Recognition canceled: {cancellation_details.reason}\n"
                # print(canceled_text)
                # log_file.write(canceled_text)
                if cancellation_details.reason == speechsdk.CancellationReason.Error:
                    error_text = f"Error details: {cancellation_details.error_details}\n"
                    print(error_text)
                    log_file.write(error_text)

        recognizer.recognized.connect(recognized_handler)

        # 開始連續識別
        recognizer.start_continuous_recognition()
        print("Listening...")

        try:
            # 保持程序運行直到按Enter鍵停止
            input("Press Enter to stop...\n")
        finally:
            recognizer.stop_continuous_recognition()

if __name__ == "__main__":
    translate_speech_to_text_continuous()
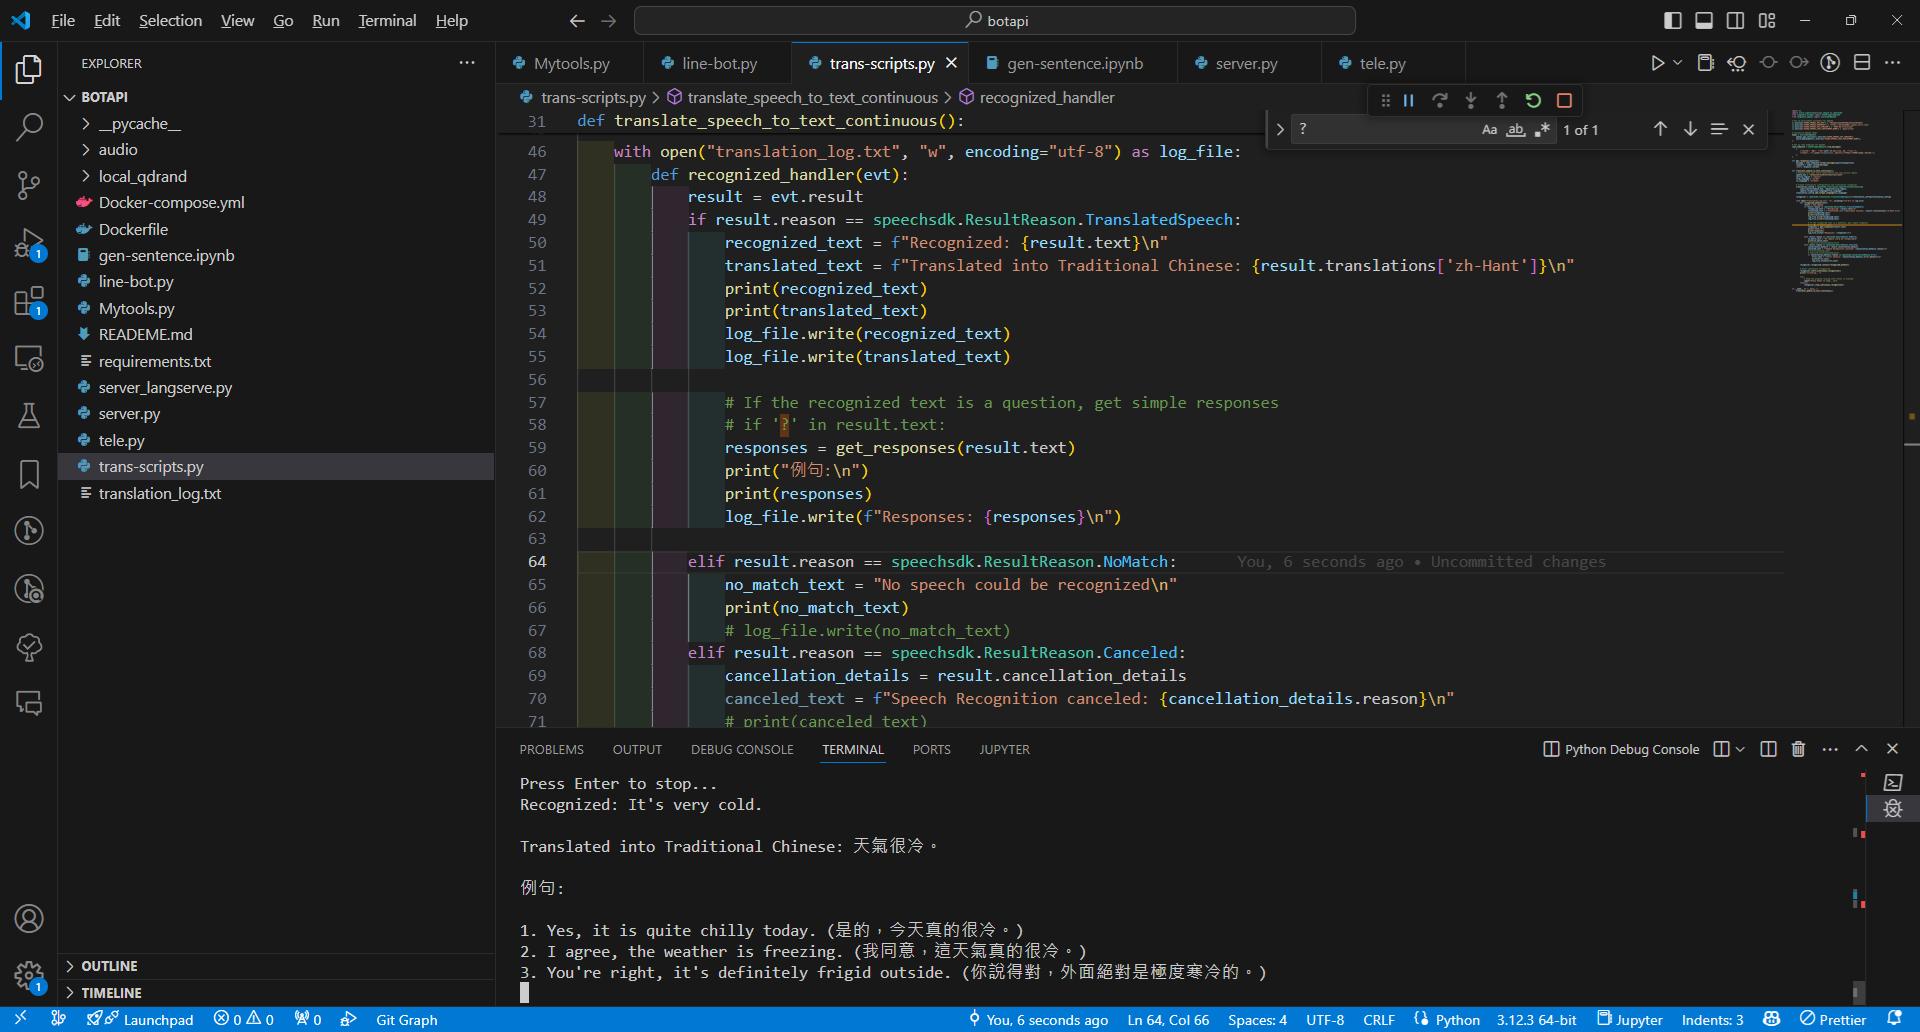
Running the Script
- When you run the Python script, the interaction unfolds as follows:
- Startup prompt: once the script launches, the system shows "Please say something..." to invite the user to speak.
- Voice input: speak into the microphone. The system captures whatever you say.
- Recognition output: as soon as you stop speaking, Azure's Speech service transcribes the audio into text. This is usually very fast. The recognized text appears on screen, for example: "Recognized text: Hello, I'd like to know more about AI."
- Response generation: the recognized text is forwarded to ChatGPT, which generates a response based on that input. This typically takes a few seconds.


Comments