
Background
Our customer service manager came back with feedback that the search experience on our website was poor. Users frequently complained that they could not find specific specs and asked for a Google-like search experience that would let them quickly find related products by spec. After spending some time on evaluation, I concluded that full-text search technology should be the solution.
Why we need full-text search
First, let's understand what full-text search tools are. They are software tools that efficiently search and retrieve large volumes of text data and return relevant results. They can scan massive text datasets in seconds and offer multiple search options such as keyword, phrase, and fuzzy search, allowing users to find what they need in many different ways.
How full-text search works
The biggest difference between full-text search and a regular database is that, with large datasets, a full table scan in a database takes a very long time. Full-text search uses an inverted index, which uses tokenizers to store data as key-value pairs ahead of time. Querying then becomes simple and fast.
Example with database-stored products
| SkuID (Stock Keeping Unit ID) | Name (SKU Name) |
|---|---|
| 1 | Kingstom 16GB Ram |
| 2 | Transcend 16GB Ram |
| ... | ... |
| P.S. SKU (Stock Keeping Unit) is the unique inventory identifier. |
The "inverted index" used by full-text search tokenizes text and records its order ahead of time, so user queries can be answered simply, quickly, and accurately.
| Term | SkuID (SKU IDs) |
|---|---|
| kingstom | 1 |
| 16gb | 1,2 |
| ram | 1,2 |
| transcend | 1,2 |
Built-in tokenizers
Elasticsearch ships with a few tokenizers — standard, whitespace, simple, and so on. Their job is to break text into terms and apply transformations such as lowercasing, stemming, and stop-word filtering, so the system can build indexes and run full-text searches more effectively. You can pick a tokenizer/analyzer that suits your use case or build your own for better search results.
Test the tokenizer
You can read this section now. Once Elasticsearch and Kibana are up, you can use Dev Tools to run the following snippet and try the tokenizer.
POST _analyze
{
  "analyzer": "standard",
  "text": "Transcend 16GB Ram"
}
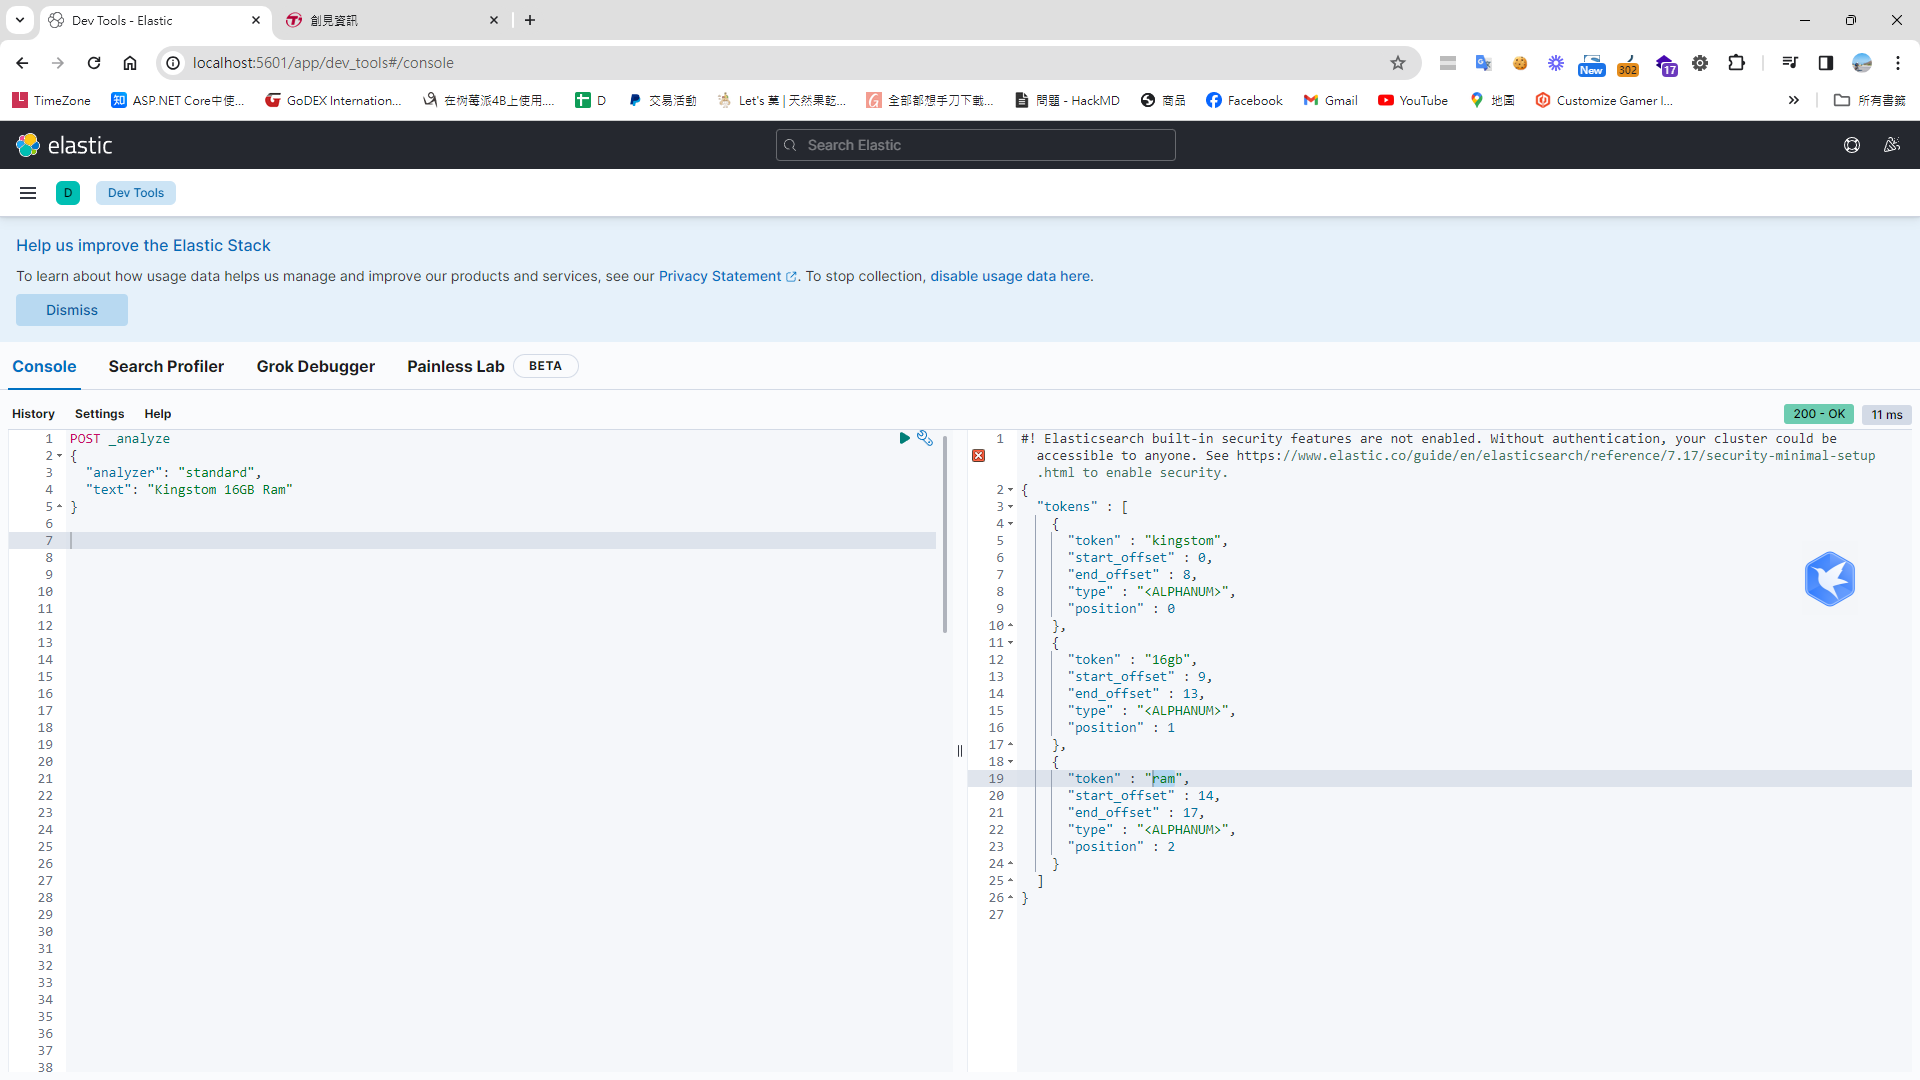 P.S. Elasticsearch does not ship with a Chinese tokenizer, but you can install popular Chinese tokenizers such as IK, Smartcn, or Jieba.
Elasticsearch concepts map closely to RDBMS — here is a quick translation table
| ElasticSearch | RDBMS |
|---|---|
| INDEX | Table |
| DOCUMENT | Row |
| FIELD | Column |
| MAPPING | Table schema |
Spin up the containers
Docker Compose (docker-compose.yml)
# Make sure version matches your docker-compose version: docker-compose --version
version: '3.8'
services:
  elasticsearch:
    image: elasticsearch:7.17.3
    ports:
      - "9200:9200"
      - "9300:9300"
    environment:
      - discovery.type=single-node
    container_name: elasticsearch

  kibana:
    image: kibana:7.17.3
    ports:
      - "5601:5601"
    environment:
      - ELASTICSEARCH_HOSTS=http://elasticsearch:9200
    container_name: kibana
    depends_on:
      - elasticsearch
Start the Docker Compose stack
docker-compose -p elasticsearch-group up
Add firewall rules with PowerShell
New-NetFirewallRule -DisplayName "elasticsearch -Port 5000" -Direction Inbound -Protocol TCP -LocalPort 5000 -Action Allow

New-NetFirewallRule -DisplayName "elasticsearch -Port 9200" -Direction Inbound -Protocol TCP -LocalPort 9200 -Action Allow

New-NetFirewallRule -DisplayName "kibana -Port 9200" -Direction Inbound -Protocol TCP -LocalPort 5601 -Action Allow
First, hit Elasticsearch at http://localhost:9200/_cat/indices to list all indexes. Elasticsearch is straightforward — it ships with a REST API, so you just hit a URL to get what you want.
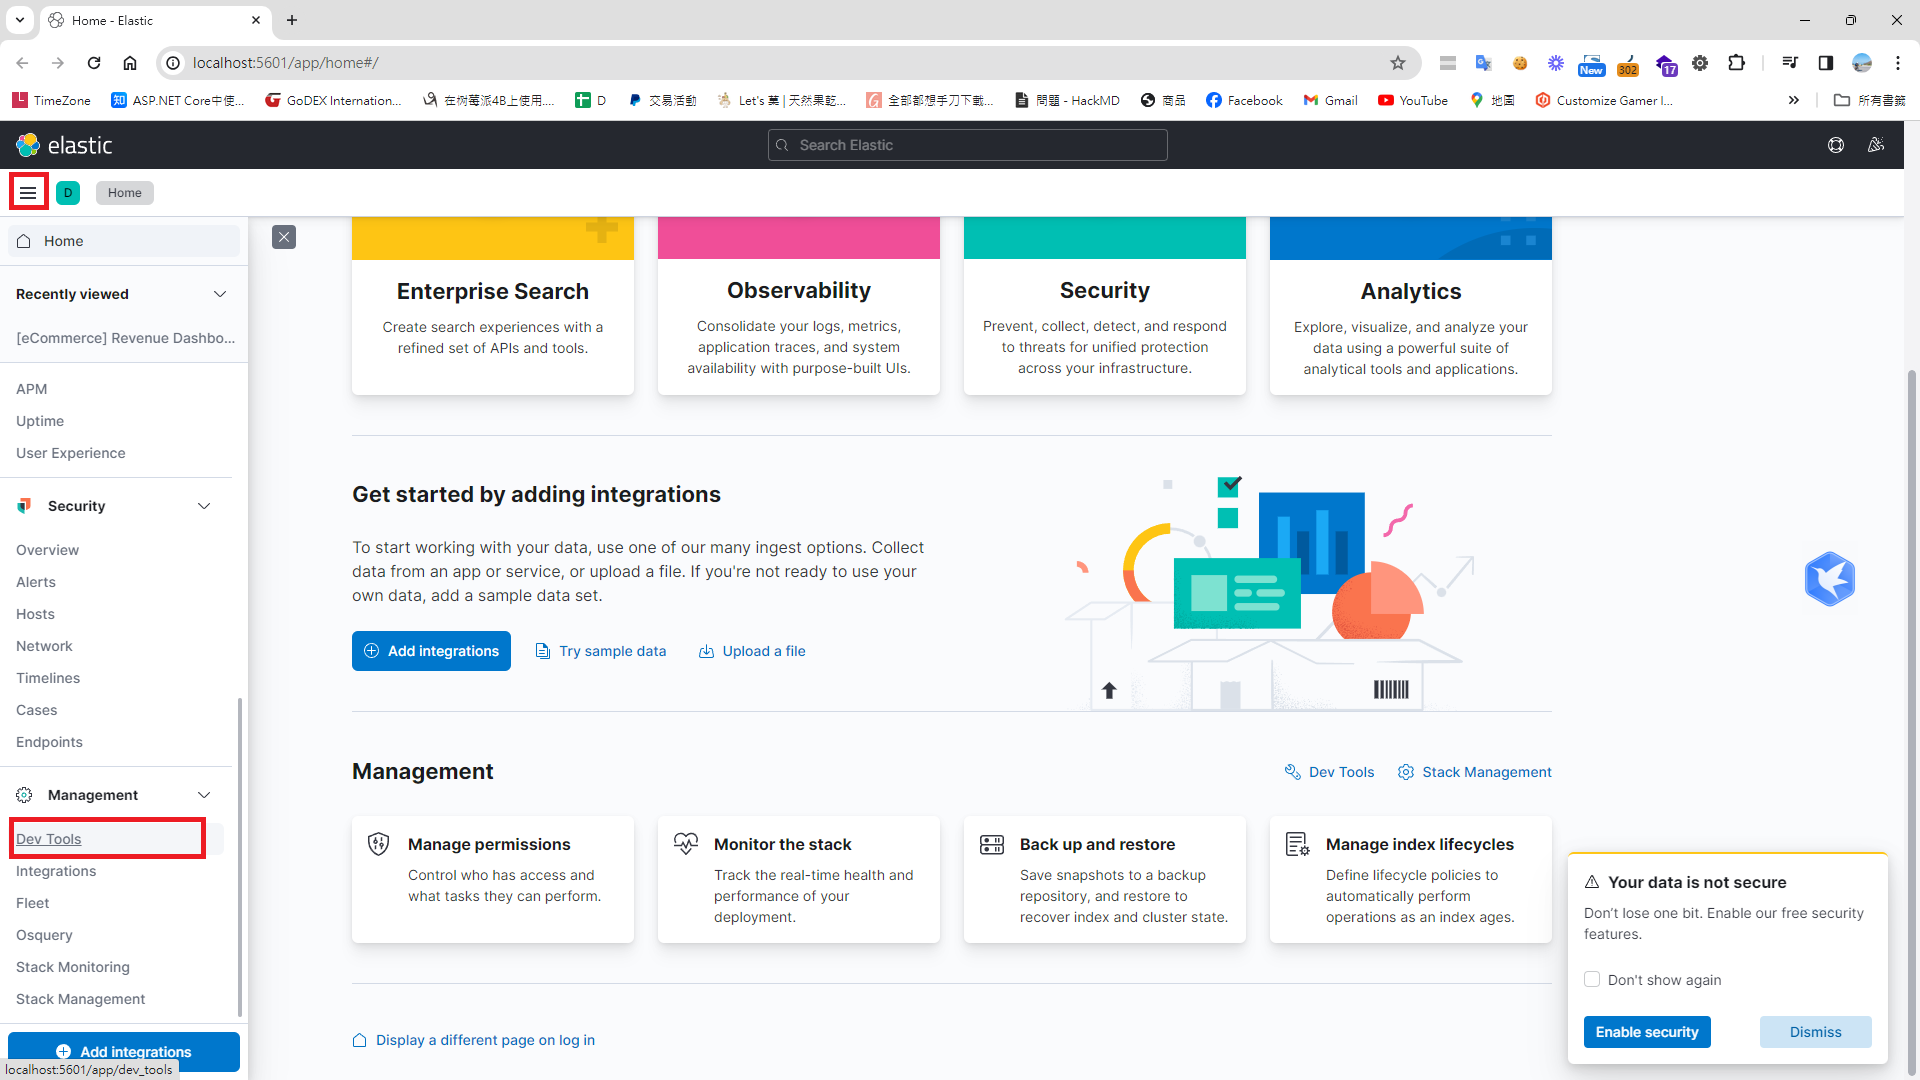
Next, open Kibana at http://localhost:5601/, expand the side nav and find Dev Tools, where you can drive the Elasticsearch instance from a UI.
GET /_cat/indices
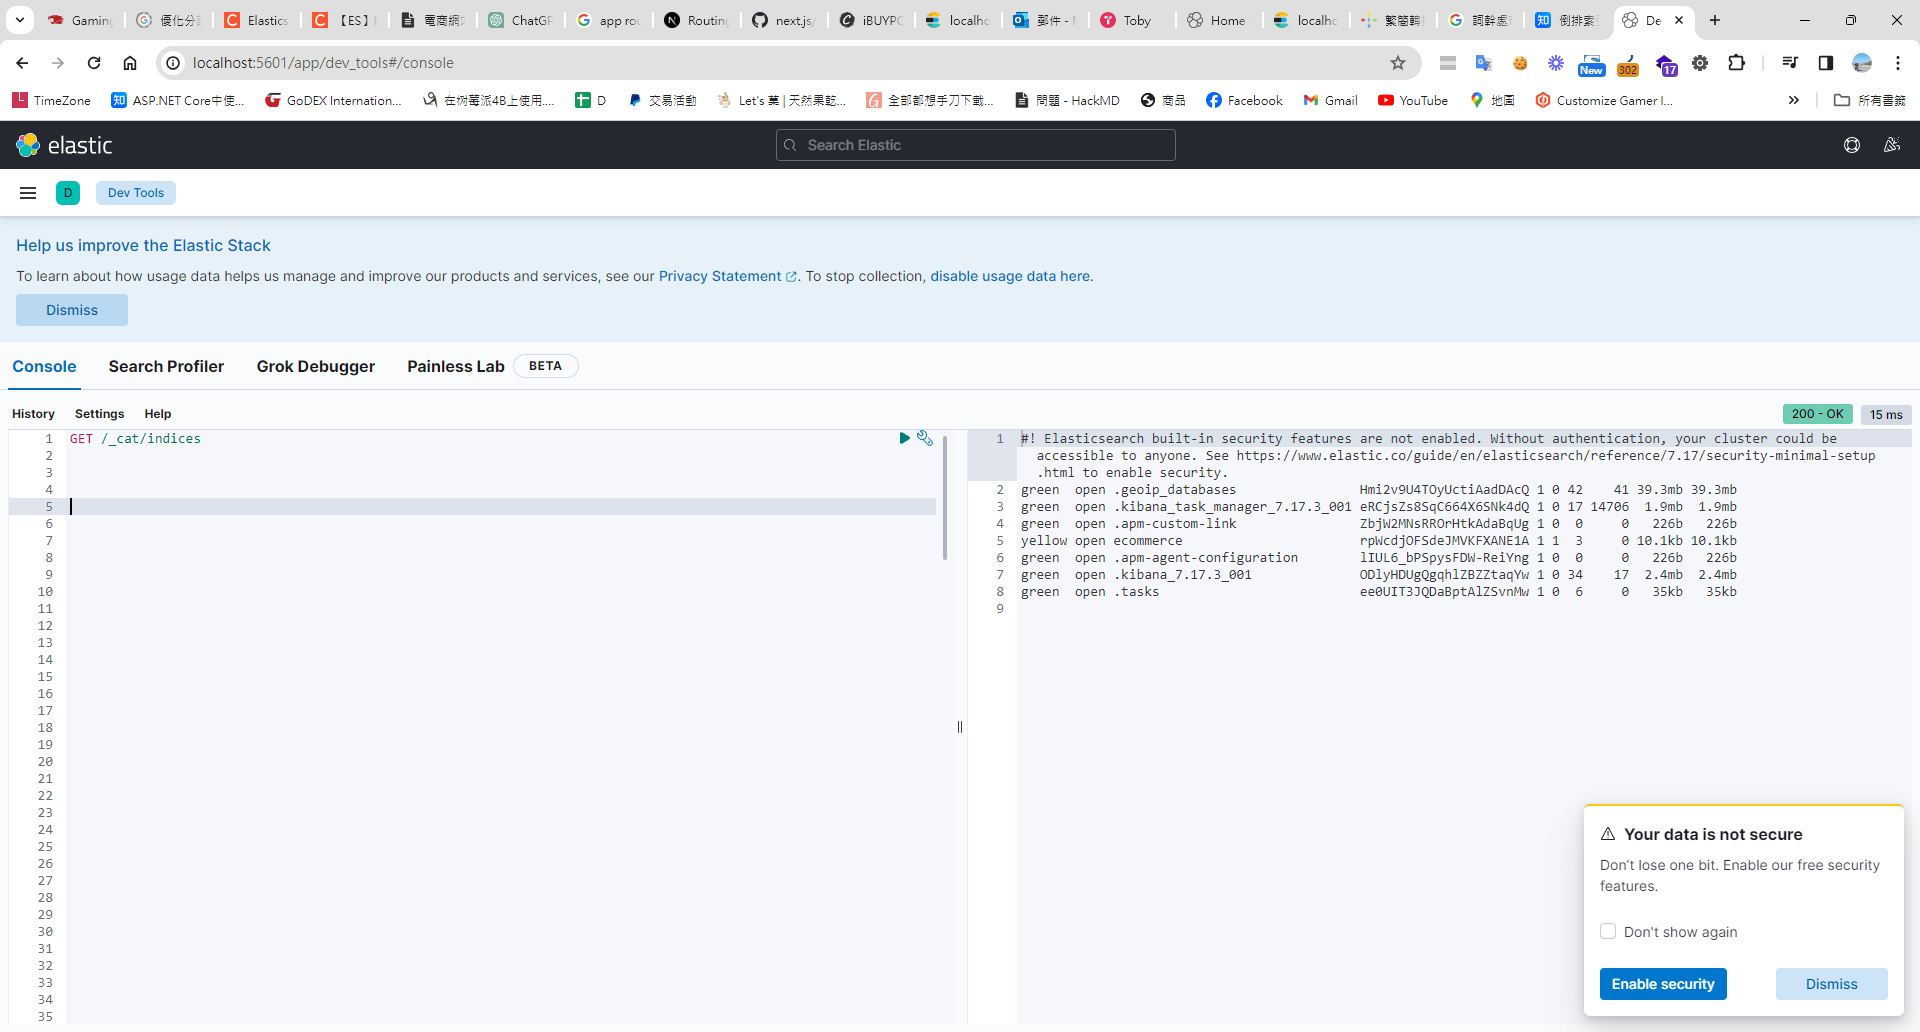
A database needs a schema before you can insert rows, but Elasticsearch is more flexible — you can insert documents first and the field types will be inferred automatically.
Insert a single document
POST product/_doc/1004
{
    "product_id": "1004",
    "product_name": "Super Tablet",
    "brand": "Techie",
    "price": 599.99,
    "processor": "ARM Cortex-A76",
    "video_card": "Integrated Mali-G76",
    "ram": "4GB",
    "storage": "128GB SSD",
    "special_features": ["Touchscreen", "Lightweight"],
    "stock": 25
}
P.S. _doc is the default document type. Modifying the document type is discouraged in newer versions and the feature is being phased out.
Bulk insert
POST _bulk
{"index": {"_index": "product", "_id": "1001"}}
{"product_id": "1001", "product_name": "UltraBook Pro", "brand": "Techie", "price": 999.99, "processor": "Intel Core i7", "video_card": "NVIDIA GeForce RTX 3060", "ram": "16GB", "storage": "512GB SSD", "special_features": ["Wifi", "Special Promotion"], "stock": 50}
{"index": {"_index": "product", "_id": "1002"}}
{"product_id": "1002", "product_name": "Gamer PowerHouse", "brand": "Xtreme", "price": 1299.99, "processor": "AMD Ryzen 7", "video_card": "AMD Radeon RX 6800 XT", "ram": "32GB", "storage": "1TB SSD", "special_features": ["Custom Liquid Cooling", "Special Promotion"], "stock": 30}
{"index": {"_index": "product", "_id": "1003"}}
{"product_id": "1003", "product_name": "PortaLight", "brand": "SleekTech", "price": 799.99, "processor": "Intel Core i5", "video_card": "Integrated Intel Iris Xe Graphics", "ram": "8GB", "storage": "256GB SSD", "special_features": ["Wifi"], "stock": 70}
Inspect the product mapping
GET /product/_mapping
P.S. A database needs a schema before you can insert rows, but Elasticsearch is more flexible — insert documents first and the field types will be inferred automatically.
Fetch the document with _id=1001
GET /product/_doc/1001
The response
{
  "_index" : "ecommerce",
  "_type" : "_doc",
  "_id" : "1001",
  "_version" : 1,
  "_seq_no" : 0,
  "_primary_term" : 1,
  "found" : true,
  "_source" : {
    "product_id" : "1001",
    "product_name" : "UltraBook Pro",
    "brand" : "Techie",
    "price" : 999.99,
    "processor" : "Intel Core i7",
    "video_card" : "NVIDIA GeForce RTX 3060",
    "ram" : "16GB",
    "storage" : "512GB SSD",
    "special_features" : [
      "Wifi",
      "Special Promotion"
    ],
    "stock" : 50
  }
}
Field cheat sheet based on the response above
| Field | Description |
|---|---|
| _index | The index the document belongs to |
| _type | Document type |
| _id | Document ID |
| _version | Version info — incremented on every update or delete |
| _source | The original JSON payload of the document |
Fetch all documents
GET /product/_search
Query a single document
GET /product/_search
{
  "query": {
    "match": {
      "product_name": "pro"
    }
  }
}
Common query types
| Query type | Description | Example |
|---|---|---|
match | Used for full-text search. Tokenizes the query and searches for each term. Supports text-field analysis, suitable for searching text fields. | Searching for "fast computer" |
match_phrase | Also used for full-text search, but requires the entire phrase to match while preserving word order. Suitable for exact phrase matching. | Searching for "fast computer", but matching the full phrase |
multi_match | Allows running a match query across multiple fields. Suitable when you want to search the same keyword across several fields. | Search "Apple" in title and description |
term | Exact-value matching with no tokenization. For non-analyzed fields, typically numbers, dates, or non-analyzed text. | Find a document with a specific ID |
fuzzy | Handles typos and approximate matching using Levenshtein edit distance. Useful when typos must be tolerated. | "aple" can match "apple" |
wildcard | Allows wildcard matching with * and ?. Suitable for matching specific patterns. | "appl*e" can match "apple" |
Wildcard query
GET /product/_search
{
  "query": {
    "wildcard": {
      "product_name": "pro*"
    }
  }
}
Fuzzy query (allows typos)
GET /product/_search
{
  "query": {
    "fuzzy": {
      "product_name": {
        "value": "pro",
        "fuzziness": "AUTO"
      }
    }
  }
}
Multi-field search
GET /product/_search
{
  "query": {
    "multi_match": {
      "query": "your keyword",
      "fields": ["price", "processor", "video_card", "ram", "storage", "special_features"]
    }
  }
}
Query index document info — (count)
POST /product/_doc
{
  "query": {
    "bool": {
      "must": [
        { "match": { "product_name": "4060" } }
      ]
    }
  }
}
Delete a document by ID
DELETE /product/_doc/1001
Delete an index along with its documents
DELETE /product
Delete all documents
POST /product/_delete_by_query
{
  "query": {
    "match_all": {}
  }
}
Integrating Elasticsearch with Next.js
Install the @elastic/elasticsearch package
npm install @elastic/elasticsearch
Then create an Elasticsearch client
// lib/elasticsearch.ts
import { Client } from '@elastic/elasticsearch';

const client = new Client({
    node: 'http://localhost:9200', // change this to your Elasticsearch node address
});

export default client;
Create a Next.js API route that queries Elasticsearch
// pages/api/search.ts
import client from '../../lib/elasticsearch';

import client from '@utils/elasticsearch';
import { NextApiRequest, NextApiResponse } from 'next';

export default async function handler(req: NextApiRequest, res: NextApiResponse) {
    try {
        // Read the search keyword from the body or query string
        const keyword = req.body.keyword || req.query.keyword;

        // Build a multi-field Elasticsearch query
        const query = {
            multi_match: {
                query: keyword,
                fields: ['price', 'processor', 'video_card', 'ram', 'storage', 'special_features'],
            },
        };

        // Run the Elasticsearch query
        const body = await client.search({
            index: 'product',
            body: { query },
        });

        // Return the result
        res.status(200).json(body.hits.hits);
    } catch (error: any) {
        res.status(500).json({ message: error.message });
    }
}
Finally, build a search input and button on the frontend
// app/elasticsearch/page.tsx
'use client';
import { useState } from 'react';

export default function Search() {
    const [keyword, setKeyword] = useState<string>('3060');
    const [searchResults, setSearchResults] = useState<any[]>([]); // state for search results

    async function searchProducts(keyword: string): Promise<any[]> {
        const response = await fetch('/api/search', {
            method: 'POST',
            headers: { 'Content-Type': 'application/json' },
            body: JSON.stringify({ keyword }),
        });
        const data = await response.json();
        debugger;
        return data;
    }

    const handleSearch = async () => {
        const results = await searchProducts(keyword);
        debugger;
        // Update the search results state
        setSearchResults(results);

        // Process the results
    };

    return (
        <div className="p-4">
            <input
                type="text"
                value={keyword}
                onChange={(e) => setKeyword(e.target.value)}
                className="mr-2 rounded-md border border-gray-300 p-2"
            />
            <button onClick={handleSearch} className="rounded-md bg-blue-500 p-2 text-white">
                Search
            </button>

            {/* Render the search results */}
            <div className="mt-4">{JSON.stringify(searchResults)}</div>
        </div>
    );
}
And the integration is done — pretty straightforward, right?



Comments