
解決問題
我目前任職流量不小的 B2C 電子商務公司,為避免不小心將結帳畫面改壞了,而沒被發現,而我著手研究 UI TEST,用於保護我們的結帳流程,之前就有用 playwright 來做 SEO 的預渲染,在評估了幾套 UI 測試後,發現 playwright 這幾年生態變得很完整及簡單,非常適合我們,其優點如下
- 微軟推出的開源 UI-Test 框架
- 整合 Jest
- 支援 vs code 開發及除錯
- 預設整合 Github
- 提供完整的 Report
- 支援 node js
我預期的運作流程

步驟
首先,我們先建立 playwright 測試專案 官方文件
npm init playwright@latest
選擇 Typescript 及 github action flow 整合
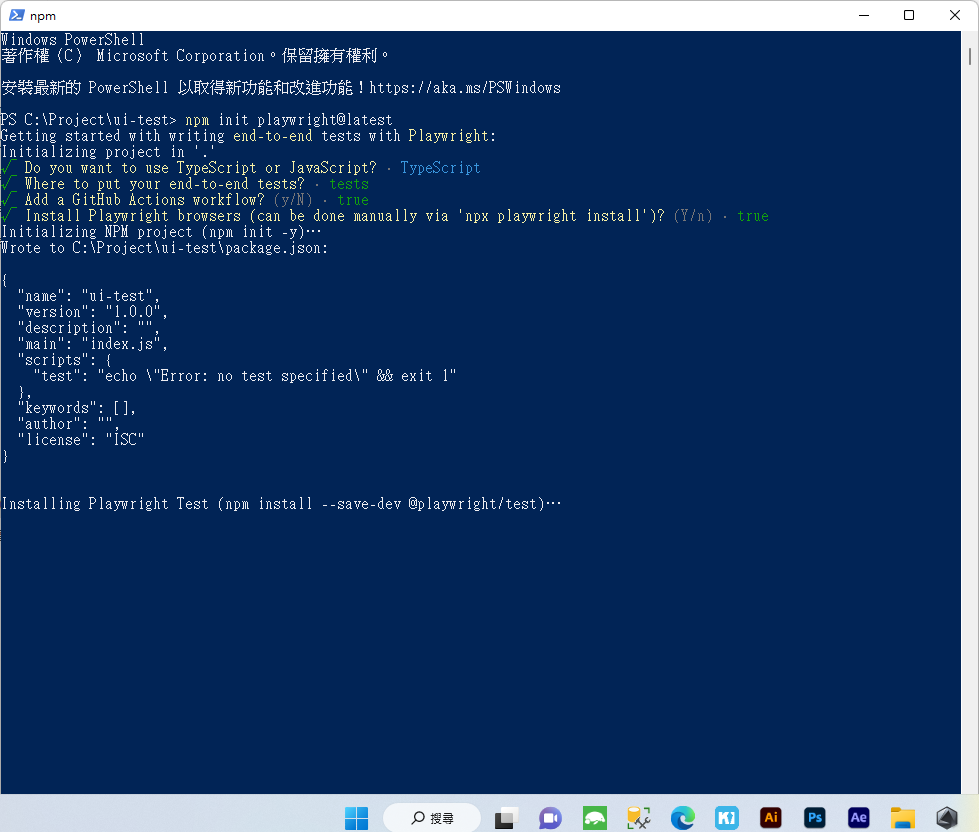
打開剛剛建立的測試專案,在資料夾裡其實己寫好基本的測試範例
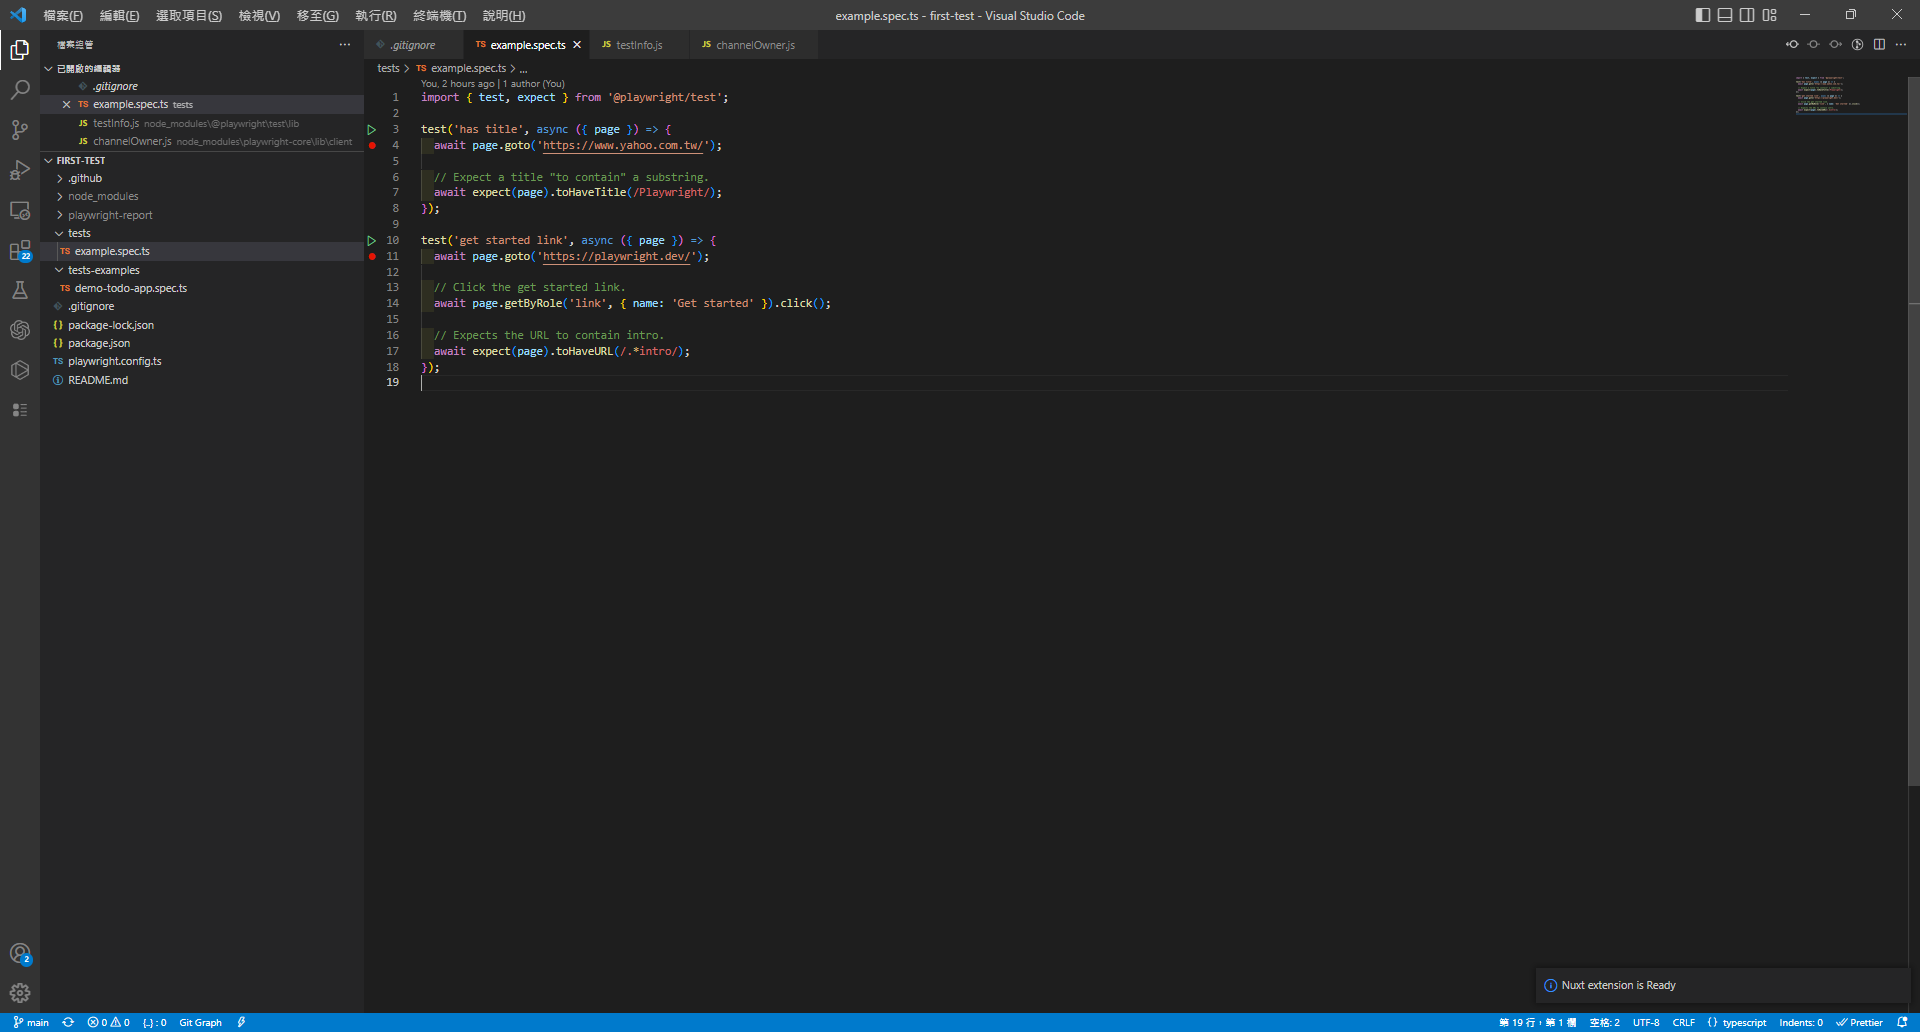
請先在 vscode 安裝 jest 套件 及 Playwright Test for VSCode 套件
並加入中斷點,並對綠色的啟動箭頭 >右鍵 > 對測試偵錯
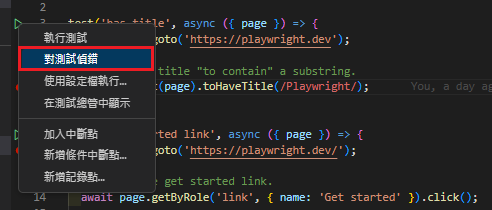
此時就會跳出瀏覽器,並可以逐行除錯
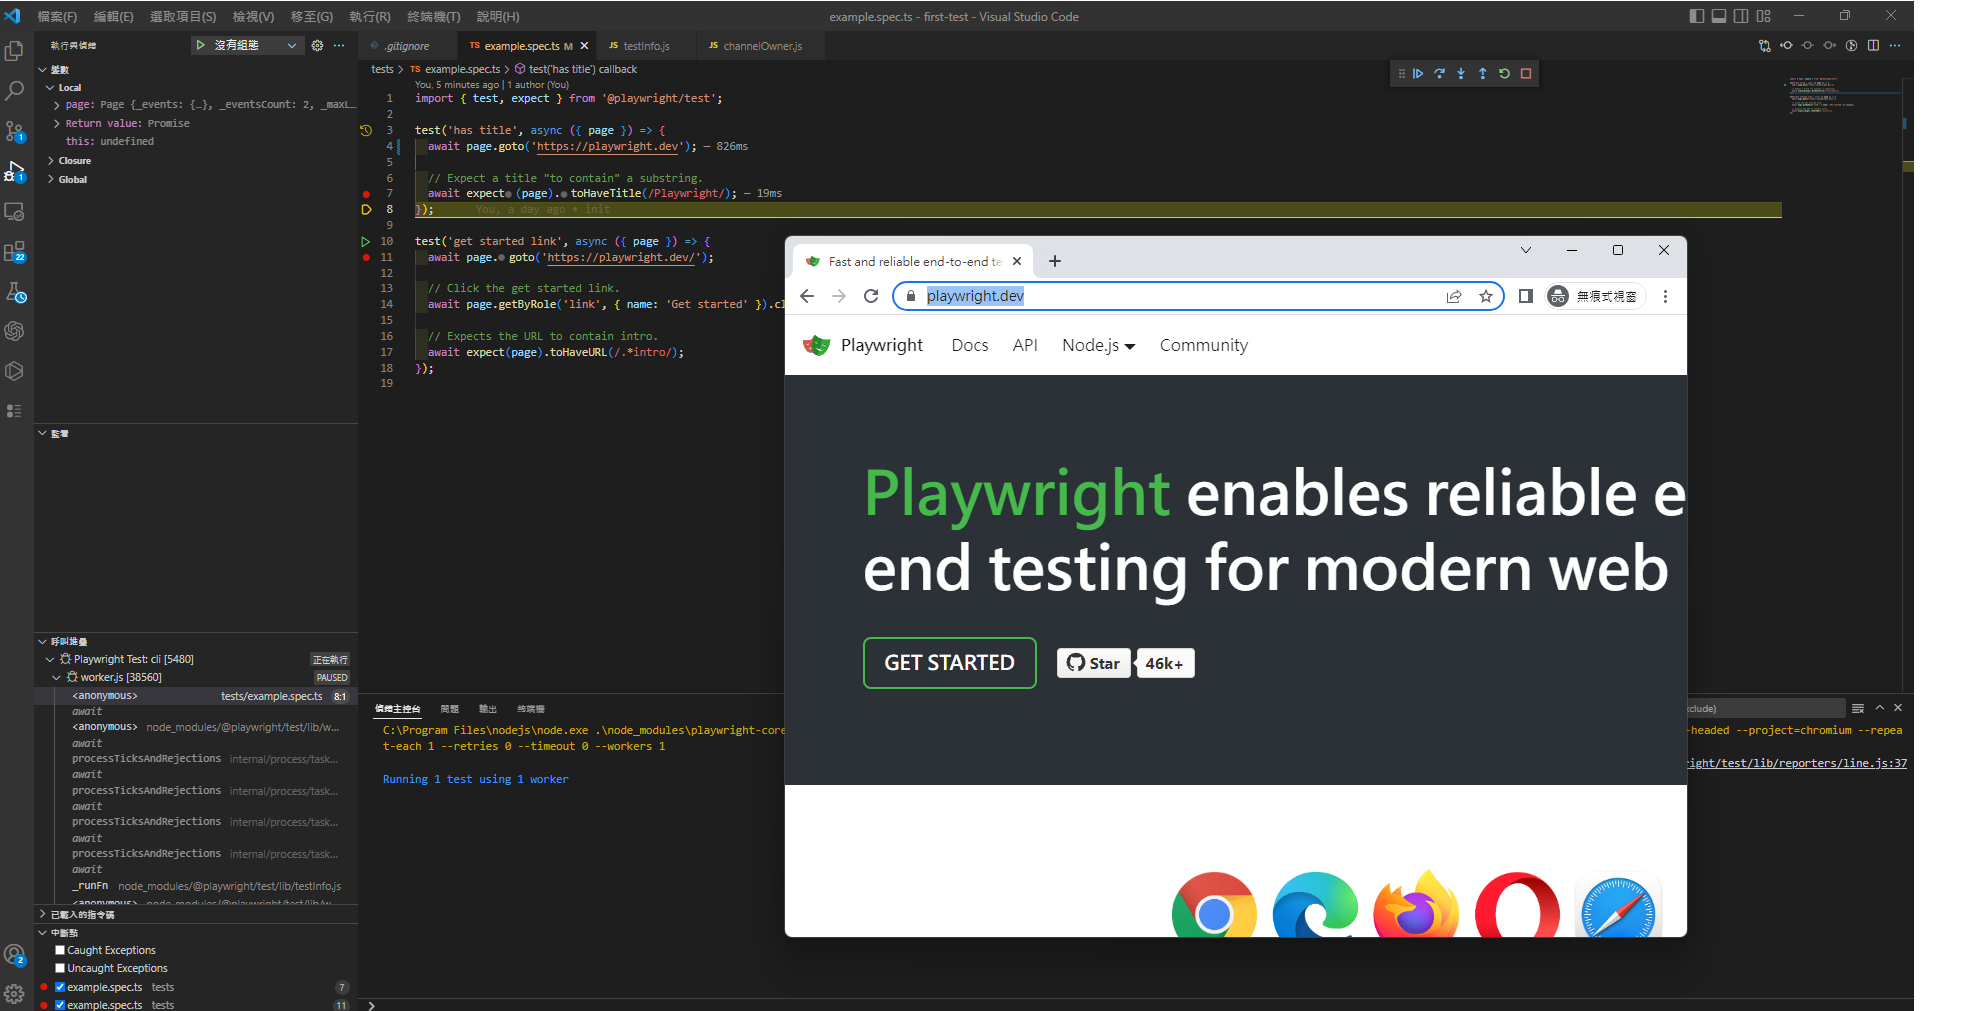
看到這邊爽度就爽度超高,過去寫過 python selenium 都還要花很多時間配置系統環境。
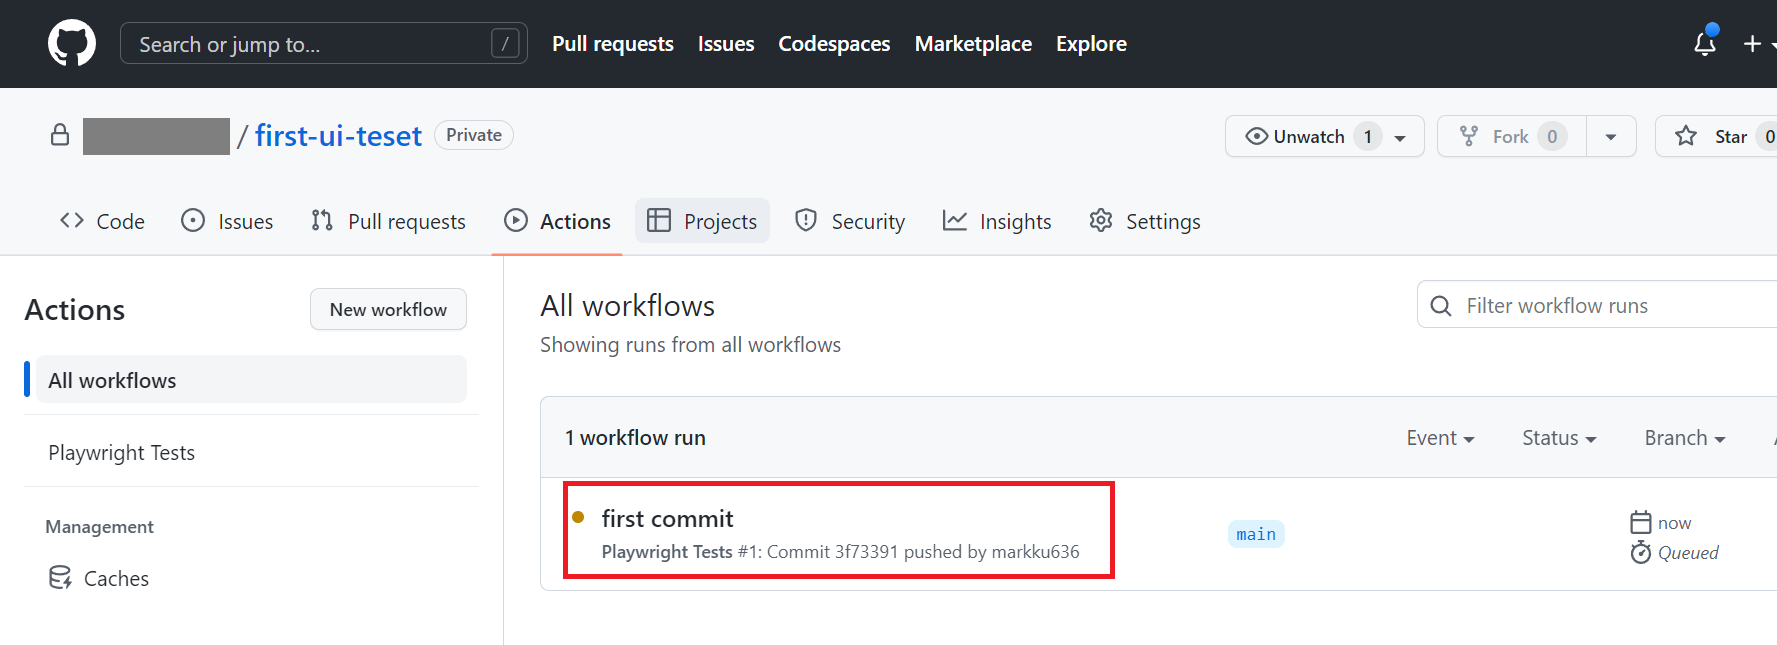
接著,將你的專案推上 github,此時就會自動建置( 測試 ),點開工作記錄
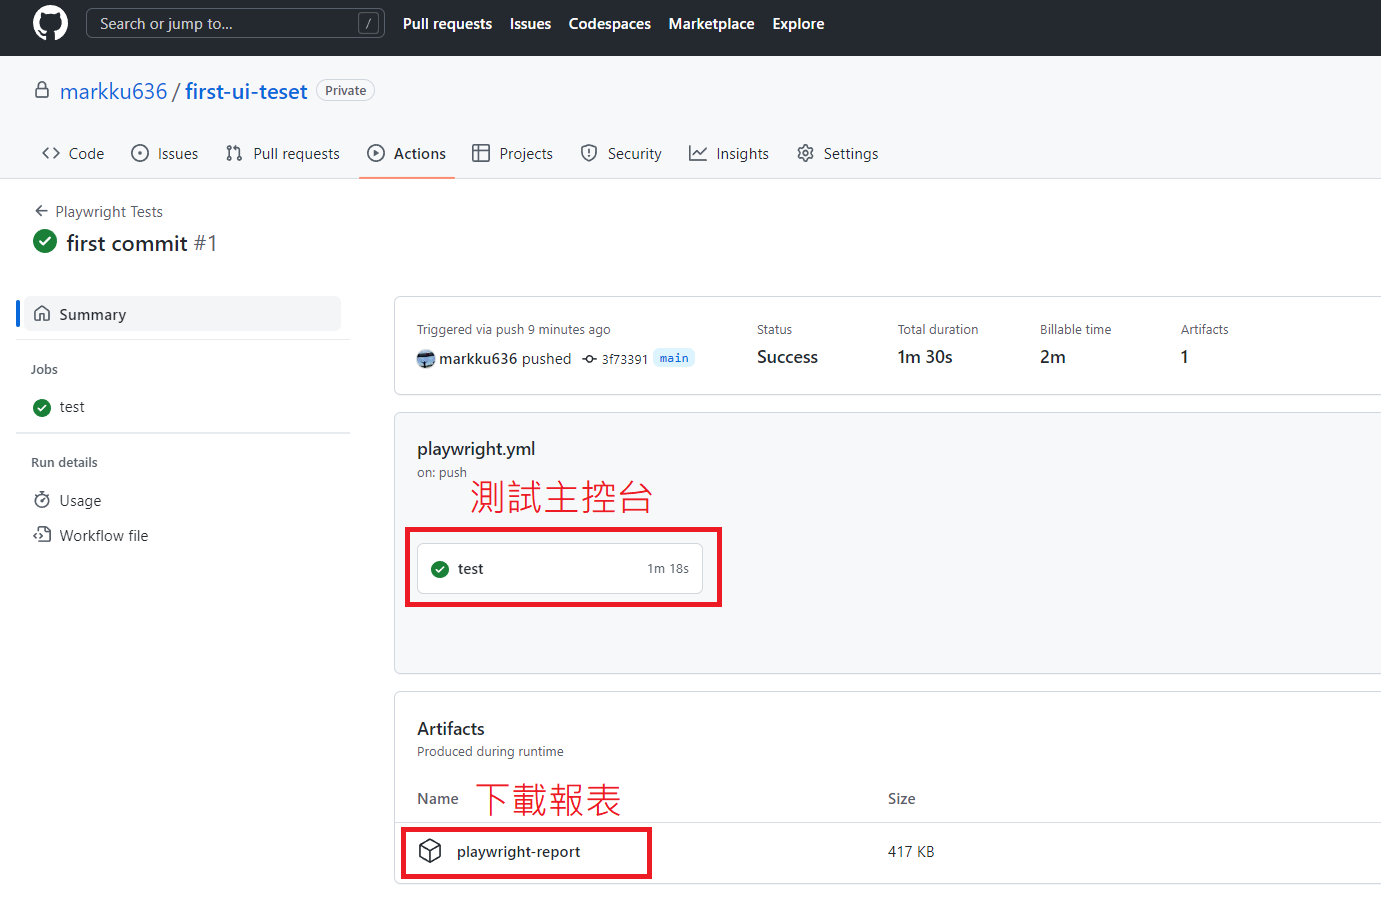
隨後我們可以發現測試己成功完成建置,並發現主控台入口及報表的入口
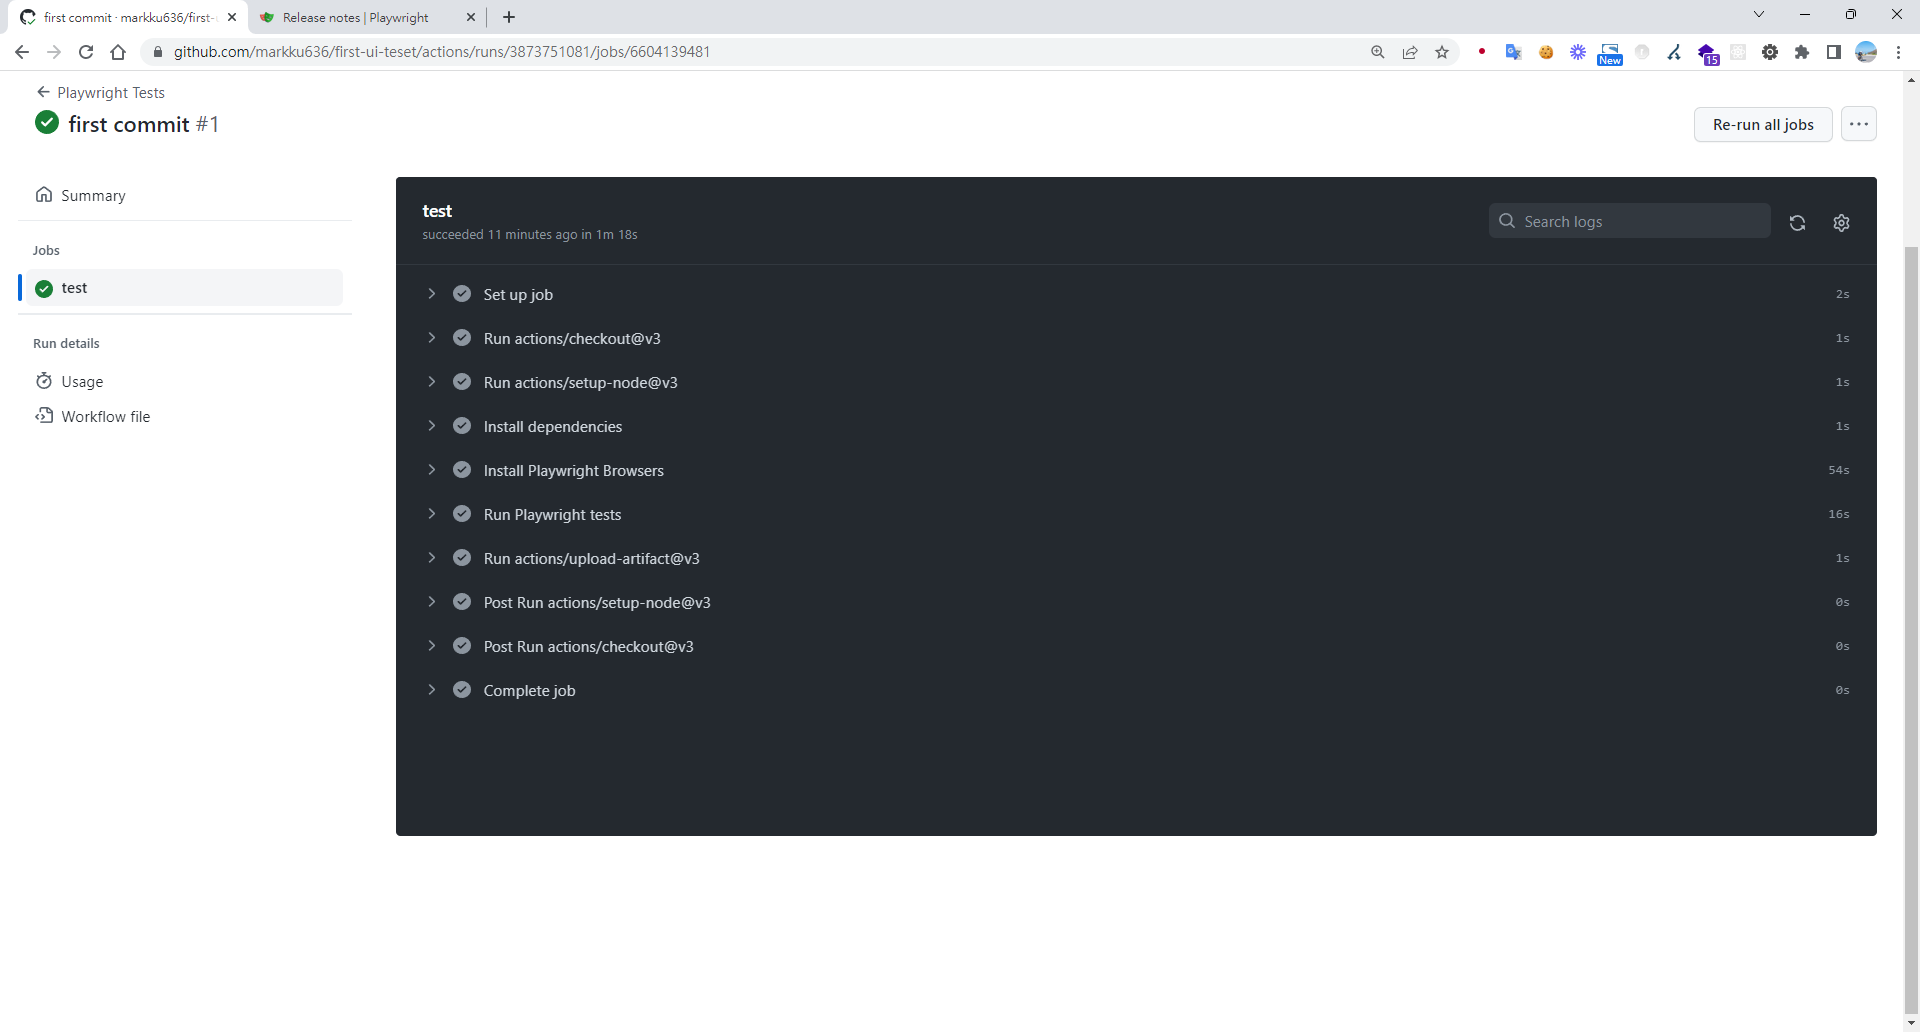
點擊進入測試主控台,可以看 job 執行了些什麼
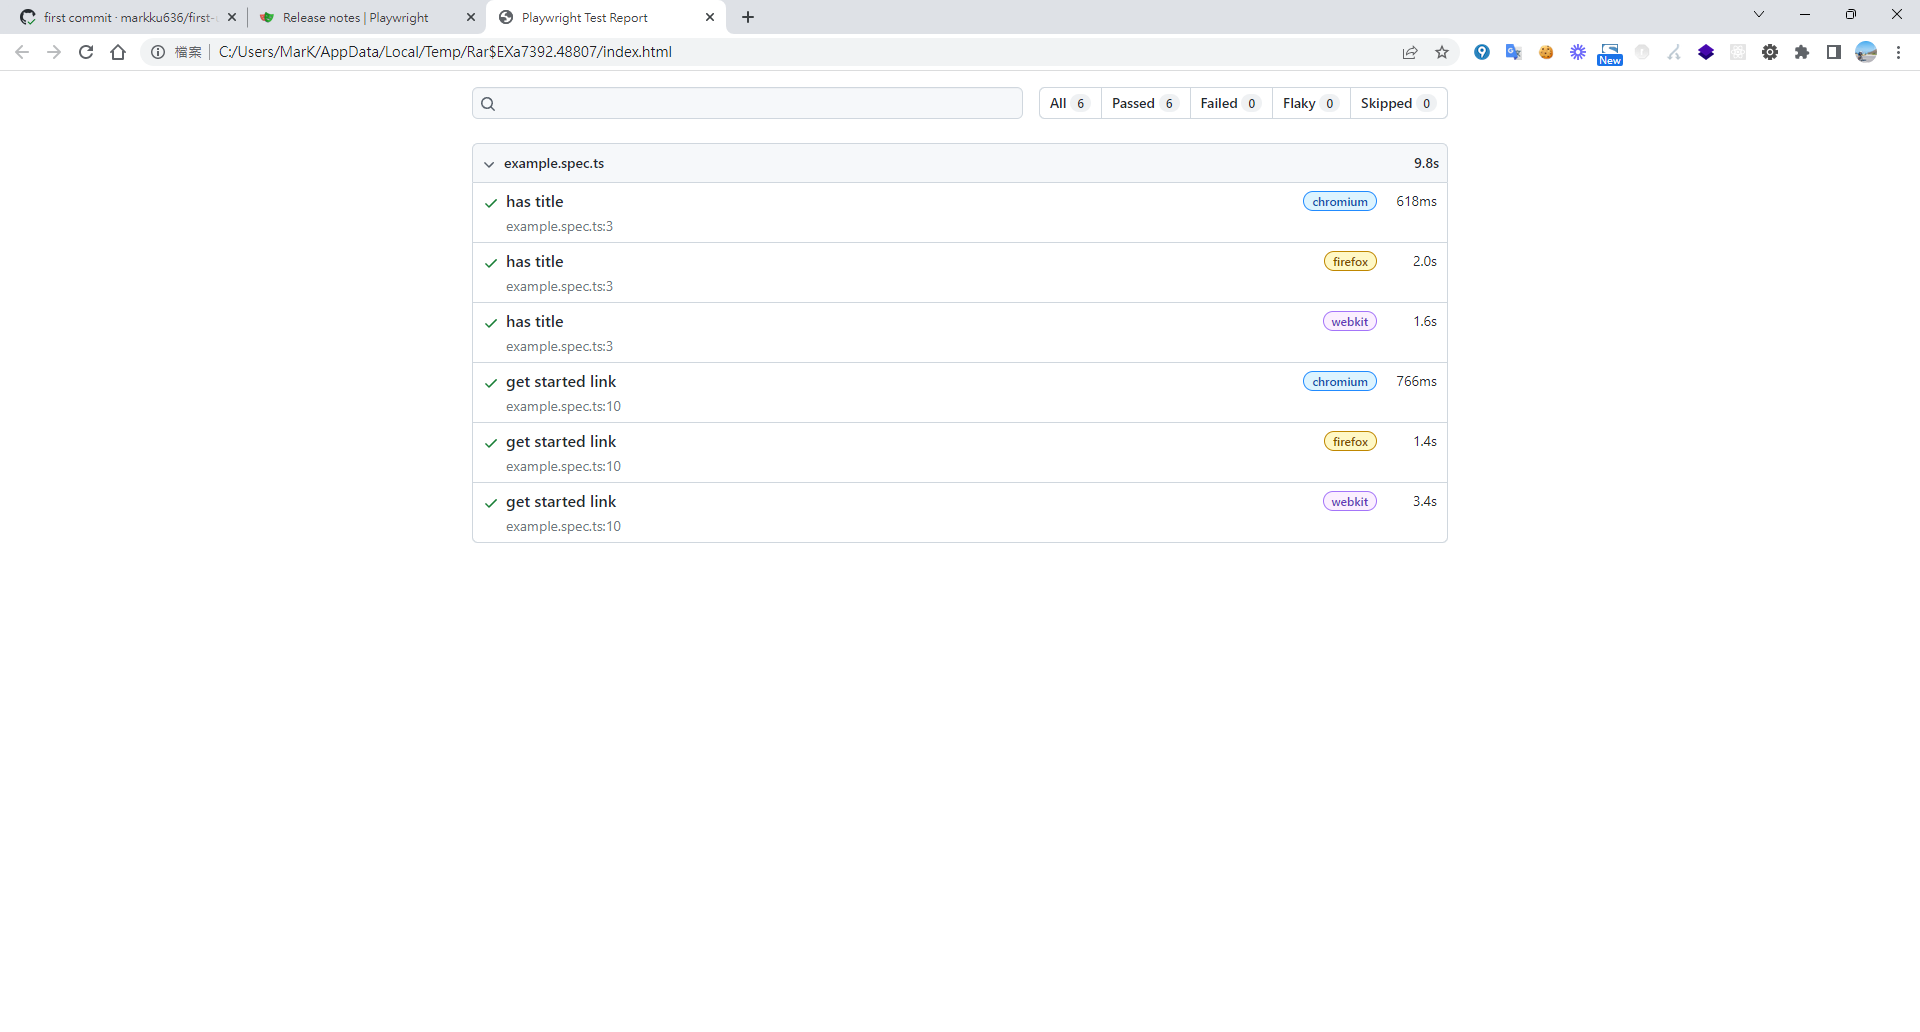
打開下載的報表
接著,因我們預期將測試的結果及報表推送到 Teams
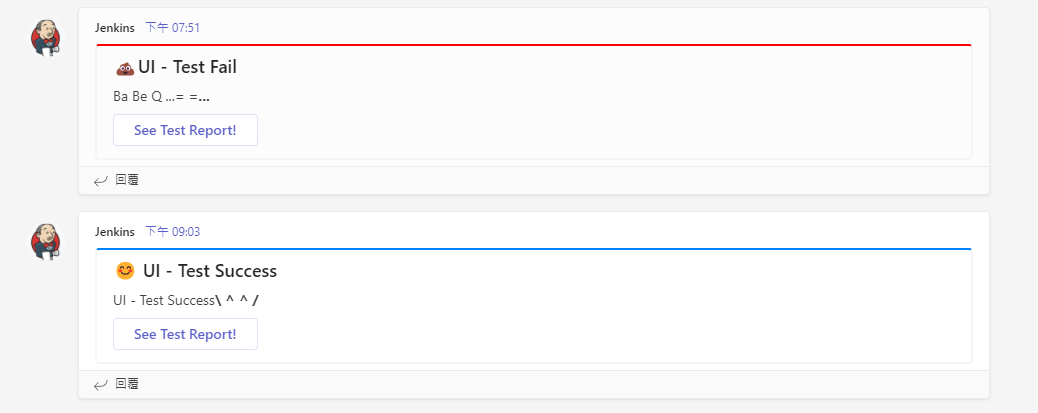
請先至 github repo 的 Settings > Secrets > 建立 Actions secrets 參數。
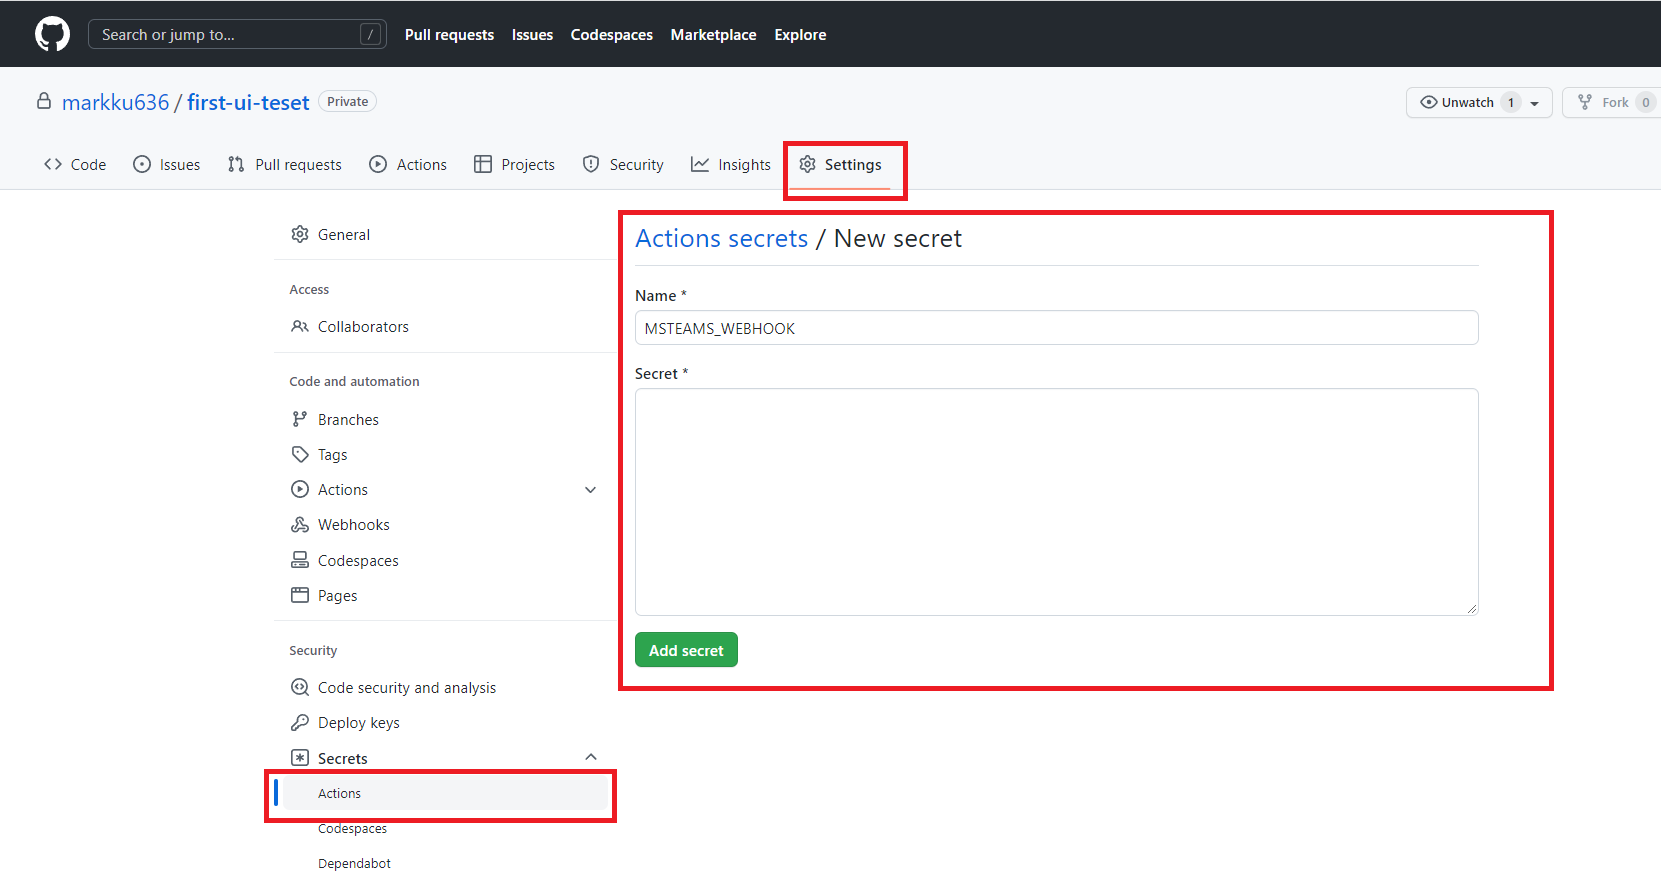
修改 .github/workflows/playwright.yml 參考以下程式碼,加入通知
name: Playwright Tests
on:
  repository_dispatch:
    types: remote-trigger-ui-test
  push:
    branches: [ main, master ]
  pull_request:
    branches: [ main, master ]
jobs:
  test:
    timeout-minutes: 60
    runs-on: ubuntu-latest
    steps:
    - uses: actions/checkout@v3
    - uses: actions/setup-node@v3
      with:
        node-version: 16
    - name: Install dependencies
      run: npm ci
    - name: Install Playwright Browsers
      run: npx playwright install --with-deps
    - name: Run Playwright tests
      run: npx playwright test
    - uses: actions/upload-artifact@v3
      if: always()
      with:
        name: playwright-report
        path: playwright-report/
        retention-days: 30
  success_notify:
    needs: test
    name: notify
    runs-on: ubuntu-18.04
    steps:
      - name: 📣 Send teams notification
        uses: simbo/msteams-message-card-action@v1
        with:
          webhook: ${{ secrets.MSTEAMS_WEBHOOK }}
          title: 😊 UI - Test Success
          message: <p>UI - Test Success<strong>\   /</strong></p>
          color: 007FFF
          buttons: |
            See Test Report! ${{ github.server_url }}/${{ github.repository }}/actions/runs/${{ github.run_id }}
  error_notify:
    needs: test
    name: error_notify
    if: ${{ always() && needs.test.result == 'failure' }}
    runs-on: ubuntu-18.04
    steps:
      - name: Send fail notification
        uses: simbo/msteams-message-card-action@v1
        with:
          webhook: ${{ secrets.MSTEAMS_WEBHOOK }}
          title: 💩UI - Test Fail
          message: <p>Ba Be Q ...<strong>= =...</strong></p>
          color: FF0000
          buttons: |
            See Test Report! ${{ github.server_url }}/${{ github.repository }}/actions/runs/${{ github.run_id }}
測試執行完的圖表
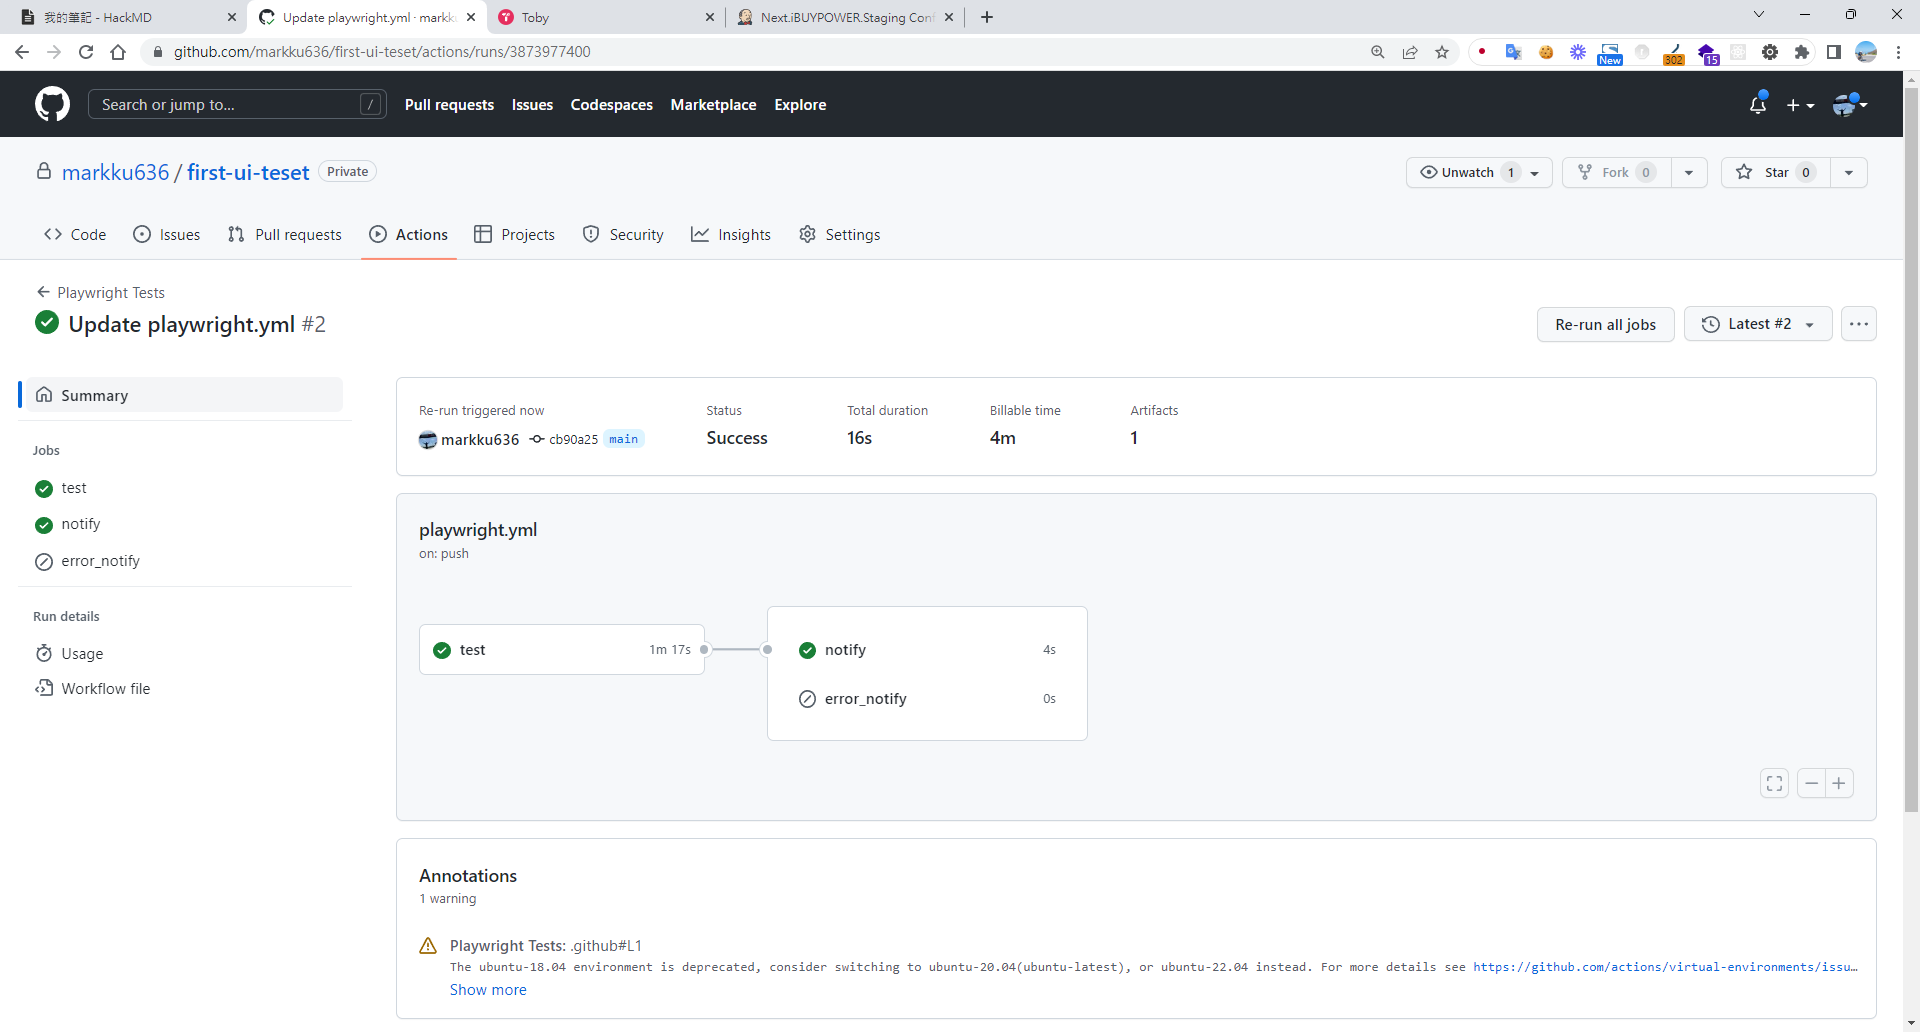
在欲應用程式,新增外部觸發 wrokflows,可參考此篇設定遠程觸發 git action,並將下面的程式碼參數換掉
:owner/:repo => markku636/first-ui-teset
:token => Github token 點我申請
on: push
jobs:
  test-curl-action:
    name: "Call Test CICD"
    runs-on: ubuntu-latest
    steps:
      - name: "Call Github API"
        uses: indiesdev/[email protected]
        id: api2
        with:
          url: https://api.github.com/repos/:owner/:repo/dispatches
          method: "POST"
          accept: 200,201,204
          headers: '{ "authorization": "token :token", "accept": "application/vnd.github.everest-preview+json","content-type":"application/x-www-form-urlencoded" }'

          # you can use multiline format to construct json data object, the content should be yml format.

          # this format apply to inputs: body, headers and params
          "body": '{ "event_type": "remote-trigger-ui-test" }'
          log-response: true
      - name: "Use response"
        run: echo ${{ steps.api.outputs.response }}
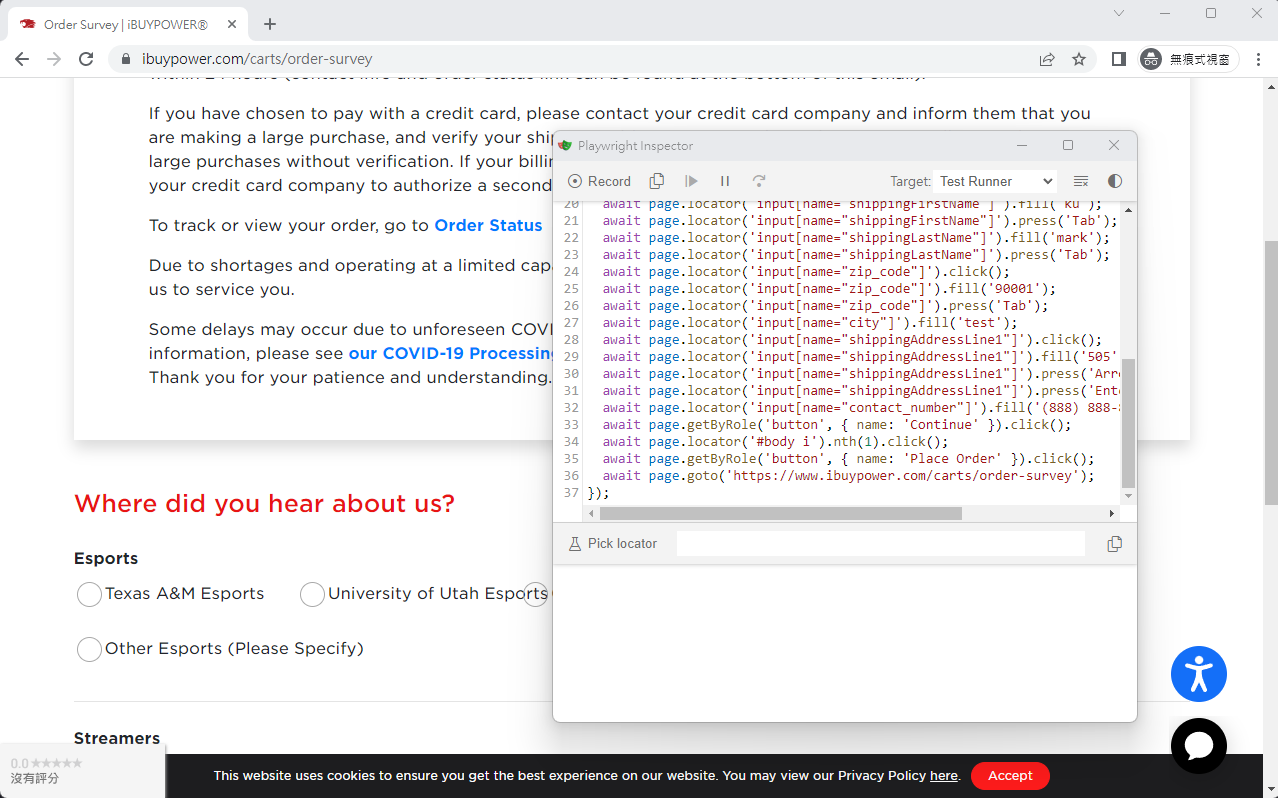
錄製腳本
超酷的,什麼環境也沒特別配置,居然能夠跳出瀏覽器錄製,真的是太好用了
npx playwright codegen www.ibuypower.com --output ./tests/ibuypower.spec.ts
結論
使用 playwright 最大的好處,微軟挾著完整的生態,把整個工作流程都整合起來,我僅用很短的時間,就能將 vscode + github + teams 整合完成,爽度超級高。
補充
如果無法在 vscode 中使用 jest 偵錯測試檔,請執行以下指令
npm i -D @playwright/test
npx playwright install
npm install -D jest jest-playwright-preset playwright
code --install-extension Orta.vscode-jest
code --install-extension ms-playwright.playwright
參考資料
Github Action 上線後覺得太慢了,後來搬到自己家的 jenkins pipeline 中運行
pipeline {
    agent any

    tools {nodejs "Node Core"}

    options {
        buildDiscarder logRotator(artifactDaysToKeepStr: '', artifactNumToKeepStr: '20', daysToKeepStr: '', numToKeepStr: '20')
        timeout(time: 10, unit: 'MINUTES')
    }

    stages {
        stage("GitHub Pull") {
            steps {
                git branch: "main", url: "https://[email protected]/iBuypowerUS/iBuypower.UI.Test.git"
            }
        }


        stage("Test and Report") {
            steps {
                script {
                    def errorEncountered = false
                    try {
                        bat "npm install"
                        bat "npm run testCase"
                    } catch(Exception e) {
                        errorEncountered = true
                        echo "Error during testing: ${e.getMessage()}"
                    } finally {
                        publishHTML([
                            alwaysLinkToLastBuild: true,
                            allowMissing: false,
                            keepAll: true,
                            reportDir: 'playwright-html-report',
                            reportFiles: 'index.html',
                            reportName: 'HTML Report',
                            reportTitles: 'HTML Report'
                        ])
                        if (errorEncountered) {
                            error "npm run testCase encountered an error."
                        }
                    }
                }
            }
        }
    }
}
P.S. Jenkins 顯示報表需要安裝 『 HTML Publisher plugin』,若報表的 html 顯示不出內容則需要在 Jenkins Script Console 執行
System.setProperty("hudson.model.DirectoryBrowserSupport.CSP", "")


留言