
時空背景
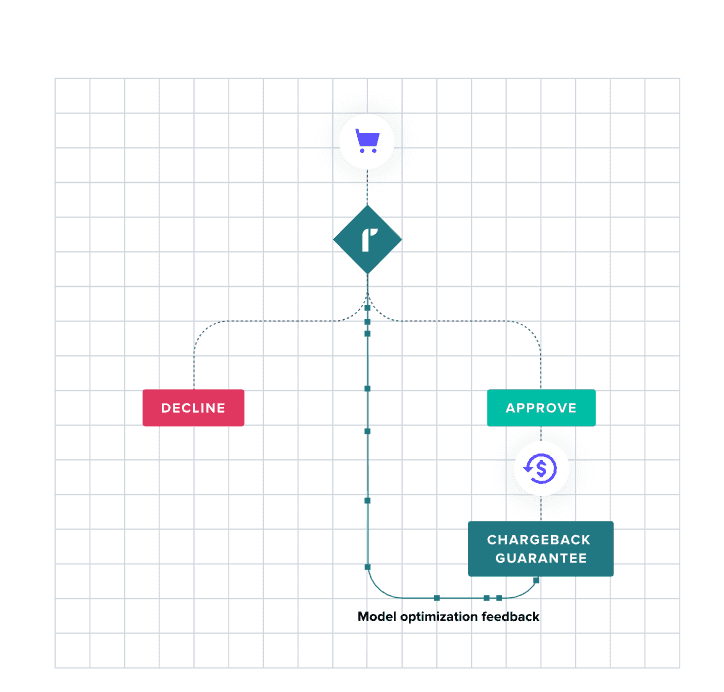
據統計 Paypal 在德國擁有22%以上的市佔,並在歐盟也相的普及,但過去因為電商詐欺太嚴重,因此User 決定把Paypal 先關閉,藉由此次重新打造德國網站,把Paypal 重新串接,並搭配 Riskified 保險服務,來分攤掉網路電商的詐欺的運營風險。
Paypal 串接
Paypal 的Api 看起來昇級了,官方也建議用新版的 Rest api v2 版本串接。
相關文件
Api Endpoint
Sandbox. https://api-m.sandbox.paypal.com
Live. https://api-m.paypal.com
取得Api 金鑰
連結
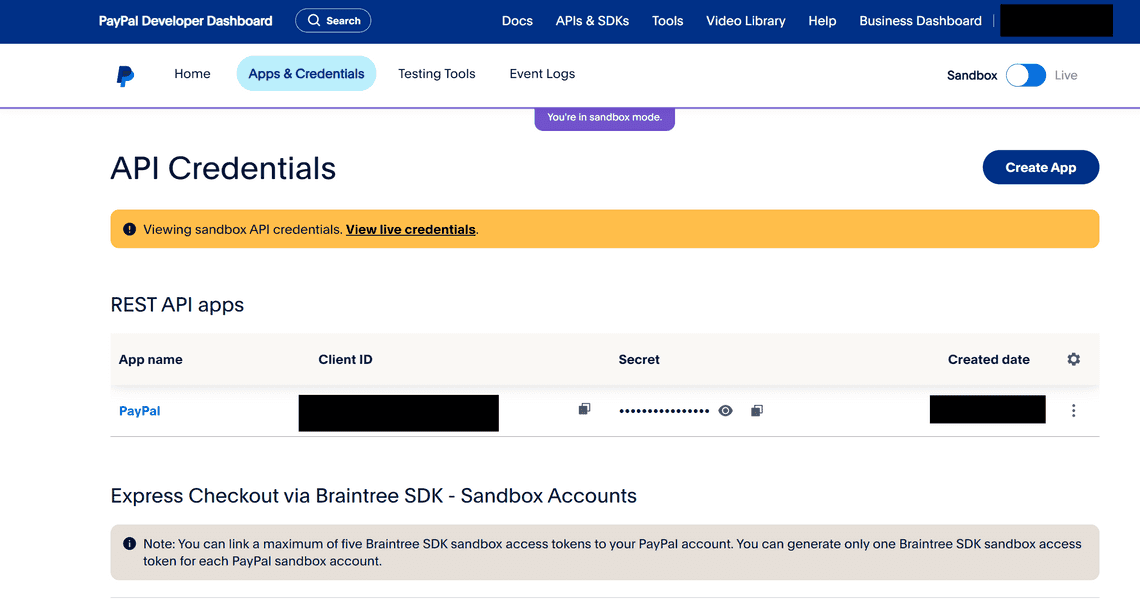
新版相當的方便,可以透過Event logs 偵錯
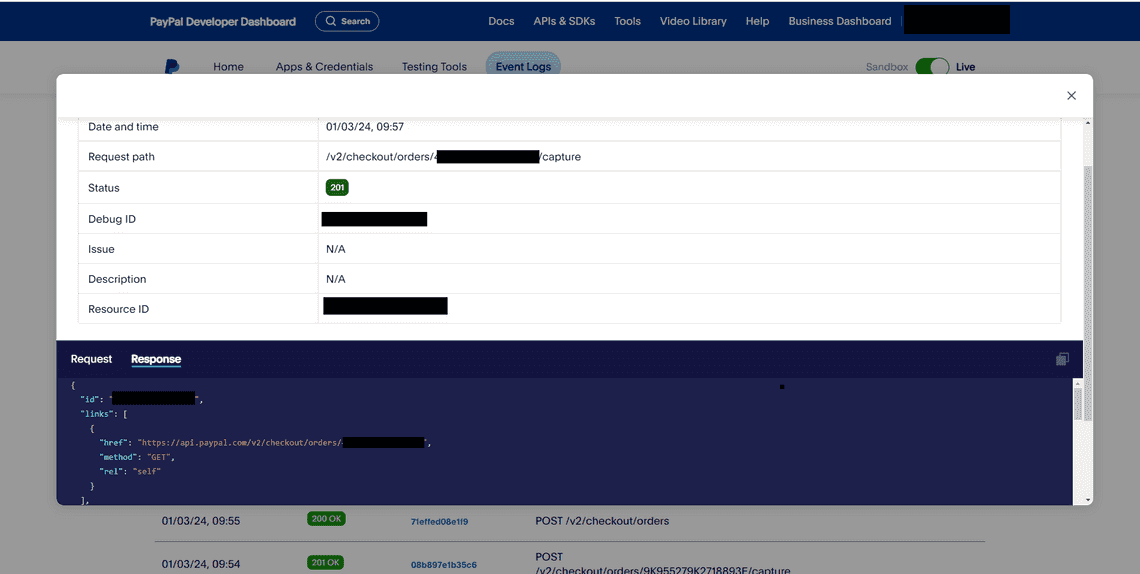
前端的錯誤也可以透過瀏覽器偵錯

進階付款功能
進階模式多了,Venmo(社交支付)、Debit or Credit Card、Paypal Pay Later (先買後付),但需要申請 PayPal 的 Braintree 付款閘道。
P.S. PayPal 的 Braintree 是一個全面的支付解決方案,類似於Payment gateway,主要是幫助商家接受、處理和分配支付,它解決了多個與接受線上支付相關的問題,提供了一個安全、靈活且易於集成的平台。
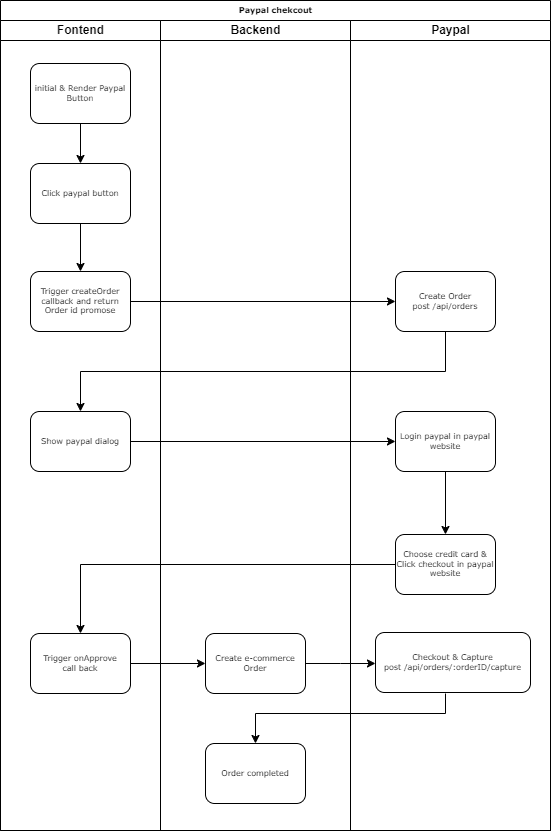
整合的流程圖
開始串接
首先,可以先參考官方的 Integration builder 的範例,其實寫的不錯,基本上照著界接就能做完了
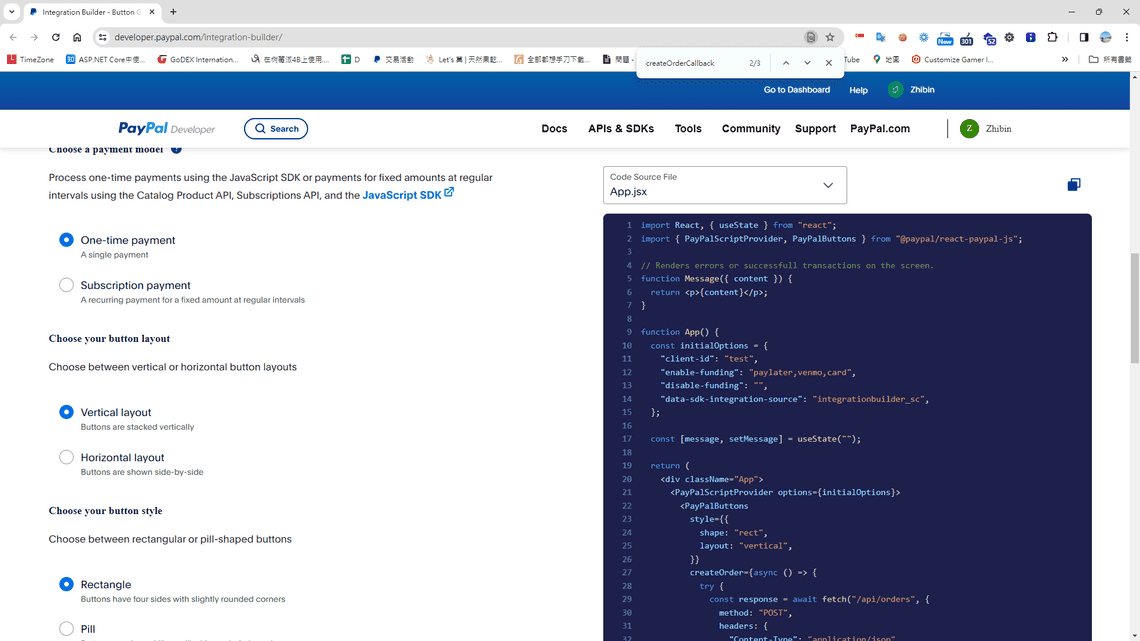
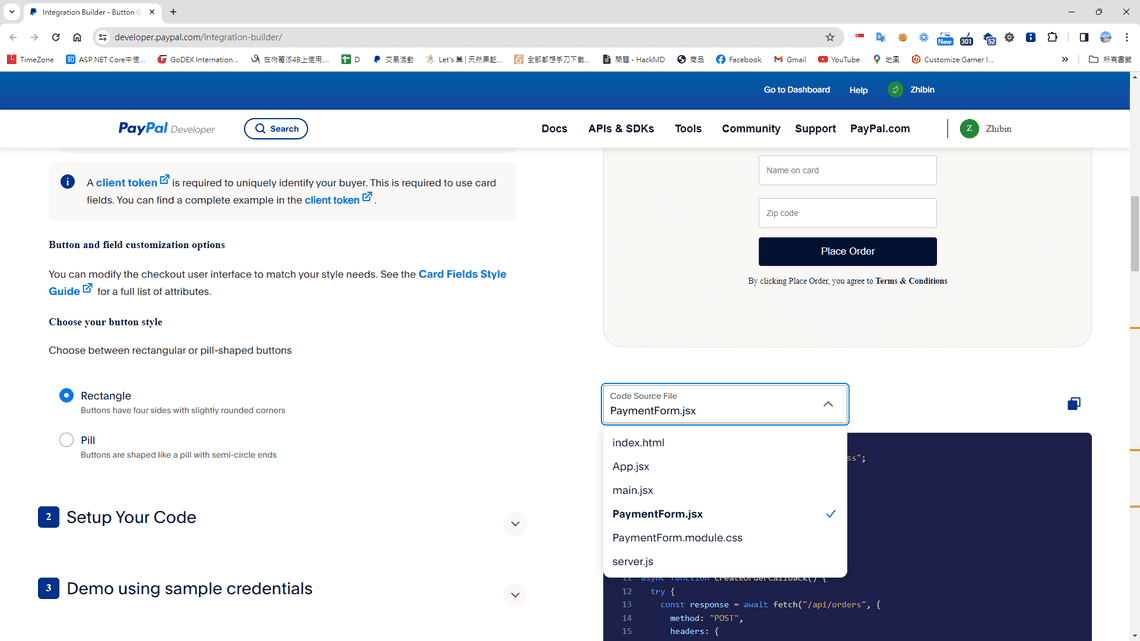
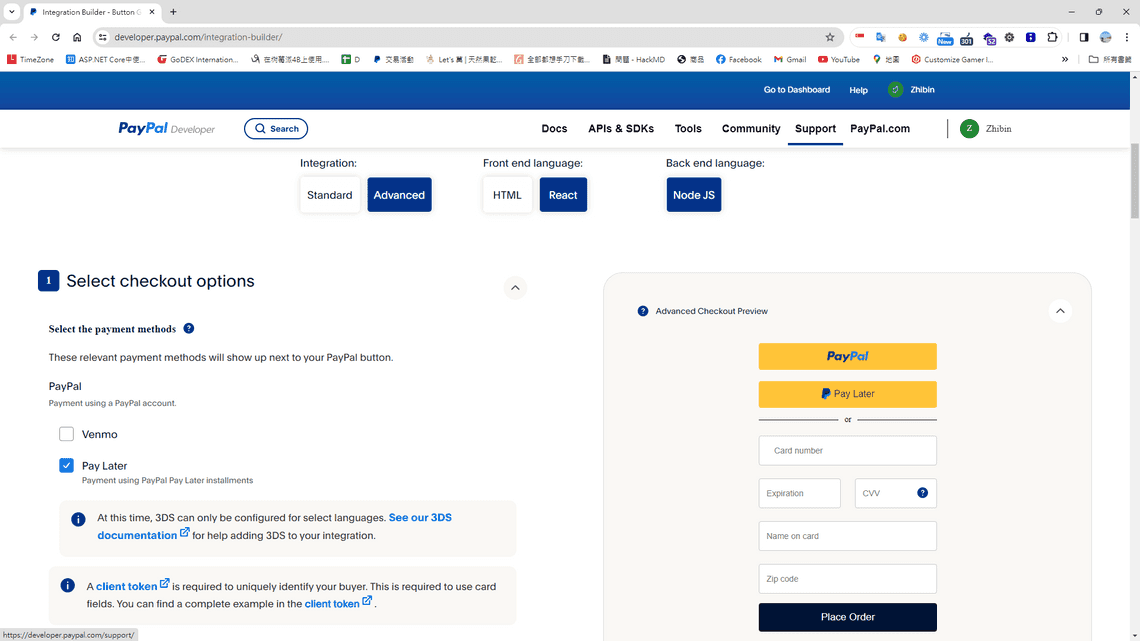
前端範例 ( Next js app route )
安裝SDK
npm install @paypal/react-paypal-js --save
撰寫前端串接的程式
'use client'; // next js client component
import { PaymentOptions } from '@/const/payment/payment-option';
import { useCaptureMutation, useGetConfigQuery, useProcessMutation } from '@/redux/api/test-payment-apiSlice';
import { IGernalPaymentParams } from '@/typing/cart';
import { PayPalButtons, PayPalScriptProvider } from '@paypal/react-paypal-js';
import { v4 as uuidv4 } from 'uuid';

export default function TestPaypal() {
    const { data: paymentInitOption, isLoading: isPaymentInitLoading } = useGetConfigQuery(); // rtk query 取得 payal sdk 前端初始化的參數

    const [Process] = useProcessMutation(); // rtk query 用來呼叫建立建立授權訂單的api

    const [Capture] = useCaptureMutation(); // rtk query 用來呼叫提取信用請款的api

    const gernalPaymentParams: IGernalPaymentParams = {
        paymentTypeCode: PaymentOptions[PaymentOptions.Paypal],
        orderNo: uuidv4(),
    } as IGernalPaymentParams;

    const createOrder = (): Promise<string> => {
        return Process(gernalPaymentParams)
            .unwrap()
            .then((res: ApiResponse<IGeneralPaymentResult>) => {
                if (res.isSuccess) {
                    const orderId = res.data.paymentReturnValue;

                    return orderId;
                }
                return '';
            });
    };

    const onApprove = (data: any) => {
        return Capture(gernalPaymentParams)
            .unwrap()
            .then((res: ApiResponse<IGeneralPaymentResult>) => {
                if (res.isSuccess) {
                    debugger;
                    paypalOrderId.current = res.data.paymentReturnValue;
                    alert('Payment success');
                }
            });
    };

    return (
        <>
            {!isPaymentInitLoading && (
                <PayPalScriptProvider options={paymentInitOption}>
                    <PayPalButtons
                        createOrder={createOrder}
                        onApprove={onApprove}
                        style={{ layout: 'horizontal', color: 'white', tagline: true }}
                    />
                </PayPalScriptProvider>
            )}
        </>
    );
}
後端範例 (C#)
定義後端環境設定 - Appsetting.json
  "Payment": {
    "PaymentOptions": [
      {
        "PaymentName": "Paypal",
        "IsSandbox": true,
        "ClientId": "Your paypal clientId",
        "Secret": "Your paypal secret",
        "EndPoint": "https://api-m.sandbox.paypal.com" // sandbox
      }]
  }
從後端環境變數組出來SDK 初始化需要的參數給前端
     public async Task<Result<Dictionary<string, string>>> GetConfig()
     {
        var dic = new Dictionary<string, string>();
        dic.Add("client-id", GeneralPaymentConfig.ClientId);
        dic.Add("currency", HardCodeKey.BasedCurrency);
        // dic.Add("disable-funding", "credit,card"); // 關閉信用卡及借記卡

        var result = new Result<Dictionary<string, string>> { IsSuccess = true, Message = "", Data = dic };
        return result;
     }
PAYPAL API 請求授權 - Authorization paypal 支援,兩種token,這邊採用 <client_id:secret> 當成登入的token
依據官方文件,所述,我們可以呼叫 api 取得 Access-Token 或是使用 client_id:secret 當成 token 去呼叫paypal API
// To make REST API calls, include the bearer token in this header with the Bearer authentication scheme. The value is Bearer <Access-Token> or Basic <client_id:secret>

public async Task<string> Authorization()
   {
      return Convert.ToBase64String(Encoding.ASCII.GetBytes($"{GeneralPaymentConfig.ClientId}:{GeneralPaymentConfig.Secret}")); ;
}
接著,我們實作 /api/orders 建立訂單及授權
public async Task<Result<GeneralPaymentResult>> ProcessAsync(GernalPaymentParameter paymentParameter)
{
   var result = new Result<GeneralPaymentResult>
   {
      IsSuccess = false,
      Message = "",
      Data = new GeneralPaymentResult
      {
         PaymentReturnType = PaymentReturnType.OrderId,
      }
   };

   try
   {
      var headers = new Dictionary<string, string>
    {
      { "Authorization", $"Basic  {Authorization()}" },
      { "PayPal-Request-Id",  HttpContext.Current.TraceIdentifier},
    };

      var paymentCapture = new PaymentCapture
      {
         Intent = "CAPTURE",
         PurchaseUnits = new List<PurchaseUnit>
   {
   new PurchaseUnit
   {
      ReferenceId = paymentParameter.OrderNo,
      Amount = new Model.ViewModels.Payment.Amount
      {
          CurrencyCode = "EUR",
          Value = "1.00"
      },
      Shipping = new PaypalShipping
      {
          Address =  new PaypalAddress
          {
              AddressLine1 = "2211 N First Street",
              AddressLine2 = "Building 17",
              AdminArea2 = "San Jose",
              AdminArea1 = "CA",
              PostalCode = "95131",
              CountryCode = "US"
          }
      }
      }
      },
         PaymentSource = new PaymentSource
         {
            PayPal = new PayPal
            {
               ExperienceContext = new ExperienceContext
               {
                  PaymentMethodPreference = "IMMEDIATE_PAYMENT_REQUIRED",
                  BrandName = "EXAMPLE INC",
                  Locale = "en-US",
                  LandingPage = "LOGIN",
                  ShippingPreference = "SET_PROVIDED_ADDRESS",
                  UserAction = "PAY_NOW",
                  ReturnUrl = "https://example.com/returnUrl",
                  CancelUrl = "https://example.com/cancelUrl"
               }
            }
         }
      };

      // Use Newtonsoft.Json to serialize the object to JSON (for demonstration)
      string body = JsonConvert.SerializeObject(paymentCapture, Formatting.Indented);

      var orderRsult = await HttpHelper.PostAsync<PaypalOrderResponse>(GeneralPaymentConfig.EndPoint + "/v2/checkout/orders", body, headers);
      result.Data.PaymentReturnValue = orderRsult.Id;
      result.Success();
   }
   catch (Exception ex)
   {
      result.Fail(ex.Message);
      NLogUtil.WriteSEQLog($"[Paypal][ProcessAsync]Error:{ex.Message},StackTrace:{ex.StackTrace}", NLog.LogLevel.Error);
   }

   return result;
}
最後,再來實作 /api/orders 請款 ( capture )
public virtual async Task<Result<GeneralPaymentResult>> CaptureAsync(GernalPaymentParameter paymentParameter)
{
   // Sandbox have some issue.cannot use capture
   var result = new Result<GeneralPaymentResult>
   {
      IsSuccess = false,
      Message = "Capture fail!",
      Data = new GeneralPaymentResult
      {
      }
   };

   try
   {
      var url = GeneralPaymentConfig.EndPoint + $"/v2/checkout/orders/{paymentParameter.PaymentGatewayOrderId}/capture";
      var requestBody = "";

      var headers = new Dictionary<string, string>
    {
      { "Authorization", $"Basic  {Authorization()}" },
      { "PayPal-Request-Id",  HttpContext.Current.TraceIdentifier},
    };

      var response = await HttpHelper.PostAsync<PaypalOrderResponse>(url, requestBody, headers);

      if (response.Status == "COMPLETED")
      {
         result.IsSuccess = true;
         result.Message = "Capture success";
      }

   }
   catch (Exception ex)
   {
      result.Fail(ex.Message);
      NLogUtil.WriteSEQLog($"[Paypal][CaptureAsync]Error:{ex.Message},StackTrace:{ex.StackTrace}", NLog.LogLevel.Error);
   }

   return result;
}
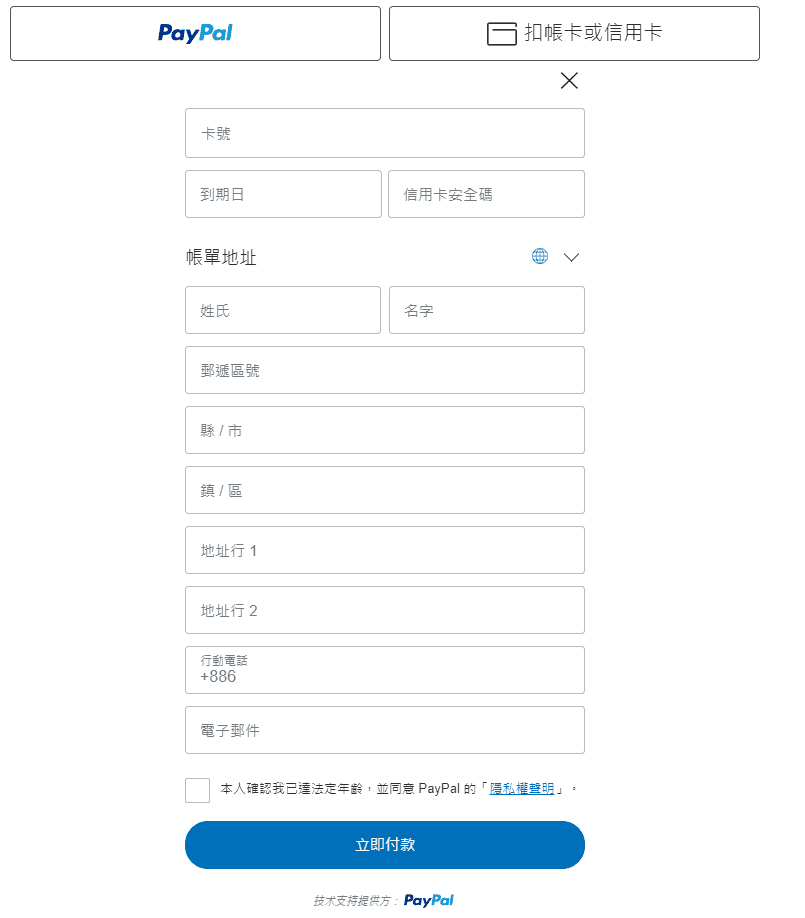
Paypal 不登入也能使用信用卡
補充 - Upon Invoice
有趣的東西,Pyapl 的第三方支付,先出貨在付款,paypal 承諾商家一定收的到錢。


