Mark Ku's Blog
首頁 關於我
深入探討 Vibe Coding 限制
AI
深入探討 Vibe Coding 限制
Mark Ku
Mark Ku
August 05, 2025
1 min

Vibe Coding 的興起與挑戰

隨著 AI 程式輔助工具的普及,許多開發者開始嘗試「Vibe coding」——也就是給 AI 一些簡單的描述或方向,讓它自動生成程式碼。雖然這種方式能夠快速生產新的程式碼,但在實際專案開發中仍有不少限制。

Vibe coding 的核心概念是透過自然語言描述需求,讓 AI 自動生成對應的程式碼。這種方法在原型開發、快速驗證想法時確實很有用,但在面對複雜的企業級專案時,往往會遇到各種挑戰。

1️⃣ 在既有複雜性上疊加功能是挑戰

AI 可以快速產生新的程式碼模組,但當需要把新功能整合進已有的複雜系統時,問題就會浮現。

具體例子:購物車折扣功能

// AI 生成的簡單折扣計算
function calculateDiscount(total, discountPercent) {
    return total * (discountPercent / 100);
}

問題所在:

  • AI 沒有考慮到會員等級的不同折扣規則
  • 忽略了商品類別的特殊折扣
  • 沒有處理折扣上限限制

實際整合時的問題:

// 現有的購物車系統
class ShoppingCart {
    calculateTotal() {
        let total = this.items.reduce((sum, item) => sum + item.price, 0);
        
        // AI 的簡單折扣計算可能破壞現有邏輯
        const discount = calculateDiscount(total, 10); // 固定 10% 折扣
        total -= discount;
        
        // 但系統原本有更複雜的折扣邏輯
        // 例如:會員折扣、商品類別折扣、滿額折扣等
        return total;
    }
}

2️⃣ 冷門且複雜的新問題時,AI 經常答不上來

AI 的能力依賴於過往訓練資料,如果問題冷門或涉及全新概念,它往往無法提供完整解法。

具體例子:密碼驗證功能

// AI 可能給出的基本驗證
function validatePassword(password) {
    if (password.length >= 8) {
        return true;
    }
    return false;
}

實際需求:

  • 需要檢查密碼複雜度(大小寫、數字、特殊符號)
  • 必須防止常見弱密碼
  • 需要符合公司安全政策

AI 的限制:

  • 缺乏安全領域的專業知識
  • 無法理解不同行業的安全要求
  • 只能提供通用的解決方案框架

3️⃣ 腦容量(Context)有限,難以處理超大型專案

再強大的 AI 也有上下文限制,能同時「記住」的程式碼量有限,超過後就無法全盤理解。

具體例子:大型電商網站

// AI 只能看到部分程式碼,無法理解整體架構
class UserService {
    // 用戶管理相關功能
    // AI 無法同時看到所有相關模組
}

class ProductService {
    // 商品管理功能
    // AI 可能不知道這個模組與其他模組的互動
}

class OrderService {
    // 訂單處理功能
    // AI 無法理解複雜的業務規則和依賴關係
}

實際問題:

  • AI 只能看到當前對話中的程式碼片段
  • 無法理解模組間的複雜依賴關係
  • 缺乏對整體架構的認知

4️⃣ 實作複雜功能時聯想力不足,容易「改 A 壞 B」

AI 在理解系統內部相依性時仍有不足,缺乏人類工程師能從經驗中建立的直覺。

具體例子:價格計算函式的修改

// 原始價格計算函式
function calculatePrice(quantity, unitPrice) {
    const subtotal = quantity * unitPrice;
    
    // 同時更新銷售統計
    updateSalesStats(quantity, subtotal);
    
    return subtotal;
}

function updateSalesStats(quantity, amount) {
    // 這個函式被多個報表功能依賴
    salesReport.addSale(quantity, amount);
}

AI 修改後的版本(可能破壞報表功能):

function calculatePrice(quantity, unitPrice) {
    const subtotal = quantity * unitPrice;
    
    // AI 可能移除這行,導致報表錯誤
    // updateSalesStats(quantity, subtotal);
    
    return subtotal;
}

問題後果:

  • 價格計算正確,但銷售報表資料不完整
  • 統計報表出現錯誤
  • 無法追蹤銷售數據

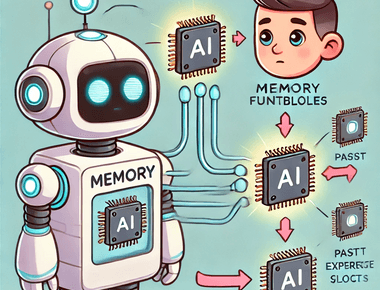
5️⃣ 記憶缺陷,難以重用已教過的方法

AI 在單次對話中能學習指引,但長期記憶不足,導致無法重用過往解法。

具體例子:陣列排序功能

// 昨天教會 AI 的快速排序
function quickSort(array) {
    if (array.length <= 1) return array;
    
    const pivot = array[0];
    const left = array.slice(1).filter(x => x < pivot);
    const right = array.slice(1).filter(x => x >= pivot);
    
    return [...quickSort(left), pivot, ...quickSort(right)];
}

今天再問類似需求時,AI 可能完全忘記,重新產生一個效率更差的版本:

// AI 重新產生的簡單排序
function simpleSort(array) {
    for (let i = 0; i < array.length; i++) {
        for (let j = 0; j < array.length - 1; j++) {
            if (array[j] > array[j + 1]) {
                [array[j], array[j + 1]] = [array[j + 1], array[j]];
            }
        }
    }
    return array;
}

6️⃣ 模型切換造成品質不穩

許多開發環境中,使用高階模型(例如 GPT-4.5)寫一部分程式碼後,為了省成本改用低階模型接續開發,結果程式碼品質大幅下降。

具體例子:用戶註冊功能

// 高階模型設計的完整版本
async function createUser(userData) {
    // 完整的驗證邏輯
    if (!userData.email || !userData.password || !userData.name) {
        throw new Error('Missing required fields');
    }
    
    // 檢查郵箱格式
    const emailRegex = /^[^\s@]+@[^\s@]+\.[^\s@]+$/;
    if (!emailRegex.test(userData.email)) {
        throw new Error('Invalid email format');
    }
    
    // 創建用戶
    const user = await saveUser(userData);
    return user;
}

低階模型維護時可能產生的問題:

// 簡化版本,遺漏重要檢查
async function createUser(userData) {
    // 只檢查基本欄位,沒有格式驗證
    if (!userData.email || !userData.password) {
        throw new Error('Missing fields');
    }
    
    const user = await saveUser(userData);
    return user;
}

7️⃣ 風格與設計不一致

除非明確告訴 AI 應遵循哪些架構原則和命名規則,否則每次產出的程式碼風格都可能不同。

具體例子:登入功能

// 第一次:使用函式式設計
function loginUser(email, password) {
    if (!email || !password) {
        return { success: false, message: 'Email and password required' };
    }
    
    const user = findUserByEmail(email);
    if (user && verifyPassword(password, user.password)) {
        return { success: true, user };
    }
    
    return { success: false, message: 'Invalid credentials' };
}

第二次:使用類別式設計

// 風格完全不同的版本
class UserAuth {
    constructor() {
        this.users = [];
    }
    
    authenticate(email, password) {
        try {
            const user = this.users.find(u => u.email === email);
            if (user && user.password === password) {
                return { success: true, user };
            }
            throw new Error('Invalid credentials');
        } catch (error) {
            return { success: false, error: error.message };
        }
    }
}

上述問題部份可以透過Cursor 指南和 Copilot 指南解決

1. Cursor 使用指南

Cursor 作為基於 AI 的程式碼編輯器,能夠大幅提升開發效率,但需要正確的使用策略。

建立專案上下文檔案

檔案位置: 專案根目錄
檔名: .cursorrules

// .cursorrules 檔案範例
const cursorRules = {
    project: {
        name: 'My Website',
        language: 'JavaScript',
        framework: 'React'
    },
    coding: {
        style: 'camelCase',
        errorHandling: 'try-catch',
        comments: 'JSDoc'
    },
    ai: {
        context: 'Follow existing patterns',
        testing: 'Include unit tests'
    }
};

建立步驟:

  1. 在專案根目錄建立 .cursorrules 檔案
  2. 複製上述範例並根據專案需求修改
  3. 儲存檔案後,Cursor 會自動讀取並應用這些設定

有效的 Cursor 提示技巧

// 提供完整上下文的提示範例
const effectivePrompt = `
請根據以下專案規範生成程式碼:

專案:My Website
程式語言:JavaScript
框架:React

要求:
1. 使用 camelCase 命名
2. 包含錯誤處理
3. 添加註解
4. 考慮現有程式碼風格

現有相關程式碼:
${existingCodeContext}
`;

2. GitHub Copilot 使用指南

GitHub Copilot 作為程式碼補全工具,能夠提供即時的程式碼建議,但需要正確的配置和使用方法。

建立 Copilot 設定檔案

檔案位置: 專案根目錄下的 .copilot 資料夾
檔名: settings.json

// .copilot/settings.json
{
    "project": {
        "name": "My Website",
        "type": "web-application",
        "stack": ["JavaScript", "React"]
    },
    "coding": {
        "style": {
            "naming": "camelCase",
            "indentation": "spaces",
            "quotes": "single"
        },
        "patterns": {
            "errorHandling": "try-catch",
            "comments": "JSDoc"
        }
    },
    "ai": {
        "context": "Follow existing patterns",
        "testing": "Include unit tests"
    }
}

建立步驟:

  1. 在專案根目錄建立 .copilot 資料夾
  2. .copilot 資料夾內建立 settings.json 檔案
  3. 複製上述範例並根據專案需求修改
  4. 儲存檔案後,Copilot 會自動讀取並應用這些設定

專案檔案結構總結

your-project/
├── .cursorrules                    # Cursor 專案上下文檔案
├── .copilot/                       # Copilot 設定資料夾
│   └── settings.json              # Copilot 設定檔案
├── src/                           # 專案原始碼
├── tests/                         # 測試檔案
├── docs/                          # 專案文件
└── package.json                   # 專案依賴

重要提醒:

  • .cursorrules.copilot 資料夾都應該加入版本控制
  • 這些檔案會影響團隊所有成員的 AI 工具行為
  • 建議在團隊中統一這些設定檔案的格式和內容

Copilot 最佳實踐

// 使用 Copilot 時的程式碼註解範例
/**
 * 創建新用戶
 * @param {Object} userData - 用戶資料
 * @param {string} userData.email - 電子郵件
 * @param {string} userData.password - 密碼
 * @returns {Object} 創建的用戶
 */
function createUser(userData) {
    // Copilot 會根據註解生成相應的程式碼
    // 包含驗證、錯誤處理等
}

// 使用 Copilot 生成測試程式碼
/**
 * 測試用戶創建功能
 * 測試案例:
 * 1. 成功創建用戶
 * 2. 重複郵箱應該失敗
 * 3. 無效資料應該拋出錯誤
 */
describe('createUser', () => {
    // Copilot 會根據描述生成測試案例
});

3. 整合使用策略

建立開發工作流程

// 開發工作流程配置
const developmentWorkflow = {
    planning: {
        tool: 'Cursor',
        purpose: '設計和生成程式碼',
        context: '提供專案需求和上下文'
    },
    implementation: {
        tool: 'Copilot',
        purpose: '即時程式碼建議',
        context: '在現有程式碼基礎上開發'
    },
    review: {
        tool: 'Cursor',
        purpose: '程式碼審查和優化',
        context: '檢查程式碼品質'
    }
};

// 使用範例
const workflowExample = `
1. 使用 Cursor 進行設計:
   - 描述功能需求
   - 提供程式碼上下文
   - 指定架構模式

2. 使用 Copilot 進行實作:
   - 在檔案中編寫程式碼
   - 利用註解引導
   - 接受或拒絕建議

3. 使用 Cursor 進行優化:
   - 重構程式碼
   - 添加測試
   - 確保品質
`;

常見問題解決方案

// 解決 Copilot 建議不準確的問題
const copilotOptimization = {
    problem: 'Copilot 建議的程式碼不符合專案規範',
    solution: {
        step1: '在檔案頂部添加註解說明專案規範',
        step2: '使用一致的命名和程式碼風格',
        step3: '提供足夠的上下文資訊'
    }
};

// 解決 Cursor 上下文限制的問題
const cursorOptimization = {
    problem: 'Cursor 無法理解大型專案的完整架構',
    solution: {
        step1: '建立專案架構文件',
        step2: '使用 .cursorrules 檔案定義專案規範',
        step3: '分模組進行開發和討論'
    }
};

結論

Vibe coding 雖然能夠快速生成程式碼、加速原型開發,但在面對大型專案、複雜邏輯、長期維護時,AI 仍難以完全取代工程師,人類工程師能夠全盤理解系統架構、具備長期記憶、解決未知問題並保證程式風格一致,這些都是當前 AI 仍無法完全做到的。

透過正確使用 Cursor 和 Copilot 等 AI 工具,開發者可以大幅提升開發效率,但關鍵在於建立正確的使用策略和工作流程,讓 AI 成為工程師的得力助手,而不是完全依賴的替代品。


Tags

Mark Ku

Mark Ku

Software Developer

10年以上豐富網站開發經驗,開發過各種網站,電子商務、平台網站、直播系統、POS系統、SEO 優化、金流串接、AI 串接,Infra 出身,帶過幾次團隊,也加入過大團隊一起開發。

Expertise

前端(React)
後端(C#)
網路管理
DevOps
溝通
領導

Social Media

facebook github website

Related Posts

2025 淺談AI 趨勢
2025 淺談AI 趨勢
June 09, 2025
1 min

Quick Links

關於我

Social Media